window GMC ENVOY XUV 2004 Owner's Manual
[x] Cancel search | Manufacturer: GMC, Model Year: 2004, Model line: ENVOY XUV, Model: GMC ENVOY XUV 2004Pages: 460, PDF Size: 2.99 MB
Page 1 of 460
Seats and Restraint Systems........................... 1-1
Front Seats
............................................... 1-2
Rear Seats
............................................... 1-7
Safety Belts
.............................................. 1-8
Child Restraints
.......................................1-29
Air Bag Systems
......................................1-50
Restraint System Check
............................1-60
Features and Controls..................................... 2-1
Keys
........................................................ 2-2
Doors and Locks
....................................... 2-7
Windows
.................................................2-19
Theft-Deterrent Systems
............................2-22
Starting and Operating Your Vehicle
...........2-24
Mirrors
....................................................2-41
OnStar
žSystem
......................................2-45
HomeLinkžTransmitter
.............................2-47
Storage Areas
.........................................2-51
Vehicle Personalization
.............................2-54
Instrument Panel............................................. 3-1
Instrument Panel Overview
.......................... 3-4
Climate Controls
......................................3-20
Warning Lights, Gages, and Indicators
........3-30
Driver Information Center (DIC)
..................3-46
Audio System(s)
.......................................3-61Driving Your Vehicle....................................... 4-1
Your Driving, the Road, and Your Vehicle
..... 4-2
Towing
...................................................4-45
Service and Appearance Care.......................... 5-1
Service
..................................................... 5-3
Fuel
......................................................... 5-4
Checking Things Under the Hood
...............5-10
Rear Axle
...............................................5-46
Four-Wheel Drive
.....................................5-46
Front Axle
...............................................5-47
Bulb Replacement
....................................5-48
Windshield Wiper Blade Replacement
.........5-50
Tires
......................................................5-52
Appearance Care
.....................................5-83
Vehicle Identi®cation
.................................5-91
Electrical System
......................................5-92
Capacities and Speci®cations
...................5-101
Maintenance Schedule..................................... 6-1
Maintenance Schedule
................................ 6-2
Customer Assistance and Information.............. 7-1
Customer Assistance and Information
........... 7-2
Reporting Safety Defects
...........................7-10
Index................................................................ 1
2004 GMC Envoy XUV Owner ManualM
Page 36 of 460
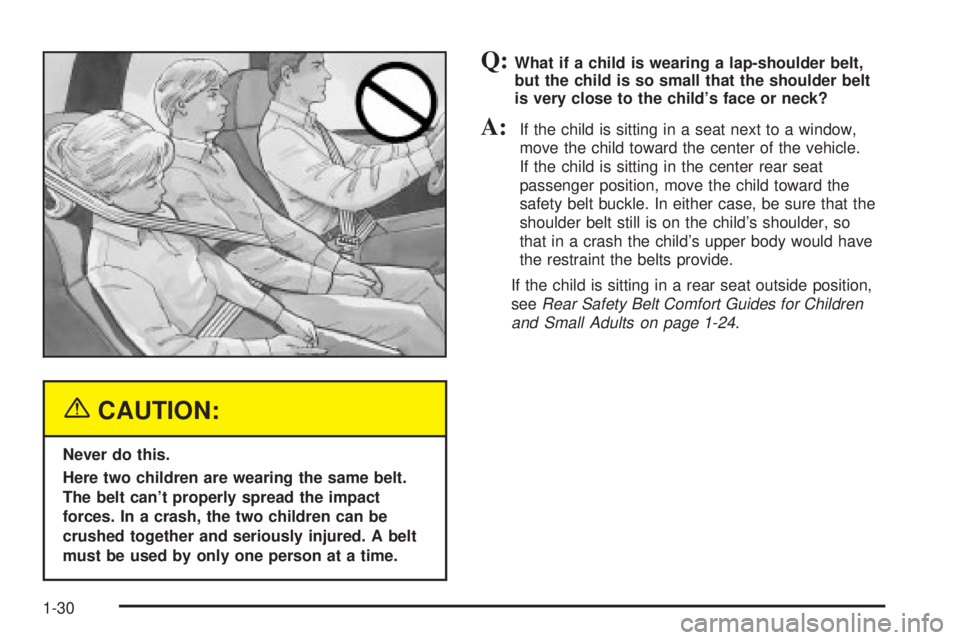
{CAUTION:
Never do this.
Here two children are wearing the same belt.
The belt can't properly spread the impact
forces. In a crash, the two children can be
crushed together and seriously injured. A belt
must be used by only one person at a time.
Q:What if a child is wearing a lap-shoulder belt,
but the child is so small that the shoulder belt
is very close to the child's face or neck?
A:If the child is sitting in a seat next to a window,
move the child toward the center of the vehicle.
If the child is sitting in the center rear seat
passenger position, move the child toward the
safety belt buckle. In either case, be sure that the
shoulder belt still is on the child's shoulder, so
that in a crash the child's upper body would have
the restraint the belts provide.
If the child is sitting in a rear seat outside position,
see
Rear Safety Belt Comfort Guides for Children
and Small Adults on page 1-24
.
1-30
Page 42 of 460
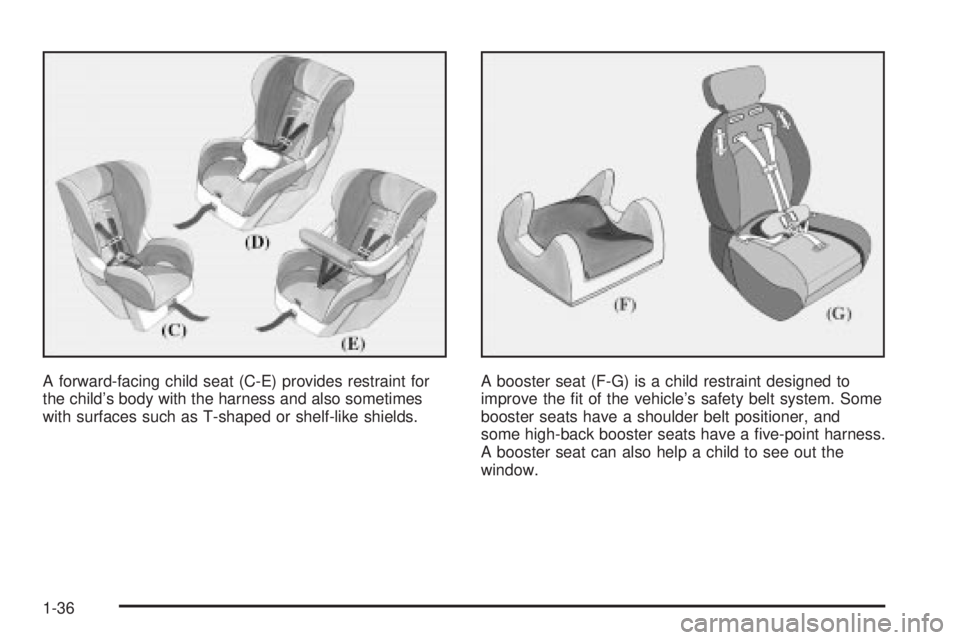
A forward-facing child seat (C-E) provides restraint for
the child's body with the harness and also sometimes
with surfaces such as T-shaped or shelf-like shields.A booster seat (F-G) is a child restraint designed to
improve the ®t of the vehicle's safety belt system. Some
booster seats have a shoulder belt positioner, and
some high-back booster seats have a ®ve-point harness.
A booster seat can also help a child to see out the
window.
1-36
Page 63 of 460
What Will You See After an Air Bag
In¯ates?
After the air bag in¯ates, it quickly de¯ates, so quickly
that some people may not even realize the air bag
in¯ated. Some components of the air bag module will be
hot for a short time. These components include the
steering wheel hub for the driver's frontal air bag and the
instrument panel for the right front passenger's frontal
air bag. For vehicles with side impact air bags, the side
of the seatback closest to the driver's and/or right
front passenger's door will be hot. The parts of the bag
that come into contact with you may be warm, but
not too hot to touch. There will be some smoke and dust
coming from the vents in the de¯ated air bags. Air
bag in¯ation doesn't prevent the driver from seeing or
being able to steer the vehicle, nor does it stop
people from leaving the vehicle.
{CAUTION:
When an air bag in¯ates, there is dust in the
air. This dust could cause breathing problems
for people with a history of asthma or other
breathing trouble. To avoid this, everyone in
the vehicle should get out as soon as it is safe
to do so. If you have breathing problems but
can't get out of the vehicle after an air bag
in¯ates, then get fresh air by opening a
window or a door. If you experience breathing
problems following an air bag deployment, you
should seek medical attention.
Your vehicle has a feature that will automatically unlock
the doors and turn the interior lamps on when the air
bags in¯ate (if battery power is available). You can lock
the doors again and turn the interior lamps off by
using the door lock and interior lamp controls.
1-57
Page 69 of 460
Keys...............................................................2-2
Remote Keyless Entry System.........................2-4
Remote Keyless Entry System Operation...........2-5
Doors and Locks.............................................2-7
Door Locks....................................................2-7
Power Door Locks..........................................2-8
Delayed Locking.............................................2-8
Programmable Automatic Door Locks................2-9
Rear Door Security Locks..............................2-11
Lockout Protection........................................2-11
Leaving Your Vehicle....................................2-11
Midgate.......................................................2-12
Tailgate.......................................................2-13
Power Roof.................................................2-17
Windows........................................................2-19
Power Windows............................................2-20
Sun Visors...................................................2-21
Theft-Deterrent Systems..................................2-22
Content Theft-Deterrent.................................2-22
Passlock
ž....................................................2-23
Starting and Operating Your Vehicle................2-24
New Vehicle Break-In....................................2-24
Ignition Positions..........................................2-24
Starting Your Engine.....................................2-26
Adjustable Throttle and Brake Pedal................2-27
Engine Coolant Heater..................................2-28
Automatic Transmission Operation...................2-29Four-Wheel Drive..........................................2-31
Parking Brake..............................................2-35
Shifting Into Park (P).....................................2-36
Shifting Out of Park (P).................................2-38
Parking Over Things That Burn.......................2-38
Engine Exhaust............................................2-39
Running Your Engine While You Are Parked. . . .2-39
Mirrors...........................................................2-41
Automatic Dimming Rearview Mirror with
OnStar
žand Compass...............................2-41
Outside Manual Mirrors..................................2-43
Outside Power Mirrors...................................2-43
Outside Convex Mirror...................................2-44
Outside Heated Mirrors..................................2-44
Outside Automatic Dimming Mirror with Curb
View Assist..............................................2-44
OnStar
žSystem.............................................2-45
HomeLinkžTransmitter...................................2-47
Programming the HomeLinkžTransmitter.........2-47
Storage Areas................................................2-51
Glove Box...................................................2-51
Overhead Console........................................2-51
Front Storage Area.......................................2-51
All-Weather Cargo Area.................................2-52
Vehicle Personalization...................................2-54
Memory Seat...............................................2-54
Section 2 Features and Controls
2-1
Page 70 of 460
Keys
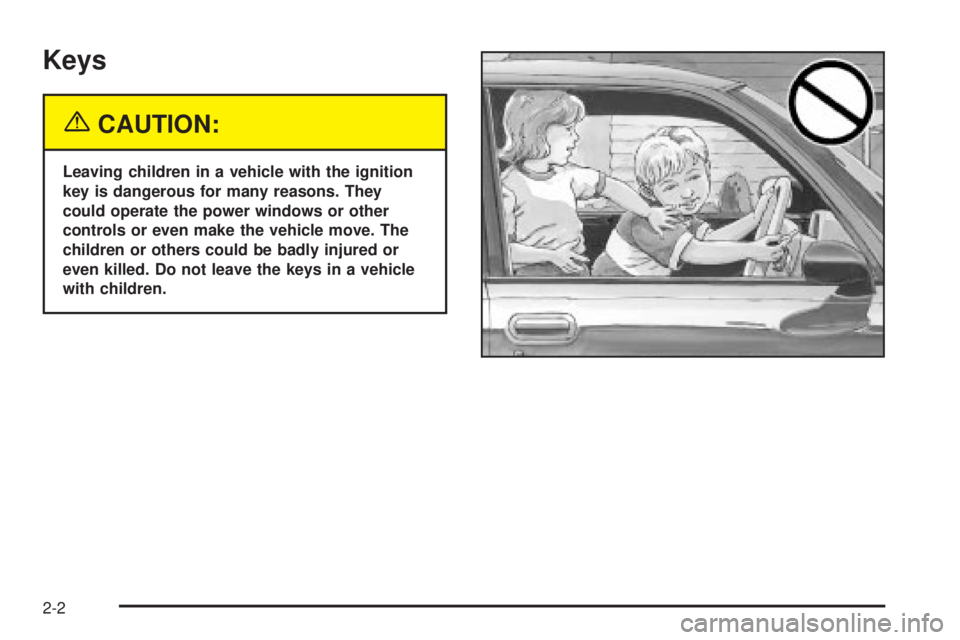
{CAUTION:
Leaving children in a vehicle with the ignition
key is dangerous for many reasons. They
could operate the power windows or other
controls or even make the vehicle move. The
children or others could be badly injured or
even killed. Do not leave the keys in a vehicle
with children.
2-2
Page 73 of 460
Remote Keyless Entry System
Operation
If your vehicle has this feature, you can lock and unlock
your doors from about 3 feet (1 m) up to 30 feet
(9 m) away using the remote keyless entry transmitter
supplied with your vehicle.
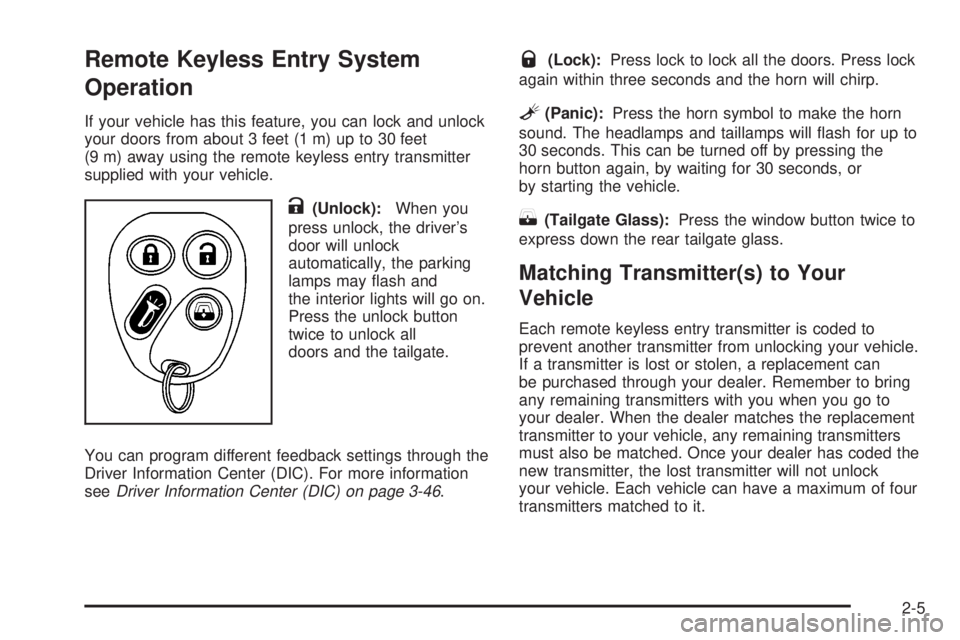
K(Unlock):When you
press unlock, the driver's
door will unlock
automatically, the parking
lamps may ¯ash and
the interior lights will go on.
Press the unlock button
twice to unlock all
doors and the tailgate.
You can program different feedback settings through the
Driver Information Center (DIC). For more information
see
Driver Information Center (DIC) on page 3-46.
Q(Lock):Press lock to lock all the doors. Press lock
again within three seconds and the horn will chirp.
L(Panic):Press the horn symbol to make the horn
sound. The headlamps and taillamps will ¯ash for up to
30 seconds. This can be turned off by pressing the
horn button again, by waiting for 30 seconds, or
by starting the vehicle.
m(Tailgate Glass):Press the window button twice to
express down the rear tailgate glass.
Matching Transmitter(s) to Your
Vehicle
Each remote keyless entry transmitter is coded to
prevent another transmitter from unlocking your vehicle.
If a transmitter is lost or stolen, a replacement can
be purchased through your dealer. Remember to bring
any remaining transmitters with you when you go to
your dealer. When the dealer matches the replacement
transmitter to your vehicle, any remaining transmitters
must also be matched. Once your dealer has coded the
new transmitter, the lost transmitter will not unlock
your vehicle. Each vehicle can have a maximum of four
transmitters matched to it.
2-5
Page 80 of 460
Midgate
{CAUTION:
It can be dangerous to drive with the cargo
area covered and the tailgate and the midgate
open because carbon monoxide (CO) gas can
come into your vehicle. You can not see or
smell CO. It can cause unconsciousness and
even death. If you must drive with the tailgate
and midgate open or if electrical wiring or
other cable connections must pass through
the seal between the body and the midgate:
·Make sure all windows are shut.
·Turn the fan on your heating or cooling
system to its highest speed with the
setting on OUTSIDE AIR. That will force
outside air into your vehicle. See
Dual
Climate Control System on page 3-20.
·If you have air outlets on or under the
instrument panel, open them all the way.
See
Engine Exhaust on page 2-39.
Midgate
Your vehicle is equipped with a midgate and power
midgate glass. The midgate allows you to extend the
length of your vehicle's cargo area.
Lowering the Midgate
The midgate can be lowered to allow the cargo area of
your vehicle to extend into the cab. The midgate
cannot be lowered when the glass is up.
To lower the midgate, do the following:
1. Fold and tumble the rear seats. The front seats
might have to be moved forward slightly to allow
the rear seats to fold and tumble. See
Rear
Seat Operation on page 1-7for more information.
2.
C:Press this overhead console button to lower
the midgate glass with the key in the ignition.
The midgate can be lowered without the key in the
ignition if the midgate glass is already down.
3. Clip the second row seat belts into the retainers.
They are mounted on the pillars below where the
seat belt passes through the trim panel. This
prevents the seat belt from being tangled in the
midgate when opening or closing the midgate.
2-12
Page 81 of 460
4. Press the midgate release button located on the
driver's side of the midgate while pulling the
release handle.
5. Lower the midgate and secure it in the down
position by engaging the midgate to the ¯oor
support. The latch for the ¯oor support is found on
the driver's side of the vehicle.
Raising the Midgate
To return the midgate to its normal position, release the
midgate by pulling up on the lever found on the
driver's side midgate support. Reverse the steps for
lowering the midgate listed previously. The midgate must
be fully latched on both sides before the midgate
glass can be raised.
Tailgate
Your vehicle is equipped with a tailgate which can be
swung out or opened ¯at. It can be locked and unlocked
with the driver or passenger door power lock button
or the remote keyless entry transmitter. The tailgate has
power rear glass. The glass must be fully lowered to
open the tailgate to its ¯at position.
The power roof and tailgate must both be fully closed to
raise the rear glass. If the roof or tailgate are not fully
closed, the words CLOSE THE ROOF or CLOSE
THE TAILGATE will appear on the DIC when you try to
raise the rear glass.
If the tailgate drop/swing, power roof, rear wiper and
rear window defogger functions are inoperative, or SEE
MANUAL± TAILGATE is displayed on the Driver
Information Center, the tailgate window position needs
to be reset. To reset the window position, activate
the tailgate window up switch and continue to hold it for
two seconds after the window is fully closed. Then
activate the tailgate window down switch and continue
to hold it for two seconds after the window is fully open.
If this process does not restore function, see your
dealer for service.
2-13
Page 82 of 460
Using the Overhead Console Switch to
Operate the Tailgate Rear Glass
To operate the tailgate glass using the overhead
console roof switch, the ignition must be in RUN or
ACCESSORY or Retained Accessory Power (RAP) must
be active.
E: Press and hold this switch to fully open the
tailgate glass.
To open the tailgate glass slightly, lightly press the front
of the tailgate glass switch. To close the tailgate
glass, press and hold the rear of the tailgate glass
switch.
Using the Tailgate Key Cylinder to Operate
Tailgate Glass
To open the tailgate glass, rotate the tailgate key
clockwise. If the power roof is not fully closed, a
counterclockwise rotation of the key will ®rst close the
roof. Return the key to neutral, then rotate it
counterclockwise to close the tailgate glass after the
roof has been closed.
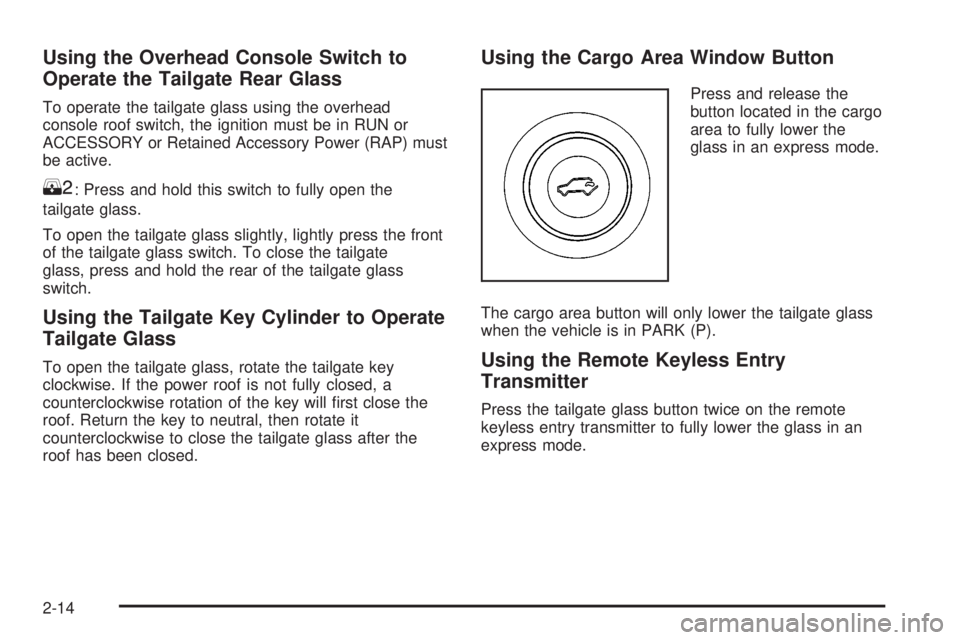
Using the Cargo Area Window Button
Press and release the
button located in the cargo
area to fully lower the
glass in an express mode.
The cargo area button will only lower the tailgate glass
when the vehicle is in PARK (P).
Using the Remote Keyless Entry
Transmitter
Press the tailgate glass button twice on the remote
keyless entry transmitter to fully lower the glass in an
express mode.
2-14