window GMC ENVOY XUV 2004 User Guide
[x] Cancel search | Manufacturer: GMC, Model Year: 2004, Model line: ENVOY XUV, Model: GMC ENVOY XUV 2004Pages: 460, PDF Size: 2.99 MB
Page 87 of 460
Windows
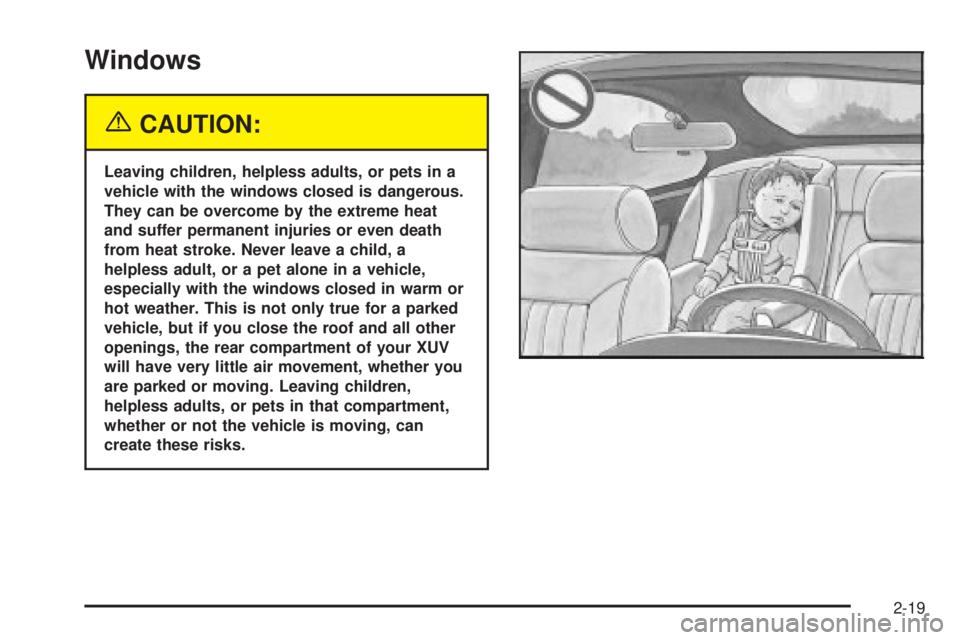
{CAUTION:
Leaving children, helpless adults, or pets in a
vehicle with the windows closed is dangerous.
They can be overcome by the extreme heat
and suffer permanent injuries or even death
from heat stroke. Never leave a child, a
helpless adult, or a pet alone in a vehicle,
especially with the windows closed in warm or
hot weather. This is not only true for a parked
vehicle, but if you close the roof and all other
openings, the rear compartment of your XUV
will have very little air movement, whether you
are parked or moving. Leaving children,
helpless adults, or pets in that compartment,
whether or not the vehicle is moving, can
create these risks.
2-19
Page 88 of 460
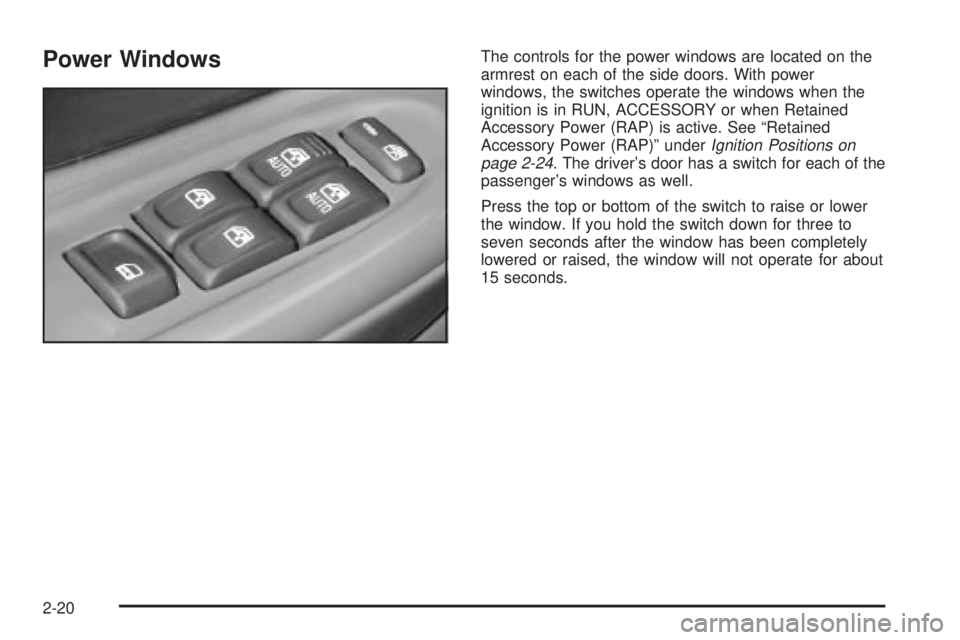
Power WindowsThe controls for the power windows are located on the
armrest on each of the side doors. With power
windows, the switches operate the windows when the
ignition is in RUN, ACCESSORY or when Retained
Accessory Power (RAP) is active. See ªRetained
Accessory Power (RAP)º under
Ignition Positions on
page 2-24. The driver's door has a switch for each of the
passenger's windows as well.
Press the top or bottom of the switch to raise or lower
the window. If you hold the switch down for three to
seven seconds after the window has been completely
lowered or raised, the window will not operate for about
15 seconds.
2-20
Page 89 of 460
Express Down Window
The driver's and front passenger's window switches
have an express down feature that allows you to lower
the window without holding the switch down. Press
down brie¯y on the bottom of the driver's window switch
labeled AUTO to activate the express-down feature.
Lightly tap the switch to open the window slightly.
The express down feature can be interrupted at any
time by pressing the top of the switch.
Window Lockout
Your vehicle has a lockout feature to prevent
passengers from operating the power windows.
The lockout switch is located in front of the window
switches. A light in the lockout switch will come on to
show that the switch has been activated. Press the
lockout switch again to return to normal operation.
Sun Visors
To block out glare, you can pull the visor down.
You can also slide the visor along the rod from
side-to-side to cover the driver or passenger front
window.
Visor Vanity Mirror
Pull the sun visor down to expose the vanity mirror.
Lighted Visor Vanity Mirror
Your vehicle may have this feature. Pull the sun visor
down and lift the mirror cover to turn on the lamps.
The lamps will turn off when the cover is closed.
2-21
Page 91 of 460
Testing the Alarm
The alarm can be tested by following these steps:
1. From inside the vehicle, lower the driver's window
and open the driver's door.
2. Activate the system by locking the doors with the
power door lock switch while the door is open, or
with the remote keyless entry transmitter.
3. Get out of the vehicle, close the door and wait for
the security light to go out.
4. Then reach in through the window, unlock the door
with the manual door lock and open the door.
This should set off the alarm.
When the alarm is set the power door unlock switch is
not operational.
If the alarm does not sound when it should but the
headlamps ¯ash, check to see if the horn works.
The horn fuse may be blown. To replace the fuse, see
Fuses and Circuit Breakers on page 5-93.
If the alarm does not sound or the headlamps do not
¯ash, the vehicle should be serviced by your dealer.
Passlockž
Your vehicle is equipped with the
Passlockžtheft-deterrent system.
Passlock
žis a passive theft-deterrent system.
Passlockženables fuel if the ignition lock cylinder is
turned with a valid key. If a correct key is not used or the
ignition lock cylinder is tampered with, the fuel system
is disabled and the vehicle will not start.
During normal operation, the security light will turn off
approximately ®ve seconds after the key is turned
to RUN.
If the engine stalls and the security light ¯ashes, wait
about 10 minutes until the light stops ¯ashing before
trying to restart the engine. Remember to release
the key from START as soon as the engine starts.
If the engine does not start after three tries, the vehicle
needs service.
If the engine is running and the security light comes on,
you will be able to restart the engine if you turn the
engine off. However, your Passlock
žsystem is
not working properly and must be serviced by your
dealer. Your vehicle is not protected by Passlock
žat this
time. You may also want to check the fuse. See your
dealer for service.
2-23
Page 93 of 460
Notice:If your key seems stuck in LOCK and you
can not turn it, be sure you are using the correct
key; if so, is it all the way in? Turn the key only with
your hand. Using a tool to force it could break the
key or the ignition switch. If none of these works,
then your vehicle needs service.
B (ACCESSORY):This position lets you use things like
the radio and the windshield wipers when the engine
is off.
Notice:Lengthy operation of features such as the
radio in the accessory ignition position may
drain the battery and prevent your vehicle from
starting. Do not operate your vehicle in the
accessory ignition position for a long period
of time.
C (RUN):This is the position for driving.
D (START):This position starts the engine.
Retained Accessory Power (RAP)
Your vehicle is equipped with a Retained Accessory
Power (RAP) feature which will allow certain features of
your vehicle to continue to work up to 20 minutes
after the ignition key is turned to LOCK.
Your radio, power windows, sunroof (option) and
overhead console (including tailgate glass and power
roof) will work when the ignition key is in RUN or
ACCESSORY. Once the key is turned from RUN to
LOCK, these features will continue to work for up
to 20 minutes or until a door is opened.
2-25
Page 107 of 460

Engine Exhaust
{CAUTION:
Engine exhaust can kill. It contains the gas
carbon monoxide (CO), which you can not see
or smell. It can cause unconsciousness and
death.
You might have exhaust coming in if:
·Your exhaust system sounds strange or
different.
·Your vehicle gets rusty underneath.
·Your vehicle was damaged in a collision.
·Your vehicle was damaged when driving
over high points on the road or over road
debris.
·Repairs were not done correctly.
·Your vehicle or exhaust system had been
modi®ed improperly.
If you ever suspect exhaust is coming into your
vehicle:
·Drive it only with all the windows down to
blow out any CO; and
·Have your vehicle ®xed immediately.
Running Your Engine While You
Are Parked
It is better not to park with the engine running. But if
you ever have to, here are some things to know.
{CAUTION:
Idling the engine with the climate control
system off could allow dangerous exhaust into
your vehicle. See the earlier Caution under
Engine Exhaust on page 2-39.
Also, idling in a closed-in place can let deadly
carbon monoxide (CO) into your vehicle even if
the climate control fan is at the highest setting.
One place this can happen is a garage.
Exhaust Ð with CO Ð can come in easily.
NEVER park in a garage with the engine
running.
Another closed-in place can be a blizzard.
See
Winter Driving on page 4-39.
2-39
Page 109 of 460
Mirrors
Automatic Dimming Rearview Mirror
with OnStar
žand Compass
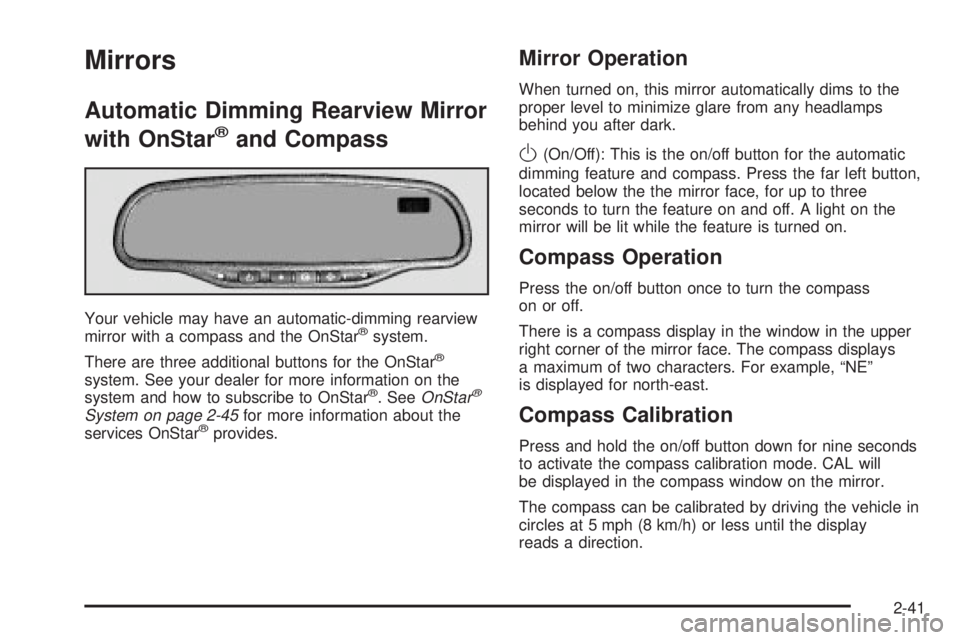
Your vehicle may have an automatic-dimming rearview
mirror with a compass and the OnStaržsystem.
There are three additional buttons for the OnStar
ž
system. See your dealer for more information on the
system and how to subscribe to OnStarž. SeeOnStarž
System on page 2-45for more information about the
services OnStaržprovides.
Mirror Operation
When turned on, this mirror automatically dims to the
proper level to minimize glare from any headlamps
behind you after dark.
O(On/Off): This is the on/off button for the automatic
dimming feature and compass. Press the far left button,
located below the the mirror face, for up to three
seconds to turn the feature on and off. A light on the
mirror will be lit while the feature is turned on.
Compass Operation
Press the on/off button once to turn the compass
on or off.
There is a compass display in the window in the upper
right corner of the mirror face. The compass displays
a maximum of two characters. For example, ªNEº
is displayed for north-east.
Compass Calibration
Press and hold the on/off button down for nine seconds
to activate the compass calibration mode. CAL will
be displayed in the compass window on the mirror.
The compass can be calibrated by driving the vehicle in
circles at 5 mph (8 km/h) or less until the display
reads a direction.
2-41
Page 110 of 460
Compass Variance
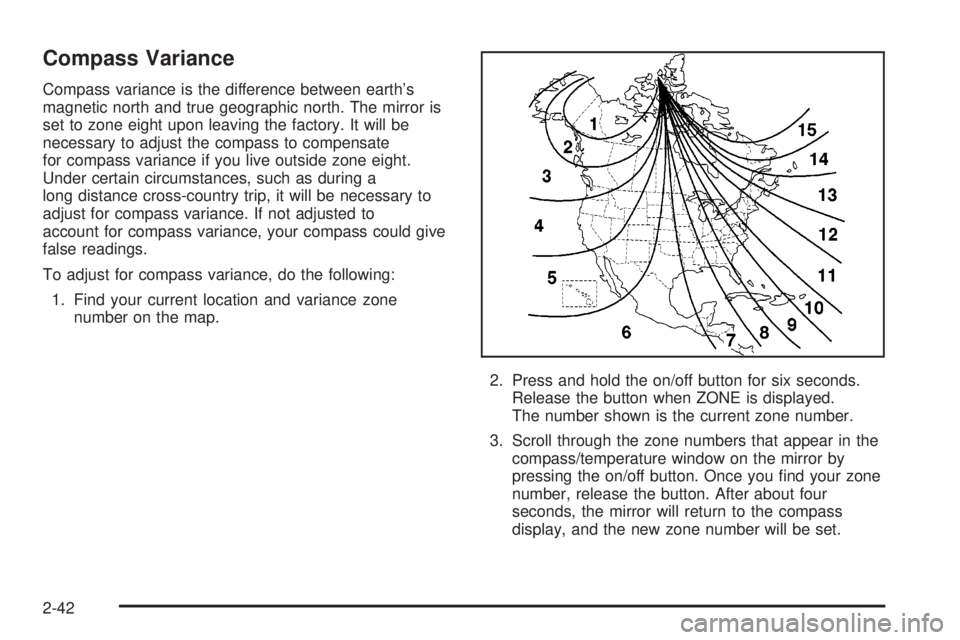
Compass variance is the difference between earth's
magnetic north and true geographic north. The mirror is
set to zone eight upon leaving the factory. It will be
necessary to adjust the compass to compensate
for compass variance if you live outside zone eight.
Under certain circumstances, such as during a
long distance cross-country trip, it will be necessary to
adjust for compass variance. If not adjusted to
account for compass variance, your compass could give
false readings.
To adjust for compass variance, do the following:
1. Find your current location and variance zone
number on the map.
2. Press and hold the on/off button for six seconds.
Release the button when ZONE is displayed.
The number shown is the current zone number.
3. Scroll through the zone numbers that appear in the
compass/temperature window on the mirror by
pressing the on/off button. Once you ®nd your zone
number, release the button. After about four
seconds, the mirror will return to the compass
display, and the new zone number will be set.
2-42
Page 112 of 460
Outside Convex Mirror
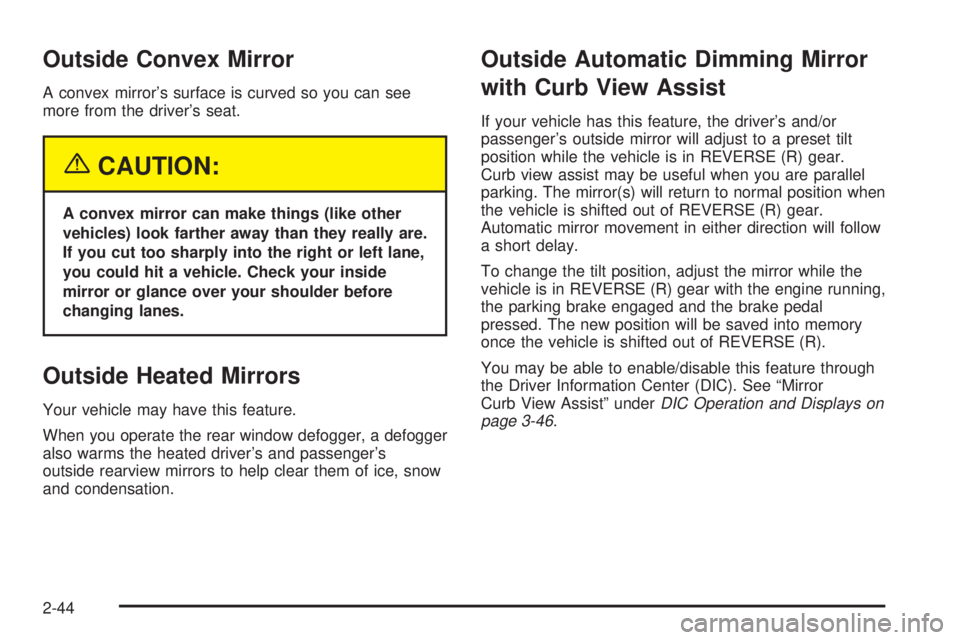
A convex mirror's surface is curved so you can see
more from the driver's seat.
{CAUTION:
A convex mirror can make things (like other
vehicles) look farther away than they really are.
If you cut too sharply into the right or left lane,
you could hit a vehicle. Check your inside
mirror or glance over your shoulder before
changing lanes.
Outside Heated Mirrors
Your vehicle may have this feature.
When you operate the rear window defogger, a defogger
also warms the heated driver's and passenger's
outside rearview mirrors to help clear them of ice, snow
and condensation.
Outside Automatic Dimming Mirror
with Curb View Assist
If your vehicle has this feature, the driver's and/or
passenger's outside mirror will adjust to a preset tilt
position while the vehicle is in REVERSE (R) gear.
Curb view assist may be useful when you are parallel
parking. The mirror(s) will return to normal position when
the vehicle is shifted out of REVERSE (R) gear.
Automatic mirror movement in either direction will follow
a short delay.
To change the tilt position, adjust the mirror while the
vehicle is in REVERSE (R) gear with the engine running,
the parking brake engaged and the brake pedal
pressed. The new position will be saved into memory
once the vehicle is shifted out of REVERSE (R).
You may be able to enable/disable this feature through
the Driver Information Center (DIC). See ªMirror
Curb View Assistº under
DIC Operation and Displays on
page 3-46.
2-44
Page 119 of 460
Storage Areas
Glove Box
To open your glove box, pull the handle on the front of
the glove box and lower the door.
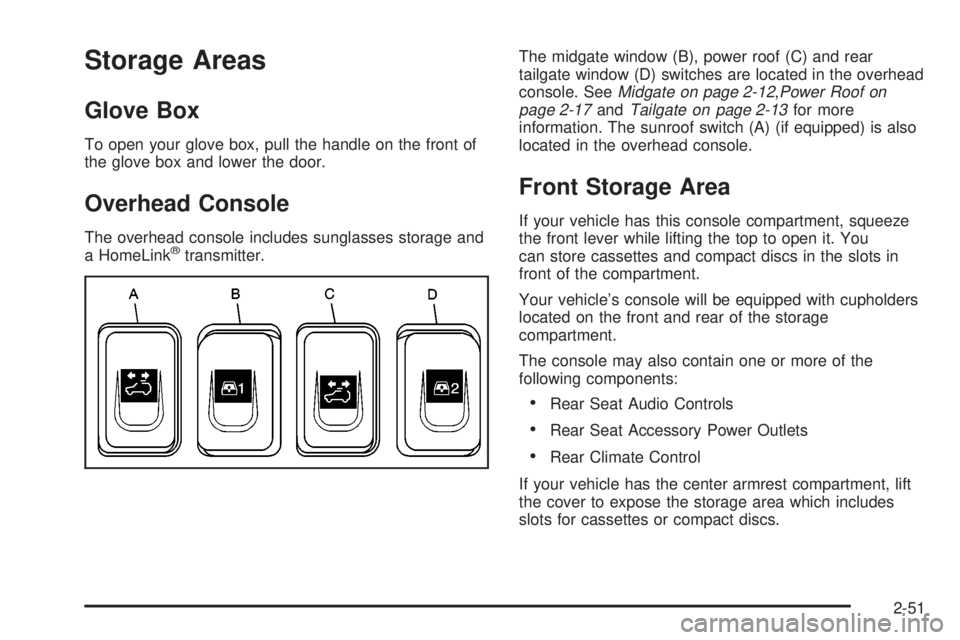
Overhead Console
The overhead console includes sunglasses storage and
a HomeLinkžtransmitter.The midgate window (B), power roof (C) and rear
tailgate window (D) switches are located in the overhead
console. See
Midgate on page 2-12,Power Roof on
page 2-17andTailgate on page 2-13for more
information. The sunroof switch (A) (if equipped) is also
located in the overhead console.
Front Storage Area
If your vehicle has this console compartment, squeeze
the front lever while lifting the top to open it. You
can store cassettes and compact discs in the slots in
front of the compartment.
Your vehicle's console will be equipped with cupholders
located on the front and rear of the storage
compartment.
The console may also contain one or more of the
following components:
·Rear Seat Audio Controls
·Rear Seat Accessory Power Outlets
·Rear Climate Control
If your vehicle has the center armrest compartment, lift
the cover to expose the storage area which includes
slots for cassettes or compact discs.
2-51