tow GMC ENVOY XUV 2005 Owner's Guide
[x] Cancel search | Manufacturer: GMC, Model Year: 2005, Model line: ENVOY XUV, Model: GMC ENVOY XUV 2005Pages: 474, PDF Size: 2.67 MB
Page 187 of 474

REAR WIPER OBSTRUCTION
Check the rear wiper. An object is preventing it from
moving to the off position. Tailgate glass operations
cannot be performed if the rear wiper is not in the off
position. SeeWindshield Wiper Blade Replacement
on page 5-53.
RIGHT REAR DOOR AJAR
If the passenger’s side rear door is not fully closed this
message will appear on the display and you will hear
a chime. Stop and turn off the vehicle, check the door for
obstacles, and close the door again. Check to see if
the message still appears on the DIC. Pressing
the select button will acknowledge this message and
clear it from the DIC display.
ROOF CLOSED
The roof is closed and latched. SeePower Roof on
page 2-18for more information.
ROOF IS CLOSING
The roof is moving in the closed direction. SeePower
Roof on page 2-18for more information.
ROOF IS OPENING
The roof is moving in the opened direction. SeePower
Roof on page 2-18for more information.
ROOF OPENED
The roof is opened and stowed. SeePower Roof on
page 2-18for more information.
SERVICE AIR BAG
If there is a problem with the airbag system this
message will be displayed on the DIC. Have your
GM dealer inspect the system for problems. SeeAirbag
Readiness Light on page 3-34andAirbag System on
page 1-46for more information. Pressing the select
button will acknowledge this message and clear it from
the DIC display.
SERVICE BRAKE SYSTEM
If a problem occurs with the brake system this message
will appear on the DIC. If this message appears, stop
as soon as possible and turn off the vehicle. Restart the
vehicle and check for the message on the DIC display.
If the message is still displayed, or appears again when
you begin driving, the brake system needs service.
See your GM dealer.
3-55
Page 199 of 474

Setting the Tone (Bass/Treble)
AUDIO:Push and release the AUDIO knob until
BASS or TREB appears on the display. Turn the knob
to increase or to decrease. The display will show
the bass or treble level. If a station is weak or noisy,
decrease the treble.
To adjust the bass and treble to the middle position,
push and hold the AUDIO knob. The radio will produce
one beep and adjust the display level to the middle
position.
To adjust all tone and speaker controls to the middle
position, push and hold the AUDIO knob when no tone
or speaker control is displayed. ALL CENTERED will
appear on the display, you will hear a beep, and
the display level will be adjusted to the middle position.
AUTO EQ (Automatic Equalization):Press this button
to select customized equalization settings designed for
country/western, jazz, talk, pop, rock, and classical.
Selecting CUSTOM or changing bass or treble, returns
the EQ to the manual bass and treble settings.
The radio will save separate AUTO EQ settings for each
preset and source.
If the radio is equipped with the Bose audio system, the
equalization settings are either CUSTOM or TALK.
Adjusting the Speakers (Balance/Fade)
AUDIO:To adjust the balance between the right
and the left speakers, push and release the AUDIO
knob until BAL appears on the display. Turn the knob to
move the sound toward the right or the left speakers.
To adjust the fade between the front and the rear
speakers, push and release the AUDIO knob until FADE
appears on the display. Turn the knob to move the
sound toward the front or the rear speakers.
To adjust the balance and fade to the middle position,
push the AUDIO knob, then push it again and hold
it until the radio produces one beep. The balance and
fade will be adjusted to the middle position and the
display will show the speaker balance.
To adjust all tone and speaker controls to the middle
position, push and hold the AUDIO knob when no tone
or speaker control is displayed. ALL CENTERED will
appear on the display, you will hear a beep, and
the display level will be adjusted to the middle position.
3-67
Page 210 of 474

Setting the Tone (Bass/Treble)
AUDIO:Push and release the AUDIO knob until BASS
or TREB appears on the display. Turn the knob to
increase or to decrease. The display will show the bass
or the treble level. If a station is weak or noisy,
decrease the treble.
To adjust the bass and the treble to the middle position,
push and hold the AUDIO knob. The radio will produce
one beep.
To adjust all tone and speaker controls to the middle
position, push and hold the AUDIO knob when no tone
or speaker control is displayed. ALL CENTERED will
appear on the display and you will hear a beep.
AUTO EQ (Automatic Equalization):Press this button
to select customized equalization settings designed
for country/western, jazz, talk, pop, rock, and classical.
To return the bass and treble to the manual mode,
push and release the AUDIO knob until CUSTOM
appears on the display.
If the radio is equipped with the Bose audio system,
the equalization settings are either CUSTOM or TALK.
Adjusting the Speakers (Balance/Fade)
AUDIO:To adjust the balance between the right
and the left speakers, push and release the AUDIO
knob until BAL appears on the display. Turn the knob to
move the sound toward the right or the left speakers.
To adjust the fade between the front and the rear
speakers, push and release the AUDIO knob until
FADE appears on the display. Turn the knob to move
the sound toward the front or the rear speakers.
To adjust the balance and the fade to the middle
position, push the AUDIO knob, then push it again and
hold it until you hear one beep.
To adjust all tone and speaker controls to the middle
position, push and hold the AUDIO knob when no tone
or speaker control is displayed. ALL CENTERED will
appear on the display and you will hear a beep.
3-78
Page 225 of 474

Setting the Tone (Bass/Treble)
AUDIO:Push and release the AUDIO knob until BASS
or TREB appears on the display. Turn the knob to
increase or to decrease. The display will show the bass
or treble level. If a station is weak or noisy, decrease
the treble.
To adjust the bass and treble to the middle position,
push and hold the AUDIO knob. The radio will produce
one beep and adjust the display level to the middle
position.
To adjust all tone and speaker controls to the middle
position, push and hold the AUDIO knob when no tone
or speaker control is displayed. ALL CENTERED will
appear on the display, you will hear a beep, and
the display level will be adjusted to the middle position.
AUTO EQ (Automatic Equalization):Press this button
to select customized equalization settings designed for
country/western, jazz, talk, pop, rock, and classical.
Selecting CUSTOM or changing bass or treble, returns
the EQ to the manual bass and treble settings.
The radio will save separate AUTO EQ settings for each
preset and source.
If the radio is equipped with the Bose audio system,
the equalization settings are either CUSTOM or TALK.
Adjusting the Speakers (Balance/Fade)
AUDIO:To adjust the balance between the right
and the left speakers, push and release the AUDIO
knob until BAL appears on the display. Turn the knob to
move the sound toward the right or the left speakers.
To adjust the fade between the front and the rear
speakers, push and release the AUDIO knob until
FADE appears on the display. Turn the knob to move
the sound toward the front or the rear speakers.
To adjust the balance and fade to the middle position,
push the AUDIO knob, then push it again and hold
it until the radio produces one beep. The balance and
fade will be adjusted to the middle position and the
display will show the speaker balance.
To adjust all tone and speaker controls to the middle
position, push and hold the AUDIO knob when no tone
or speaker control is displayed. ALL CENTERED will
appear on the display, you will hear a beep, and
the display level will be adjusted to the middle position.
3-93
Page 239 of 474

Adjusting the Speakers (Balance/Fade)
AUDIO:To adjust the balance between the right
and the left speakers, push and release the AUDIO
knob until BAL appears on the display. Turn the knob to
move the sound toward the right or the left speakers.
To adjust the fade between the front and rear speakers,
push and release the AUDIO knob until FAD appears
on the display. Turn the knob to move the sound toward
the front or the rear speakers.
To adjust the balance and fade to the middle position,
push and hold the AUDIO knob. The radio will produce
one beep and adjust the display level to the middle
position.
To adjust all tone and speaker controls to the middle
position, push and hold the AUDIO knob when no tone
or speaker controls are displayed. ALL CENTERED
will appear on the display and you will hear a beep.
Finding a Program Type (PTY) Station
(RDS and XM™)
To select and �nd a desired PTY perform the following:
1. Press the TYPE button to activate program type
select mode. P-TYPE and the last selected PTY
will appear on the display.
2. Turn the TYPE knob or press and release the
TYPE button to select a PTY.
3. Once the desired PTY is displayed, press either the
TYPE or the SEEK arrows to select and to take you
to the PTY’s �rst station.
4. To go to another station within that PTY and the
PTY is displayed, press either the TYPE or the
SEEK arrows once. If the PTY is not displayed,
go back to Step 1.
5. Press either the TYPE or the SEEK arrows to exit
program type select mode.
3-107
Page 255 of 474

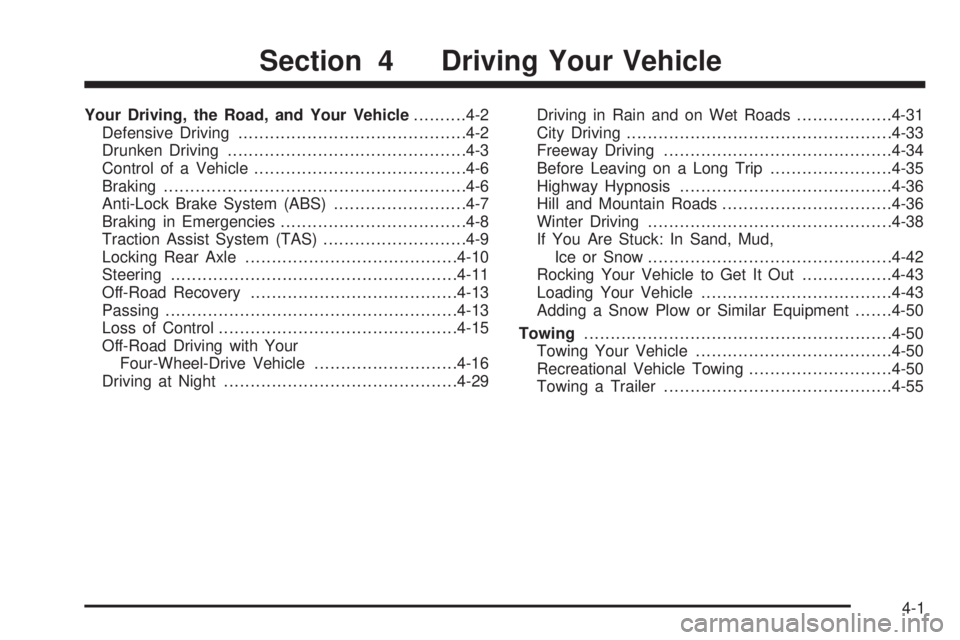
Your Driving, the Road, and Your Vehicle..........4-2
Defensive Driving...........................................4-2
Drunken Driving.............................................4-3
Control of a Vehicle........................................4-6
Braking.........................................................4-6
Anti-Lock Brake System (ABS).........................4-7
Braking in Emergencies...................................4-8
Traction Assist System (TAS)...........................4-9
Locking Rear Axle........................................4-10
Steering......................................................4-11
Off-Road Recovery.......................................4-13
Passing.......................................................4-13
Loss of Control.............................................4-15
Off-Road Driving with Your
Four-Wheel-Drive Vehicle...........................4-16
Driving at Night............................................4-29Driving in Rain and on Wet Roads..................4-31
City Driving..................................................4-33
Freeway Driving...........................................4-34
Before Leaving on a Long Trip.......................4-35
Highway Hypnosis........................................4-36
Hill and Mountain Roads................................4-36
Winter Driving..............................................4-38
If You Are Stuck: In Sand, Mud,
Ice or Snow..............................................4-42
Rocking Your Vehicle to Get It Out.................4-43
Loading Your Vehicle....................................4-43
Adding a Snow Plow or Similar Equipment.......4-50
Towing..........................................................4-50
Towing Your Vehicle.....................................4-50
Recreational Vehicle Towing...........................4-50
Towing a Trailer...........................................4-55
Section 4 Driving Your Vehicle
4-1
Page 297 of 474

Rocking Your Vehicle to Get It Out
First, turn your steering wheel left and right. That will
clear the area around your front wheels. If you have a
four-wheel-drive vehicle, shift into 4HI. Then shift
back and forth between REVERSE (R) and a forward
gear, spinning the wheels as little as possible. Release
the accelerator pedal while you shift, and press lightly
on the accelerator pedal when the transmission is
in gear. By slowly spinning your wheels in the forward
and reverse directions, you will cause a rocking
motion that may free your vehicle. If that does not get
you out after a few tries, you may need to be towed out.
If you do need to be towed out, seeTowing Your
Vehicle on page 4-50.
Loading Your Vehicle
It is very important to know how much weight your
vehicle can carry. This weight is called the vehicle
capacity weight and includes the weight of all occupants,
cargo and all nonfactory-installed options. Two labels
on your vehicle show how much weight it was designed
to carry, the Tire and Loading Information label and
the Certi�cation/Tire label.
{CAUTION:
Do not load your vehicle any heavier than the
Gross Vehicle Weight Rating (GVWR), or either
the maximum front or rear Gross Axle Weight
Rating (GAWR). If you do, parts on your
vehicle can break, and it can change the way
your vehicle handles. These could cause you
to lose control and crash. Also, overloading
can shorten the life of your vehicle.
4-43
Page 299 of 474

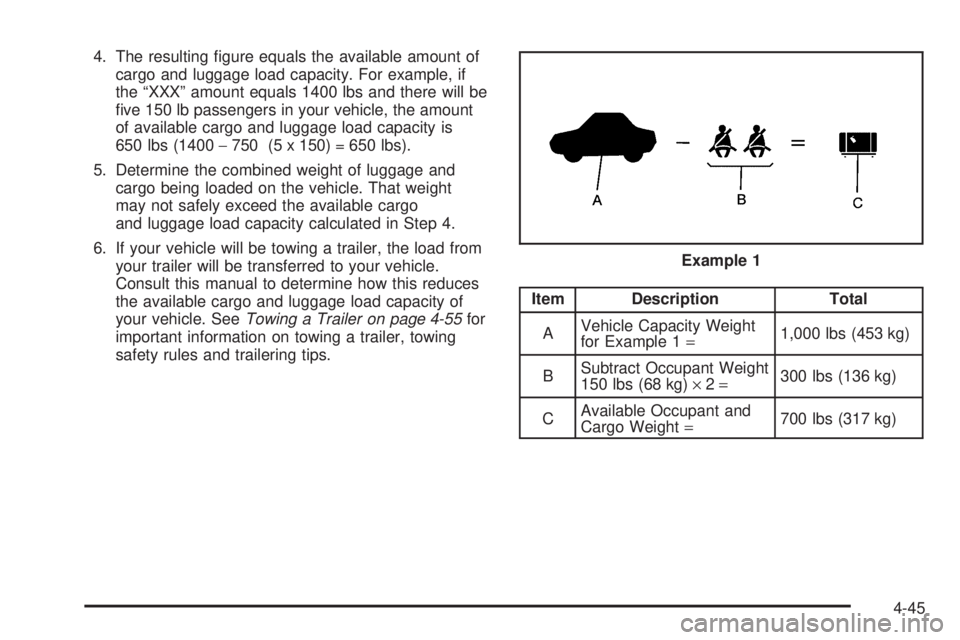
4. The resulting �gure equals the available amount of
cargo and luggage load capacity. For example, if
the “XXX” amount equals 1400 lbs and there will be
�ve 150 lb passengers in your vehicle, the amount
of available cargo and luggage load capacity is
650 lbs (1400−750 (5 x 150) = 650 lbs).
5. Determine the combined weight of luggage and
cargo being loaded on the vehicle. That weight
may not safely exceed the available cargo
and luggage load capacity calculated in Step 4.
6. If your vehicle will be towing a trailer, the load from
your trailer will be transferred to your vehicle.
Consult this manual to determine how this reduces
the available cargo and luggage load capacity of
your vehicle. SeeTowing a Trailer on page 4-55for
important information on towing a trailer, towing
safety rules and trailering tips.
Item Description Total
AVehicle Capacity Weight
for Example 1=1,000 lbs (453 kg)
BSubtract Occupant Weight
150 lbs (68 kg)×2=300 lbs (136 kg)
CAvailable Occupant and
Cargo Weight=700 lbs (317 kg) Example 1
4-45
Page 304 of 474

Indicator Light
The indicator light on the in�ator switch in the rear
passenger compartment also serves as an indicator for
internal system error. If the indicator light is �ashing
without the load leveling function or the in�ator being
active, turn off the ignition. The next day turn on
the ignition and check the indicator light. The vehicle
can be driven with the light �ashing, but if it is you
should have the vehicle serviced as soon as possible.
Adding a Snow Plow or
Similar Equipment
Your vehicle was neither designed nor intended for a
snow plow.
Notice:Adding a snow plow or similar equipment
to your vehicle can damage it, and the repairs would
not be covered by warranty. Do not install a snow
plow or similar equipment on your vehicle.
Towing
Towing Your Vehicle
Consult your dealer or a professional towing service
if you need to have your disabled vehicle towed.
SeeRoadside Assistance Program on page 7-6.
If you want to tow your vehicle behind another vehicle
for recreational purposes (such as behind a motorhome),
see “Recreational Vehicle Towing” following.
Recreational Vehicle Towing
Recreational vehicle towing means towing your vehicle
behind another vehicle – such as behind a motorhome.
The two most common types of recreational vehicle
towing are known as “dinghy towing” (towing your vehicle
with all four wheels on the ground) and “dolly towing”
(towing your vehicle with two wheels on the ground and
two wheels up on a device known as a “dolly”).
With the proper preparation and equipment, many
vehicles can be towed in these ways. See “Dinghy
Towing” and “Dolly Towing,” following. You may
also need brakes for the vehicle being towed.
See your dealer for additional trailering information.
4-50
Page 305 of 474

Here are some important things to consider before you
do recreational vehicle towing:
What’s the trailering capacity of the towing vehicle?
Be sure you read the tow vehicle manufacturer’s
recommendations.
How far will you tow? Some vehicles have
restrictions on how far and how long they can
be towed.
Do you have the proper towing equipment?
See your dealer or trailering professional for
additional advice and equipment recommendations.
Is your vehicle ready to be towed? Just as you
would prepare your vehicle for a long trip, you’ll
want to make sure your vehicle is prepared to be
towed. SeeBefore Leaving on a Long Trip on
page 4-35.
Dinghy Towing
Two-Wheel-Drive Vehicles
Notice:If you tow your vehicle with all four wheels
on the ground, the drivetrain components could
be damaged. The repairs would not be covered by
your warranty. Do not tow your vehicle with all
four wheels on the ground.
Two-wheel-drive vehicles should not be towed with
all four wheels on the ground. Two-wheel-drive
transmissions have no provisions for internal lubrication
while being towed. To properly tow these vehicles,
they should be placed on a platform trailer.
4-51