Index GMC JIMMY 1999 Owner's Guide
[x] Cancel search | Manufacturer: GMC, Model Year: 1999, Model line: JIMMY, Model: GMC JIMMY 1999Pages: 432, PDF Size: 2.85 MB
Page 101 of 432

yellowblue
2-37
Shifting Out of PARK (P)
(Automatic Transmission Only)
CAUTION:
Before shifting out of PARK (P) you must fully
apply your regular brakes. Your vehicle can roll.
If you have left the engine running, the vehicle
can move suddenly. You or others could be
injured. If you're pulling a trailer, see ªTowing a
Trailerº in the Index.
Your vehicle has a Brake-Transmission Shift Interlock
(BTSI). You have to fully apply your regular brake
before you can shift from PARK (P) when the ignition is
in RUN. See ªAutomatic Transmission Operationº in
the Index.
If you cannot shift out of PARK (P), ease pressure on
the shift lever
-- push the shift lever all the way into
PARK (P) as you maintain brake application. Then
move the shift lever into the gear you want. (You must
press the shift lever button if you have the console
shift lever.)If you ever hold the brake pedal down but still can't
shift out of PARK (P), try this:
1. Turn the key to OFF.
2. Apply and hold the brake until the end of Step 4.
3. Shift the transmission to NEUTRAL (N).
4. Start the vehicle and then shift to the drive gear
you want.
5. Have the vehicle fixed as soon as you can.
Parking Your Vehicle
(Manual Transmission Models Only)
Before you get out of your vehicle, turn off your engine,
put your manual transmission in REVERSE (R) and
firmly apply the parking brake.
If you are parking on a hill, or if your vehicle is pulling
a trailer, see ªTowing a Trailerº in the Index.
Page 103 of 432

yellowblue
2-39
Running Your Engine While You're
Parked (Automatic Transmission)
It's better not to park with the engine running. But if
ever you have to, here are some things to know.
CAUTION:
Idling the engine with the climate control
system off could allow dangerous exhaust into
your vehicle (see the earlier Caution under
ªEngine Exhaustº).
Also, idling in a closed-in place can let deadly
carbon monoxide (CO) into your vehicle even if
the fan switch is at the highest setting. One place
this can happen is a garage. Exhaust
-- with
CO
-- can come in easily. NEVER park in a
garage with the engine running.
Another closed-in place can be a blizzard.
(See ªBlizzardº in the Index.)
CAUTION:
It can be dangerous to get out of your vehicle if
the shift lever is not fully in PARK (P) with the
parking brake firmly set. Your vehicle can roll.
Don't leave your vehicle when the engine is
running unless you have to. If you've left the
engine running, the vehicle can move suddenly.
You or others could be injured. To be sure your
vehicle won't move, even when you're on fairly
level ground, always set your parking brake and
move the shift lever to PARK (P).
If you have four-wheel drive, your vehicle will
be free to roll
-- even if your shift lever is in
PARK (P)
-- if your transfer case is in
NEUTRAL. So be sure the transfer case is in a
drive gear
-- not in NEUTRAL. See ªFour-Wheel
Drive (Automatic Transfer Case)º in the Index.
Follow the proper steps to be sure your vehicle won't
move. See ªShifting Into PARK (P)º in the Index.
If you're pulling a trailer, see ªTowing a Trailerº in
the Index.
Page 104 of 432

yellowblue
2-40
Locking Rear Axle
If your vehicle has this feature, your locking rear axle
can give you additional traction on snow, mud, ice, sand
or gravel. It works like a standard axle most of the time,
but when one of the rear wheels has no traction and the
other does, this feature will allow the wheel with
traction to move the vehicle.
Windows
Manual Windows
Turn the hand crank on each door to raise or lower your
manual side door windows.
Power Windows (If Equipped)
If you have the optional power windows, the controls
are on each of the side doors. With power windows, the
switches control the windows when the ignition is on or
when Retained Accessory Power (RAP) is present. (See
ªRetained Accessory Powerº in the Index.) The driver's
door has a switch for the passenger windows as well.
Press the side of the switch with the down arrow to
lower the window.
Press the side of the switch with the up arrow to raise
the window.
Express
-Down Window
The driver's window switch has an express
-down
feature that allows you to lower it without holding the
window switch. Hold the driver's window switch down
for more than half a second to activate the express
-down
feature. Lightly tap the switch to open the window
slightly. The express
-down feature can be interrupted at
any time by pressing the up arrow end of the switch.
Page 107 of 432

yellowblue
2-43
As you signal a turn or a lane change, if the arrows don't
flash but just stay on, a signal bulb may be burned out
and other drivers won't see your turn signal.
If a bulb is burned out, replace it to help avoid an
accident. If the arrows don't go on at all when you
signal a turn, check the fuse (see ªFuses and Circuit
Breakersº in the Index) and for burned
-out bulbs.
If you have a trailer towing option with added wiring for
the trailer lamps, a different turn signal flasher is used.
With this flasher installed, the signal indicator will flash
even if a turn signal bulb is burned out. Check the front
and rear turn signal lamps regularly to make sure they
are working.
Turn Signal On Chime
If your turn signal is left on for more than 3/4 of a mile
(1.2 km), a chime will sound at each flash of the turn
signal. To turn off the chime, move the turn signal lever
to the off position.
Headlamp High/Low Beam Changer
To change the headlamps from low beam to high or high
to low, pull the multifunction lever all the way toward
you. Then release it.
When the high beams are
on, this indicator light on
the instrument panel will
also be on.
Flash-to-Pass
This feature lets you use your high-beam headlamps
to signal a driver in front of you that you want to pass.
It works even if your headlamps are in the
automatic position.
To use it, pull the turn signal lever toward you, but not
so far that you hear a click.
If your headlamps are in the automatic position or on
low beam, your high
-beam headlamps will turn on.
They'll stay on as long as you hold the lever toward you
and the high
-beam indicator on the dash will come on.
Release the lever to return to normal operation.
Page 119 of 432

yellowblue
2-55 Electrochromic Outside Rearview Mirror
(If Equipped)
Only the driver's side outside mirror will adjust for the
glare of headlamps behind you. See ªElectrochromic
Day/Night Inside Rearview Mirrorº earlier in
this section.
Heated Outside Rearview Mirror
(If Equipped)
When you operate the rear window defogger, a defogger
also warms the heated outside rearview mirrors to help
clear them of ice, snow and condensation. See ªRear
Window Defoggerºin the Index for more information.
Storage Compartments
Glove Box
To open your glove box, lift the lever on the front of the
glove box and lower the door. The glove box should not
be open while driving.
Overhead Console (If Equipped)
The overhead console includes reading lamps, a
compartment for a garage door opener, a temperature
and compass display and a storage compartment
for sunglasses.
Some models have a driver information system in the
console. See ªDriver Information Systemº later in
this section.
Page 120 of 432

yellowblue
2-56
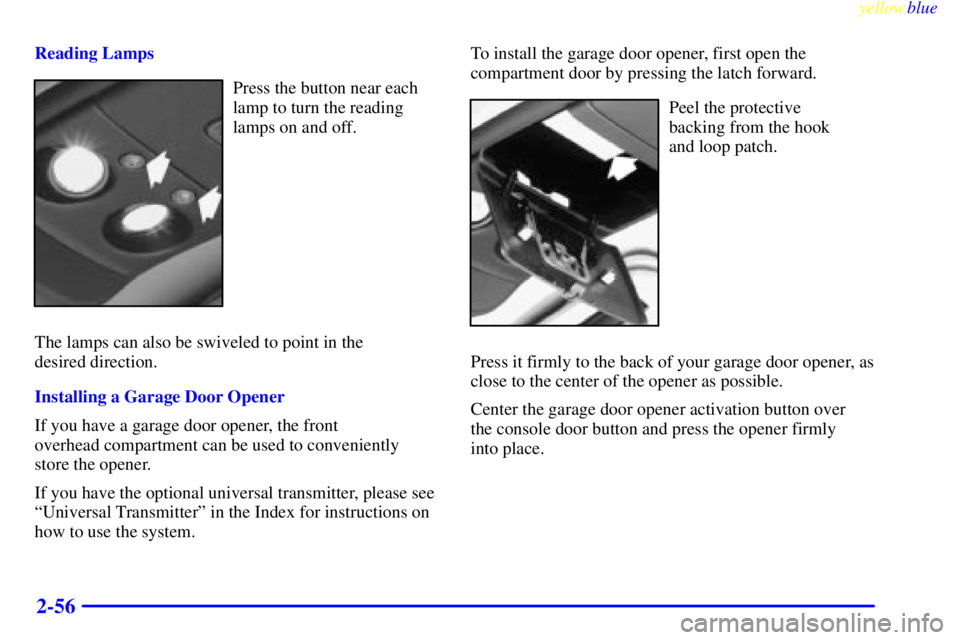
Reading Lamps
Press the button near each
lamp to turn the reading
lamps on and off.
The lamps can also be swiveled to point in the
desired direction.
Installing a Garage Door Opener
If you have a garage door opener, the front
overhead compartment can be used to conveniently
store the opener.
If you have the optional universal transmitter, please see
ªUniversal Transmitterº in the Index for instructions on
how to use the system.To install the garage door opener, first open the
compartment door by pressing the latch forward.
Peel the protective
backing from the hook
and loop patch.
Press it firmly to the back of your garage door opener, as
close to the center of the opener as possible.
Center the garage door opener activation button over
the console door button and press the opener firmly
into place.
Page 129 of 432

yellowblue
2-65
NOTICE:
Loading cargo that weighs more than 200 lbs.
(91 kg) on the luggage carrier may damage your
vehicle. When you carry large things, never let
them hang over the rear or the sides of your
vehicle. When loading cargo on the roof panel, be
sure it rests on the slats and does not scratch or
damage the vehicle.
Put the cargo against the side rails and fasten it
securely to the luggage carrier. Put the main
weight as far forward as you can and move the
rear crossrail forward as far as possible to keep
the load from shifting.
Don't exceed the maximum vehicle capacity when
loading your vehicle. For more information on vehicle
capacity and loading, see ªLoading Your Vehicleº in
the Index.
To prevent damage or loss of cargo as you're driving,
check now and then to make sure the luggage carrier and
cargo are still securely fastened.
Ashtrays and Cigarette Lighter
Pull the front ashtray door down to open it.
NOTICE:
Don't put papers and other things that burn into
your ashtray. If you do, cigarettes or other
smoking materials could set them on fire,
causing damage.
To remove the front ashtray, pull the bin upward.
To use the lighter, press it in all the way, and let go.
When it's ready, it will pop back by itself.
NOTICE:
Don't hold a cigarette lighter in with your hand
while it is heating. If you do, it won't be able to
back away from the heating element when it's
ready. That can make it overload, damaging the
lighter and the heating element.
Page 131 of 432

yellowblue
2-67
Accessory Power Outlets
(If Equipped)
If you have accessory power outlets, you can plug in
auxiliary electrical equipment. The accessory power
outlets are located near the center of the vehicle on the
lower part of the instrument panel. Just remove the plug
from the outlet and follow the proper installation
instructions that are included with any electrical
equipment you install.
These circuits are protected by a fuse and have
maximum current levels.
NOTICE:
When using the accessory power outlets,
maximum electrical load must not exceed 20
amps. Always turn off any electrical equipment
when not in use. Leaving electrical equipment on
for extended periods will drain your battery.
Sunroof (If Equipped)
Your vehicle may be equipped with a power sliding
sunroof. To open or close your sunroof, the ignition or
RAP needs to be on. See ªRetained Accessory Powerº
in the Index.
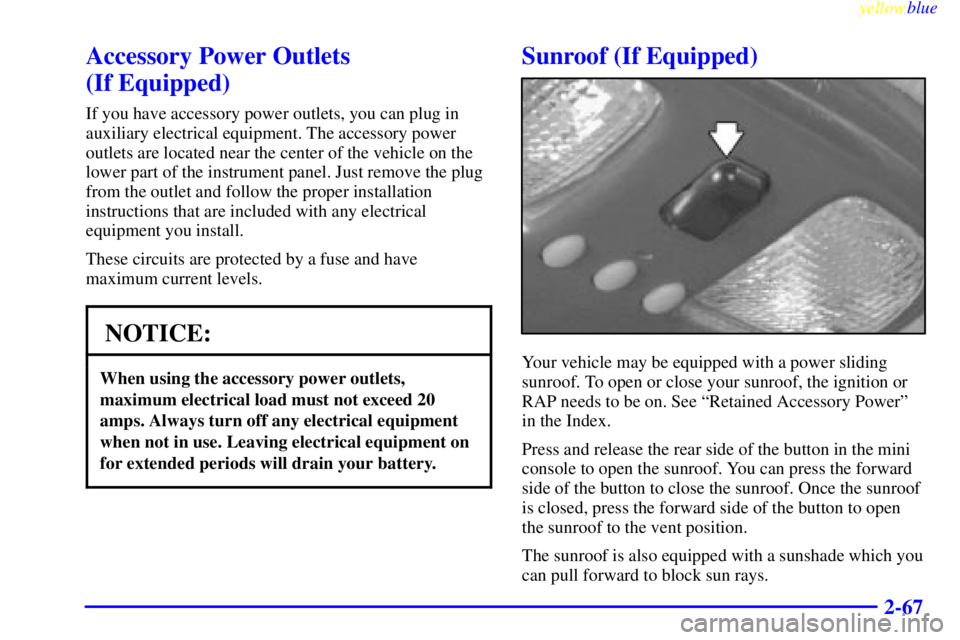
Press and release the rear side of the button in the mini
console to open the sunroof. You can press the forward
side of the button to close the sunroof. Once the sunroof
is closed, press the forward side of the button to open
the sunroof to the vent position.
The sunroof is also equipped with a sunshade which you
can pull forward to block sun rays.
Page 141 of 432

yellowblue
2-77 Air Bag Readiness Light
There is an air bag readiness light on the instrument
panel, which shows the air bag symbol. The system
checks the air bag's electrical system for malfunctions.
The light tells you if there is an electrical problem. The
system check includes the air bag sensors, the air bag
modules, the wiring and the crash sensing and
diagnostic module. For more information on the air bag
system, see ªAir Bagº in the Index.
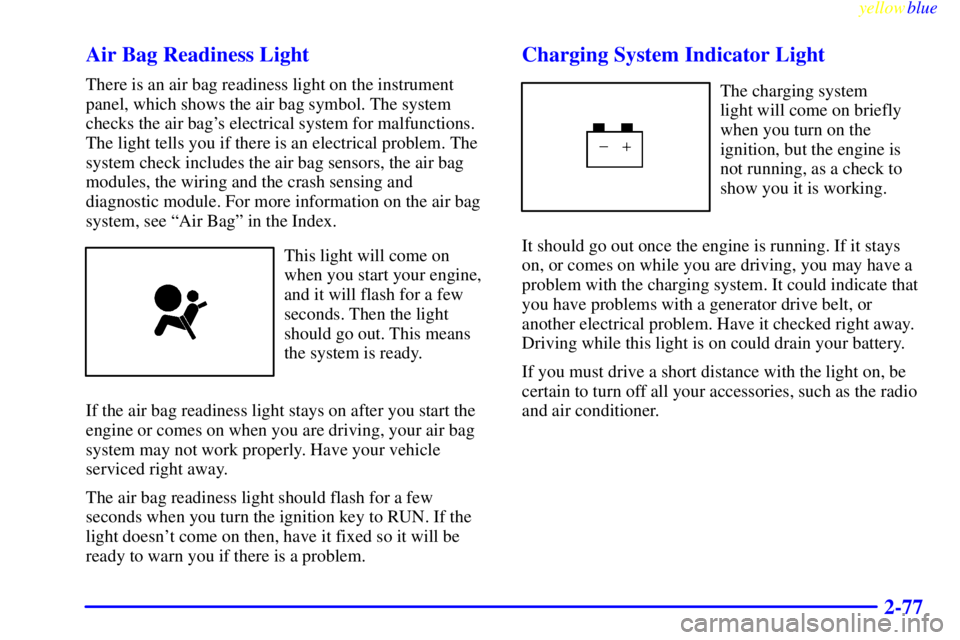
This light will come on
when you start your engine,
and it will flash for a few
seconds. Then the light
should go out. This means
the system is ready.
If the air bag readiness light stays on after you start the
engine or comes on when you are driving, your air bag
system may not work properly. Have your vehicle
serviced right away.
The air bag readiness light should flash for a few
seconds when you turn the ignition key to RUN. If the
light doesn't come on then, have it fixed so it will be
ready to warn you if there is a problem.
Charging System Indicator Light
The charging system
light will come on briefly
when you turn on the
ignition, but the engine is
not running, as a check to
show you it is working.
It should go out once the engine is running. If it stays
on, or comes on while you are driving, you may have a
problem with the charging system. It could indicate that
you have problems with a generator drive belt, or
another electrical problem. Have it checked right away.
Driving while this light is on could drain your battery.
If you must drive a short distance with the light on, be
certain to turn off all your accessories, such as the radio
and air conditioner.
Page 142 of 432

yellowblue
2-78 Voltmeter Gage
When your engine is not
running, but the ignition is
on (in RUN), this gage
shows your battery's state of
charge in DC volts.
When the engine is running, the gage shows the
condition of the charging system. Readings between the
low and high warning zones indicate the normal
operating range.
Readings in the low warning zone may occur when a
large number of electrical accessories are operating in
the vehicle and the engine is left at an idle for an
extended period. This condition is normal since the
charging system is not able to provide full power at
engine idle. As engine speeds are increased, this
condition should correct itself as higher engine speeds
allow the charging system to create maximum power.You can only drive for a short time with the reading in
either warning zone. If you must drive, turn off all
unnecessary accessories.
Readings in either warning zone indicate a possible
problem in the electrical system. Have the vehicle
serviced as soon as possible.
Shift Light
You have the shift
light if you have a
manual transmission.
Shifting when the indicator light is on will help you get
the best fuel economy. See ªShift Lightº in the Index.