low GMC SAFARI 2004 Owner's Manual
[x] Cancel search | Manufacturer: GMC, Model Year: 2004, Model line: SAFARI, Model: GMC SAFARI 2004Pages: 394, PDF Size: 4.38 MB
Page 267 of 394
Rear Axle
When to Check Lubricant
Refer to the Maintenance Schedule to determine how
often to check the lubricant. SeePart A: Scheduled
Maintenance Services on page 6-4.
How to Check Lubricant
To get an accurate reading, the vehicle should be on a
level surface.
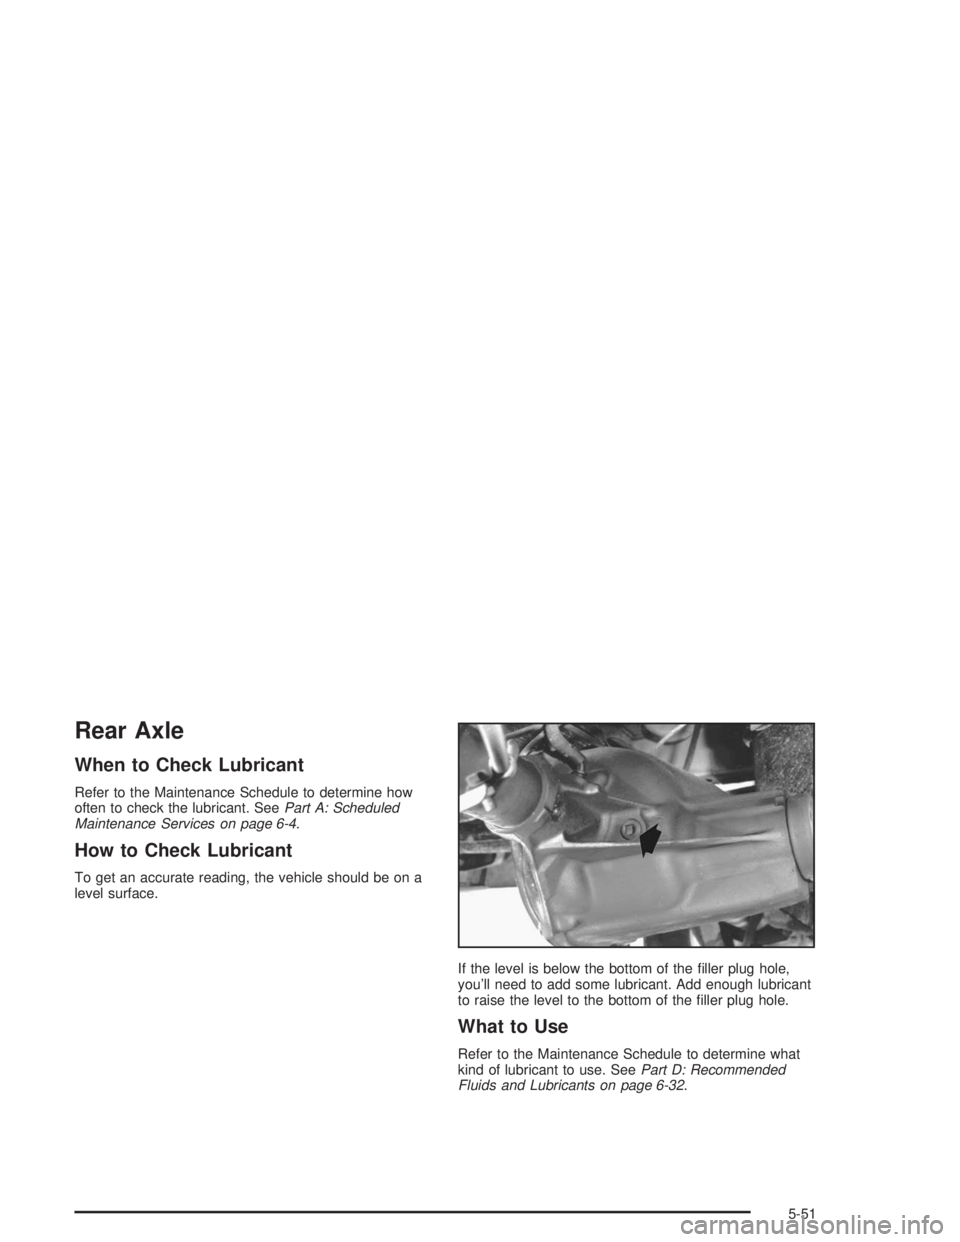
If the level is below the bottom of the ller plug hole,
you’ll need to add some lubricant. Add enough lubricant
to raise the level to the bottom of the ller plug hole.
What to Use
Refer to the Maintenance Schedule to determine what
kind of lubricant to use. SeePart D: Recommended
Fluids and Lubricants on page 6-32.
5-51
Page 268 of 394
Front Axle
When to Check and Change Lubricant
Refer to the Maintenance Schedule to determine how
often to check the lubricant and when to change it. See
Part A: Scheduled Maintenance Services on page 6-4.
How to Check Lubricant
To get an accurate reading, the vehicle should be on a
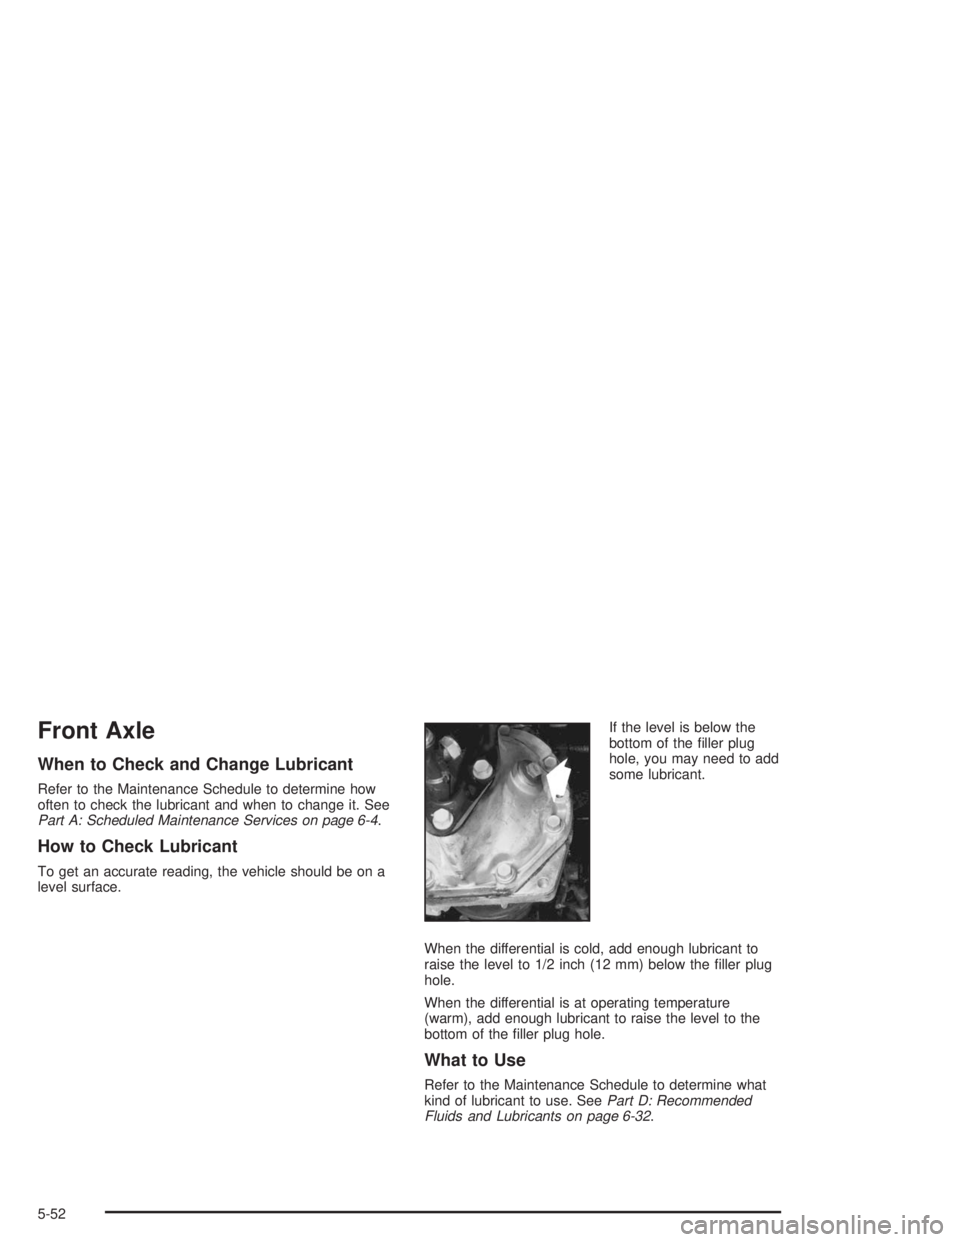
level surface.If the level is below the
bottom of the ller plug
hole, you may need to add
some lubricant.
When the differential is cold, add enough lubricant to
raise the level to 1/2 inch (12 mm) below the ller plug
hole.
When the differential is at operating temperature
(warm), add enough lubricant to raise the level to the
bottom of the ller plug hole.
What to Use
Refer to the Maintenance Schedule to determine what
kind of lubricant to use. SeePart D: Recommended
Fluids and Lubricants on page 6-32.
5-52
Page 269 of 394
Bulb Replacement
For any bulb changing procedure not listed in this
section, contact your dealer.
For the type of bulbs, seeReplacement Bulbs on
page 5-59.
Halogen Bulbs
{CAUTION:
Halogen bulbs have pressurized gas inside
and can burst if you drop or scratch the bulb.
You or others could be injured. Be sure to read
and follow the instructions on the bulb
package.
Headlamps
Sealed Beam Headlamp
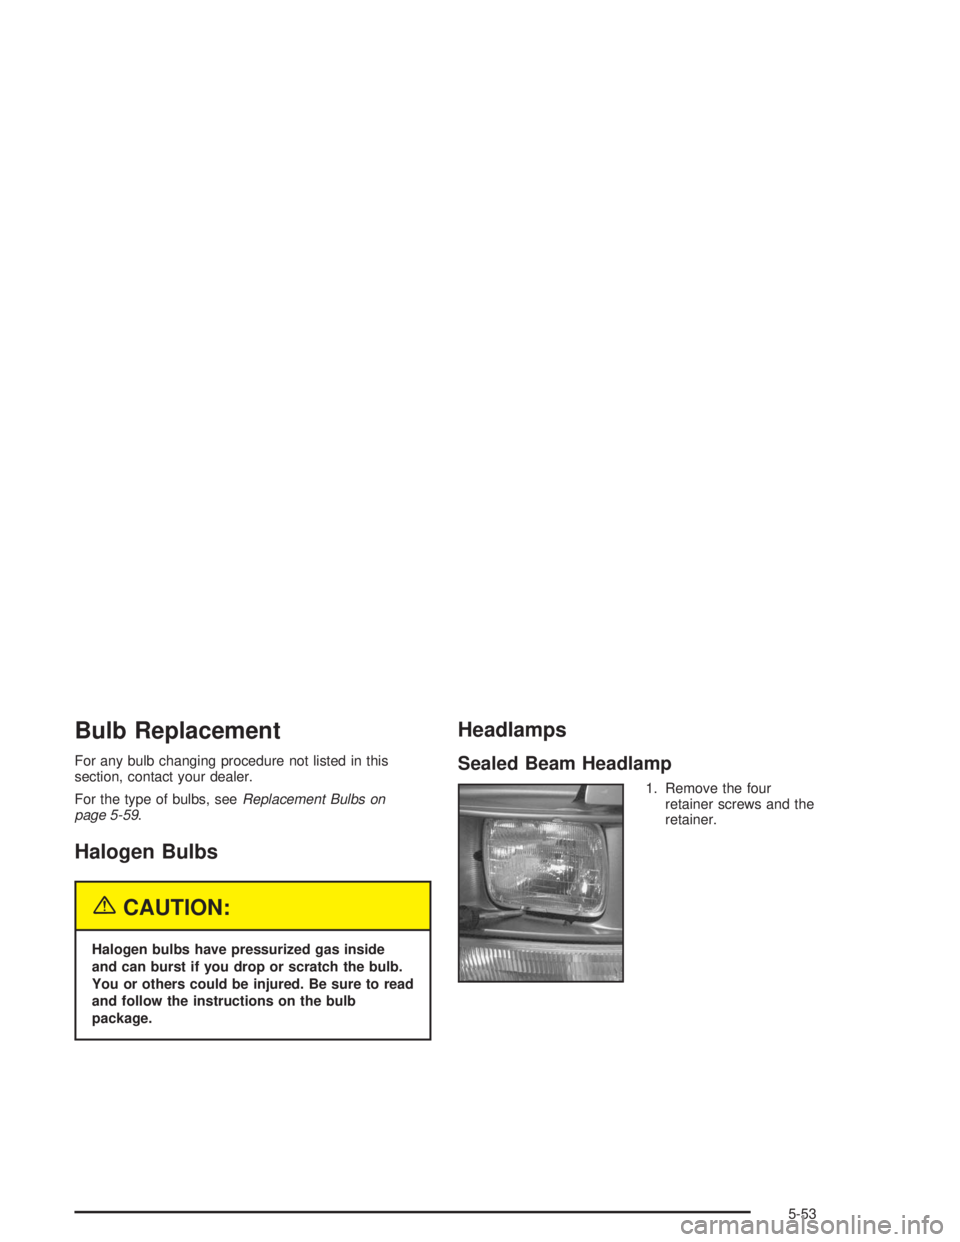
1. Remove the four
retainer screws and the
retainer.
5-53
Page 275 of 394

4. Press the tab and turn
the socket
counterclockwise to
remove the socket from
the bezel. If the
socket does not have a
tab, turn the socket
counterclockwise
to remove the socket
from the bezel.
5. Remove the old bulb from the socket and replace it
with a new one.
6. Reverse Steps 1 through 4 to reinstall the taillamp.Replacement Bulbs
Exterior Lamp Bulb Number
Back-Up Lamps 1156
Halogen Headlamps Composite 9005 (High Beam)
Halogen Headlamps Composite 9006 (Low Beam)
Halogen Headlamps Sealed
BeamH6054
Parking, Turn Signal Lamps 3157NA
Rear,Stoplamps 2057
Sidemarker Lamps 194
For any bulb not listed here, contact your dealer.
5-59
Page 276 of 394
Windshield Wiper Blade
Replacement
Windshield wiper blades should be inspected at least
twice a year for wear and cracking. See “Wiper
Blade Check” inAt Least Twice a Year on page 6-26for
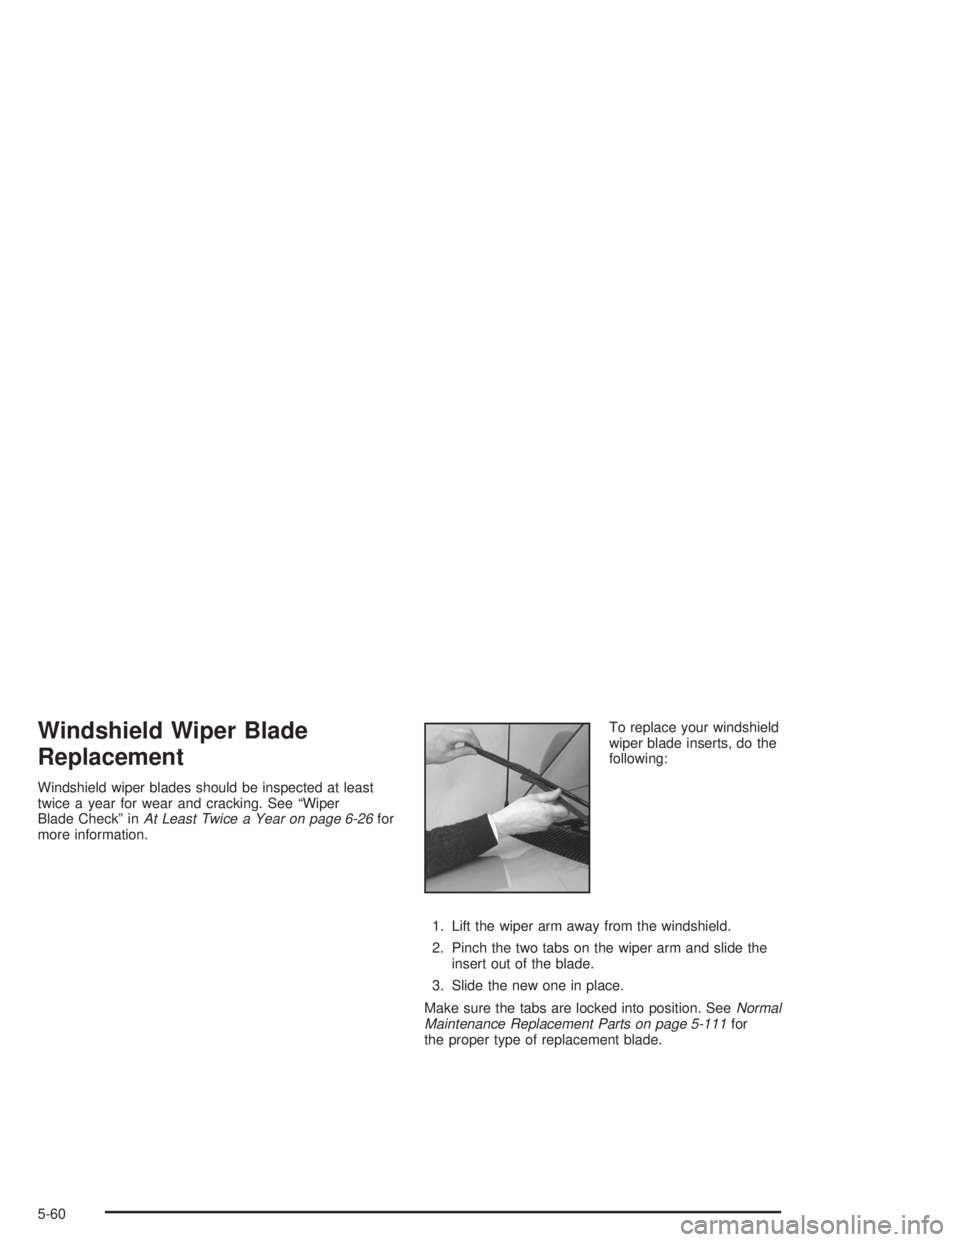
more information.To replace your windshield
wiper blade inserts, do the
following:
1. Lift the wiper arm away from the windshield.
2. Pinch the two tabs on the wiper arm and slide the
insert out of the blade.
3. Slide the new one in place.
Make sure the tabs are locked into position. SeeNormal
Maintenance Replacement Parts on page 5-111for
the proper type of replacement blade.
5-60
Page 278 of 394
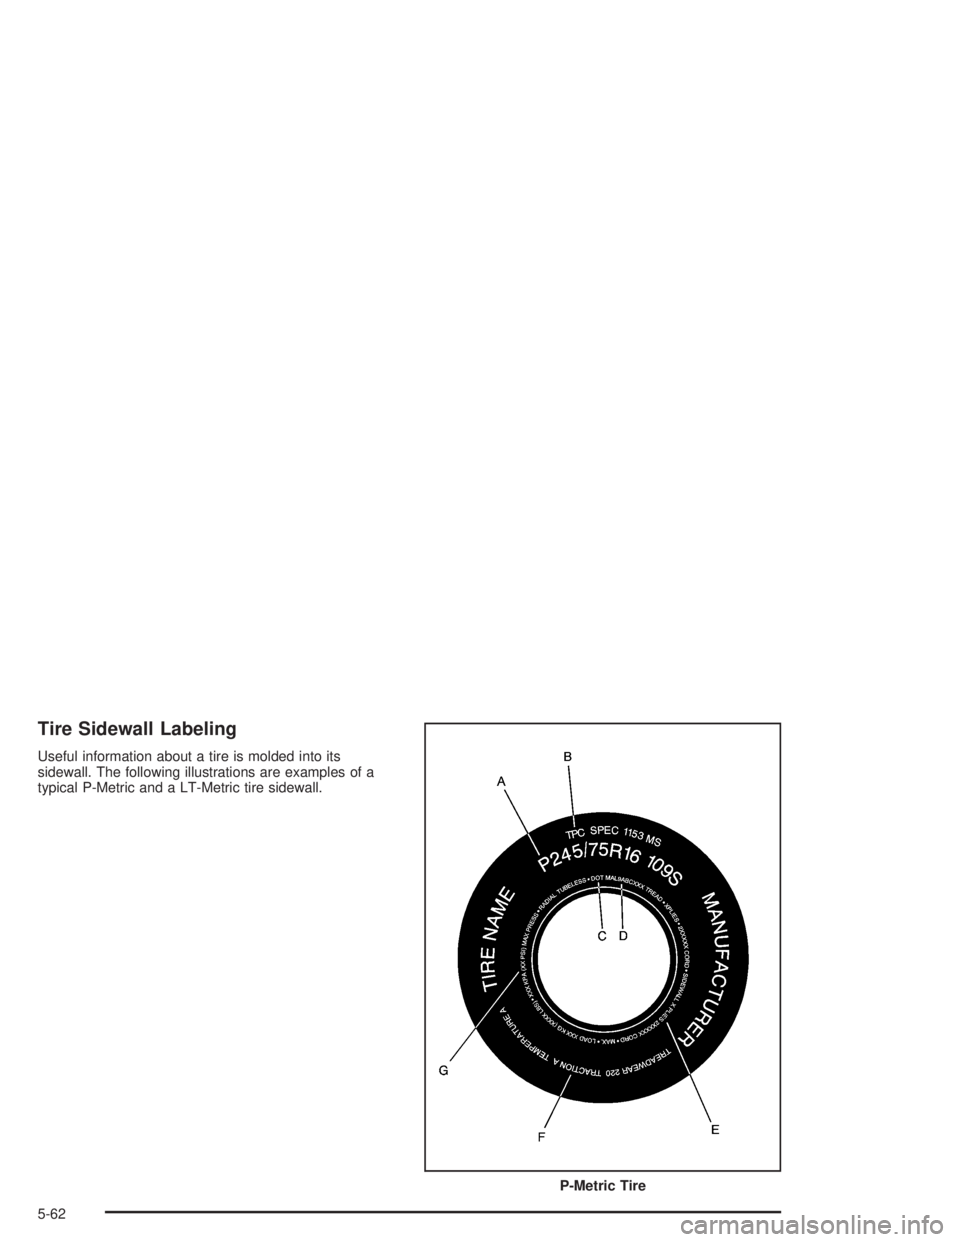
Tire Sidewall Labeling
Useful information about a tire is molded into its
sidewall. The following illustrations are examples of a
typical P-Metric and a LT-Metric tire sidewall.
P-Metric Tire
5-62
Page 279 of 394

(A) Tire Size Code:The tire size code is a combination
of letters and numbers used to dene a particular
tire’s width, height, aspect ratio, construction type and
service description. See the “Tire Size Code” illustration
later in this section for more detail.
(B) Tire Performance Criteria Specication (TPC
Spec):Original equipment tires designed to GM’s
specic tire performance criteria have a TPC
specication code molded onto the sidewall. GM’s TPC
specications meet or exceed all federal safety
guidelines.
(C) Department of Transportation (DOT):The
Department of Transportation (DOT) code indicates that
the tire is in compliance with the U.S. Department of
Transportation Motor Vehicle Safety Standards.
(D) Tire Identication Number (TIN):The letters and
numbers following DOT code are the Tire Identication
Number (TIN). The TIN shows the manufacturer
and plant code, tire size, and date the tire was
manufactured. The TIN is molded onto both sides of the
tire, although only one side may have the date of
manufacture.(E) Tire Ply Material:The type of cord and number of
plies in the sidewall and under the tread.
(F) Uniform Tire Quality Grading (UTQG):Tire
manufacturers are required to grade tires based on three
performance factors: treadwear, traction and
temperature resistance. For more information, see
Uniform Tire Quality Grading on page 5-76.
(G) Maximum Cold Ination Load Limit:Maximum
load that can be carried and the maximum pressure
needed to support that load. For information on
recommended tire pressure seeInation - Tire Pressure
on page 5-71andLoading Your Vehicle on page 4-29.
5-63
Page 281 of 394

(D) Department of Transportation (DOT):The
Department of Transportation (DOT) code indicates that
the tire is in compliance with the U.S. Department of
Transportation Motor Vehicle Safety Standards.
(E) Tire Identication Number (TIN):The letters and
numbers following DOT code are the Tire Identication
Number (TIN). The TIN shows the manufacturer
and plant code, tire size, and date the tire was
manufactured. The TIN is molded onto both sides of the
tire, although only one side may have the date of
manufacture.(F) Tire Ply Material:The type of cord and number of
plies in the sidewall and under the tread.
(G) Single Tire Maximum Load:Maximum load that
can be carried and the maximum pressure needed
to support that load when used as a single. For
information on recommended tire pressure seeInation
- Tire Pressure on page 5-71andLoading Your
Vehicle on page 4-29.
5-65
Page 283 of 394

(F) Tire Size:A combination of letters and numbers
dene a tire’s width, height, aspect ratio, construction
type and service description. The letter “T” as the
rst character in the tire size means the tire is for
temporary use only.
(G) Tire Performance Criteria Specication (TPC
Spec):Original equipment tires designed to GM’s
specic tire performance criteria have a TPC
specication code molded onto the sidewall. GM’s TPC
specications meet or exceed all federal safety
guidelines.
Tire Size
The following examples show the different parts
of a tire size.(A) Passenger (P-Metric) Tire:The United States
version of a metric tire sizing system. The letter “P” as
the rst character in the tire size means a passenger
vehicle tire engineered to standards set by the U.S. Tire
and Rim Association.
(B) Tire Width:The three-digit number indicates the
tire section width in millimeters from sidewall to sidewall.
(C) Aspect Ratio:A two-digit number that indicates
the tire height-to-width measurements. For example, if
the tire size aspect ratio is “75,” as shown in item “C” of
the illustration, it would mean that the tire’s sidewall is
75% as high as it is wide.
(D) Construction Code:A letter code is used to
indicate the type of ply construction in the tire. The letter
“R” means radial ply construction; the letter “D” means
diagonal or bias ply construction; and the letter “B”
means belted-bias ply construction.
(E) Rim Diameter:Diameter of the wheel in inches.
(F) Service Description:The service description
indicates the load range and speed rating of a tire.
The load index can range from 1 to 279. Speed ratings
range from “A” to “Z”.
Passenger (P-Metric) Tire
5-67
Page 287 of 394
Vehicle Capacity Weight:The number of designated
seating positions multiplied by 150 lbs. (68 kg) plus
the rated cargo load. SeeLoading Your Vehicle
on page 4-29.
Vehicle Maximum Load on the Tire:Load on an
individual tire due to curb weight, accessory weight,
occupant weight and cargo weight.
Vehicle Placard:A label permanently attached to a
vehicle showing the original equipment tire size
and recommended ination pressure. SeeLoading Your
Vehicle on page 4-29.
Ination - Tire Pressure
The Certication/Tire label or Tire and Loading
Information label shows the correct ination pressures
for your tires when they’re cold. “Cold” means your
vehicle has been sitting for at least three hours or driven
no more than 1 mile (1.6 km). SeeLoading Your
Vehicle on page 4-29.Notice:Don’t let anyone tell you that underination
or overination is all right. It’s not. If your tires
don’t have enough air (underination), you can get
the following:
Too much exing
Too much heat
Tire overloading
Bad wear
Bad handling
Bad fuel economy
If your tires have too much air (overination), you
can get the following:
Unusual wear
Bad handling
Rough ride
Needless damage from road hazards
5-71