clock GMC SAFARI 2005 User Guide
[x] Cancel search | Manufacturer: GMC, Model Year: 2005, Model line: SAFARI, Model: GMC SAFARI 2005Pages: 370, PDF Size: 2.43 MB
Page 263 of 370
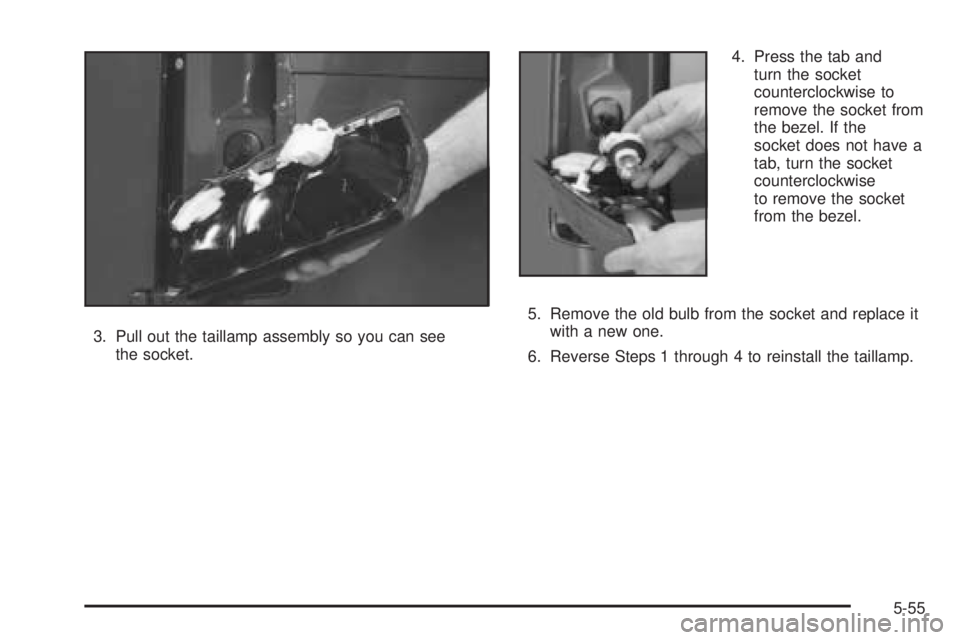
3. Pull out the taillamp assembly so you can see
the socket.4. Press the tab and
turn the socket
counterclockwise to
remove the socket from
the bezel. If the
socket does not have a
tab, turn the socket
counterclockwise
to remove the socket
from the bezel.
5. Remove the old bulb from the socket and replace it
with a new one.
6. Reverse Steps 1 through 4 to reinstall the taillamp.
5-55
Page 281 of 370

Removing the Spare Tire and Tools
The jacking equipment you’ll need is stored by your
vehicle’s rear doors, along the passenger’s side wall.
1. Remove the jack cover by pulling it away from
the side wall and down to release the tabs
securing the top of the cover.2. Remove the wheel blocks by turning the top nut
counterclockwise. Remove the nut and washer,
then pull the wheel blocks off the bolt.
3. Push down on the bolt and remove the hooked end
from the slot. Slide the jack toward the front of the
vehicle and lift it from the mounting. Remove
the extension and the ratchet from the pouch.
5-73
Page 283 of 370
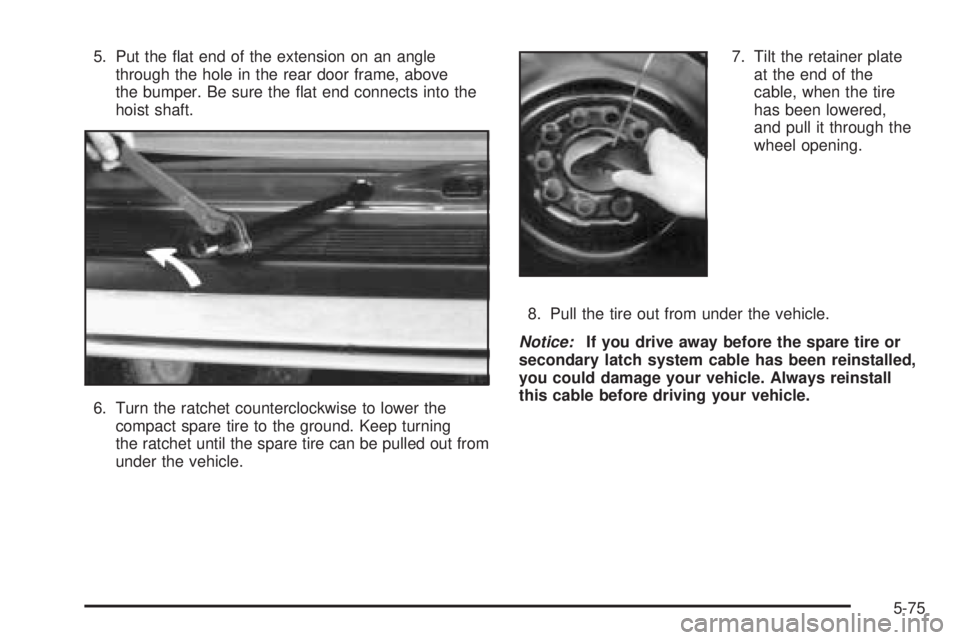
5. Put the �at end of the extension on an angle
through the hole in the rear door frame, above
the bumper. Be sure the �at end connects into the
hoist shaft.
6. Turn the ratchet counterclockwise to lower the
compact spare tire to the ground. Keep turning
the ratchet until the spare tire can be pulled out from
under the vehicle.7. Tilt the retainer plate
at the end of the
cable, when the tire
has been lowered,
and pull it through the
wheel opening.
8. Pull the tire out from under the vehicle.
Notice:If you drive away before the spare tire or
secondary latch system cable has been reinstalled,
you could damage your vehicle. Always reinstall
this cable before driving your vehicle.
5-75
Page 284 of 370
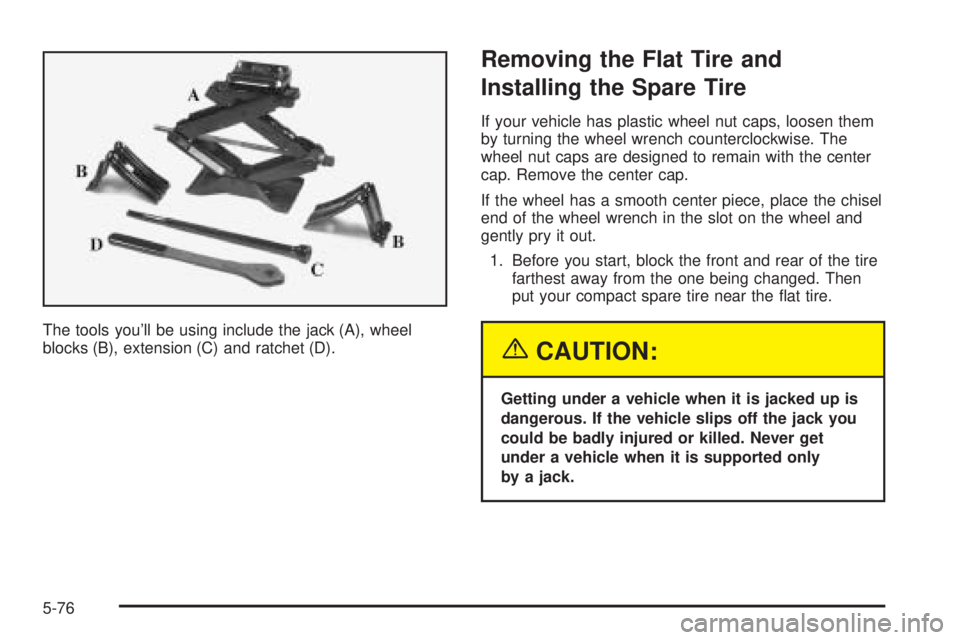
The tools you’ll be using include the jack (A), wheel
blocks (B), extension (C) and ratchet (D).
Removing the Flat Tire and
Installing the Spare Tire
If your vehicle has plastic wheel nut caps, loosen them
by turning the wheel wrench counterclockwise. The
wheel nut caps are designed to remain with the center
cap. Remove the center cap.
If the wheel has a smooth center piece, place the chisel
end of the wheel wrench in the slot on the wheel and
gently pry it out.
1. Before you start, block the front and rear of the tire
farthest away from the one being changed. Then
put your compact spare tire near the �at tire.
{CAUTION:
Getting under a vehicle when it is jacked up is
dangerous. If the vehicle slips off the jack you
could be badly injured or killed. Never get
under a vehicle when it is supported only
by a jack.
5-76
Page 285 of 370
{CAUTION:
Raising your vehicle with the jack improperly
positioned can damage the vehicle and even
make the vehicle fall. To help avoid personal
injury and vehicle damage, be sure to �t the
jack lift head into the proper location before
raising the vehicle.
2. With the DOWN side facing you, turn the ratchet
and socket to loosen all the wheel nuts
counterclockwise. Don’t remove them yet.
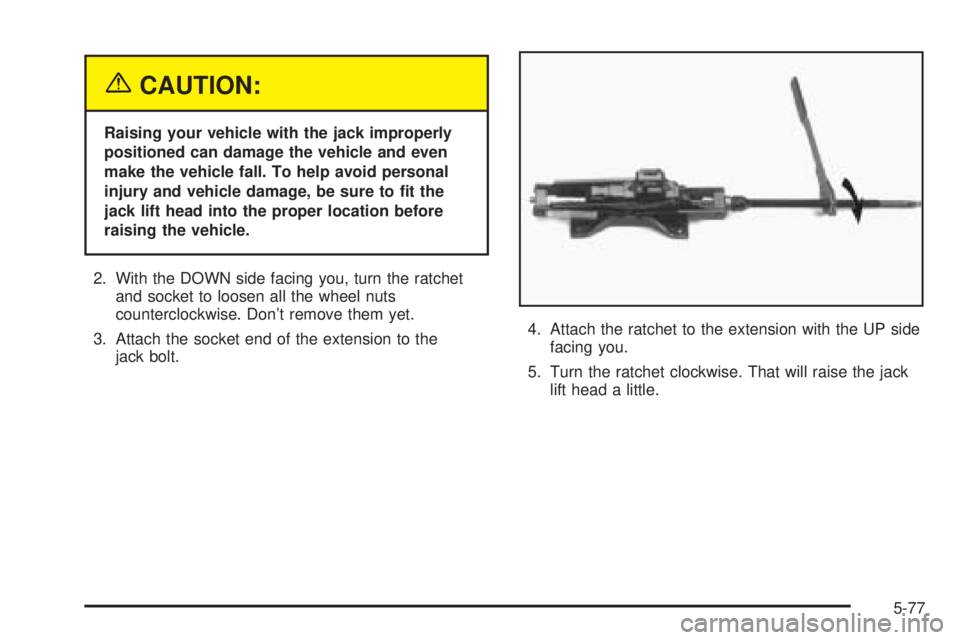
3. Attach the socket end of the extension to the
jack bolt.4. Attach the ratchet to the extension with the UP side
facing you.
5. Turn the ratchet clockwise. That will raise the jack
lift head a little.
5-77
Page 287 of 370
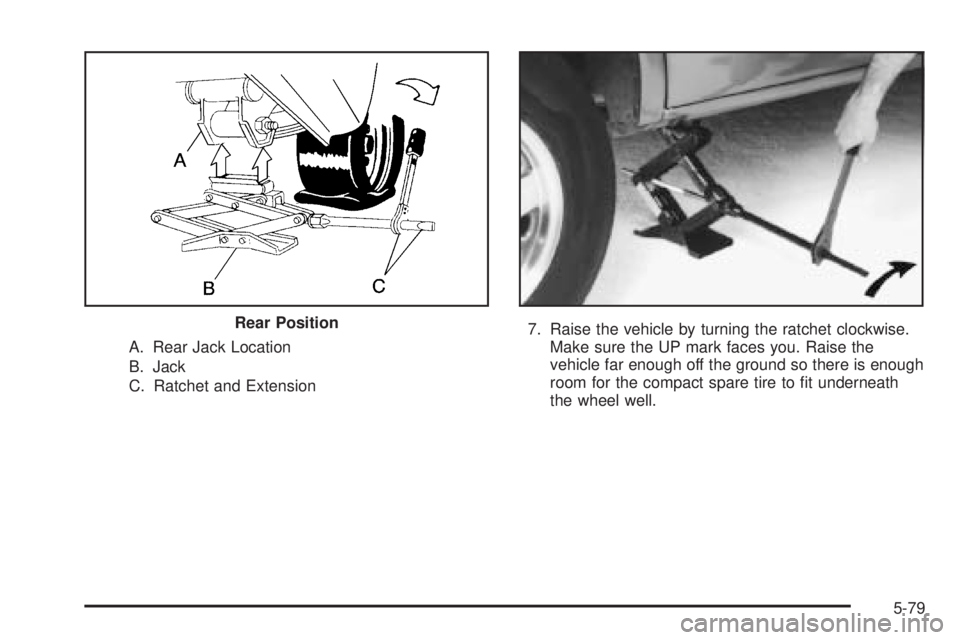
A. Rear Jack Location
B. Jack
C. Ratchet and Extension7. Raise the vehicle by turning the ratchet clockwise.
Make sure the UP mark faces you. Raise the
vehicle far enough off the ground so there is enough
room for the compact spare tire to �t underneath
the wheel well. Rear Position
5-79
Page 289 of 370
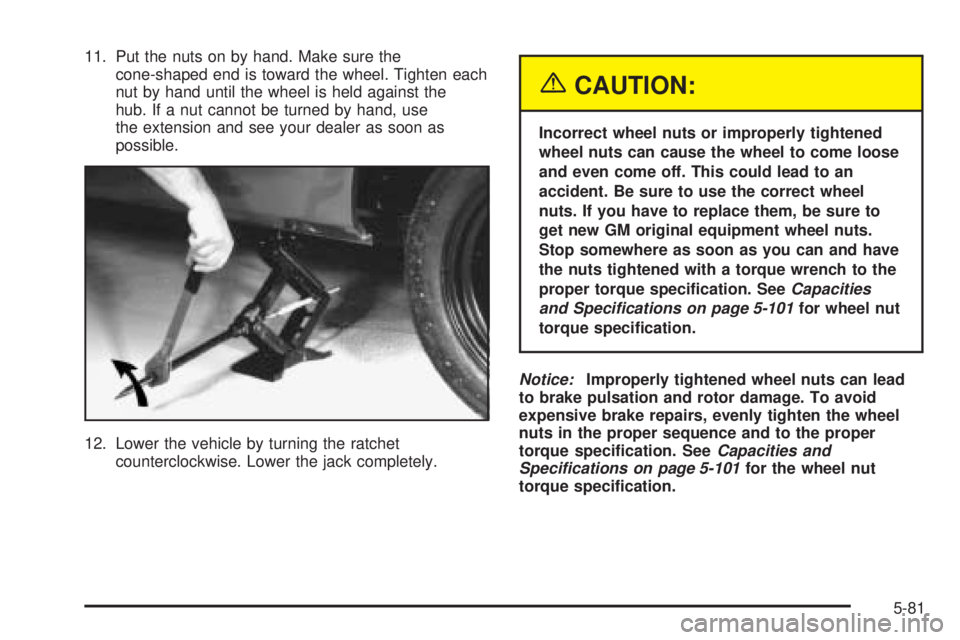
11. Put the nuts on by hand. Make sure the
cone-shaped end is toward the wheel. Tighten each
nut by hand until the wheel is held against the
hub. If a nut cannot be turned by hand, use
the extension and see your dealer as soon as
possible.
12. Lower the vehicle by turning the ratchet
counterclockwise. Lower the jack completely.
{CAUTION:
Incorrect wheel nuts or improperly tightened
wheel nuts can cause the wheel to come loose
and even come off. This could lead to an
accident. Be sure to use the correct wheel
nuts. If you have to replace them, be sure to
get new GM original equipment wheel nuts.
Stop somewhere as soon as you can and have
the nuts tightened with a torque wrench to the
proper torque speci�cation. SeeCapacities
and Specifications on page 5-101for wheel nut
torque speci�cation.
Notice:Improperly tightened wheel nuts can lead
to brake pulsation and rotor damage. To avoid
expensive brake repairs, evenly tighten the wheel
nuts in the proper sequence and to the proper
torque speci�cation. SeeCapacities and
Specifications on page 5-101for the wheel nut
torque speci�cation.
5-81
Page 290 of 370
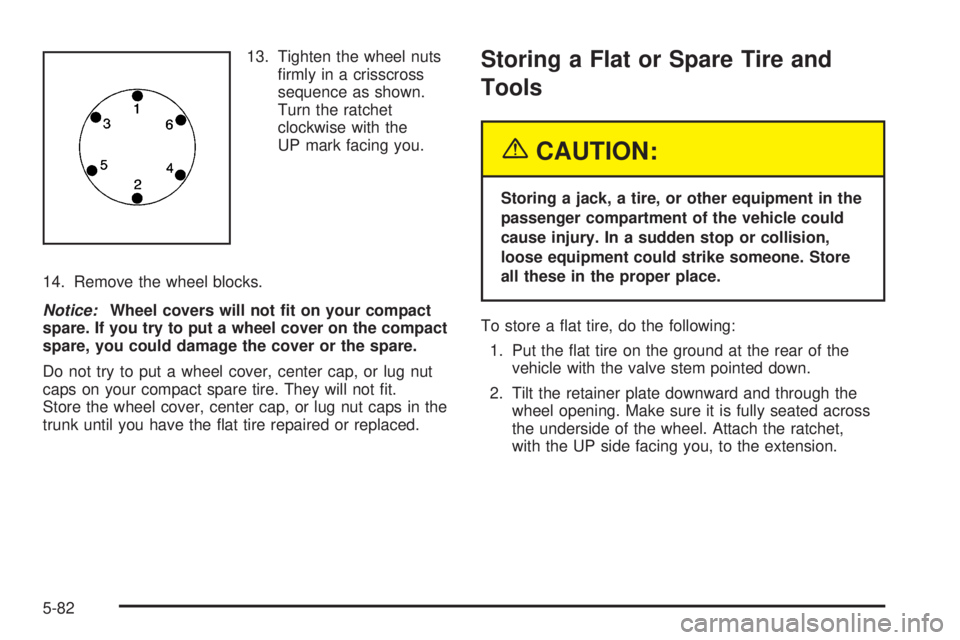
13. Tighten the wheel nuts
�rmly in a crisscross
sequence as shown.
Turn the ratchet
clockwise with the
UP mark facing you.
14. Remove the wheel blocks.
Notice:Wheel covers will not �t on your compact
spare. If you try to put a wheel cover on the compact
spare, you could damage the cover or the spare.
Do not try to put a wheel cover, center cap, or lug nut
caps on your compact spare tire. They will not �t.
Store the wheel cover, center cap, or lug nut caps in the
trunk until you have the �at tire repaired or replaced.Storing a Flat or Spare Tire and
Tools
{CAUTION:
Storing a jack, a tire, or other equipment in the
passenger compartment of the vehicle could
cause injury. In a sudden stop or collision,
loose equipment could strike someone. Store
all these in the proper place.
To store a �at tire, do the following:
1. Put the �at tire on the ground at the rear of the
vehicle with the valve stem pointed down.
2. Tilt the retainer plate downward and through the
wheel opening. Make sure it is fully seated across
the underside of the wheel. Attach the ratchet,
with the UP side facing you, to the extension.
5-82