ECO mode GMC SAVANA 2006 User Guide
[x] Cancel search | Manufacturer: GMC, Model Year: 2006, Model line: SAVANA, Model: GMC SAVANA 2006Pages: 394, PDF Size: 2.56 MB
Page 188 of 394
3. Once the light stops flashing and turns green,
INSERT CD # will appear on the display, load
a CD. Insert the CD partway into the slot, label side
up. The player will pull the CD in.
Once the CD is loaded, the indicator light will begin
flashing again. Once the light stops flashing and
turns green, you can load another CD. The
CD player takes up to six CDs. Do not try to load
more than six.
To load more than one CD but less than six, complete
Steps 1 through 3. When finished loading CDs,
press the LOAD button to cancel the loading function.
The radio will begin to play the last CD loaded.
If more than one CD has been loaded, a number for
each CD will appear on the display.
Playing a Speci�c Loaded CD
For every CD loaded, a number will appear on the
display. To play a specific CD, first press the CD AUX
button (if not already in CD mode), then press the
numbered pushbutton that corresponds to the CD. A
small bar will appear under the CD number that is
playing and the track number will appear on the display.
If an error appears on the display, see “CD Messages”
later in this section.CD
Z(Eject):Press this button to eject CD(s).
To eject the CD that is currently playing, press and
release this button.
To eject multiple CDs, do the following:
1. Press and hold the CD eject button for five seconds.
You will hear a beep and the indicator light, located
to the right of the slot, will begin to flash and
EJECT ALL will appear on the display.
2. Once the light stops flashing, REMOVE CD # will
appear on the display. The CD will eject and can
be removed.
Once the CD is removed, the indicator light will
begin flashing again and another CD will eject.
To stop ejecting the CDs, press the LOAD or the
eject button.
If the CD is not removed, after 25 seconds, the CD will
be automatically pulled back into the player. If CD is
pushed back into the player, before the 25 second time
period is complete, the player will sense an error
and will try to eject the CD several times before
stopping.
Do not repeatedly press the CD eject button to eject a
CD after you have tried to push it in manually. The
player’s 25-second eject timer will reset at each press of
eject, causing the player to not eject the CD until the
25-second time period has elapsed.
3-70
Page 190 of 394
©SCAN¨:To scan one CD, press and hold either
SCAN arrow for more than two seconds until SCAN
appears on the display and you hear a beep. The radio
will go to the next track, play for 10 seconds, then go
on to the next track. Press either SCAN arrow again, to
stop scanning.
To scan all loaded CDs, press and hold either SCAN
arrow for more than four seconds until CD SCAN
appears on the display and you hear a beep. Use this
feature to listen to 10 seconds of the first track of
each loaded CD. Press either SCAN arrow again, to
stop scanning.
INFO (Information):Press this knob to see how long
the current track has been playing. To change the
default on the display, track or elapsed time, press the
knob until you see the display you want, then press
and hold the knob until the radio beeps. The selected
display will now be the default.
BAND:Press this button to listen to the radio when a
CD is playing. The inactive CD(s) will remain safely
inside the radio for future listening.Using Song List Mode
The six-disc CD changer has a feature called song list.
This feature is capable of saving 20 track selections.
To save tracks into the song list feature, perform
the following steps:
1. Turn the CD player on and load it with at least
one CD. See “LOAD CD” listed previously in this
section for more information.
2. Check to see that the CD changer is not in song
list mode. S-LIST should not appear on the
display. If S-LIST is present, press the SONG LIST
button to turn it off.
3. Select the desired CD by pressing the numbered
pushbutton and then use the SEEK or TYPE right
arrow to locate the track to be saved. The track will
begin to play.
4. Press and hold the SONG LIST button to save the
track into memory. When SONG LIST is pressed,
one beep will be heard immediately. After
two seconds of continuously pressing the SONG
LIST button, two beeps will sound to confirm
the track has been saved.
5. Repeat Steps 3 and 4 for saving other selections.
S-LIST FULL will appear on the display if you try to save
more than 20 selections.
3-72
Page 191 of 394
To play the song list, press the SONG LIST button.
One beep will be heard and S-LIST will appear on the
display. The recorded tracks will begin to play in
the order they were saved.
Seek through the song list by using the SEEK or TYPE
arrows. Seeking past the last saved track will return
to the first saved track.
To delete tracks from the song list, perform the
following steps:
1. Turn the CD player on.
2. Press the SONG LIST button to turn song list on.
S-LIST will appear on the display.
3. Press either SEEK or TYPE arrow to select the
desired track to be deleted.
4. Press and hold the SONG LIST button for
two seconds. When SONG LIST is pressed,
one beep will be heard immediately. After
two seconds of continuously pressing the SONG
LIST button, two beeps will be heard to confirm that
the track has been deleted.
After a track has been deleted, the remaining tracks
are moved up the list. When another track is added to
the song list, the track will be added to the end of
the list.To delete the entire song list, perform the
following steps:
1. Turn the CD player on.
2. Press the SONG LIST button to turn song list on.
S-LIST will appear on the display.
3. Press and hold the SONG LIST button for more
than four seconds. One beep will be heard,
followed by two beeps after two seconds, and a
final beep will be heard after four seconds. S-LIST
EMPTY will appear on the display indicating the
song list has been deleted.
If a CD is ejected, and the song list contains saved
tracks from that CD, those tracks are automatically
deleted from the song list. Any tracks saved to the song
list again are added to the bottom of the list.
To end song list mode, press the SONG LIST button.
One beep will be heard and S-LIST will be removed from
the display.
3-73
Page 234 of 394
Trailering is different than just driving your vehicle by
itself. Trailering means changes in acceleration, braking,
handling, durability and fuel economy. Successful,
safe trailering takes correct equipment, and it has to be
used properly.
That’s the reason for this part. In it are many time-tested,
important trailering tips and safety rules. Many of
these are important for your safety and that of your
passengers. So please read this section carefully before
you pull a trailer.
If You Do Decide To Pull A Trailer
If you do, here are some important points:
•There are many different laws, including speed limit
restrictions, having to do with trailering. Make sure
your rig will be legal, not only where you live
but also where you’ll be driving. A good source for
this information can be state or provincial police.
•Consider using a sway control. See “Hitches” later
in this section.
•Don’t tow a trailer at all during the first 500 miles
(800 km) your new vehicle is driven. Your engine,
axle or other parts could be damaged.
•Then, during the first 500 miles (800 km) that you
tow a trailer, don’t drive over 50 mph (80 km/h)
and don’t make starts at full throttle. This helps your
engine and other parts of your vehicle wear in at
the heavier loads.
•See also “Driving on Grades” later in this section.
Three important considerations have to do with weight:
•the weight of the trailer
•the weight of the trailer tongue
•and the weight on your vehicle’s tires
Tow/Haul Mode
Tow/haul is designed to assist while your vehicle is
pulling a large or heavy load or trailer. Tow/haul is most
useful while pulling such a load in rolling terrain, in
stop-and-go traffic, or when you need improved
low-speed control, such as when parking. The purpose
of the tow/haul mode is to:
•Reduce the frequency and improve the predictability
of transmission shifts,
•provide the same solid shift feel when pulling a
heavy load as when the vehicle is unloaded,
•improve control of vehicle speed while requiring
less throttle pedal activity.
4-38
Page 235 of 394
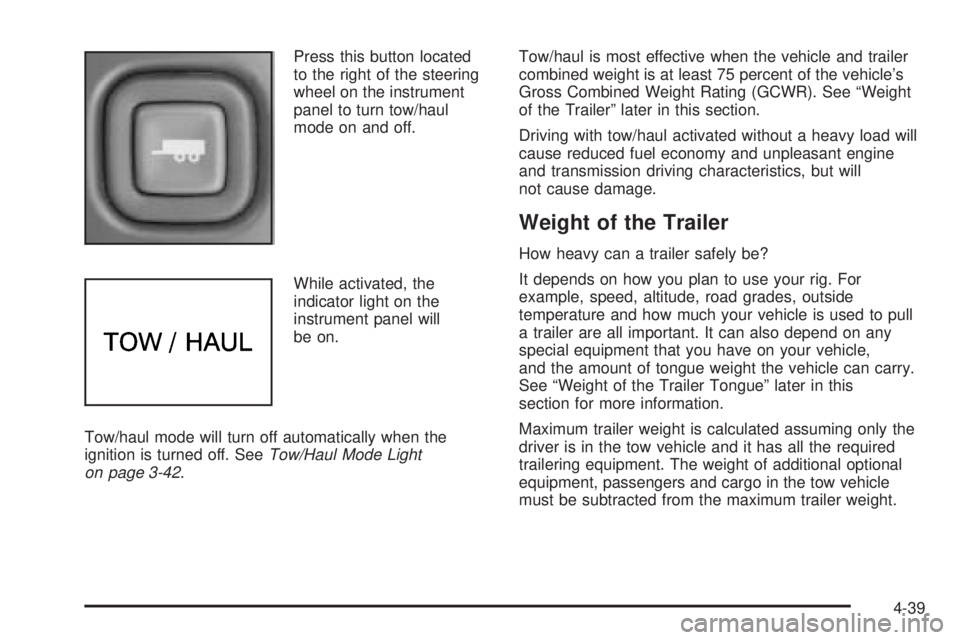
Press this button located
to the right of the steering
wheel on the instrument
panel to turn tow/haul
mode on and off.
While activated, the
indicator light on the
instrument panel will
be on.
Tow/haul mode will turn off automatically when the
ignition is turned off. SeeTow/Haul Mode Light
on page 3-42.Tow/haul is most effective when the vehicle and trailer
combined weight is at least 75 percent of the vehicle’s
Gross Combined Weight Rating (GCWR). See “Weight
of the Trailer” later in this section.
Driving with tow/haul activated without a heavy load will
cause reduced fuel economy and unpleasant engine
and transmission driving characteristics, but will
not cause damage.
Weight of the Trailer
How heavy can a trailer safely be?
It depends on how you plan to use your rig. For
example, speed, altitude, road grades, outside
temperature and how much your vehicle is used to pull
a trailer are all important. It can also depend on any
special equipment that you have on your vehicle,
and the amount of tongue weight the vehicle can carry.
See “Weight of the Trailer Tongue” later in this
section for more information.
Maximum trailer weight is calculated assuming only the
driver is in the tow vehicle and it has all the required
trailering equipment. The weight of additional optional
equipment, passengers and cargo in the tow vehicle
must be subtracted from the maximum trailer weight.
4-39
Page 271 of 394
Checking Coolant for Gasoline Engines
If your vehicle has a diesel engine, see “Checking
Coolant” under “Van Models” in the DURAMAX®Diesel
Supplement for information on checking your vehicle’s
coolant.
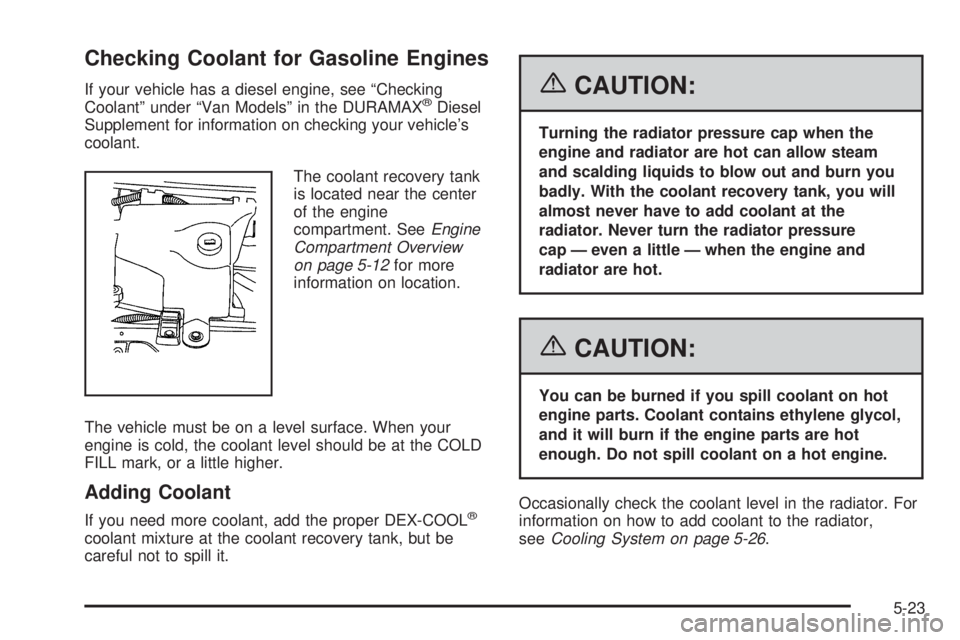
The coolant recovery tank
is located near the center
of the engine
compartment. SeeEngine
Compartment Overview
on page 5-12for more
information on location.
The vehicle must be on a level surface. When your
engine is cold, the coolant level should be at the COLD
FILL mark, or a little higher.
Adding Coolant
If you need more coolant, add the proper DEX-COOL®
coolant mixture at the coolant recovery tank, but be
careful not to spill it.
{CAUTION:
Turning the radiator pressure cap when the
engine and radiator are hot can allow steam
and scalding liquids to blow out and burn you
badly. With the coolant recovery tank, you will
almost never have to add coolant at the
radiator. Never turn the radiator pressure
cap — even a little — when the engine and
radiator are hot.
{CAUTION:
You can be burned if you spill coolant on hot
engine parts. Coolant contains ethylene glycol,
and it will burn if the engine parts are hot
enough. Do not spill coolant on a hot engine.
Occasionally check the coolant level in the radiator. For
information on how to add coolant to the radiator,
seeCooling System on page 5-26.
5-23
Page 274 of 394
Cooling System
If your vehicle has a diesel engine, see “Van Models”
under “Cooling System” in the DURAMAX®Diesel
Supplement.
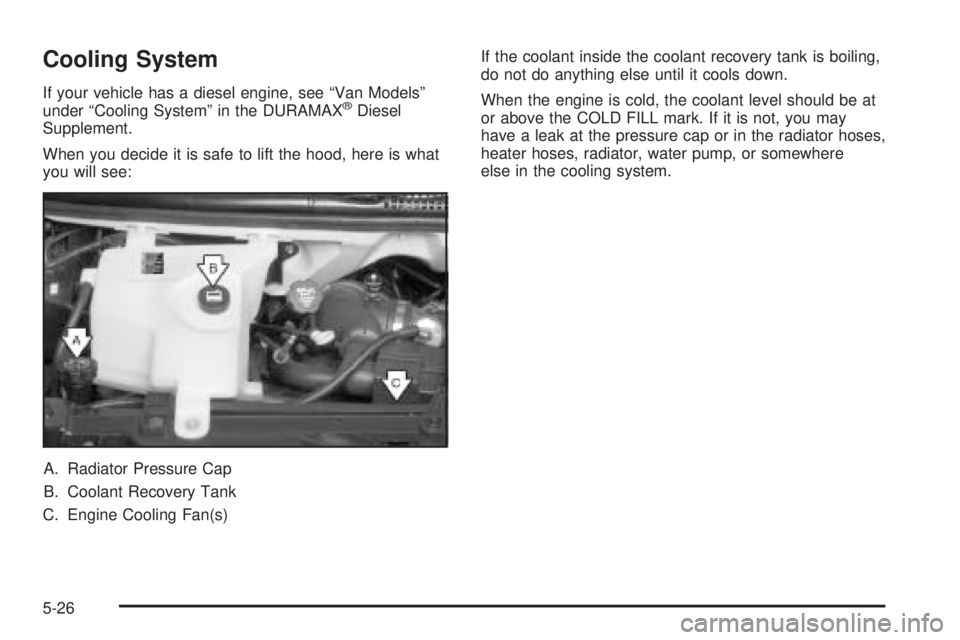
When you decide it is safe to lift the hood, here is what
you will see:
A. Radiator Pressure Cap
B. Coolant Recovery Tank
C. Engine Cooling Fan(s)If the coolant inside the coolant recovery tank is boiling,
do not do anything else until it cools down.
When the engine is cold, the coolant level should be at
or above the COLD FILL mark. If it is not, you may
have a leak at the pressure cap or in the radiator hoses,
heater hoses, radiator, water pump, or somewhere
else in the cooling system.
5-26
Page 276 of 394
How to Add Coolant to the Coolant
Recovery Tank for Gasoline Engines
If your vehicle has a diesel engine, see “How to
Add Coolant to the Coolant Recovery Tank” under “Van
Models” in the Cooling System section of the
DURAMAX
®Diesel Supplement for the proper coolant
fill procedure.
If you have not found a problem yet, but the coolant
level is not at the COLD FILL mark, add a 50/50 mixture
of clean, drinkable water and DEX-COOL
®engine
coolant at the coolant recovery tank. SeeEngine
Coolant on page 5-21for more information.
{CAUTION:
Adding only plain water to your cooling
system can be dangerous. Plain water, or
some other liquid such as alcohol, can boil
before the proper coolant mixture will. Your
vehicle’s coolant warning system is set for the
proper coolant mixture. With plain water or the
wrong mixture, your engine could get too hot
but you would not get the overheat warning.
Your engine could catch �re and you or others
could be burned. Use a 50/50 mixture of clean,
drinkable water and DEX-COOL
®coolant.
Notice:
When using concentrated washer �uid, follow the
manufacturer’s instructions for adding water.
Do not mix water with ready-to-use washer �uid.
Water can cause the solution to freeze and
damage your washer �uid tank and other parts of
the washer system. Also, water does not clean as
well as washer �uid.
5-28
Page 305 of 394
GAWR FRT:Gross Axle Weight Rating for the front
axle, seeLoading Your Vehicle on page 4-30.
GAWR RR:Gross Axle Weight Rating for the rear axle,
seeLoading Your Vehicle on page 4-30.
Intended Outboard Sidewall:The side of an
asymmetrical tire, that must always face outward when
mounted on a vehicle.
Kilopascal (kPa):The metric unit for air pressure.
Light Truck (LT-Metric) Tire:A tire used on light duty
trucks and some multipurpose passenger vehicles.
Load Index:An assigned number ranging from
1 to 279 that corresponds to the load carrying capacity
of a tire.
Maximum In�ation Pressure:The maximum air
pressure to which a cold tire may be inflated. The
maximum air pressure is molded onto the sidewall.
Maximum Load Rating:The load rating for a tire at the
maximum permissible inflation pressure for that tire.
Maximum Loaded Vehicle Weight:The sum of curb
weight; accessory weight; vehicle capacity weight;
and production options weight.Normal Occupant Weight:The number of occupants a
vehicle is designed to seat multiplied by 150 lbs (68 kg).
SeeLoading Your Vehicle on page 4-30.
Occupant Distribution:Designated seating positions.
Outward Facing Sidewall:The side of an
asymmetrical tire that has a particular side that faces
outward when mounted on a vehicle. The side of the tire
that contains a whitewall, bears white lettering, or
bears manufacturer, brand, and/or model name molding
that is higher or deeper than the same moldings on
the other sidewall of the tire.
Passenger (P-Metric) Tire:A tire used on passenger
cars and some light duty trucks and multipurpose
vehicles.
Recommended In�ation Pressure:Vehicle
manufacturer’s recommended tire inflation pressure and
shown on the tire placard. SeeIn�ation - Tire Pressure
on page 5-59andLoading Your Vehicle on page 4-30.
Radial Ply Tire:A pneumatic tire in which the ply cords
that extend to the beads are laid at 90 degrees to the
centerline of the tread.
5-57
Page 373 of 394
In many instances, mechanical failures are covered
under GMC’s Bumper-to-Bumper warranty. However,
when other services are utilized, our Roadside
Assistance Representatives will explain any payment
obligations you might incur.
For prompt and efficient assistance when calling, please
provide the following to the Roadside Assistance
Representative:
•Your name, home address, and home
telephone number.
•Telephone number of your location.
•Location of the vehicle.
•Model, year, color, and license plate number
of the vehicle.
•Mileage, Vehicle Identification Number (VIN)
and delivery date of the vehicle.
•Description of the problem.While we hope you never have the occasion to use our
service, it is added security while traveling for you
and your family. Remember, we are only a phone call
away. GMC Roadside Assistance:1-800-462-8782,
text telephone (TTY) users, call1-888-889-2438.
GMC reserves the right to limit services or reimbursement
to an owner or driver when, in GMC’s judgement, the
claims become excessive in frequency or type of
occurrence.
Roadside Assistance is not part of or included in the
coverage provided by the New Vehicle Limited Warranty.
GMC reserves the right to make any changes or
discontinue the Roadside Assistance program at any
time without notification.
Canadian Roadside Assistance
Vehicles purchased in Canada have an extensive
roadside assistance program accessible from anywhere
in Canada or the United States. Please refer to the
Warranty and Owner Assistance Information book.
7-7