spare tire location GMC SIERRA 1500 2012 Owners Manual
[x] Cancel search | Manufacturer: GMC, Model Year: 2012, Model line: SIERRA 1500, Model: GMC SIERRA 1500 2012Pages: 556, PDF Size: 7.88 MB
Page 423 of 556
Black plate (37,1)GMC Sierra Owner Manual - 2012 - CRC - 11/15/11
Vehicle Care 10-37
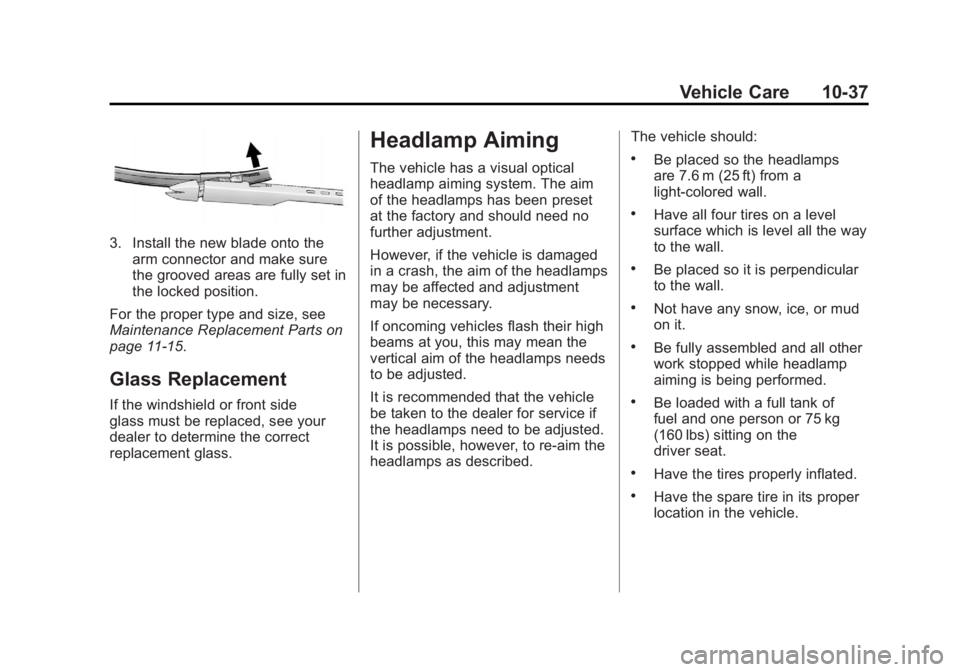
3. Install the new blade onto thearm connector and make sure
the grooved areas are fully set in
the locked position.
For the proper type and size, see
Maintenance Replacement Parts on
page 11‑15.
Glass Replacement
If the windshield or front side
glass must be replaced, see your
dealer to determine the correct
replacement glass.
Headlamp Aiming
The vehicle has a visual optical
headlamp aiming system. The aim
of the headlamps has been preset
at the factory and should need no
further adjustment.
However, if the vehicle is damaged
in a crash, the aim of the headlamps
may be affected and adjustment
may be necessary.
If oncoming vehicles flash their high
beams at you, this may mean the
vertical aim of the headlamps needs
to be adjusted.
It is recommended that the vehicle
be taken to the dealer for service if
the headlamps need to be adjusted.
It is possible, however, to re-aim the
headlamps as described. The vehicle should:.Be placed so the headlamps
are 7.6 m (25 ft) from a
light‐colored wall.
.Have all four tires on a level
surface which is level all the way
to the wall.
.Be placed so it is perpendicular
to the wall.
.Not have any snow, ice, or mud
on it.
.Be fully assembled and all other
work stopped while headlamp
aiming is being performed.
.Be loaded with a full tank of
fuel and one person or 75 kg
(160 lbs) sitting on the
driver seat.
.Have the tires properly inflated.
.Have the spare tire in its proper
location in the vehicle.
Page 448 of 556
Black plate (62,1)GMC Sierra Owner Manual - 2012 - CRC - 11/15/11
10-62 Vehicle Care
Tire Pressure Monitor
Operation
This vehicle may have a Tire
Pressure Monitor System (TPMS).
The TPMS is designed to warn the
driver when a low tire pressure
condition exists. TPMS sensors are
mounted onto each tire and wheel
assembly, excluding the spare tire
and wheel assembly. The TPMS
sensors monitor the air pressure in
the tires and transmit the tire
pressure readings to a receiver
located in the vehicle.
When a low tire pressure condition
is detected, the TPMS illuminates
the low tire pressure warning light
located on the instrument cluster.If the warning light comes on, stop
as soon as possible and inflate the
tires to the recommended pressure
shown on the Tire and Loading
Information label. See
Vehicle Load
Limits on page 9‑16.
A message to check the pressure in
a specific tire displays in the Driver
Information Center (DIC). The low
tire pressure warning light and the
DIC warning message come on at
each ignition cycle until the tires
are inflated to the correct inflation
pressure. If the vehicle has DIC
buttons, tire pressure levels can be
viewed. For additional information
and details about the DIC operation
and displays, see Driver Information
Center (DIC) on page 5‑30 andTire
Messages on page 5‑45.
The low tire pressure warning light
may come on in cool weather when
the vehicle is first started, and then
turn off as the vehicle is driven.
This could be an early indicator that
the air pressure is getting low and
needs to be inflated to the proper
pressure. A Tire and Loading Information
label shows the size of the original
equipment tires and the correct
inflation pressure for the tires when
they are cold. See
Vehicle Load
Limits on page 9‑16, for an example
of the Tire and Loading Information
label and its location. Also see Tire
Pressure on page 10‑58.
The TPMS can warn about a
low tire pressure condition but it
does not replace normal tire
maintenance. See Tire Inspection
on page 10‑65, Tire Rotation on
page 10‑65 andTires on
page 10‑50.
Notice: Tire sealant materials are
not all the same. A non-approved
tire sealant could damage the
TPMS sensors. TPMS sensor
damage caused by using an
incorrect tire sealant is not
covered by the vehicle
warranty. Always use only the
GM-approved tire sealant
available through your dealer or
included in the vehicle.
Page 451 of 556
Black plate (65,1)GMC Sierra Owner Manual - 2012 - CRC - 11/15/11
Vehicle Care 10-65
9. Turn the ignition switch toLOCK/OFF.
10. Set all four tires to the recommended air pressure
level as indicated on the Tire
and Loading Information label.
Tire Inspection
We recommend that the tires,
including the spare tire, if the
vehicle has one, be inspected
for signs of wear or damage at
least once a month.
Replace the tire if:
.The indicators at three or
more places around the tire
can be seen.
.There is cord or fabric
showing through the tire's
rubber.
.The tread or sidewall is
cracked, cut, or snagged
deep enough to show cord or
fabric.
.The tire has a bump, bulge,
or split.
.The tire has a puncture, cut,
or other damage that cannot
be repaired well because of
the size or location of the
damage.
Tire Rotation
Tires should be rotated every
12 000 km (7,500 mi). See
Maintenance Schedule on
page 11‑3.
Tires are rotated to achieve
a uniform wear for all tires.
The first rotation is the most
important.
Any time unusual wear is
noticed, rotate the tires as
soon as possible and check the
wheel alignment. Also check for
damaged tires or wheels. See
When It Is Time for New Tires
on page 10‑68 andWheel
Replacement on page 10‑72. If your vehicle has dual rear
wheels, also see
Dual Tire
Rotation on page 10‑67.
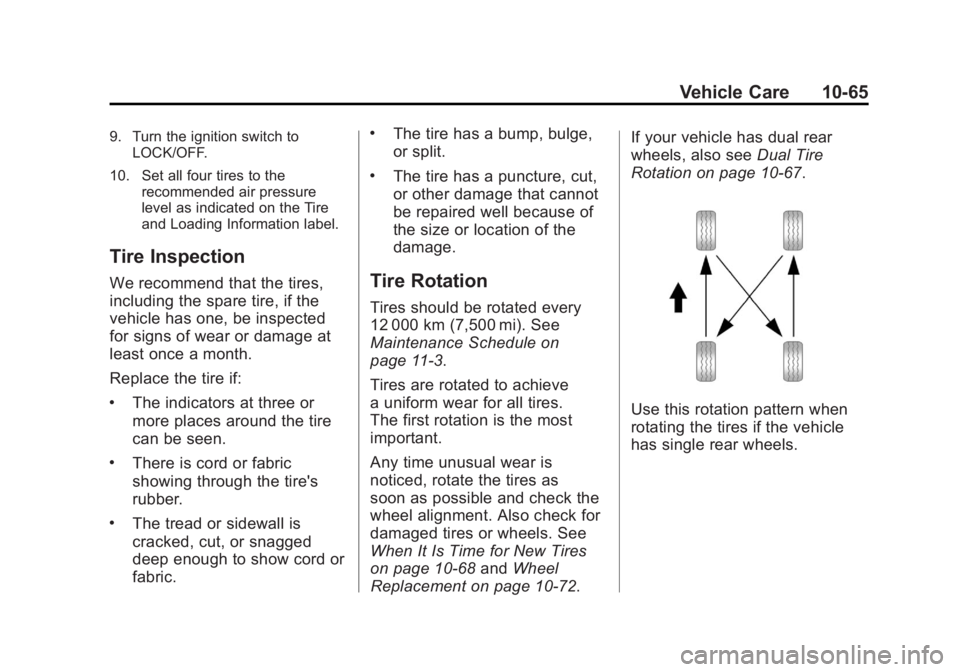
Use this rotation pattern when
rotating the tires if the vehicle
has single rear wheels.
Page 456 of 556
Black plate (70,1)GMC Sierra Owner Manual - 2012 - CRC - 11/15/11
10-70 Vehicle Care
Vehicles that have a tire pressure
monitoring system could give an
inaccurate low‐pressure warning
if non‐TPC Spec rated tires are
installed. SeeTire Pressure Monitor
System on page 10‑60.
The Tire and Loading Information
label indicates the original
equipment tires on the vehicle. See
Vehicle Load Limits on page 9‑16
for the label location and more
information about the Tire and
Loading Information label.
Different Size Tires and
Wheels
If wheels or tires are installed that
are a different size than the original
equipment wheels and tires, vehicle
performance, including its braking,
ride and handling characteristics,
stability, and resistance to rollover
may be affected. If the vehicle has
electronic systems such as antilock
brakes, rollover airbags, traction control, and electronic stability
control, the performance of these
systems can also be affected.
{WARNING
If different sized wheels are used,
there may not be an acceptable
level of performance and safety
if tires not recommended for
those wheels are selected. This
increases the chance of a crash
and serious injury. Only use GM
specific wheel and tire systems
developed for the vehicle, and
have them properly installed by a
GM certified technician.
See Buying New Tires on
page 10‑68 andAccessories and
Modifications on page 10‑3.
Uniform Tire Quality
Grading
Quality grades can be found
where applicable on the tire
sidewall between tread shoulder
and maximum section width. For
example:
Treadwear 200 Traction AA
Temperature A
The following information relates
to the system developed by the
United States National Highway
Traffic Safety Administration
(NHTSA), which grades tires
by treadwear, traction, and
temperature performance. This
applies only to vehicles sold in
the United States. The grades
are molded on the sidewalls of
most passenger car tires. The
Uniform Tire Quality Grading
(UTQG) system does not apply
to deep tread, winter tires,
compact spare tires, tires with
Page 468 of 556
Black plate (82,1)GMC Sierra Owner Manual - 2012 - CRC - 11/15/11
10-82 Vehicle Care
Make sure that the jack head is
positioned so that the rear axle
is resting securely between
the grooves that are on the
jack head.
{WARNING
Getting under a vehicle when it is
lifted on a jack is dangerous.
If the vehicle slips off the jack,
you could be badly injured or
killed. Never get under a vehicle
when it is supported only by
a jack.
{WARNING
Raising the vehicle with the
jack improperly positioned can
damage the vehicle and even
make the vehicle fall. To help
avoid personal injury and vehicle
damage, be sure to fit the jack lift
head into the proper location
before raising the vehicle.6. Turn the wheel wrench
clockwise to raise the vehicle.
Raise the vehicle far enough off
the ground so there is enough
room for the spare tire to fit
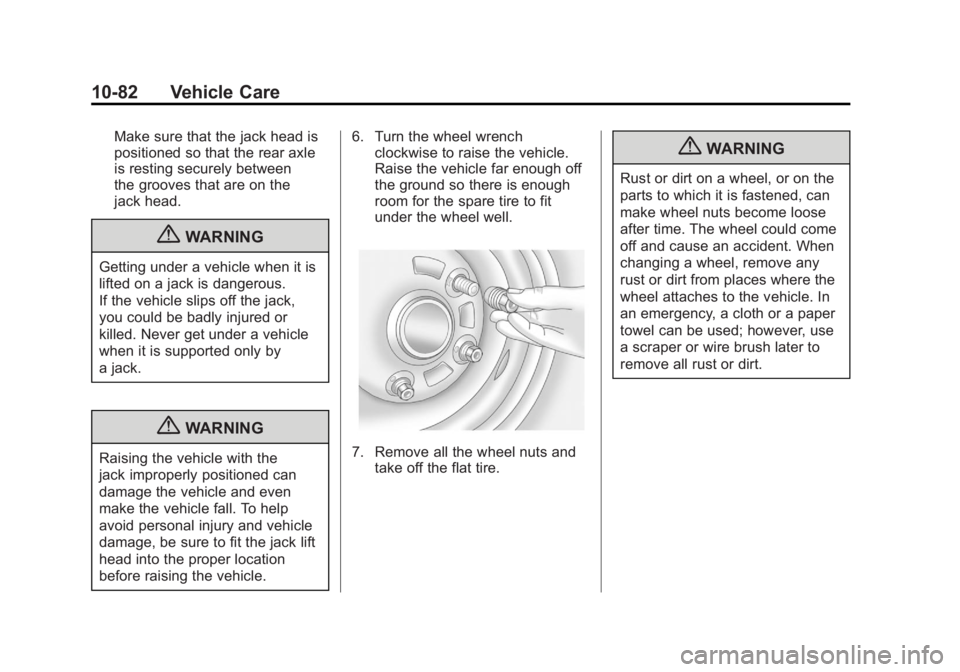
under the wheel well.7. Remove all the wheel nuts andtake off the flat tire.
{WARNING
Rust or dirt on a wheel, or on the
parts to which it is fastened, can
make wheel nuts become loose
after time. The wheel could come
off and cause an accident. When
changing a wheel, remove any
rust or dirt from places where the
wheel attaches to the vehicle. In
an emergency, a cloth or a paper
towel can be used; however, use
a scraper or wire brush later to
remove all rust or dirt.
Page 472 of 556
Black plate (86,1)GMC Sierra Owner Manual - 2012 - CRC - 11/15/11
10-86 Vehicle Care
5. Raise the tire part way upward.Make sure the retainer is seated
in the wheel opening.
6. Raise the tire fully against the underside of the vehicle by
turning the wheel wrench
clockwise until you hear two
clicks or feel it skip twice. You
cannot overtighten the cable.
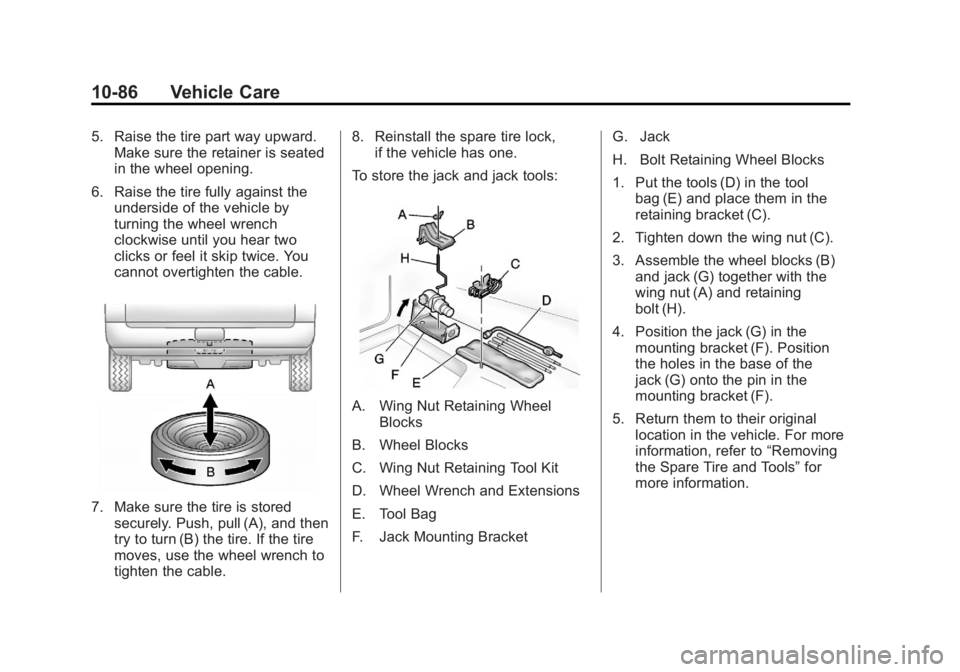
7. Make sure the tire is storedsecurely. Push, pull (A), and then
try to turn (B) the tire. If the tire
moves, use the wheel wrench to
tighten the cable. 8. Reinstall the spare tire lock,
if the vehicle has one.
To store the jack and jack tools:
A. Wing Nut Retaining Wheel Blocks
B. Wheel Blocks
C. Wing Nut Retaining Tool Kit
D. Wheel Wrench and Extensions
E. Tool Bag
F. Jack Mounting Bracket G. Jack
H. Bolt Retaining Wheel Blocks
1. Put the tools (D) in the tool
bag (E) and place them in the
retaining bracket (C).
2. Tighten down the wing nut (C).
3. Assemble the wheel blocks (B) and jack (G) together with the
wing nut (A) and retaining
bolt (H).
4. Position the jack (G) in the mounting bracket (F). Position
the holes in the base of the
jack (G) onto the pin in the
mounting bracket (F).
5. Return them to their original location in the vehicle. For more
information, refer to “Removing
the Spare Tire and Tools” for
more information.