GMC SIERRA 1995 Owners Manual
Manufacturer: GMC, Model Year: 1995, Model line: SIERRA, Model: GMC SIERRA 1995Pages: 488, PDF Size: 26.01 MB
Page 311 of 488
Brake Adjustment
Every time you make a brake stop, your disc brakes adjust for wear.
If your brake pedal goes down farther than normal, your rear drum brakes
may need adjustment. Adjust them by backing
up and firmly applying the
brakes
a few times.
Replacing Brake System Parts
The braking system on a modeffl VEShicle is complex. Its many parts have to
be of top quality and work well together if the vehicle
is to have really good
braking. Vehicles we design and test have top-quality
GM brake parts in
them, as your vehicle does when it is new. When you replace parts of your
braking system
- for example, when your brake linings wear down and
you have to have new ones put
in - be sure you get new genuine GM
replacement parts. If you don't, your brakes may no longer work properly.
For example, if someone puts in brake linings that are wrong for your
vehicle, the balance between your front and rear brakes can change
- for
the worse. The braking performance you've come to expect can change
in
many other ways if someone puts in the wrong replacement brake parts.
Front Shock Absorbers
The front shock absorbers of your vehicle do many things. They help the
vehicle ride smoothly and
also control the travel of the suspension system.
When the shock absorbers are serviced, any replacement shock absorbers
must be the same as the original equipment shock absorbers
in both
extended length and strength.
I NOTICE:
If you use shock absorbers that are not the same as the original
shock absorbers, the shock absorbers
or suspension system
could be damaged.
6-45
ProCarManuals.com
Page 312 of 488
Windshield Wiper Blade Inserts
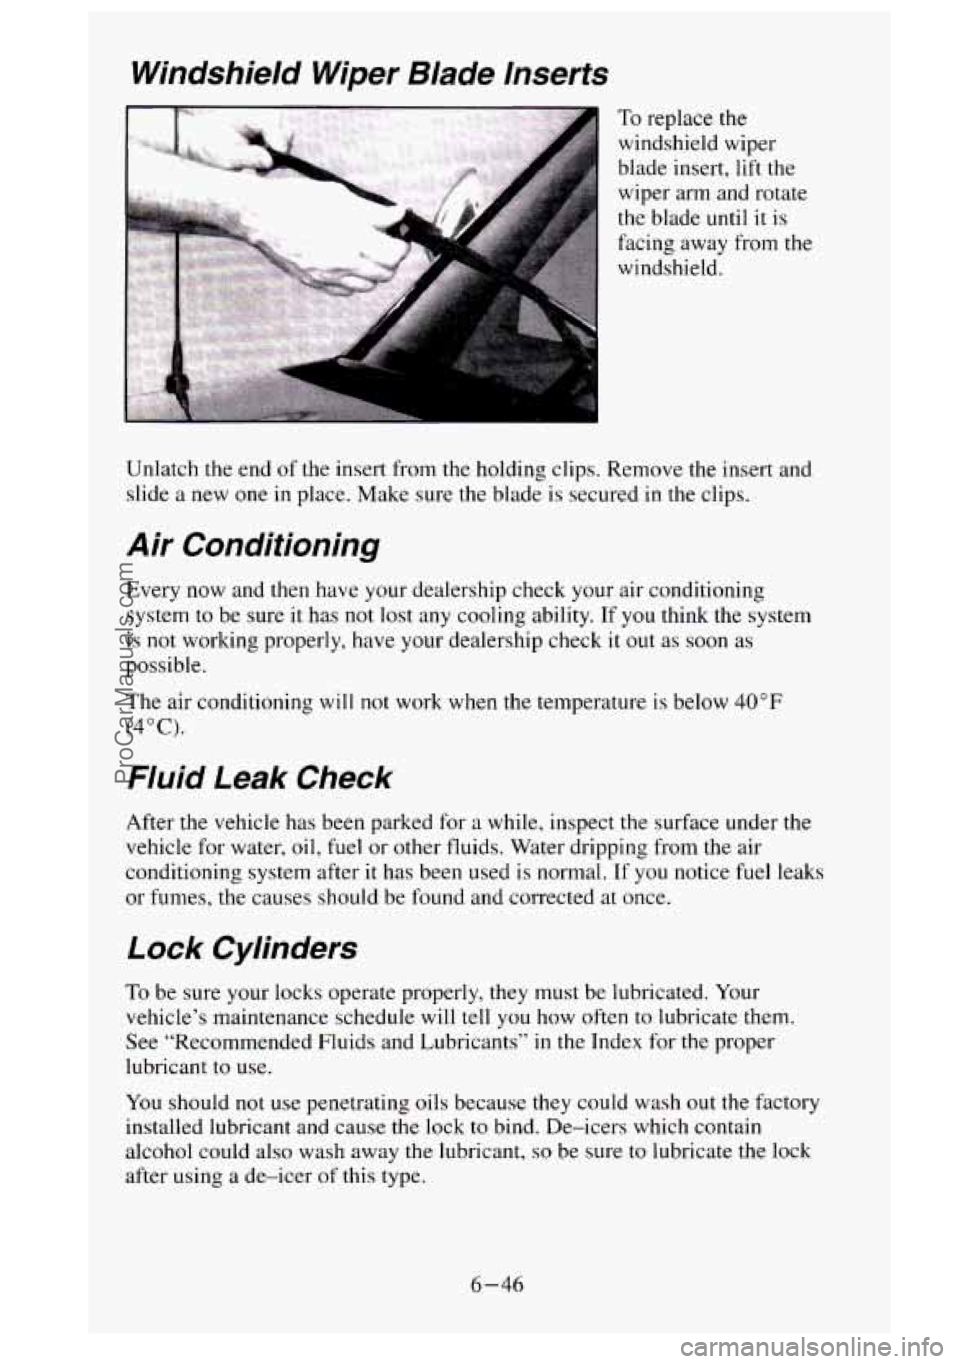
To replace the
windshield wiper
blade insert, lift
the
wiper arm and rotate
the blade until
it is
facing away from the
windshield.
Unlatch the end
of the insert from the holding clips. Remove the insert and
slide
a new one in place. Make sure the blade is secured in the clips.
Air Conditioning
Every now and then have your dealership check your air conditioning
system to be sure it
has not lost any cooling ability. If you think the system
is not working properly, have your dealership check it out as soon as
possi bleb
The air conditioning will
not work when the temperature is below 40°F
(4°C).
Fluid Leak Check
After the vehicle has been parked for a while, inspect the surface under the
vehicle for water, oil, fuel
or other fluids. Water dripping from the air
conditioning system after it has been used is normal.
If you notice fuel leaks
or fumes, the causes should be found and corrected at once.
Lock Cylinders
To be sure your locks operate properly, they must be lubricated. Your
vehicle’s maintenance schedule will tell you how often to lubricate them.
See “Recommended Fluids and Lubricants” in the Index for
the proper
lubricant to use.
You should
not use penetrating oils because they could wash out the factory
installed lubricant and cause
the lock to bind. De-icers which contain
alcohol could also
wash away the lubricant, so be sure to lubricate the lock
after using
a de-icer of this type.
6-46
ProCarManuals.com
Page 313 of 488
Battery
Every new GM vehicle has a Delco Freedom@ battery. You never have to
add water to one of these. When it’s time for a new battery, we recommend
a Delco Freedom@ battery. Get one that has the replacement number shown
on the original battery’s label.
Vehicle Storage
If you’re not going to drive your vehicle for 25 days or more. take off the
black, negative (-) cable from the battery. This will help keep your battery
from running down.
A CAUTION:
Batteries have acid that can burn you and gas that can explod\
e.
You can be badly hurt if you aren’t careful. See “Jump Start\
ing’’
in the Index for tips on working around a battery without
getting hurt.
Contact your dealer to learn how to prepare your vehicle for longer storage
periods.
Bulb Replacement
Before you replace any bulbs. be sure that all the lamps are off and the
engine isn’t running.
Sealed Beam Headlamps
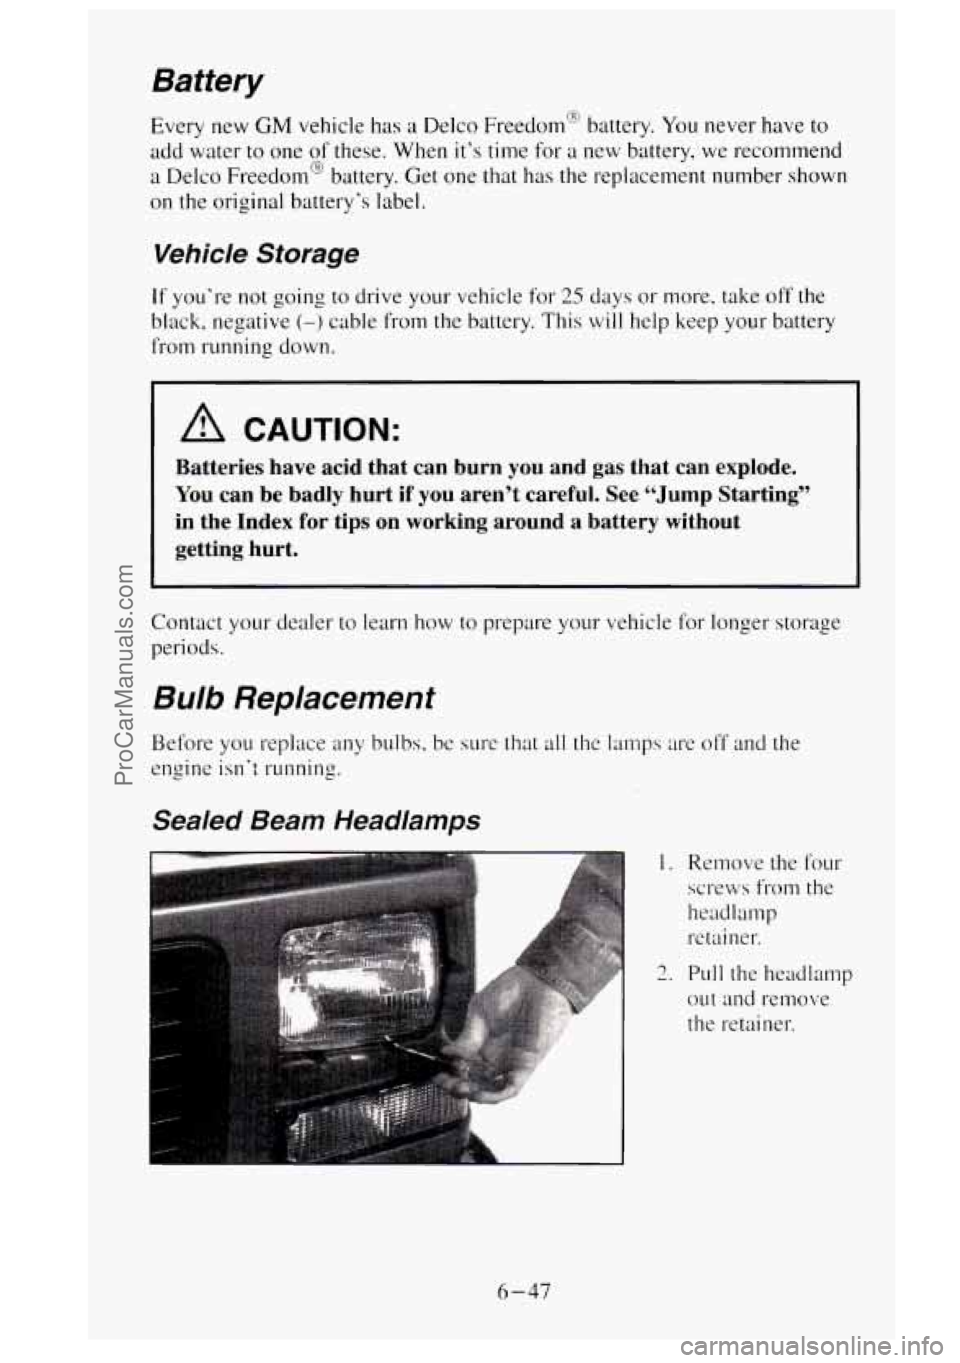
I. Remove the four
screws from the
headlamp retainer.
2. Pull the headlamp
out and remove
the retainer.
6-47
ProCarManuals.com
Page 314 of 488
Halogen Bulbs
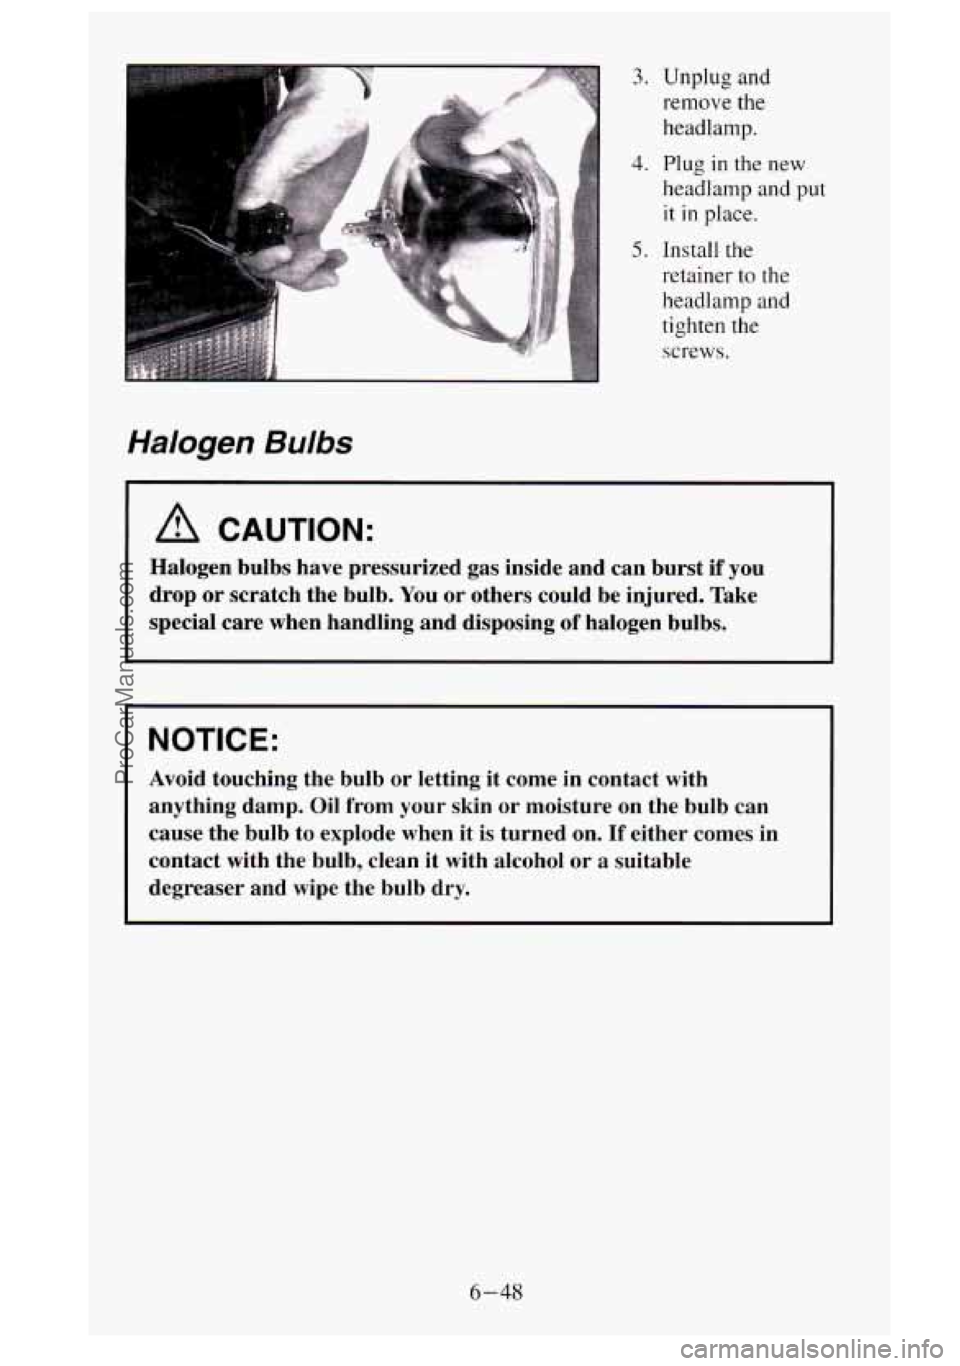
3. Unplug and remove
the
headlamp.
headlamp and put
it in place.
4. Plug in the new
5. Install the
retainer
to the
headlamp and
tighten the
screws.
A CAUTION:
Halogen bulbs have pressurized gas inside and can burst if you
drop or scratch the bulb. You or others could be injured. Take
special care when handling and disposing
of halogen bulbs.
NOTICE:
Avoid touching the bulb or letting it come in contact with
anything damp.
Oil from your skin or moisture on the bulb can
cause the bulb to explode when it
is turned on. If either comes in
contact with the bulb, clean it with alcohol or
a suitable
degreaser and wipe the bulb dry.
6-48
ProCarManuals.com
Page 315 of 488
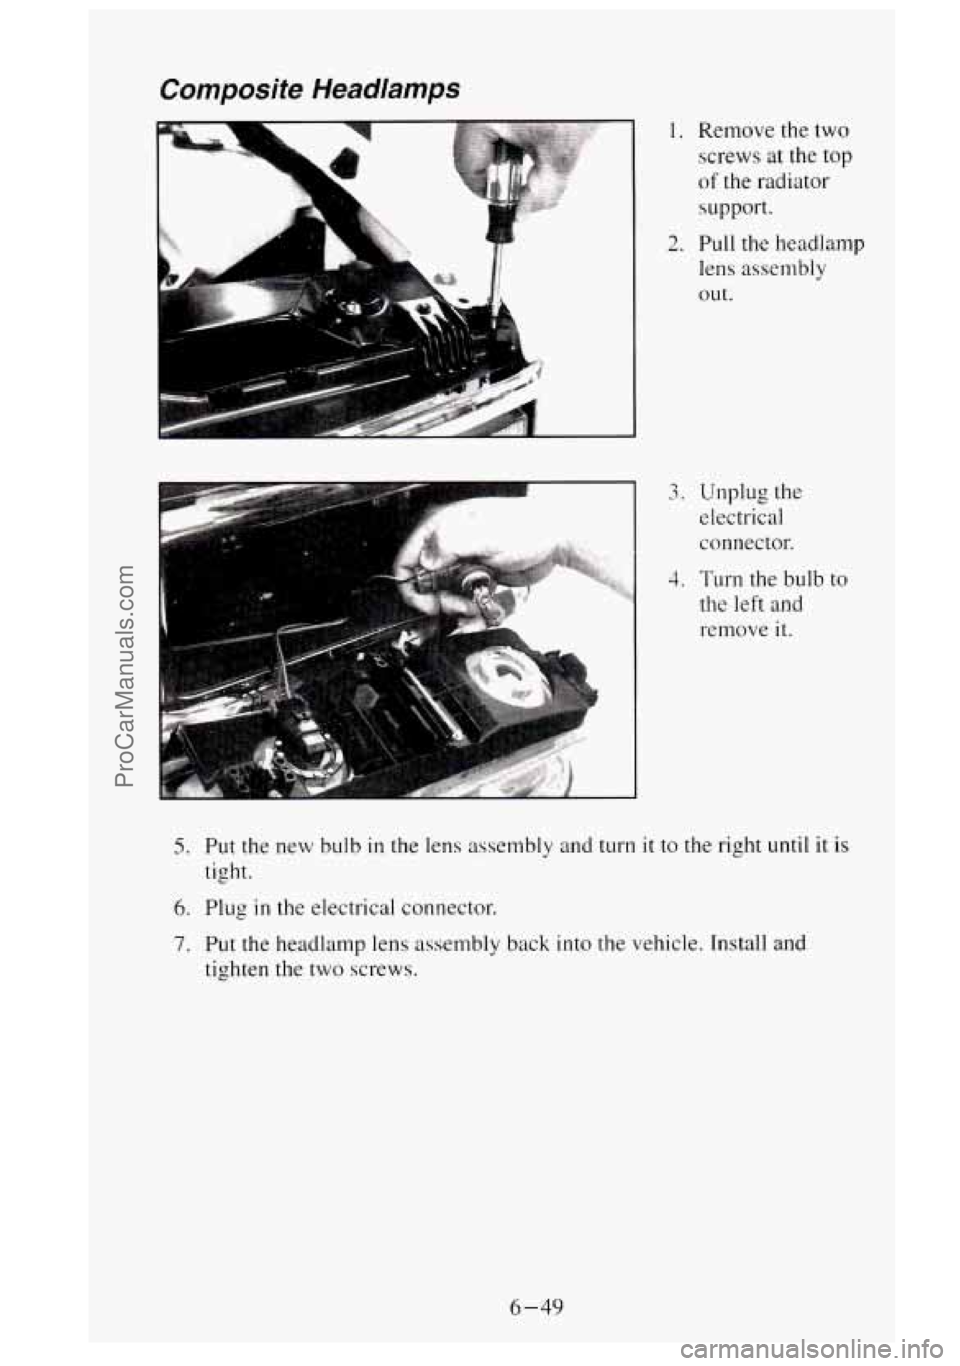
Composite Headlamps
1. Remove the two screws
at the top
of the radiator
support.
2. Pull the headlamp
lens assembly
out.
1
3. Unplug the
electrical
connector.
4. TLH-II the bulb to
the left and
remove
it.
5. Put the new bulb in the lens assembly and turn it to the right until it is
tight.
6. Plug in the electrical connector.
7. Put the headlamp lens assembly back into the vehicle. Install and
tighten the two screws.
6-49
ProCarManuals.com
Page 316 of 488
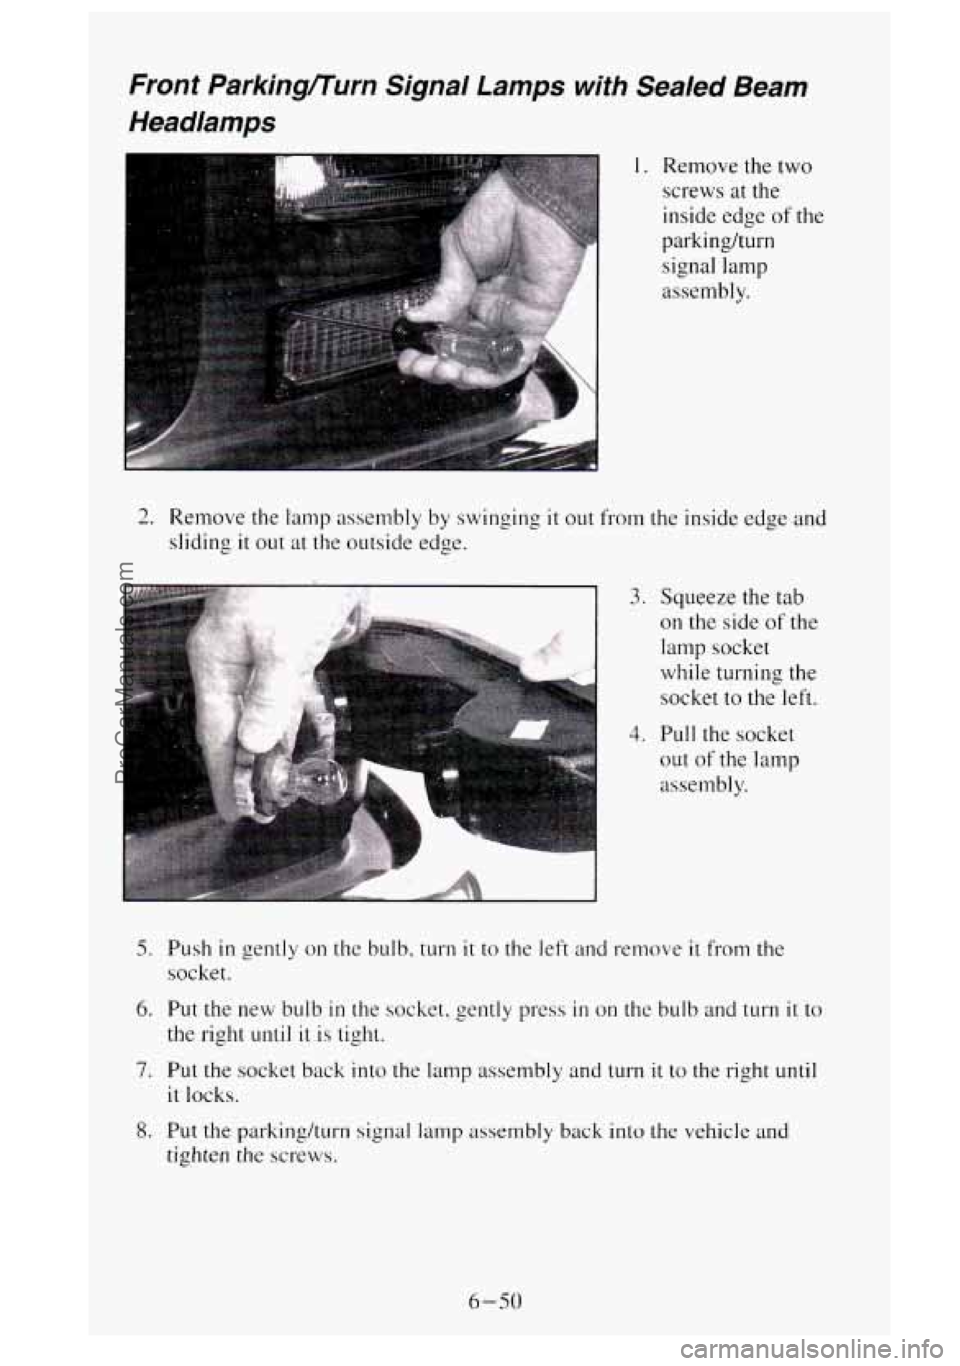
Front Parkingnurn Signal Lamps with Sealed Beam
Headiamps
1. Remove the two
screws at the
inside edge
of the
parkinghrn
signal lamp
assembly.
2. Remove the lamp assembly by swinging it out from the inside edge and
sliding
it out at the outside edge.
3. Squeeze the tab
on the side
of the
lamp socket
while turning the
socket
to the left.
4. Pull the socket
out
of the lamp
assembly.
5. Push in gently on the bulb, turn it to the left and remove it from the
socket.
6. Put the new bulb in the socket, gently press in on the bulb and turn it to
the right until it is tight.
7. Put the socket back into the lamp assembly and turn it to the right until
it locks.
8. Put the parking/turn signal lamp assembly back inlo the vehicle and
tighten the screws.
4-50
ProCarManuals.com
Page 317 of 488
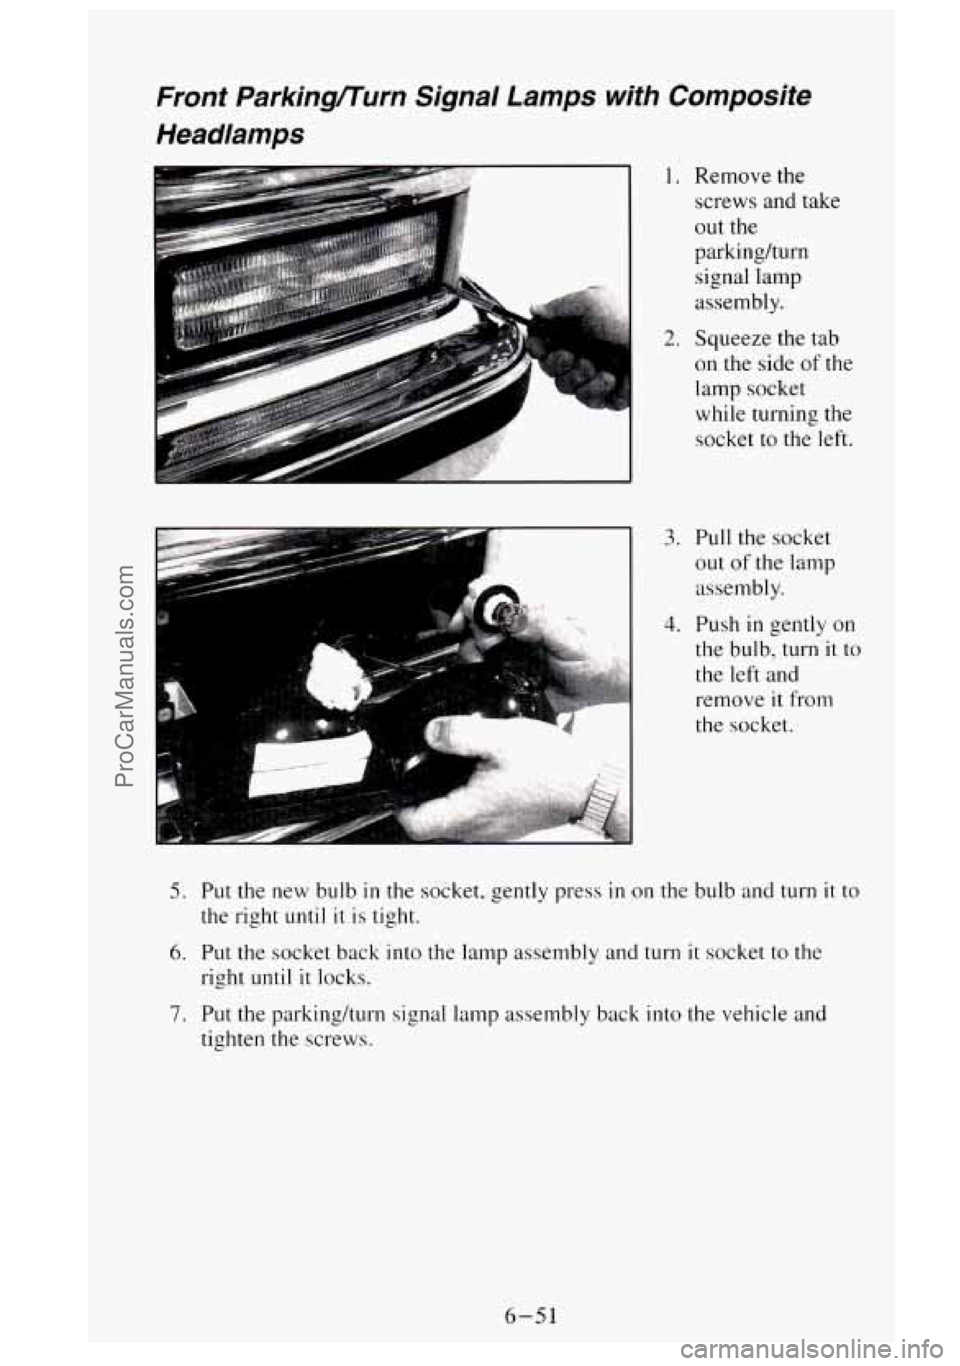
Front Parkingflurn Signal Lamps with Composite
Headlamps
1. Remove the
screws and take
out the
parkinghum
signal lamp
assembly.
2. Squeeze the tab
on the side of the
lamp socket
while turning the
socket to the left.
3. Pull the socket
out: of the lamp
assembly.
4. Push in gently on
the bulb, turn
it to
the left and
remove
it from
the socket.
5. Put the new bulb in the socket, gently press in on the bulb and turn it to
the right until it is tight.
6. Put the socket back into the lamp assembly and turn it socket to the
right
until it locks.
7. Put the parkinghurn signal lamp assembly back into the vehicle and
tighten the screws.
6-51
ProCarManuals.com
Page 318 of 488
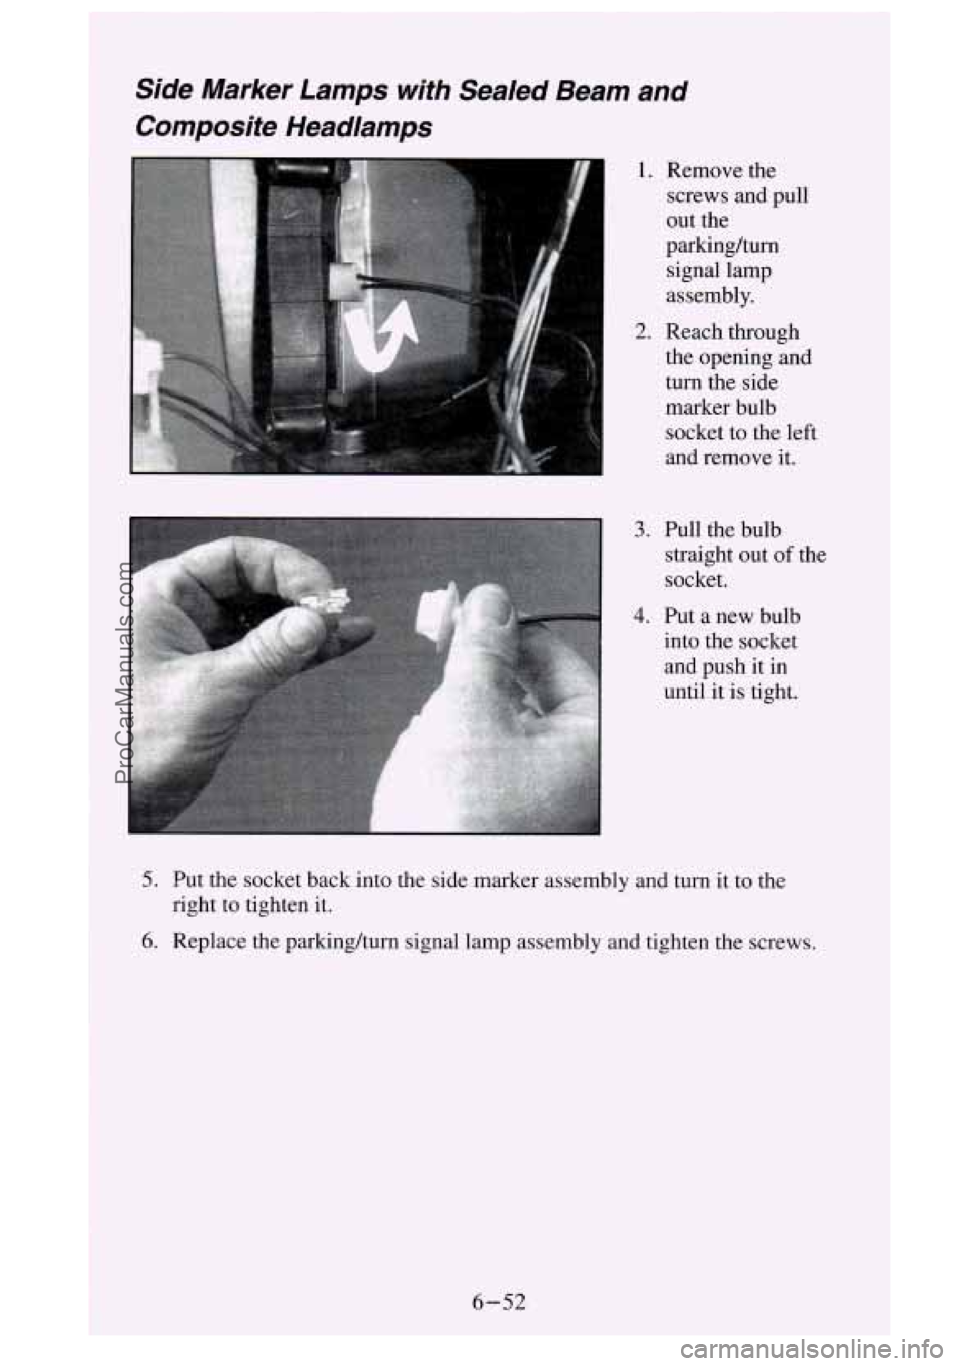
Side Marker Lamps with Sealed Beam and Composite Headlamps
1. Remove the
screws and pull
out the
parkinghum signal lamp
assembly.
2. Reach through
the opening and
turn the side
marker bulb
socket to the left
and remove
it.
3. Pull the bulb
straight out
of the
socket.
4. Put a new bulb
into the socket
and push it in
until it is tight.
5. Put the socket back into the side marker assembly and turn it to the
right to tighten it.
6. Replace the parking/turn signal lamp assembly and tighten the screws.
6-52
ProCarManuals.com
Page 319 of 488
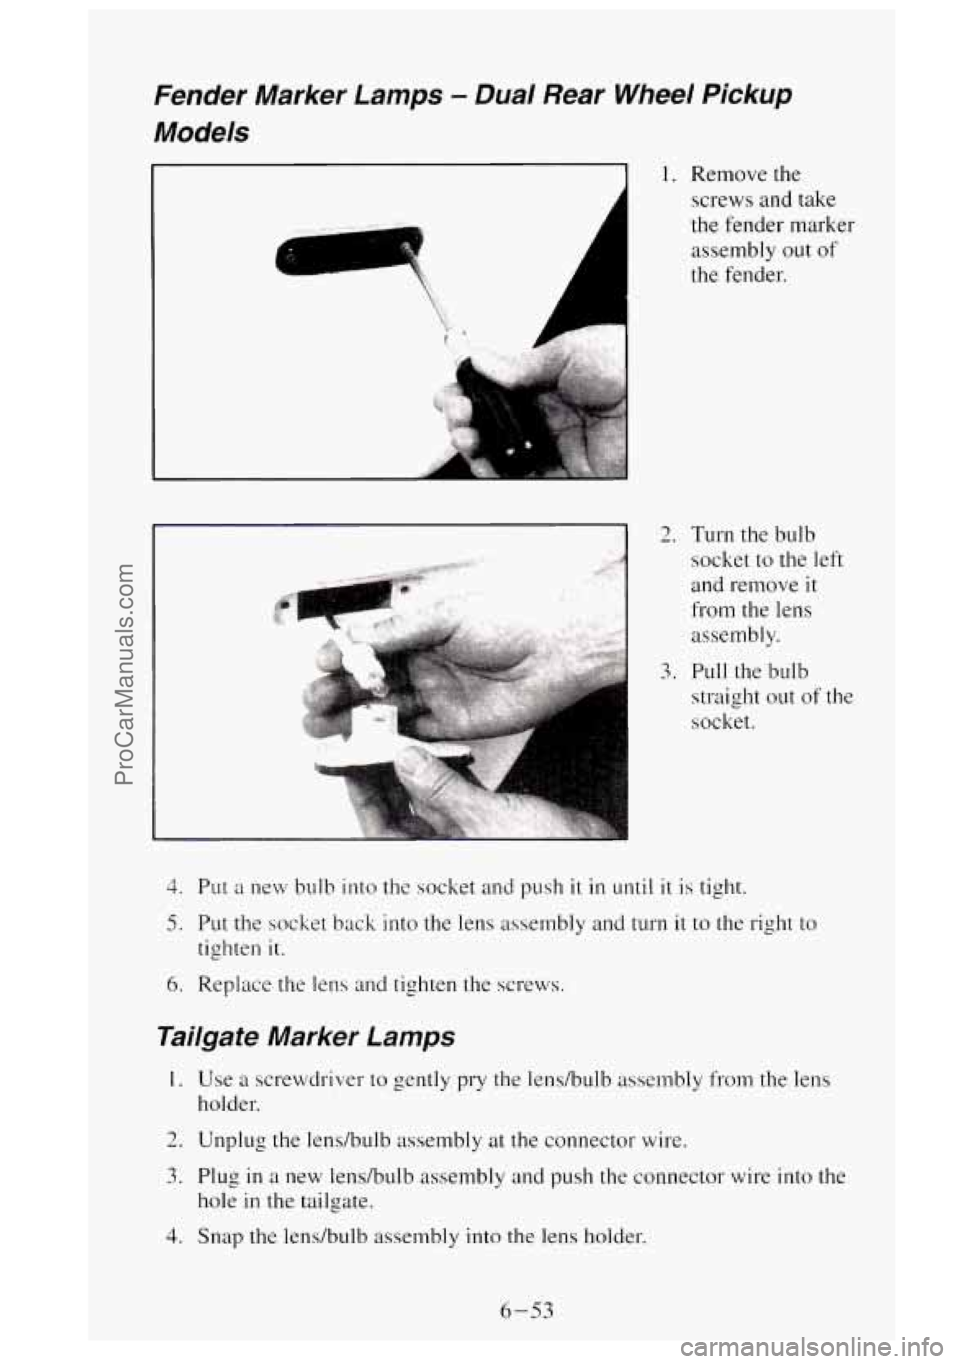
Fender Marker Lamps - Dual Rear Wheel Pickup
Models
I 1. Remove the
4
screws and take
the fender mark
assembly out of
the fender.
I 2. Turn the bulb er
socket to the left
and remove
it
from the lens
assembly.
3. Pull the bulb
straight out
of the
socket.
3. Put a new bulb into the socket and push it in until it is tight.
5. Put the socket back into the lens assembly and turn it to the right to
tighten it.
6. Replace the lens and tighten the screws.
Tailgate Marker Lamps
I. Use a screwdriver to gently pry the lens/bulb assembly from the lens
holder.
2. Unplug the lens/bulb assembly at the connector wire.
3. Plug in a new lens/bulb assembly and push the connector wire into the
hole in the tailgate.
4. Snap the lens/bulb assembly into the lens holder.
6-53
ProCarManuals.com
Page 320 of 488
Roof Marker Lamps
1. Remove the screws and lift off the lens.
2. Pull the bulb straight out of the socket.
3. Put a new bulb into the socket and push it in until it is tight.
4. Replace the lens and tighten the screws.
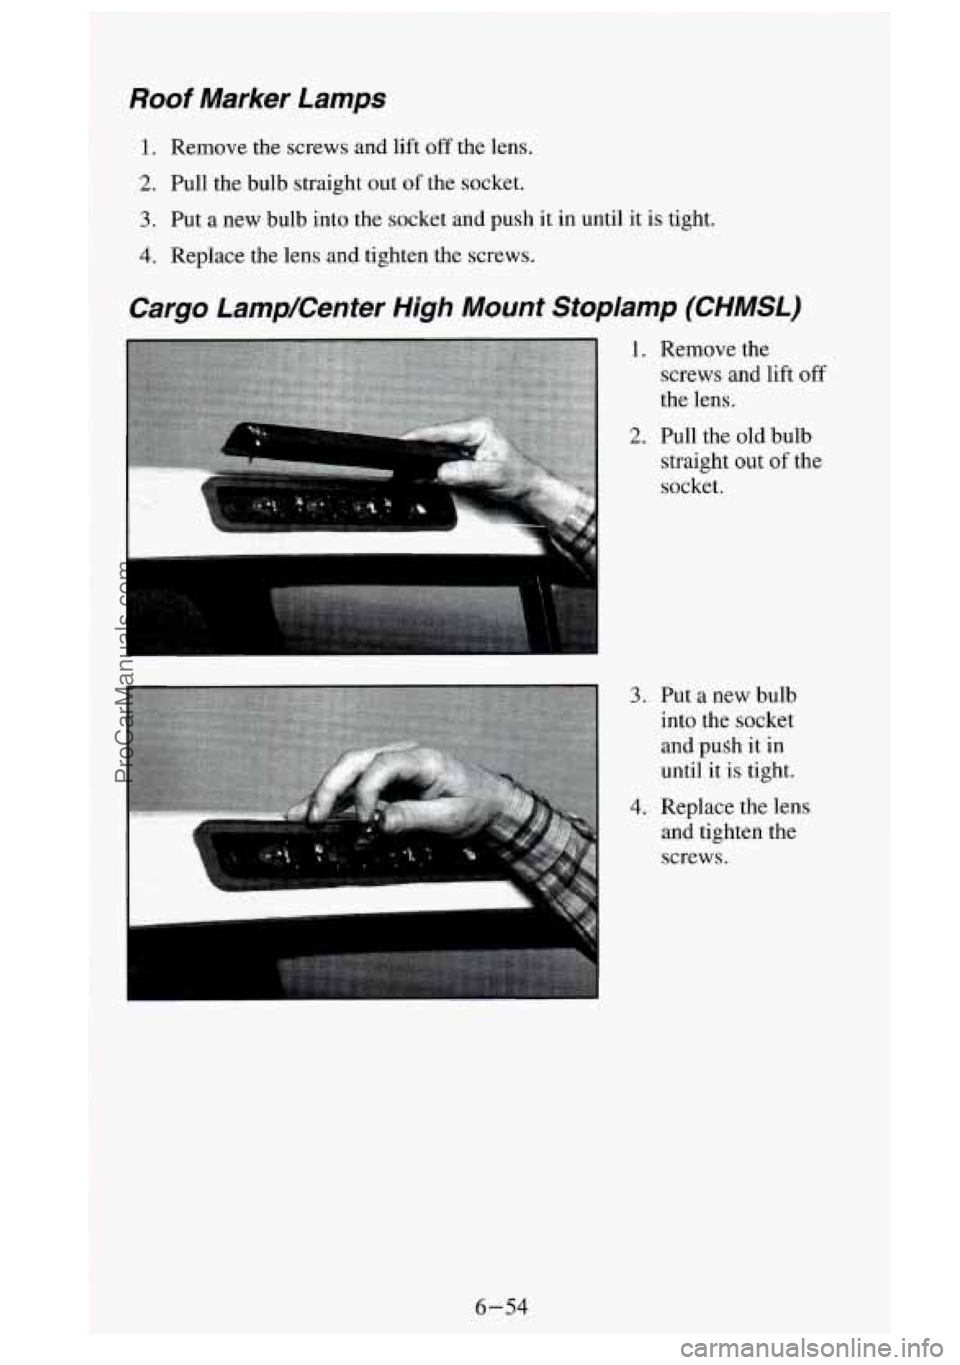
Cargo LampKenter High Mount Stoplamp (CHMSL)
LI
.. . . .
~
1. Remove the
screws and lift
off
the lens.
2. Pull the old bulb
straight out of the
socket.
3. Put a new bulb
into the socket
and push it in
until it is tight.
4. Replace the lens
and tighten the
screws.
6-54
ProCarManuals.com