ECO mode GMC SIERRA 1995 Owners Manual
[x] Cancel search | Manufacturer: GMC, Model Year: 1995, Model line: SIERRA, Model: GMC SIERRA 1995Pages: 488, PDF Size: 26.01 MB
Page 38 of 488
impact more evenly over the occ.upant’s upper body, stopping the occupant
more gradually. But air bags would not help you
in many types of collisions,
including rollovers and rear and side impacts, primarily because an
occupant’s motion
is not toward the air bag. Air bags should never be
regarded
as anything more than a supplement to safety belts, and then only
in moderate to severe frontal or near-frontal collisions.
What will you see after an air bag inflates?
After the air bag inflates, it quickly deflates. This occurs so quickly that
some people may not even realize the air bag inflated. Some components of
the air bag module
in the steering wheel hub will be hot for a short time, but
the part of the bag that comes into contact with you will not be hot to the
touch. There will be some smoke
and dust coming from vents in the deflated
air bag. Air bag inflation
will not prevent the driver from seeing or from
being able to steer the vehicle, nor
will it stop people from leaving the
vehicle.
A CAUTION:
When an air bag inflates, there is dust in the air. This dust could
cause breathing problems for people with
a history of asthma or
other breathing trouble. To avoid this, everyone in the vehicle
should get out as soon as it
is safe to do so. If you have breathing
problems but can’t get out of the vehicle after an air bag\
inflates,
then get fresh air
by opening a window or door.
e
e
0
The air bag is designed to inflate only once. After it inflates, you’ll
need some new parts for your air bag system.
If you don’t get them, the
air
bag system won’t be there to help protect you in another crash. A
new system
will include the air bag module and possibly other parts.
The service manual for your vehicle covers the need to replace other
parts.
Your vehicle is equipped with a diagnostic module, which records
information about the air bag system. The module records information
about the readiness of the system, when
the sensors are activated and
driver’s safety belt usage at deployment.
Let only qualified technicians work on your air bag system. Improper
service can mean that your air bag system won’t work properly. See
your dealer for service.
1-22
ProCarManuals.com
Page 90 of 488
NOTICE:
Driving with the parking brake on can cause your rear brakes to
overheat. You may have to replace them, and you could also
damage other parts of your vehicle. Always check to be sure
your parking brake is fully released before you drive.
If you are towing a trailer and are parking on any hill: See “Towing a
Trailer” in the Index. That section shows what to do first to keep the trailer
from moving.
Propshaft Brake Burnish Procedure
If you have a 3500 HD model, it is recommended that the propshaft mounted
parking brake be burnished
as part of the new vehicle break in. The parking
brake will work best after
it has been burnished following these instructions.
Make
10 (ten) stops, using the parking brake foot pedal, from 20 mph (32
km/h) about
2 1/2 miles (4 km) apart. In between stops, drive the vehicle at
20 mph (32 km/h).
Torque Lock
When parking, the weight of the vehicle may put too much force on the
parking pawl
in the transmission. It may be difficult to pull the selector
lever out of
PARK (P). This is called ”torque lock.” To find out how to
avoid torque lock, see “Torque Lock” later in this section.
Shifting lnto PARK (P) (Automatic
Transmission Models Only)
2-28
ProCarManuals.com
Page 99 of 488
The driver’s window switch also has an “express down” feature that allows
the window to lower without holding the switch. Press and hold the side
of
the window switch marked AUTO for one second to activate the \
express
down mode. The express down mode can be cancelled at any time by
pressing the opposite side of the switch. To open the window part way,
lightly tap the switch until the window is at the desired pos\
ition.
If you have a Crew Cab and power windows, the power window switch has a
lock-ut feature.
This feature prevents the rear windows from operating when
the front drivers-side switch is in the lock-out position. When the switch is
moved out of the lock-out position, the rear power windows will operate again.
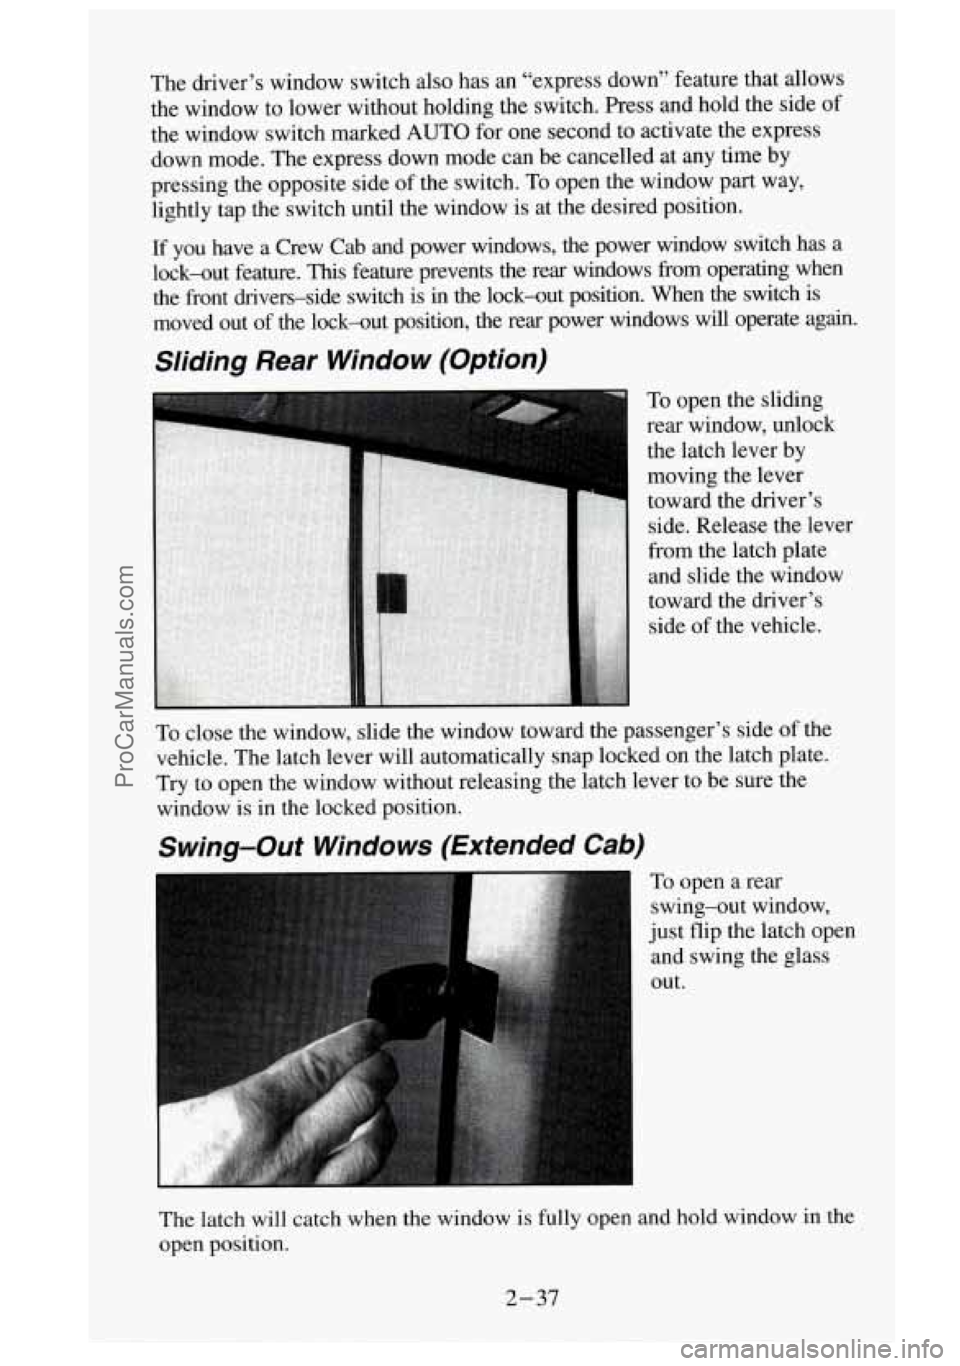
Sliding Rear Window (Option)
To open the sliding
rear window, unlock
the latch lever by
moving the lever
toward the driver’s side. Release the lever
from the latch plate
and slide the window
toward the driver’s
side of the vehicle.
To close the window, slide the window toward the passenger’s side of the
vehicle. The latch lever will automatically snap locked on the latch plate. \
Try to open the window without releasing the latch lever to be su\
re the
window is in the locked position.
Swing-Out Windows (Extended Cab)
To open a rear
swing-out window,
just flip the latch open
and swing the glass
out.
The latch will catch when the window is fully open and hold window in the
open position.
2-37
ProCarManuals.com
Page 140 of 488
If your vehicle was first sold, when new, in Canada, you will have this green
light
on the instrument panel. It will light whenever the Daytime Running
Lamps are on. For more details about DRL, see “Headlamps and Vehicle
Lighting”
in this section.
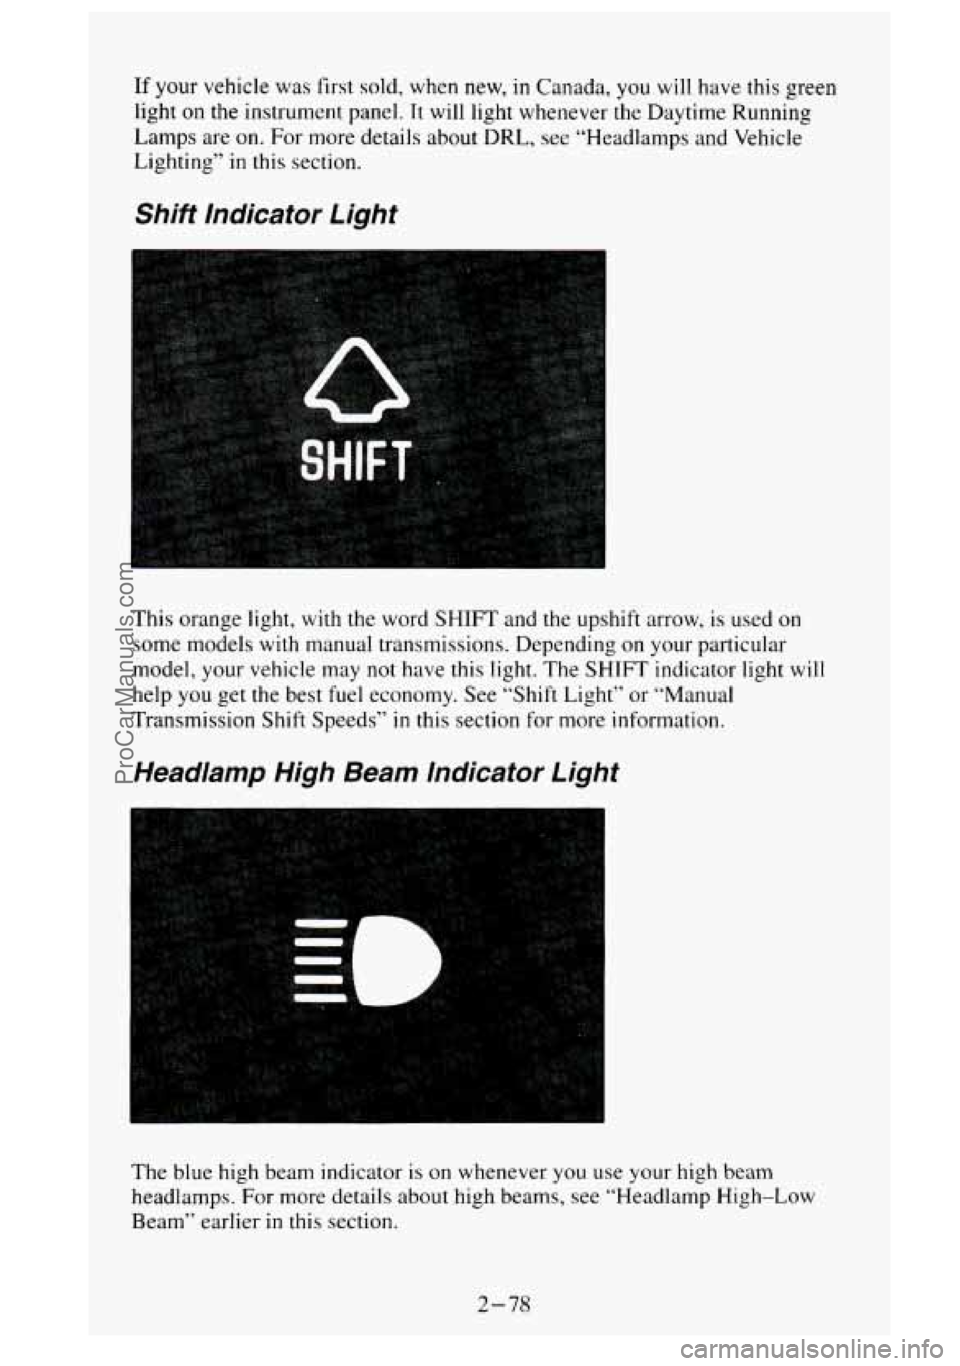
Shift Indicator Light
e
This orange light, with the word SHIFT and the upshift arrow, is used on
some models with manual transmissions. Depending on your particular
model, your vehicle may not have this light. The SHIFT indicator light will
help you get
the best fuel economy. See “Shift Light” or “Manual
Transmission Shift Speeds”
in this section for more information.
Headlamp High Beam Indicator Light
The blue high beam indicator is on whenever you use your high beam
headlamps. For more details about high beams, see “Headlamp High-Low
Beam” earlier
in this section.
2-78
ProCarManuals.com
Page 149 of 488
Before using your vehicle's air conditioning. open the windows to clear the.
vehicle of hot air.
Using the recirculation function can also help. See "Recirculation Buttor:"
in this section for more information.
The knob on the left side of the heating system control panel controls the
fan speed. The knob has four speed positions. To increase the air
flow. move
the knob toward
HI. To decrease the air flow. move it toward LO. To turn
the fan off. move the knob
to OFF. If you have the air conditioner on.
moving the fan knob
to OFF also turns off' the A/C compressor.
The middle knob on the control panel lets you select the relative
temperature of the air flowing into the passenger
area of your vehicle. This
knob
will allow you to adjust the relative air temperature independently of'
the function knob setting. Move the knob right toward the red area for
warmer air. Move the knob left toward the blue area for cooler air. With
A/C
on, move the knob to MAX for maximum cooling.
This setting puts the system
in the recirculation mode and helps to maximize
your air conditioner's performance and your vehicle's fuel economy. This
setting also cools the air the fastest. After the vehicle's interior reaches
a
comfortable temperature, move the knob clockwise to place the air
conditioning system
in the normal mode.
The right knob
on the control panel changes the heatedair conditioning
setting.
VENT - This setting, with the arrow pointing at the figure's head. directs
air through the instrument panel vents.
VENT/HEAT
- Use this setting, with the arrows pointing at the figure's
feet and head, to divide airflow between the heater floor vents and
instrument panel vents.
HEAT
- This setting. with the arrow pointing at the figure's feet. directs air
through the heater floor vents. This setting is useful for cold weather.
HEAT/DEFROST
- Use this setting, with the arrow pointing at the figure's
feet and the defroster symbol near the figure's head. to divide airflow
between the heater floor vents and windshield.
DEFROST
- This setting with the defrost symbol directs air through the
windshield defroster vents. This setting is useful when you have fog
or ice
on the windshield.
The control knob can be placed
in any position between two heatedair
conditioning settings to blend the flow
of air. The closer the knob is to a
setting symbol, the more the air flow will represent that symbol's air flow
arrows.
RECIRCULATION
BUTTON - This button, between the left and middle
knobs, allows the air inside your vehicle
to be recirculated. This setting
helps to maximize your air conditioner's performance and your vehicle's
3-3
ProCarManuals.com
Page 153 of 488
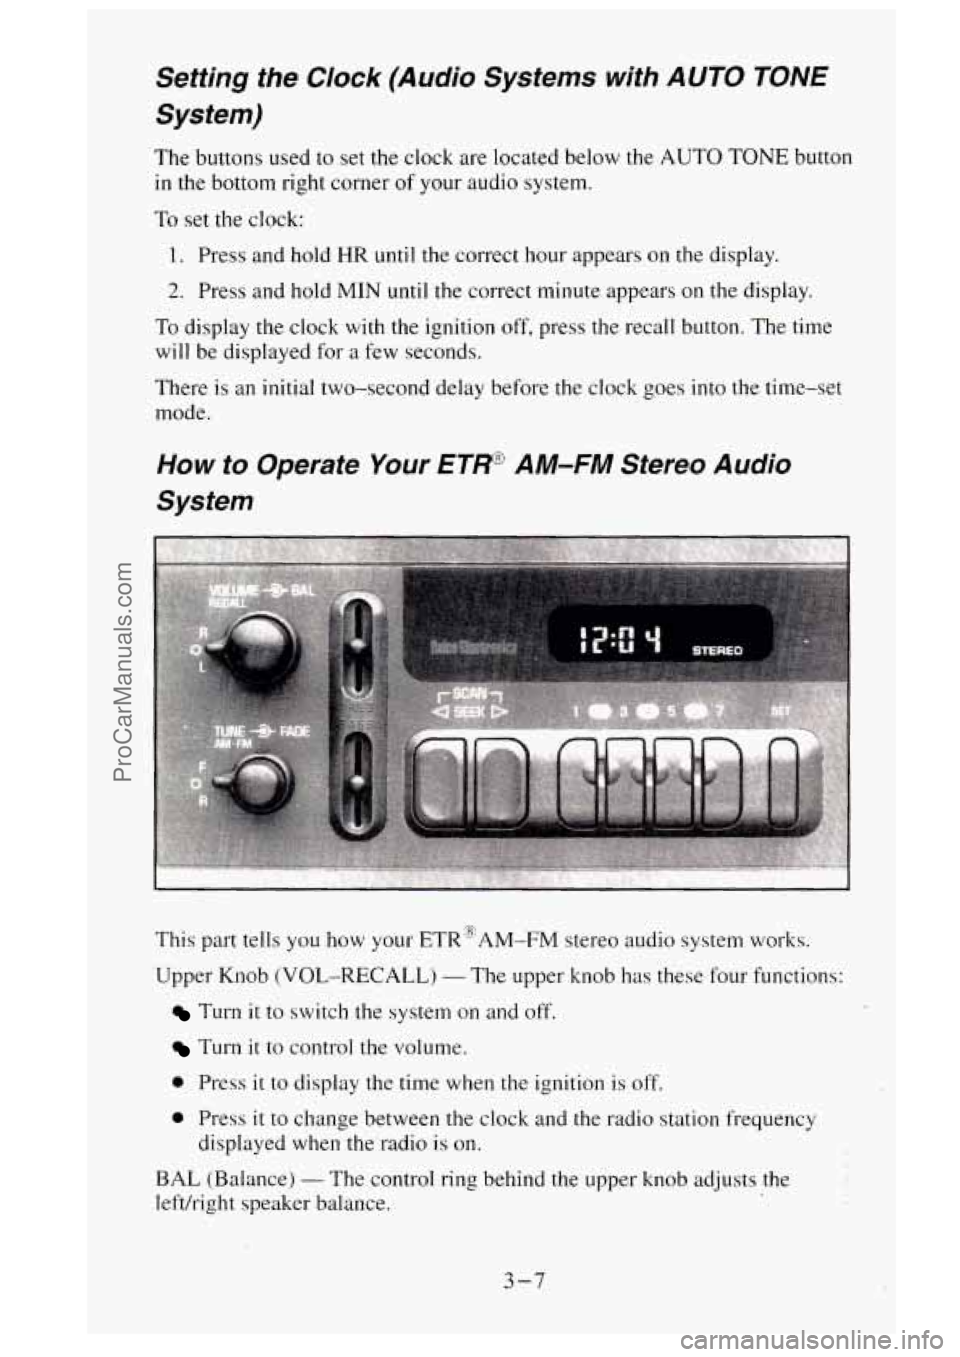
The buttons used to set the clock are located below the AUTO TONE button
in the bottom right corner of your audio system.
To set the clock:
1. Press and hold HR until the correct hour appears on the display.
2. Press and hold MIN until the correct minute appears on the display.
To display the clock with the ignition off, press the recall button. The time
will be displayed for
a few seconds.
There is
an initial two-second delay before the clock goes into the time-set
mode.
This part tells you how your ETR@AM-FM stereo audio system works.
Upper Knob (VOL-RECALL)
- The upper knob has these four functions:
Turn it to switch the system on and off.
Turn it to control the volume.
0 Press it to display the time when the ignition is off.
0 Press it to change between the clock and the radio station frequency
displayed when the radio
is on.
BAL (Balance)
- The control ring behind the upper knob adjusts the
lefvright speaker balance.
3-7
ProCarManuals.com
Page 154 of 488
Lower Knob (TUNE-AM-FM) - The lower knob has two functions:
Turn it to tune in radio stations.
Press it to change between the AM and FM bands.
FADE
- The control ring behind the lower knob adjusts the fronthear
speaker balance.
SEEK
- Press the SEEK b button to cause the receiver to seek the next
higher station.
Press the
4 SEEK button to cause the receiver to seek the next lower
station.
SCAN
- Press the SCAN button to momentarily hear each available
station. SCAN is a two button function and requires that you also press the
SEEK
b or 4 SEEK. “SCAN” appears in the display while you are in the
SCAN mode.
Press and hold SEEK
b, then press 4 SEEK to cause the receiver to scan
to the next higher station.
Press and hold
4 SEEK, then press SEEK to cause the receiver to scan
to
the next lower station.
The receiver will continue to scan until
you press the VOL-RECALL knob
or both SEEK buttons again.
Pushbuttons
- The four pushbuttons let you return to favorite stations. To
set the pushbuttons for up to fourteen favorite stations (7 AM and 7 FM):
I. Tune in the desired station.
2. Press the SET button. “SET” appears in the display.
3. Within 5 seconds, press one of the four pushbuttons to store the station.
Whenever you press that button, the preset station will return.
Repeat these steps for each pushbutton.
NOTE:
In addition to the four stations set as above, up to three additional stations
may be preset on each band by pressing two adjoining buttons at the same
time. Then do the following:
1. Tune
in the desired station.
2. Press the SET button. “SET” appears in the display momentarily.
3. Within 5 seconds, press any two adjoining pushbuttons at the same
time. (The station will return when the same two buttons are pressed
again.)
TREBLE
- Slide the TREBLE lever up to increase the treble response. If a
station is weak or noisy, slide the TREBLE lever down to reduce
the noise.
BASS
- Slide the BASS lever up to increase the bass response. Adjust the
BASS lever to give a pleasing sound to your ear.
3-8
ProCarManuals.com
Page 156 of 488
at each station until you press either SEEK button or the VOL-RECALL
knob.
“PSCAN” appears in the display while you are in the P. SCAN mode.
Pushbuttons
- The four pushbuttons let you return to favorite stations. To
set the pushbuttons for up to twenty-one favorite stations (7 AM, 7 FM1
and 7 FM2):
1. Tune in the desired station.
2. Press the SET button. “SET” appears in the display.
3. Within 5 seconds, press one of the four pushbuttons to store the station.
Whenever you press that button, the preset station
will return.
Repeat these steps for each pushbutton.
NOTE:
In addition to the four stations set as above, up to three additional stations
may be preset on each band by pressing two adjoining buttons at the same
time. Then do the following:
1. Tune in the desired station.
2. Press the SET button. “SET” appears in the display momentarily.
3. Within 5 seconds, press any two adjoining pushbuttons at the same
time. (The station will return when the same two buttons are pressed
again.)
TREBLE
- Slide the TREBLE lever up to increase the treble response. If a
station is weak or noisy, slide the TREBLE lever down to reduce the noise.
BASS - Slide the BASS lever up to increase the bass response. Adjust the
BASS lever to give
a pleasing sound to your ear.
To Play A Cassette
Your tape player is built to work best with tapes that are 30 to 45 minutes
long on each side. Tapes longer than that are
so thin they may not work well
in this player.
Once the tape is playing, use the controls for volume, balance, fade, treble
and bass just as you do
for the radio. A lighted arrow will also appear and
show the direction
of play when a tape is in the player.
FORWARD
- To rapidly advance the tape, press 4 SEEK or SEEK in
the direction that the amber arrow points and the tape will rapidly go
forward
until you press the same SEEK button lightly.
REVERSE
- To rapidly reverse the tape, press 4 SEEK or SEEK in
the opposite direction that the amber arrow points and the tape will rapidly
reverse until you press the same SEEK button lightly.
PROGRAM
- To go from one side of the tape to the other, press the
VOL-RCL knob.
3- 10
ProCarManuals.com
Page 158 of 488
counterclockwise to decrease radio frequency. When done, press the knob
again
to return it to its stored position.
Pushbuttons
- The six pushbuttuns let you return to favorite stations. To
set the pushbuttons for up to I8 favorite stations (6 AM. 6 FM 1 and 6 FM2):
1. Tune in the desired station.
2. Press AUTO TONE to select the best setting for the type of station
chosen.
3. Press and hold one of the pushbuttons until sound returns
(approximately two seconds). Whenever you press
that button. the
preset station
will return.
Repeat these steps for each pushbutton.
SEEK - Press SEEK to cause the receiver to seek the next higher
station.
Press
4 SEEK to cause the receiver to seek the next lower station.
SCAN
- Press and hold the center of the SEEK button to ~nomentarily hear
each available station. Release
the button when SCAN appears in the
display. The receiver
will continue to scan and momentarily stop at each
station
until you press the center of the SEEK button again.
P. SCAN (Preset Scan)
- Press this button to scan each preset pushbutton
station. The receiver
will continue to scan and momentarily stop at each
station
until you press either P. SCAN again or one of the six pushbuttons.
The AUTO SCAN setting for that preset button will
also return. Thc
pushbutton number (P
I-P6) will appear momentarily just before frequency
is displayed.
AUTO TONE - Press this button to select between five preset eclualization
settings and tailor the sound
to the music or voice bcing heard. Each time you
press
the button, the selection will switch to one of the preset settings of
CLASSIC, NEWS. ROCK, POP. or JAZZ. The display will show which
mode the receiver
is in. To return to the manual mode. press and release
AUTO TONE
until MAN (manual) appears in the display. This will return
the tone adjustment to the TREB
and BASS controls. Also. any time a TREB
or BASS control is rotated. tone is auton~atically set back to MAN (manual 1.
ProCarManuals.com
Page 160 of 488
NEXT (3) - Press NEXT or SEEK (in the direction that the lighted tape
direction arrow points) to search for the next selection.
A minimum
three-second blank gap is needed for the player
10 stop at the beginning of
the selection. NEXT
will appear in thc display.
REV
(4)- To rapidly revcrse the tape. press REV and the tape will rapidly
reverse to the beginning
of the cassette reel or until you press REV again.
The radio plays the last selected station during
REV.
00 (5)- Press 00 to reduce cassette tape noise. The 10 symbol will
appear in the display while thc player is in this mode.
FWD
(6)- To rapidly advance the tape. press FWD and the tape will
rapidly advance to the end of the cassette reel or until you press FWD again.
The radio plays the last selected station during FWD.
TAPE
AUX- To switch between the player and the radio when a tape is
playing, press the AM/FM button.
To return to the tape player, press TAPE
AUX. The lighted arrow
will appear and show the dircction of play when a
tape is active.
EJECT
- To remove the tape press the EJECT button. EJECT can be used
with either the ignition or radio off. Also, you must press EJECT before
loading a cassette
with the radio off to allow loading.
If a tape is inserted with side "1" (or "A") up. then the right arrow means
that that side is being played. Likewise, a left arrow would indicate that side
"2" (or 'bB") had been selected.
00 Dolby@ Noise Reduction is manufactured undcr a license from Dolby
Laboratories Licensing Corporation. Dolby" and the symbol are
trademarks of Dolby Laboratories Licensing Corporation.
THEFTLOCK" Theft Deterrent Feature
THEFTLOCK" is an anti-theft feature for the cassette player. It can be
used or ignored.
If ignored, the system plays normally. If it is used, your
player won't be usable
if it is ever stolen, because it will go to LOC mode
any time the battery power is removed. After
a loss of battery power, the
player cannot be turned on unless an unlock code
is entered. When
activated, an indicator
will flash while the ignition is off.
The following instructions tell you how to enter a secret code to activate the
THEFTLOCK system.
If your vehicle loses battery power for any reason,
you
must unlock the system with the secret code before the radio will turn on.
3-14
ProCarManuals.com