Specifications GMC SIERRA 1995 Owners Manual
[x] Cancel search | Manufacturer: GMC, Model Year: 1995, Model line: SIERRA, Model: GMC SIERRA 1995Pages: 488, PDF Size: 26.01 MB
Page 96 of 488
NOTICE:
Driving in the 4-WHEEL HIGH (4H) or 4-WHEEL LOW (4,)
positions for a long time on dry or wet pavement could shorten
the life of your vehicle’s drivetrain.
NOTICE:
Changing your vehicle’s body height can damage your vehicle’s
suspension, drivetrain, or other vehicle components. It
may also
affect the
way your vehicle handles, and the function of your
vehicle’s safety features.
Do not change your vehicle’s height
from the original design specifications.
Transfer Case
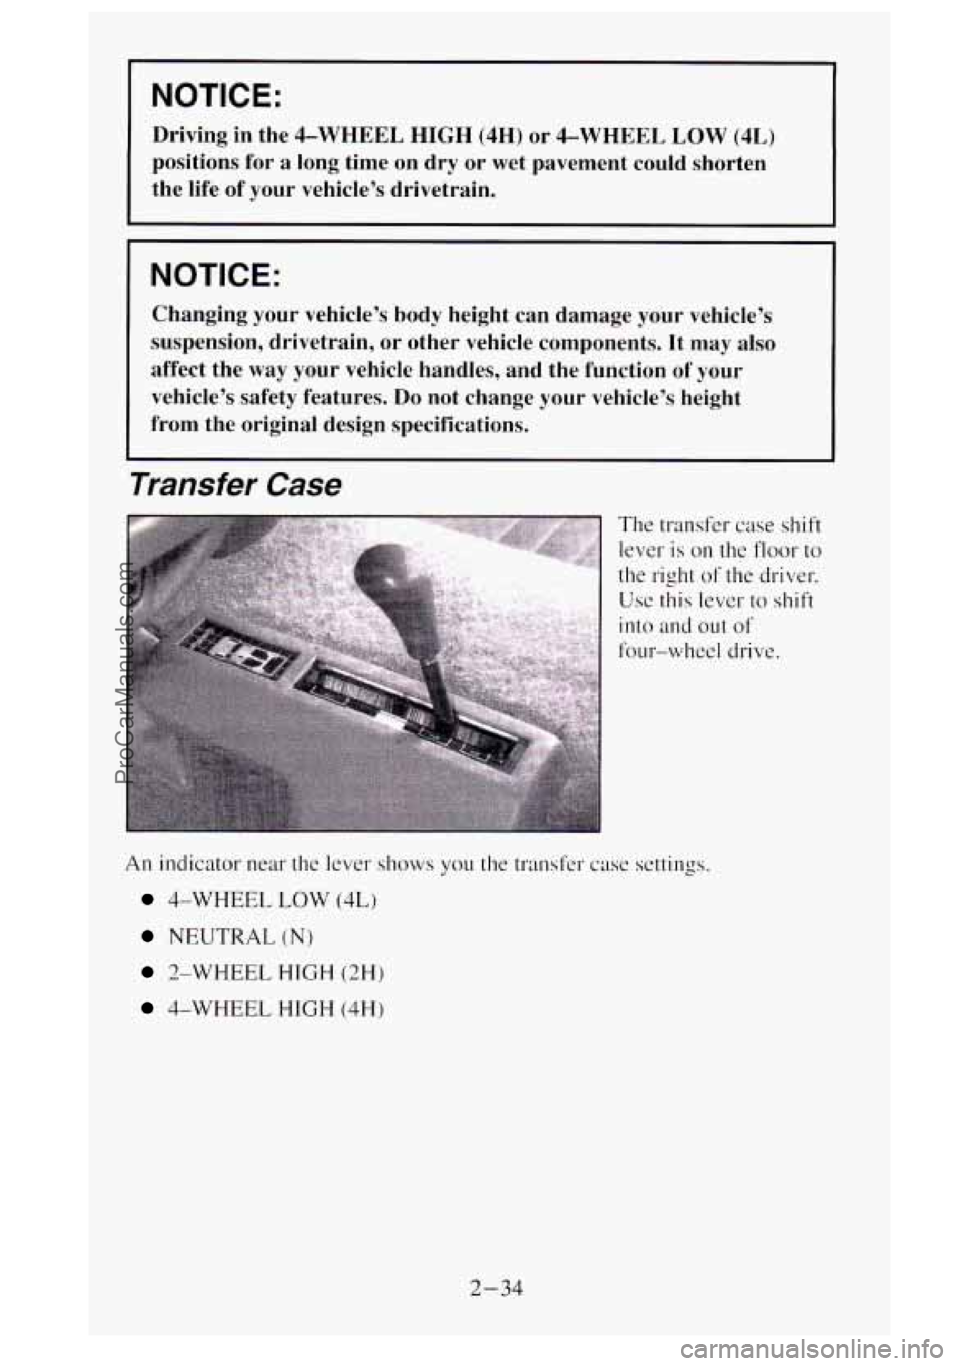
The transfer case shift
lever
is on the floor to
the right of the driver.
Use
this lever to shift
into and
out of
four-whcel drive.
An indicator near the lever shows you the transfer case settings.
4-WHEEL LOW (4L)
NEUTRAL (N)
2-WHEEL HIGH (2H)
4-WHEEL HIGH (4H)
2-34
ProCarManuals.com
Page 212 of 488
A CAUTION:
DO not load your vehicle any heavier than the GVWR, or either
the maximum front or rear
GAWR. If you do, parts on your
vehicle can break, or it can change the way your vehicle handles.
These could cause you to lose control. Also, overloading can
shorten the life
of your vehicle.
Using heavier suspension components to get added durability might not
change your weight ratings.
Ask your dealer to help you load your vehicle
the right way.
If your vehicle is equipped
for front-end equipment (a snow plow, for
example), the front suspension may have been adjusted (raised) to level the
vehicle when the equipment was installed. If the front suspension was
adjusted,
you must re-adjust the front suspension after the equipment is
removed to avoid possible front suspension damage. Adjust the front
suspension to original design specifications for your particular model.
NOTICE:
Your warranty does not cover parts or components that fail
because
of overloading.
There’s also important loading information for off-road driving in this
manual. See “Loading
Your Vehicle“ in the Index.
4-38
ProCarManuals.com
Page 268 of 488
You should keep a record with all parts receipts and list the mileage and the
date
of any service work you perform. See “Maintenance Record” in the
Index.
A CAUTION:
You can be injured if you try to do service work on a vehicle
without knowing enough about it,
Be sure you have sufficient knowledge, experience, and the
proper replacement parts and tools before you attempt
any
vehicle maintenance task.
Be sure to use the proper nuts, bolts and other fasteners,
“English” and “metric” fasteners can be easily confused. If
you use the wrong fasteners, parts can later break or fall
off.
You could be hurt.
NOTICE:
If you try to do your own service work without knowing enough
about it, your vehicle could be damaged.
Fuel (Gasoline Engine)
If your vehicle has a diesel engine, see “Diesel Fuel Requirements and Fuel
System”
in this Section. For vehicles with gasoline engines, please read this.
Use regular unleaded gasoline rated at 87 octane or higher. It should meet
specifications ASTM D48
14 in the United States and CGSB 3.5-92 in
Canada. These fuels should have the proper additives, so you should not
have to add anything
to the fuel.
In the United States and Canada, it’s easy to be sure
you get the right kind
of gasoline (unleaded). You’ll see UNLEADED right on the pump. And
only unleaded nozzles will
fit into your vehicle’s filler neck.
Be sure the posted octane is at least
87. If the octane is less than 87, you
may get a heavy knocking noise when you drive. If it’s bad enough,
it can
damage your engine.
If you’re using fuel rated at 87 octane or higher and you still hear heavy
knocking, your engine needs service. But don’t worry
if you hear a little
pinging noise when you’re accelerating or driving up a hill. That’s normal
and you don’t have to buy a higher octane fuel to get rid
of pinging. It’s the
heavy, constant knock that means you have a problem.
6-2
ProCarManuals.com
Page 281 of 488
Tampering With Noise Control System Prohibited
Federal law prohibits the following acts or the causing thereof
1. The removal or rendering inoperative by any person, other than for
purposes of maintenance, repair or replacement,
of any device or
element
of design incorporated into any new vehicle for the purpose of
noise control, prior to its sale or delivery to the ultimate purchaser or
while
it is in use; or
2. The use of the vehicle after such device or element of design has been
removed or rendered inoperative by any person.
Among those acts presumed
to constitute tampering are the acts listed
below.
Insulation:
Removal of noise shields or underhood insulation.
Engine:
0 Removal or rendering engine speed governor (if so equipped)
inoperative
so as to allow engine speed to exceed manufacturer
specifications.
Fan and Drive:
Removal of fan clutch (if so equipped) or rendering clutch inoperative.
0 Removal of fan shroud (if so equipped).
Air Intake:
0 Removal of air cleaner silencer.
Reversing air cleaner cover.
Exhaust:
0 Removal of muffler and/or resonator.
0 Removal of exhaust pipes and exhaust pipe clamps.
6- 15
ProCarManuals.com
Page 283 of 488
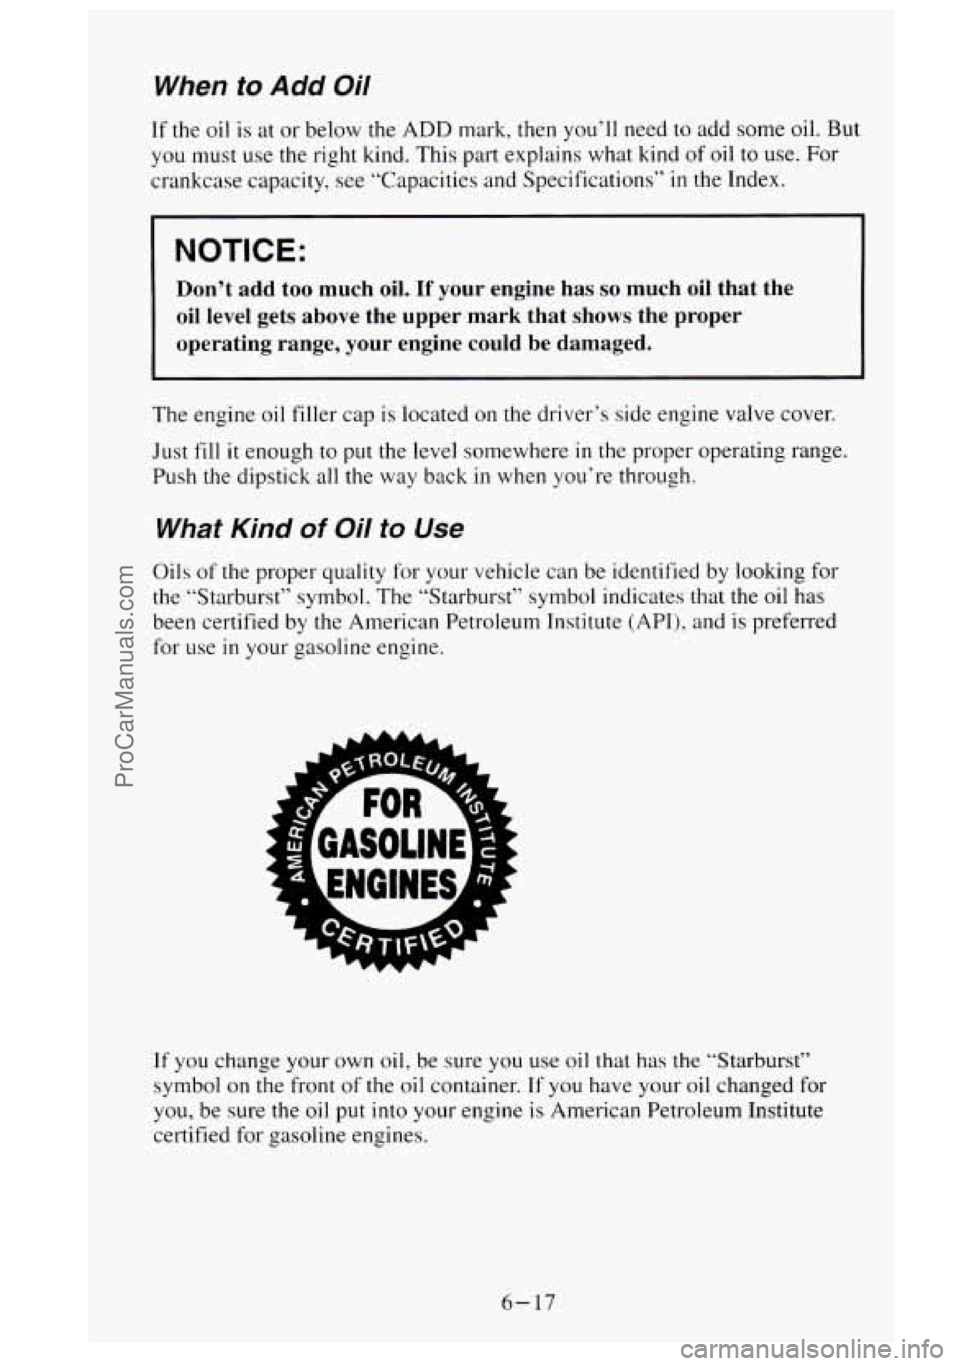
When to Add Oil
If the oil is at or below the ADD mark, then you’ll need to add some oil. But
you must use the right kind. This part explains what kind of oil to use. For
crankcase capacity, see ”Capacities and Specifications”
in the Index.
NOTICE:
Don’t add too much oil. If your engine has so much oil that the
oil level gets above the upper
mark that shows the proper
operating range, your engine could be damaged.
The engine oil filler cap is located on the driver’s side engine valve cover.
Just fill
it enough to put the level somewhere in the proper operating range.
Push the dipstick all the way back
in when you’re through.
What Kind of Oil to Use
Oils of the proper quality for your vehicle can be identified by looking for
the “Starburst” symbol. The “Starburst” symbol indicates that the oil has
been certified by the American Petroleum Institute
(API), and is prefenced
for use in your gasoline engine.
If
you change your own oil, be sure you use oil that has the “Starburst”
symbol on the front
of the oil container. If you have your oil changed for
you, be sure the
oil put into your engine is American Petroleum Institute
certified for gasoline engines.
6- 17
ProCarManuals.com
Page 288 of 488
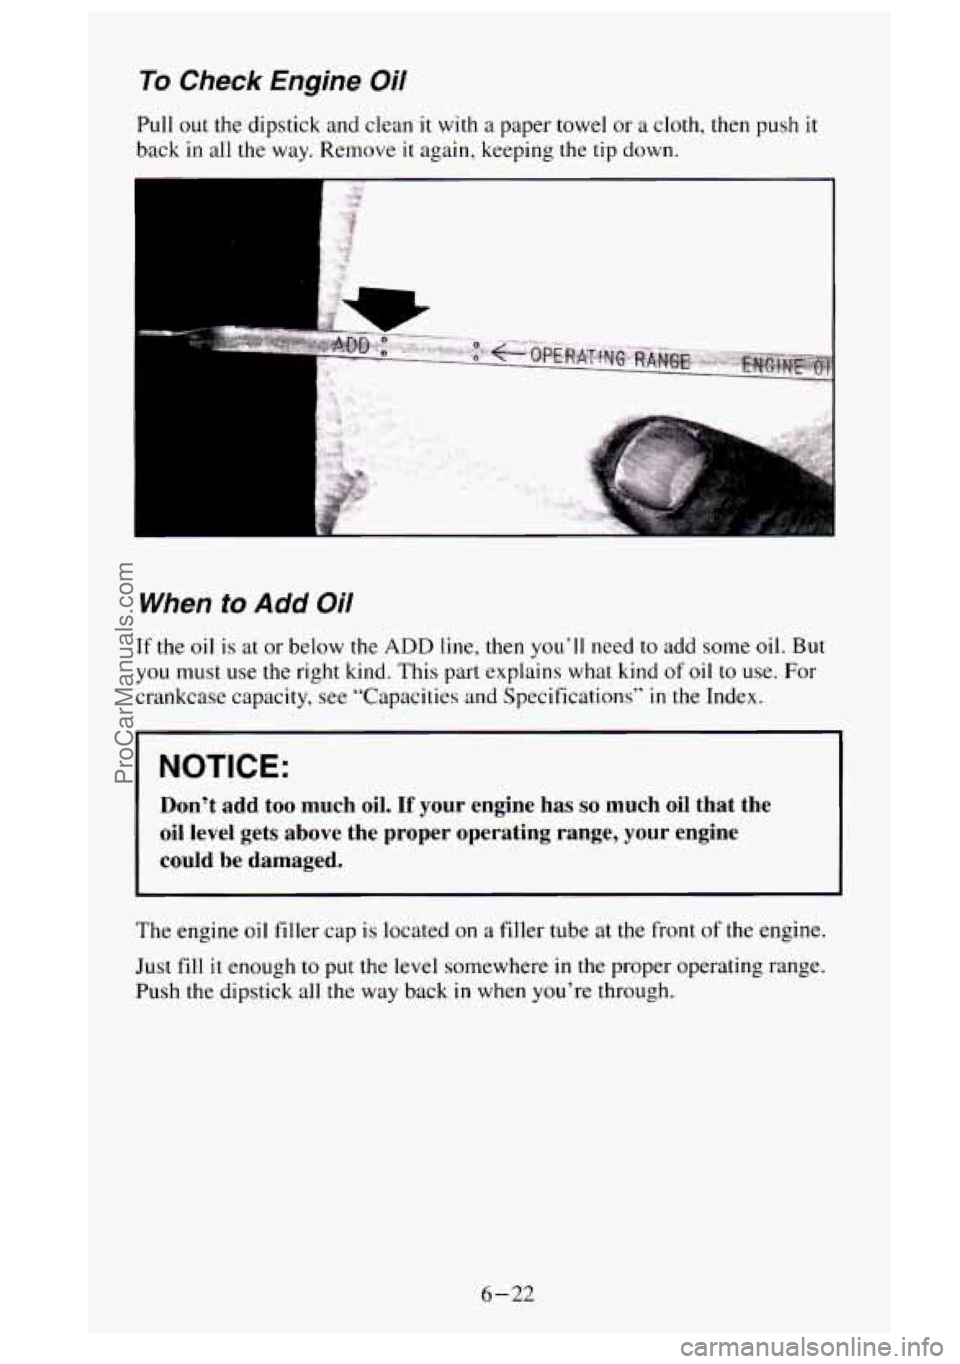
To Check Engine Oil
Pull out the dipstick and clean it with a paper towel or a cloth, then push it
back in all the way. Remove it again, keeping the tip down.
When to Add Oil
If the oil is at or below the ADD line, then you’ll need to add some oil. But
you must use the right kind. This part explains what kind of oil to use. For
crankcase capacity, see “Capacities and Specifications”
in the Index.
I I
I NOTICE: I
Don’t add too much oil. If your engine has so much oil that the
oil level gets above the proper operating range, your engine
could be damaged.
I I
The engine oil filler cap is located on a filler tube at the front of the engine.
Just fill it
enough to put the level somewhere in the proper operating range.
Push the dipstick
all the way back in when you’re through.
6-22
ProCarManuals.com
Page 342 of 488
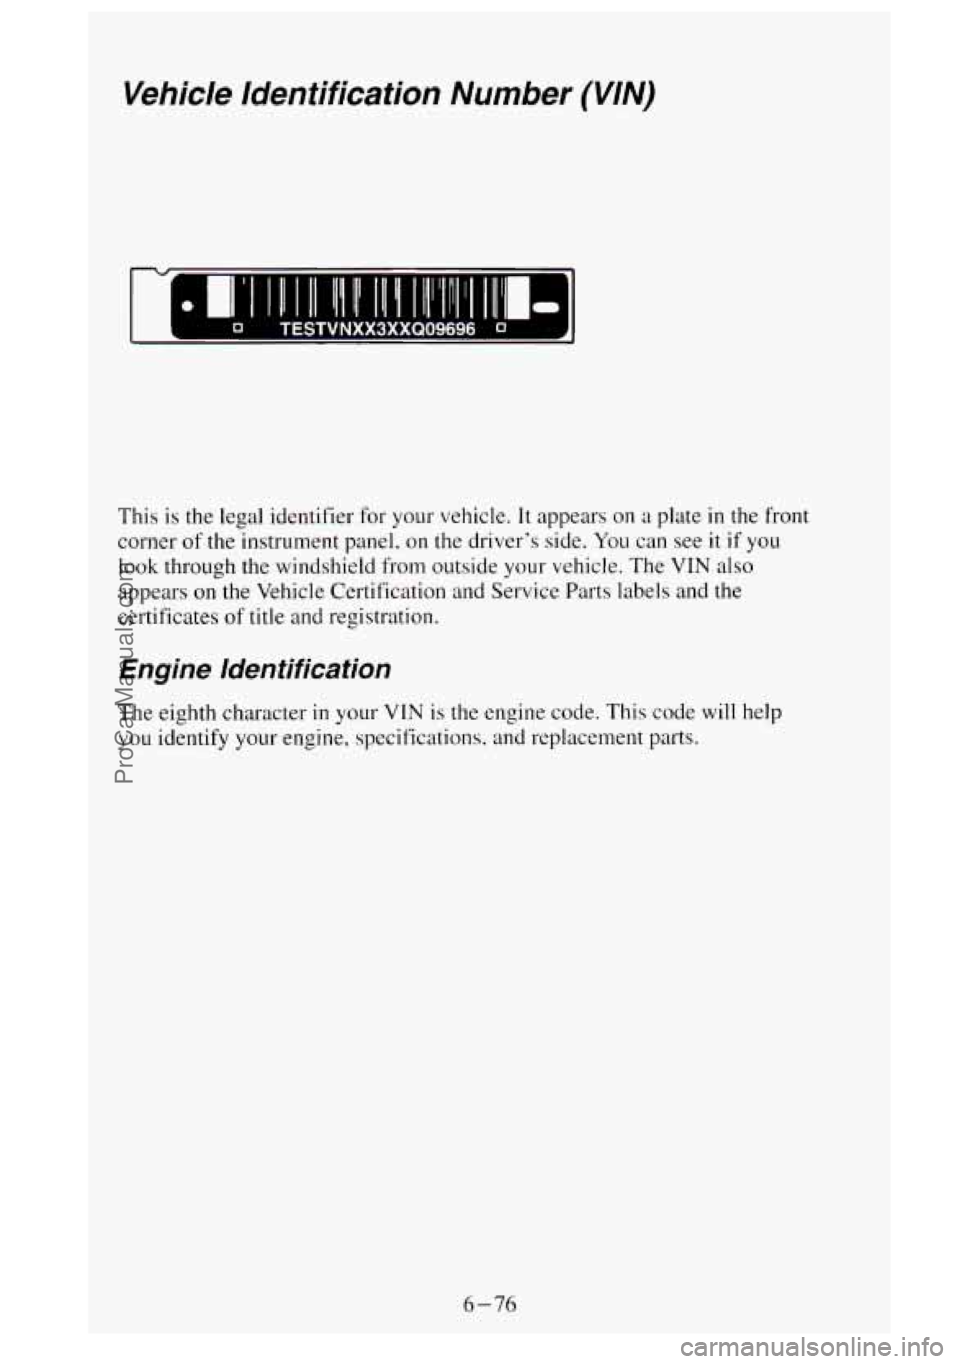
Vehicle Identification Number (VIN)
0 TESTVNXX3XXQ09696 G
This is the legal identifier for your vehicle. It appears on a plate in the front
corner
of the instrument panel, on the driver’s side. You can see it if you
look through the windshield from outside your vehicle. The
VIN also
appears
on the Vehicle Certification and Service Parts labels and the
certificates of title and registration.
Engine ldentificafion
The eighth character in your VIN is the engine code. This code will help
you identify your engine, specifications. and replacement parts.
6-76
ProCarManuals.com
Page 346 of 488
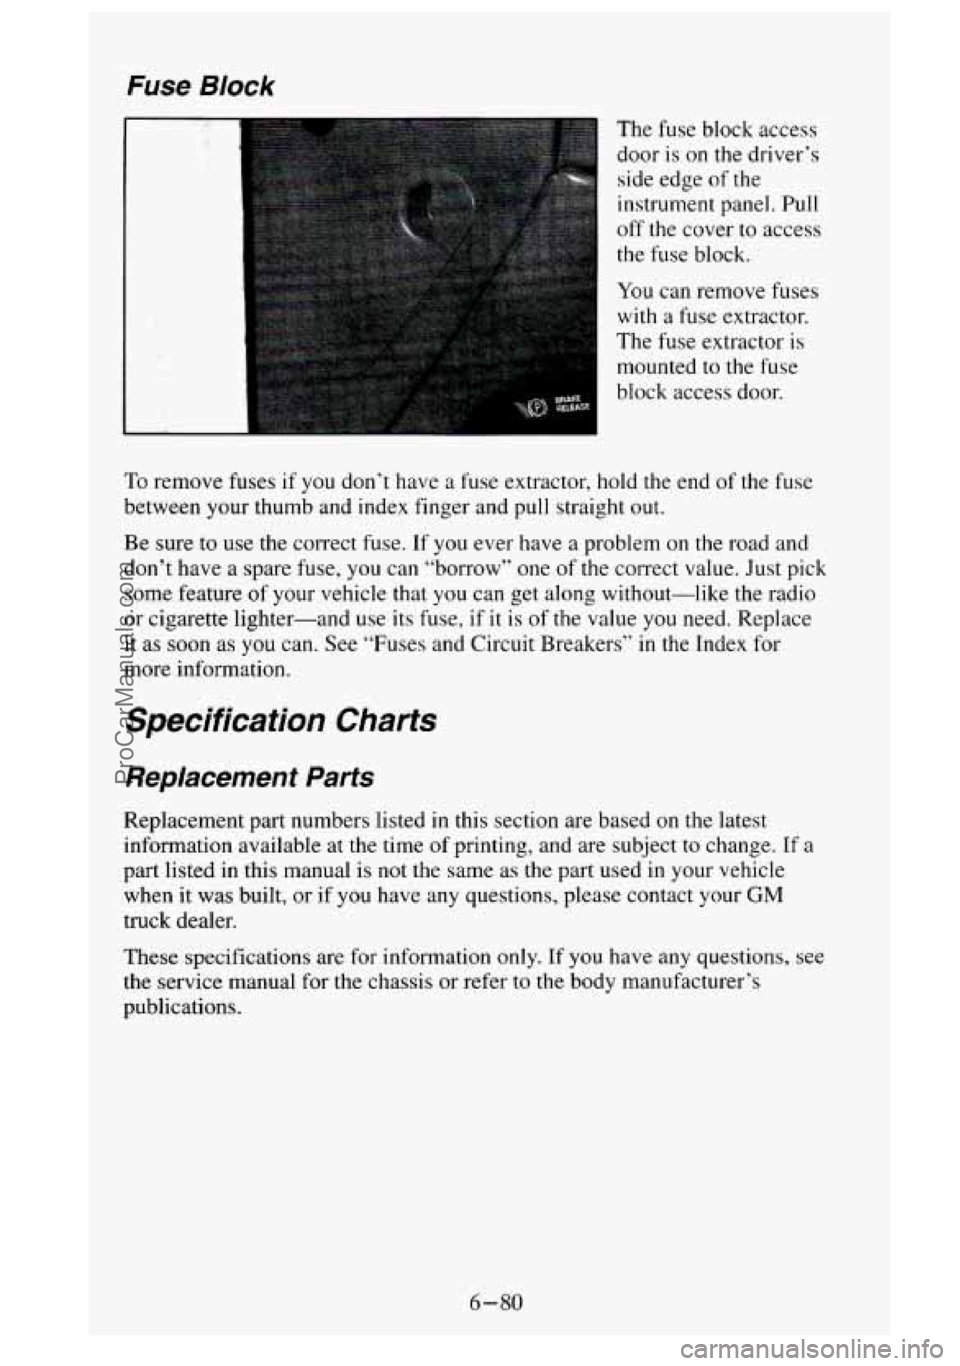
Fuse Block
The fuse block access
door is on the driver’s
side edge
of the
instrument panel.
Pull
off the cover to access
the fuse block.
You can remove fuses
with a fuse extractor.
The fuse extractor is
mounted to the fuse
block access door.
To remove fuses if you don’t have a fuse extractor, hold the end of the fuse
between your thumb and index finger and pull straight out.
Be sure to use the correct fuse. If you ever have a problem
on the road and
don’t have a spare fuse, you can “borrow” one
of the correct value. Just pick
some feature of your vehicle that
you can get along without-like the radio
or cigarette lighter-and use its fuse, if
it is of the value you need. Replace
it as soon as you can. See “Fuses and Circuit Breakers” in the Tndex for
more information.
Specification Charts
Replacement Parts
Replacement part numbers listed in this section are based on the latest
information available at the time
of printing, and are subject to change. If a
part listed in this manual is not the same as the part used in your vehicle
when it was built,
or if you have any questions, please contact your GM
truck dealer.
These specifications are for information
only. If you have any questions, see
the service manual for the chassis or refer
to the body manufacturer’s
publications.
6-80
ProCarManuals.com
Page 368 of 488
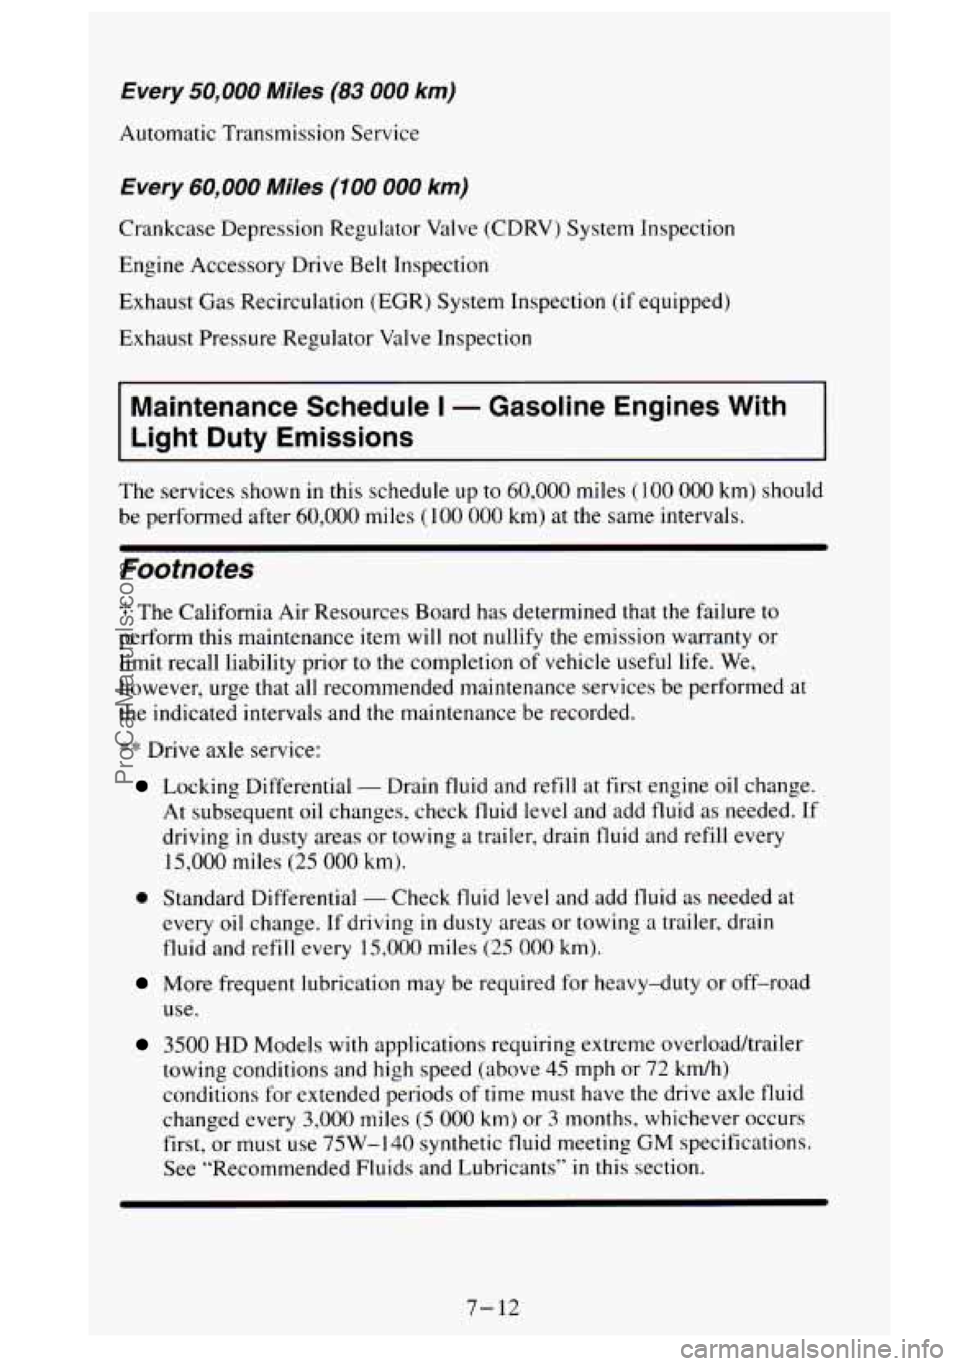
Every 50,000 Miles (83 000 km)
Automatic Transmission Service
Every 60,000 Miles (100 000 km)
Crankcase Depression Regulator Valve (CDRV) System Inspection
Engine Accessory Drive Belt Inspection
Exhaust Gas Recirculation (EGR) System Inspection
(if equipped)
Exhaust Pressure Regulator Valve Inspection
Maintenance Schedule I - Gasoline Engines With
Light
Duty Emissions
The services shown in this schedule up to 60,000 miles (1 00 000 km) should
be performed after
60,000 miles (100 000 km) at the same intervals.
Footnotes
3 The California Air Resources Board has determined that the failure to
perform this maintenance item will not nullify the emission warranty or
limit recall liability prior to the completion of vehicle useful life. We,
however, urge that all recommended maintenance services be performed at
the indicated intervals and the maintenance be recorded.
:$* Drive axle service:
Locking Differential - Drain fluid and refill at first engine oil change.
At subsequent oil changes, check fluid level and add fluid
as needed. If
driving in dusty areas or towing a trailer, drain fluid and refill every
15,000 miles (25 000 km).
0 Standard Differential - Check fluid level and add fluid as needed at
every oil change.
If driving in dusty areas or towing a trailer, drain
fluid and refill every 15,000 miles (25 000 km).
More frequent lubrication may be required for heavy-duty or off-road
use.
3500 HD Models with applications requiring extreme overload/trailer
towing conditions and high speed (above
45 mph or 72 kmh)
conditions for extended periods of time must have the drive axle fluid
changed every
3,000 miles (5 000 km) or 3 months, whichever occurs
first, or must use
75W-140 synthetic fluid meeting GM specifications.
See “Recommended Fluids and Lubricants”
in this section.
7-12
ProCarManuals.com
Page 383 of 488
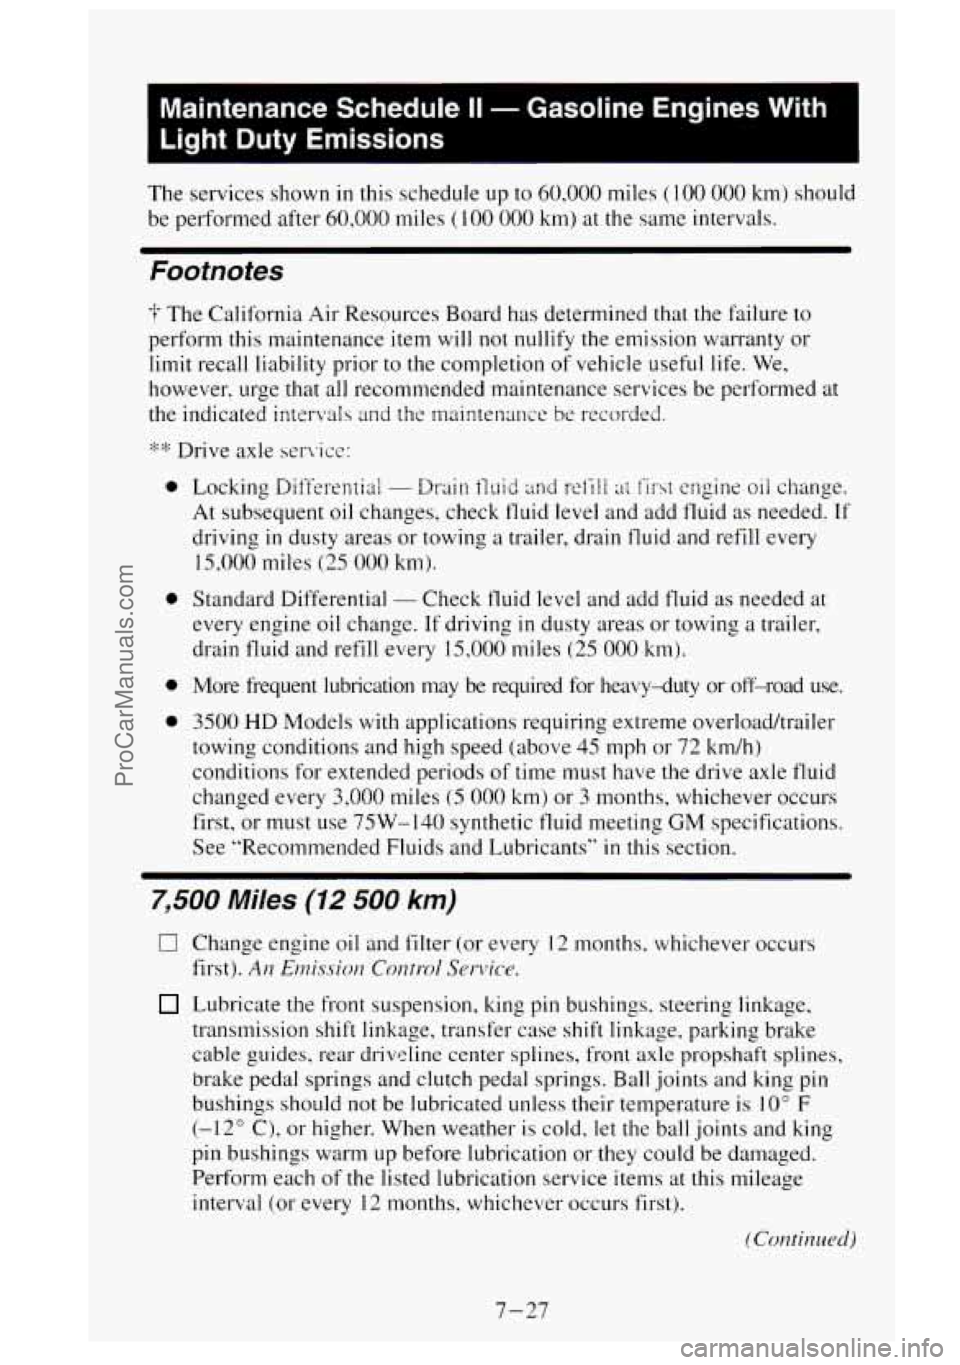
Maintenance Schedule II - Gasoline Engines With
Light Duty Emissions
The services shown in this schedule up to 60.000 miles ( 100 000 km) should
be performed after
60.000 miles ( 100 000 km) at the same intervals.
Footnotes
-i- The California Air Resources Board has determined that the Failure to
perform this maintenance item will
not nullify the emission warranty or
limit recall liability prior
to the completion of vehicle useful life. We,
however. urge that all recommended maintenance services be performed at
the indicated intsrkrds
and t!w rnlrinlcn;nnx be recor-ded.
0
0
0
0
Locking Differential - Drain iluid mci wi.il! :ii !.iI-st cngine oii change.
At subsequent oil changes, check fluid level and add fluid as needed. If
driving in dusty areas or towing a trailer. drain fluid and refill every
15,000 miles
(25 000 km).
Standard Differential - Check tluid level and add fluid as needed at
every engine
oil change. If--driving in dusty areas or towing a trailer.
drain fluid and refill every
15,000 miles (25 000 km).
More frequent lubrication may be required for heavy-duty or off\
-road use.
3500 HD Models with applications requiring extreme overload/trailer
towing conditions and high speed (above
45 mph or 72 km/h)
conditions for extended periods
of time must have the drive axle fluid
changed every
3,000 miles (5 000 km) or 3 months, whichever occurs
first, or must use 7SW-140 synthetic tluid meeting
GM specifications.
See "Recommended Fluids and Lubricants"
in this section.
7,500 Miles (12 500 km)
0 Change engine oil and filter (or every 12 months. whichever occurs
first).
A11 E1?7iLs.~io1I Corlti-ol Serl7ic-e.
Lubricate the front suspension, king pin bushings. steering linkage,
transmission shift linkage, transfer case shift linkage. parking brake
cable guides.
rear driveline center splines, front axle propshaft splines,
brake pedal springs and clutch pedal springs.
Ball joints and king pin
bushings should
not be lubricated unless their temperature is 10" F
(-12" C). or higher. When weather is cold, let the ball joints and king
pin bushings warm up before lubrication or they could be damaged.
Perform each of the listed lubrication service items at this mileage
interval (or every
12 months. whichever occurs first).
(ColltillltL'd)
7-27
ProCarManuals.com