GMC SIERRA 2004 Owner's Manual
Manufacturer: GMC, Model Year: 2004,
Model line: SIERRA,
Model: GMC SIERRA 2004
Pages: 588, PDF Size: 3.74 MB
GMC SIERRA 2004 Owner's Manual
SIERRA 2004
GMC
GMC
https://www.carmanualsonline.info/img/44/35577/w960_35577-0.png
GMC SIERRA 2004 Owner's Manual
Trending: oil capacity, gas mileage, wheel torque, light, climate settings, seat memory, window
Page 461 of 588
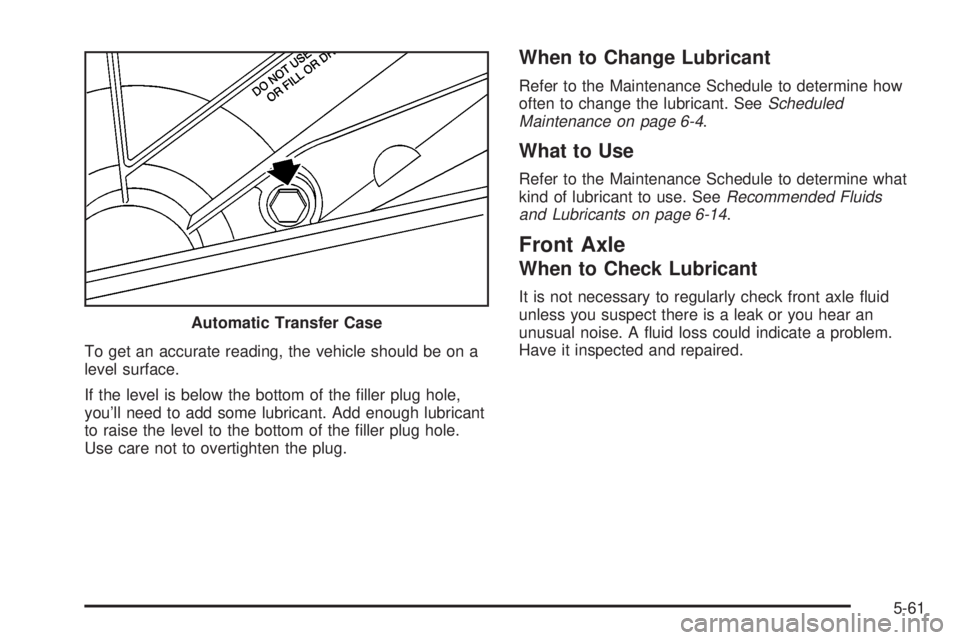
To get an accurate reading, the vehicle should be on a
level surface.
If the level is below the bottom of the ®ller plug hole,
you'll need to add some lubricant. Add enough lubricant
to raise the level to the bottom of the ®ller plug hole.
Use care not to overtighten the plug.
When to Change Lubricant
Refer to the Maintenance Schedule to determine how
often to change the lubricant. SeeScheduled
Maintenance on page 6-4.
What to Use
Refer to the Maintenance Schedule to determine what
kind of lubricant to use. SeeRecommended Fluids
and Lubricants on page 6-14.
Front Axle
When to Check Lubricant
It is not necessary to regularly check front axle ¯uid
unless you suspect there is a leak or you hear an
unusual noise. A ¯uid loss could indicate a problem.
Have it inspected and repaired. Automatic Transfer Case
5-61
Page 462 of 588
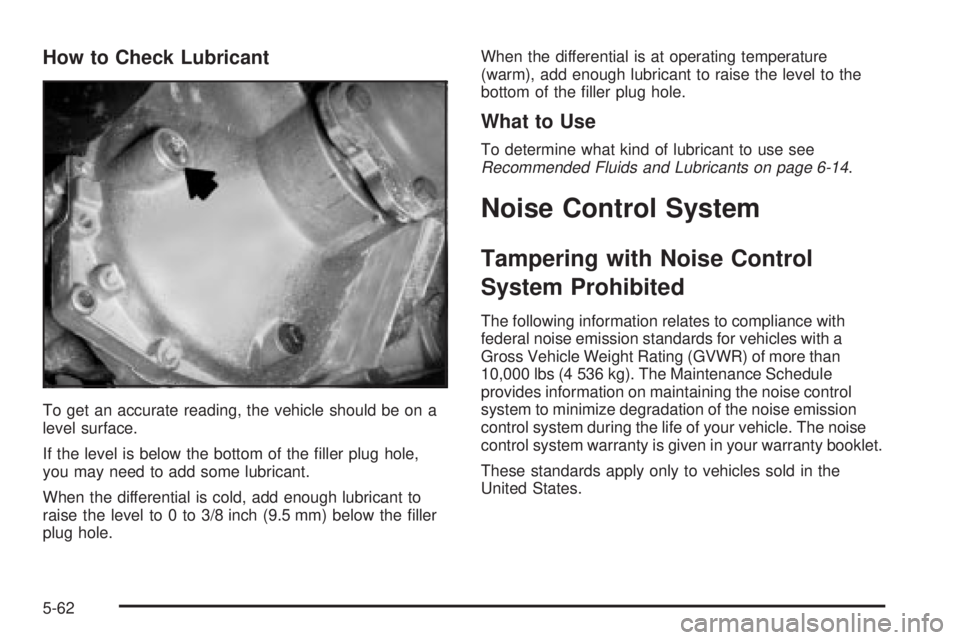
How to Check Lubricant
To get an accurate reading, the vehicle should be on a
level surface.
If the level is below the bottom of the ®ller plug hole,
you may need to add some lubricant.
When the differential is cold, add enough lubricant to
raise the level to 0 to 3/8 inch (9.5 mm) below the ®ller
plug hole.When the differential is at operating temperature
(warm), add enough lubricant to raise the level to the
bottom of the ®ller plug hole.
What to Use
To determine what kind of lubricant to use seeRecommended Fluids and Lubricants on page 6-14.
Noise Control System
Tampering with Noise Control
System Prohibited
The following information relates to compliance with
federal noise emission standards for vehicles with a
Gross Vehicle Weight Rating (GVWR) of more than
10,000 lbs (4 536 kg). The Maintenance Schedule
provides information on maintaining the noise control
system to minimize degradation of the noise emission
control system during the life of your vehicle. The noise
control system warranty is given in your warranty booklet.
These standards apply only to vehicles sold in the
United States.
5-62
Page 463 of 588
Federal law prohibits the following acts or the causing
thereof:
1. The removal or rendering inoperative by any
person, other than for purposes of maintenance,
repair or replacement, of any device or element of
design incorporated into any new vehicle for
the purpose of noise control, prior to its sale or
delivery to the ultimate purchaser or while it is in
use; or
2. The use of the vehicle after such device or element
of design has been removed or rendered inoperative
by any person.
Among those acts presumed to constitute tampering are
the acts listed below.
Insulation:
·
Removal of the noise shields or any underhood
insulation.
Engine:
·
Removal or rendering engine speed governor
(if equipped) inoperative so as to allow engine
speed to exceed manufacturer speci®cations.
Fan and Drive:
·
Removal of fan clutch (if equipped) or rendering
clutch inoperative.
·Removal of the fan shroud (if equipped).
Air Intake:
·
Removal of the air cleaner silencer.
·Modi®cation of the air cleaner.
Exhaust:
·
Removal of the muffler and/or resonator.
·Removal of the exhaust pipes and exhaust pipe
clamps.
5-63
Page 464 of 588
Bulb Replacement
For any bulb changing procedure not listed in this
section, contact your dealer.
See
Replacement Bulbs on page 5-74for the proper
types of bulbs to use.
Halogen Bulbs
{CAUTION:
Halogen bulbs have pressurized gas inside
and can burst if you drop or scratch the bulb.
You or others could be injured. Be sure to read
and follow the instructions on the bulb
package.
Headlamps
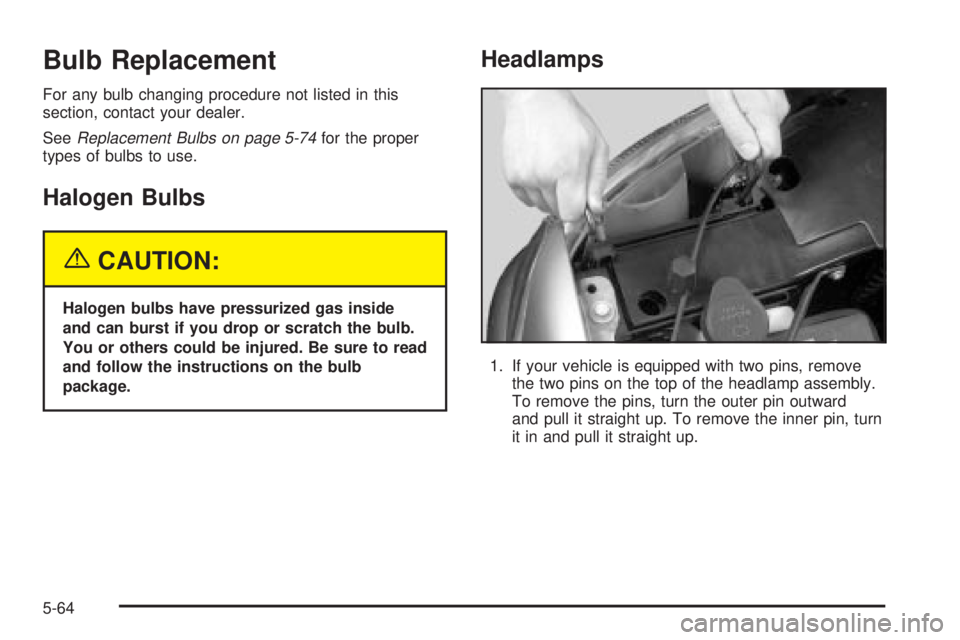
1. If your vehicle is equipped with two pins, remove
the two pins on the top of the headlamp assembly.
To remove the pins, turn the outer pin outward
and pull it straight up. To remove the inner pin, turn
it in and pull it straight up.
5-64
Page 465 of 588
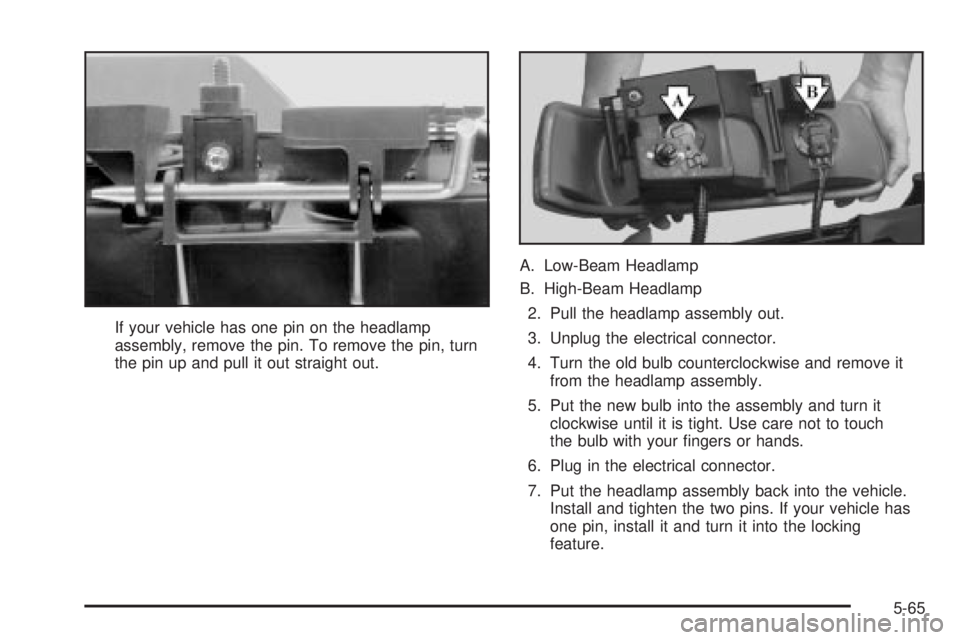
If your vehicle has one pin on the headlamp
assembly, remove the pin. To remove the pin, turn
the pin up and pull it out straight out.A. Low-Beam Headlamp
B. High-Beam Headlamp
2. Pull the headlamp assembly out.
3. Unplug the electrical connector.
4. Turn the old bulb counterclockwise and remove it
from the headlamp assembly.
5. Put the new bulb into the assembly and turn it
clockwise until it is tight. Use care not to touch
the bulb with your ®ngers or hands.
6. Plug in the electrical connector.
7. Put the headlamp assembly back into the vehicle.
Install and tighten the two pins. If your vehicle has
one pin, install it and turn it into the locking
feature.
5-65
Page 466 of 588
Front Turn Signal, Sidemarker and
Daytime Running Lamps
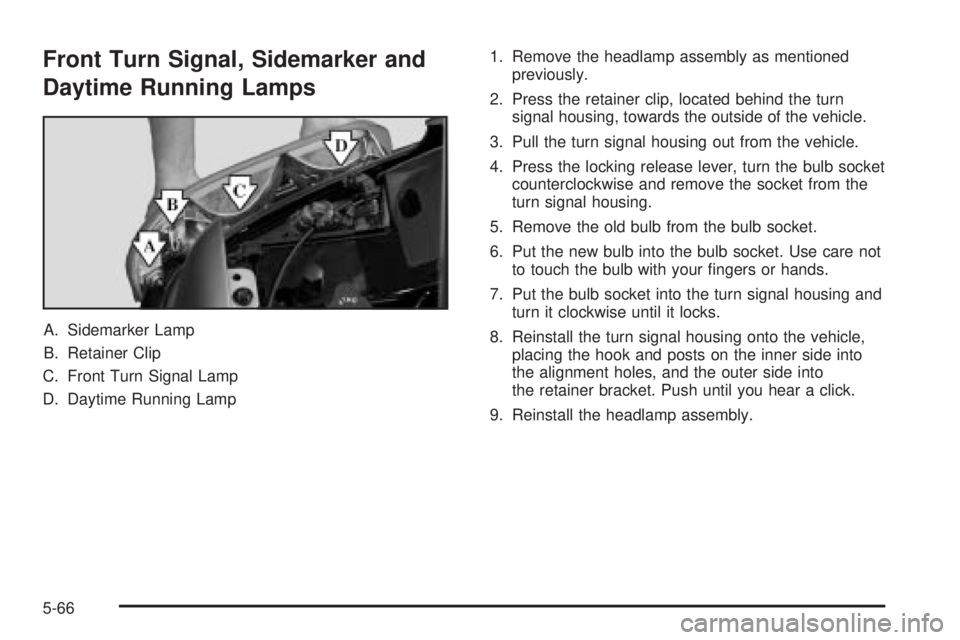
A. Sidemarker Lamp
B. Retainer Clip
C. Front Turn Signal Lamp
D. Daytime Running Lamp1. Remove the headlamp assembly as mentioned
previously.
2. Press the retainer clip, located behind the turn
signal housing, towards the outside of the vehicle.
3. Pull the turn signal housing out from the vehicle.
4. Press the locking release lever, turn the bulb socket
counterclockwise and remove the socket from the
turn signal housing.
5. Remove the old bulb from the bulb socket.
6. Put the new bulb into the bulb socket. Use care not
to touch the bulb with your ®ngers or hands.
7. Put the bulb socket into the turn signal housing and
turn it clockwise until it locks.
8. Reinstall the turn signal housing onto the vehicle,
placing the hook and posts on the inner side into
the alignment holes, and the outer side into
the retainer bracket. Push until you hear a click.
9. Reinstall the headlamp assembly.
5-66
Page 467 of 588
Roof Marker Lamps
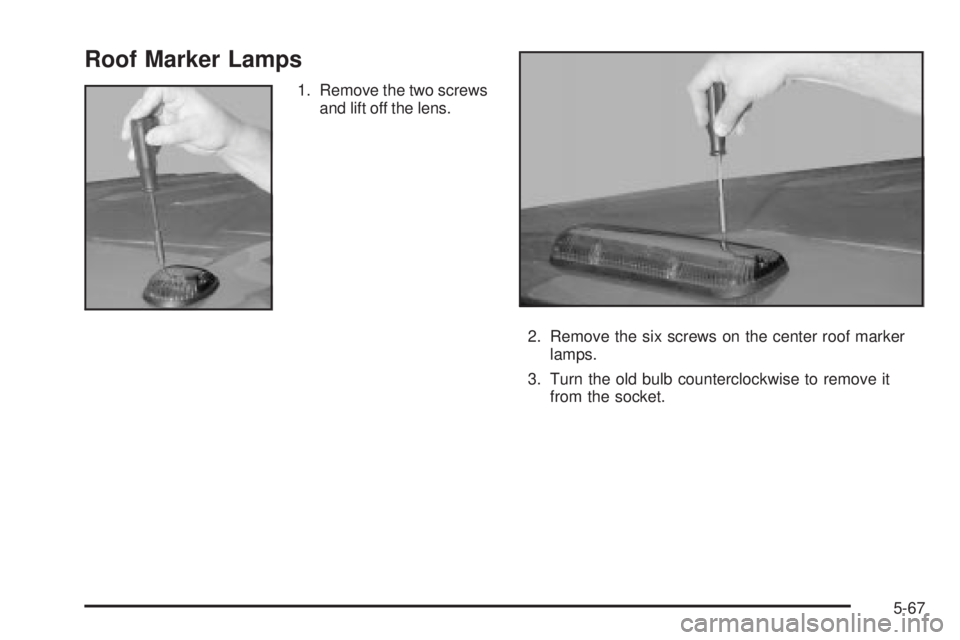
1. Remove the two screws
and lift off the lens.
2. Remove the six screws on the center roof marker
lamps.
3. Turn the old bulb counterclockwise to remove it
from the socket.
5-67
Page 468 of 588
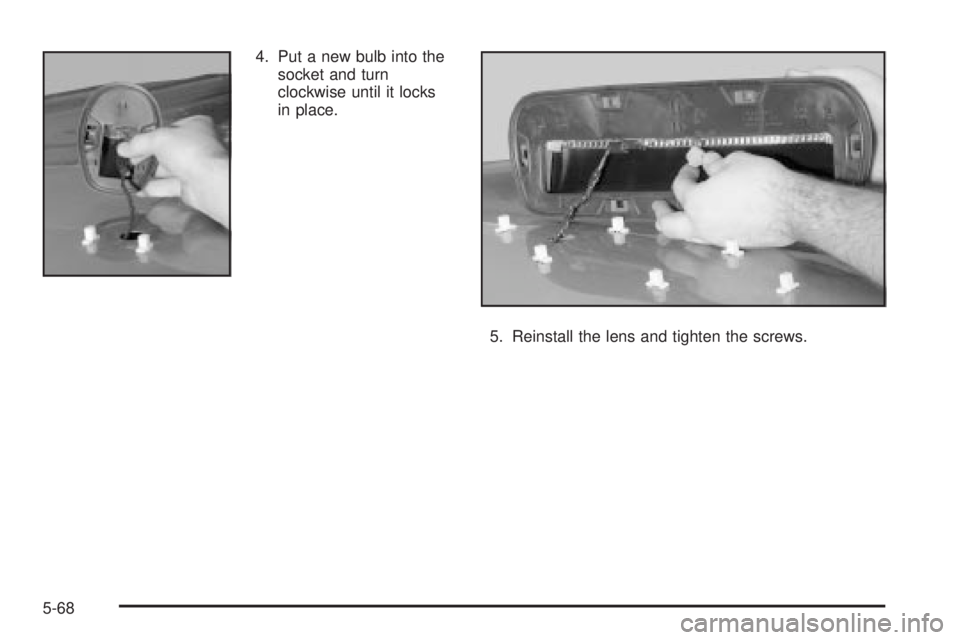
4. Put a new bulb into the
socket and turn
clockwise until it locks
in place.
5. Reinstall the lens and tighten the screws.
5-68
Page 469 of 588
Center High-Mounted Stoplamp
(CHMSL) and Cargo Lamp
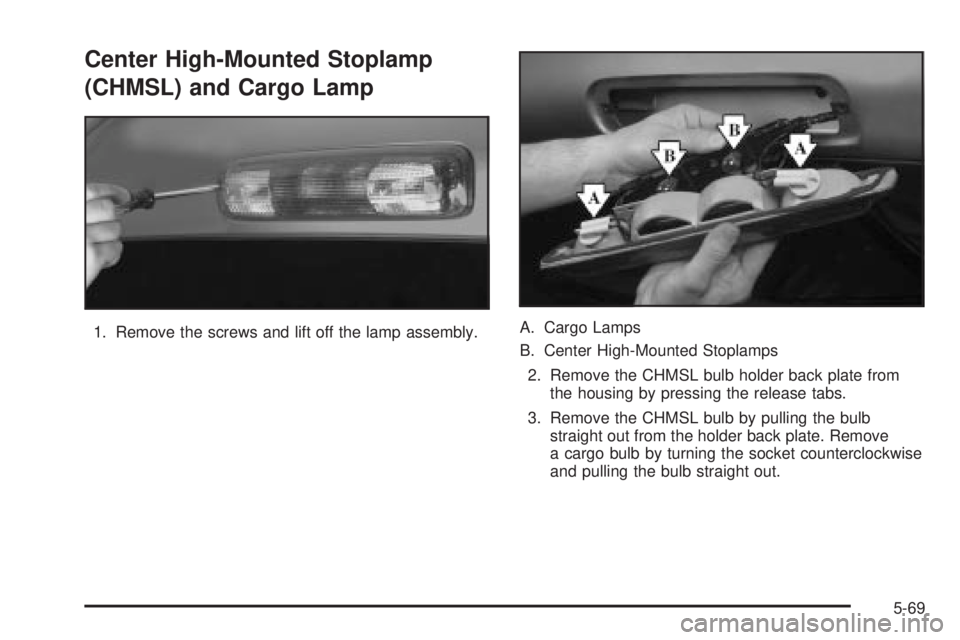
1. Remove the screws and lift off the lamp assembly.A. Cargo Lamps
B. Center High-Mounted Stoplamps
2. Remove the CHMSL bulb holder back plate from
the housing by pressing the release tabs.
3. Remove the CHMSL bulb by pulling the bulb
straight out from the holder back plate. Remove
a cargo bulb by turning the socket counterclockwise
and pulling the bulb straight out.
5-69
Page 470 of 588
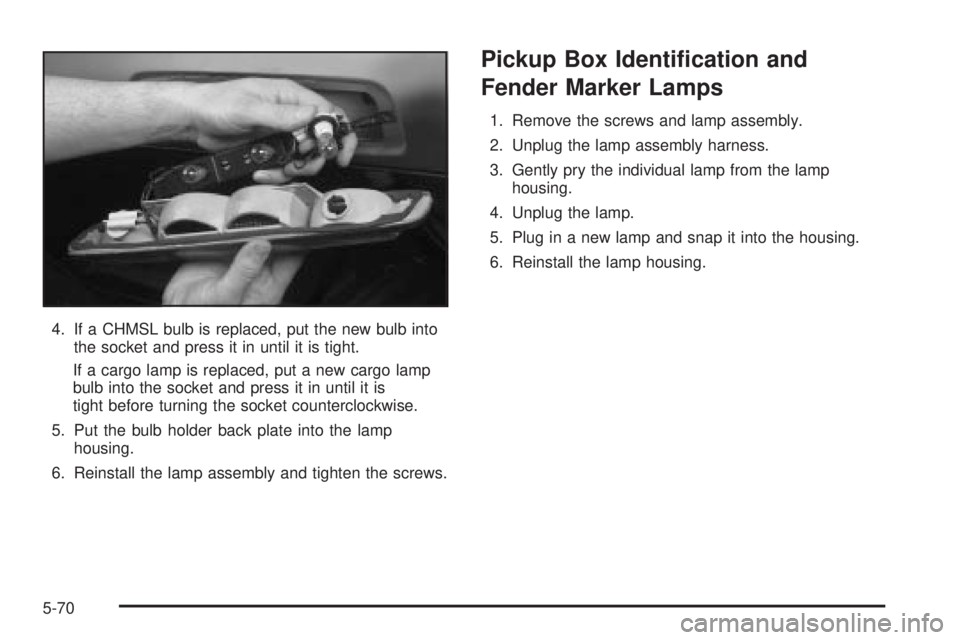
4. If a CHMSL bulb is replaced, put the new bulb into
the socket and press it in until it is tight.
If a cargo lamp is replaced, put a new cargo lamp
bulb into the socket and press it in until it is
tight before turning the socket counterclockwise.
5. Put the bulb holder back plate into the lamp
housing.
6. Reinstall the lamp assembly and tighten the screws.
Pickup Box Identi®cation and
Fender Marker Lamps
1. Remove the screws and lamp assembly.
2. Unplug the lamp assembly harness.
3. Gently pry the individual lamp from the lamp
housing.
4. Unplug the lamp.
5. Plug in a new lamp and snap it into the housing.
6. Reinstall the lamp housing.
5-70
Trending: steering, wheel bolt torque, horn, oil capacity, CLOCK, seat memory, emergency towing
