clock GMC SIERRA 2005 Owner's Guide
[x] Cancel search | Manufacturer: GMC, Model Year: 2005, Model line: SIERRA, Model: GMC SIERRA 2005Pages: 574, PDF Size: 2.95 MB
Page 492 of 574
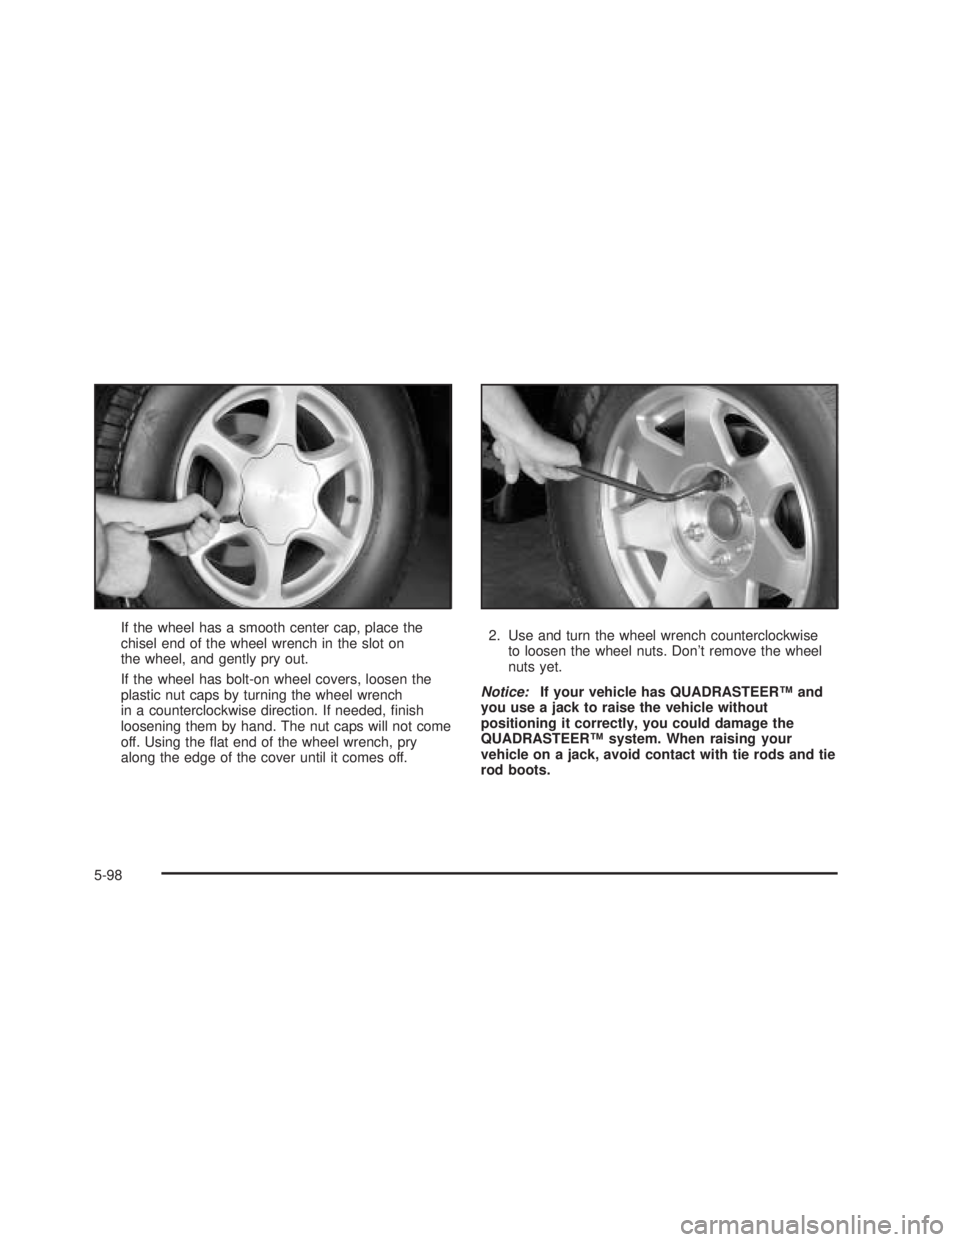
If the wheel has a smooth center cap, place the
chisel end of the wheel wrench in the slot on
the wheel, and gently pry out.
If the wheel has bolt-on wheel covers, loosen the
plastic nut caps by turning the wheel wrench
in a counterclockwise direction. If needed, �nish
loosening them by hand. The nut caps will not come
off. Using the �at end of the wheel wrench, pry
along the edge of the cover until it comes off.2. Use and turn the wheel wrench counterclockwise
to loosen the wheel nuts. Don’t remove the wheel
nuts yet.
Notice:If your vehicle has QUADRASTEER™ and
you use a jack to raise the vehicle without
positioning it correctly, you could damage the
QUADRASTEER™ system. When raising your
vehicle on a jack, avoid contact with tie rods and tie
rod boots.
5-98
Page 495 of 574
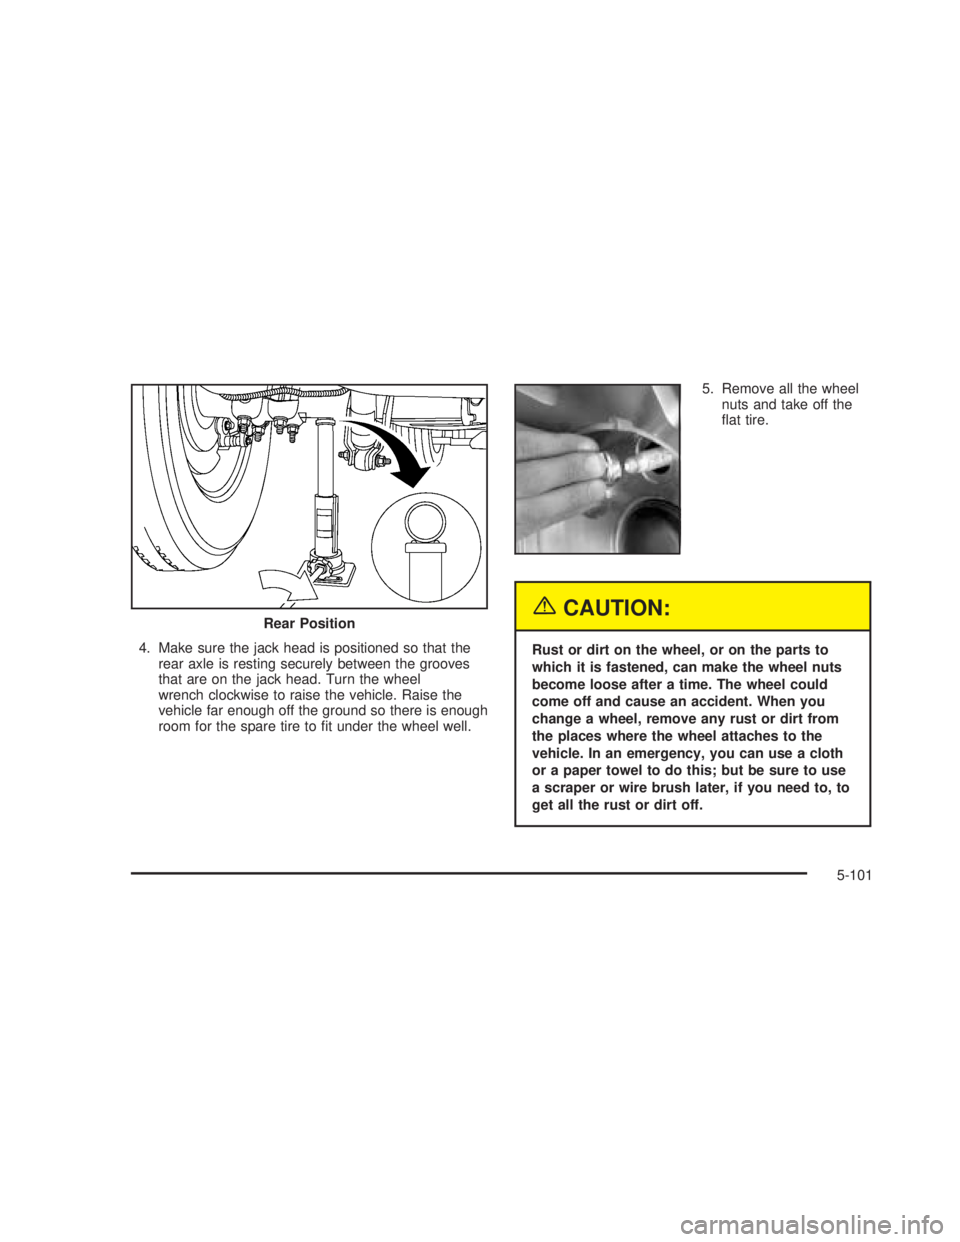
4. Make sure the jack head is positioned so that the
rear axle is resting securely between the grooves
that are on the jack head. Turn the wheel
wrench clockwise to raise the vehicle. Raise the
vehicle far enough off the ground so there is enough
room for the spare tire to �t under the wheel well.5. Remove all the wheel
nuts and take off the
�at tire.
{CAUTION:
Rust or dirt on the wheel, or on the parts to
which it is fastened, can make the wheel nuts
become loose after a time. The wheel could
come off and cause an accident. When you
change a wheel, remove any rust or dirt from
the places where the wheel attaches to the
vehicle. In an emergency, you can use a cloth
or a paper towel to do this; but be sure to use
a scraper or wire brush later, if you need to, to
get all the rust or dirt off. Rear Position
5-101
Page 498 of 574
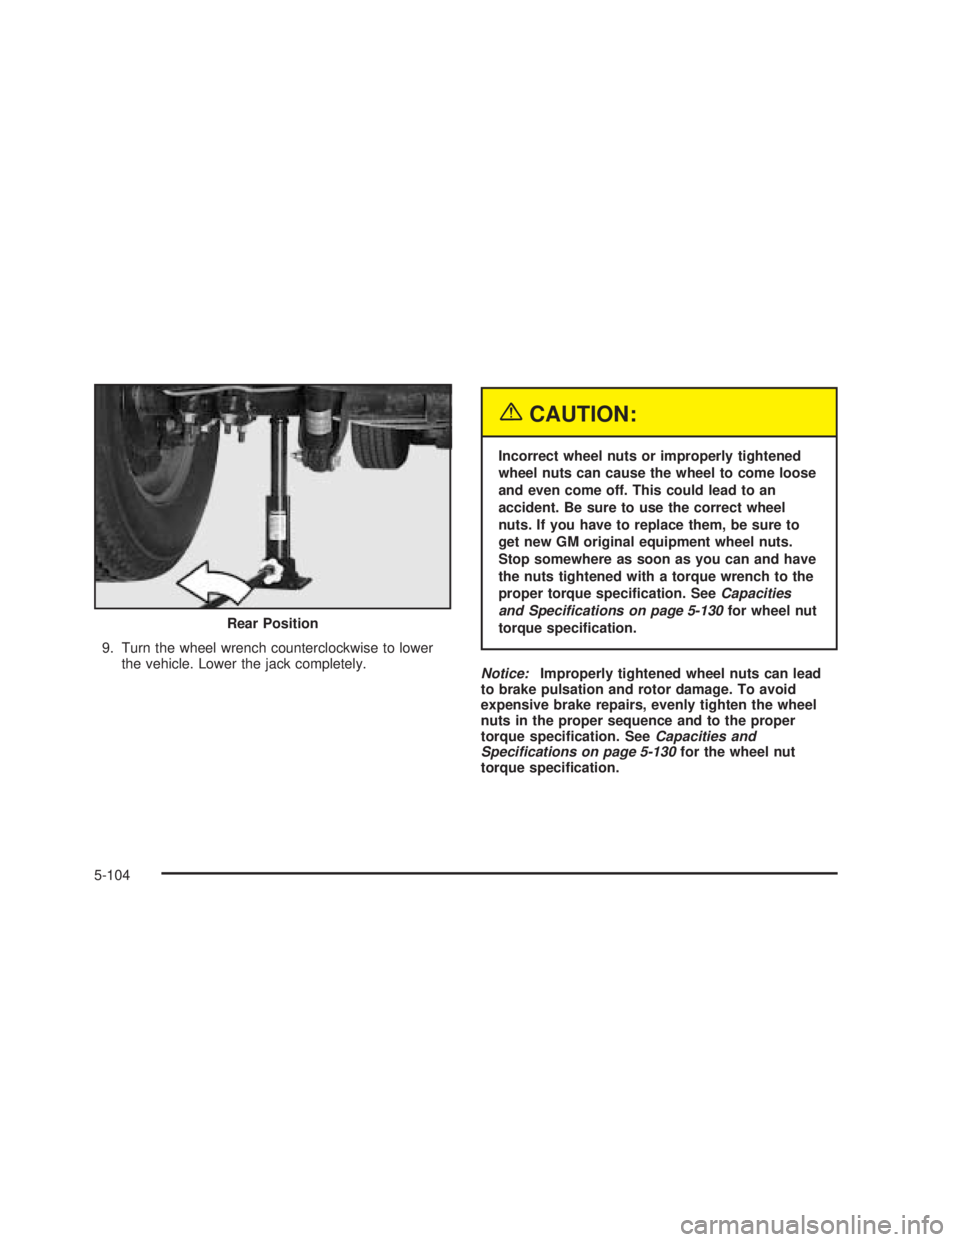
9. Turn the wheel wrench counterclockwise to lower
the vehicle. Lower the jack completely.
{CAUTION:
Incorrect wheel nuts or improperly tightened
wheel nuts can cause the wheel to come loose
and even come off. This could lead to an
accident. Be sure to use the correct wheel
nuts. If you have to replace them, be sure to
get new GM original equipment wheel nuts.
Stop somewhere as soon as you can and have
the nuts tightened with a torque wrench to the
proper torque speci�cation. SeeCapacities
and Specifications on page 5-130for wheel nut
torque speci�cation.
Notice:Improperly tightened wheel nuts can lead
to brake pulsation and rotor damage. To avoid
expensive brake repairs, evenly tighten the wheel
nuts in the proper sequence and to the proper
torque speci�cation. SeeCapacities and
Specifications on page 5-130for the wheel nut
torque speci�cation. Rear Position
5-104
Page 499 of 574
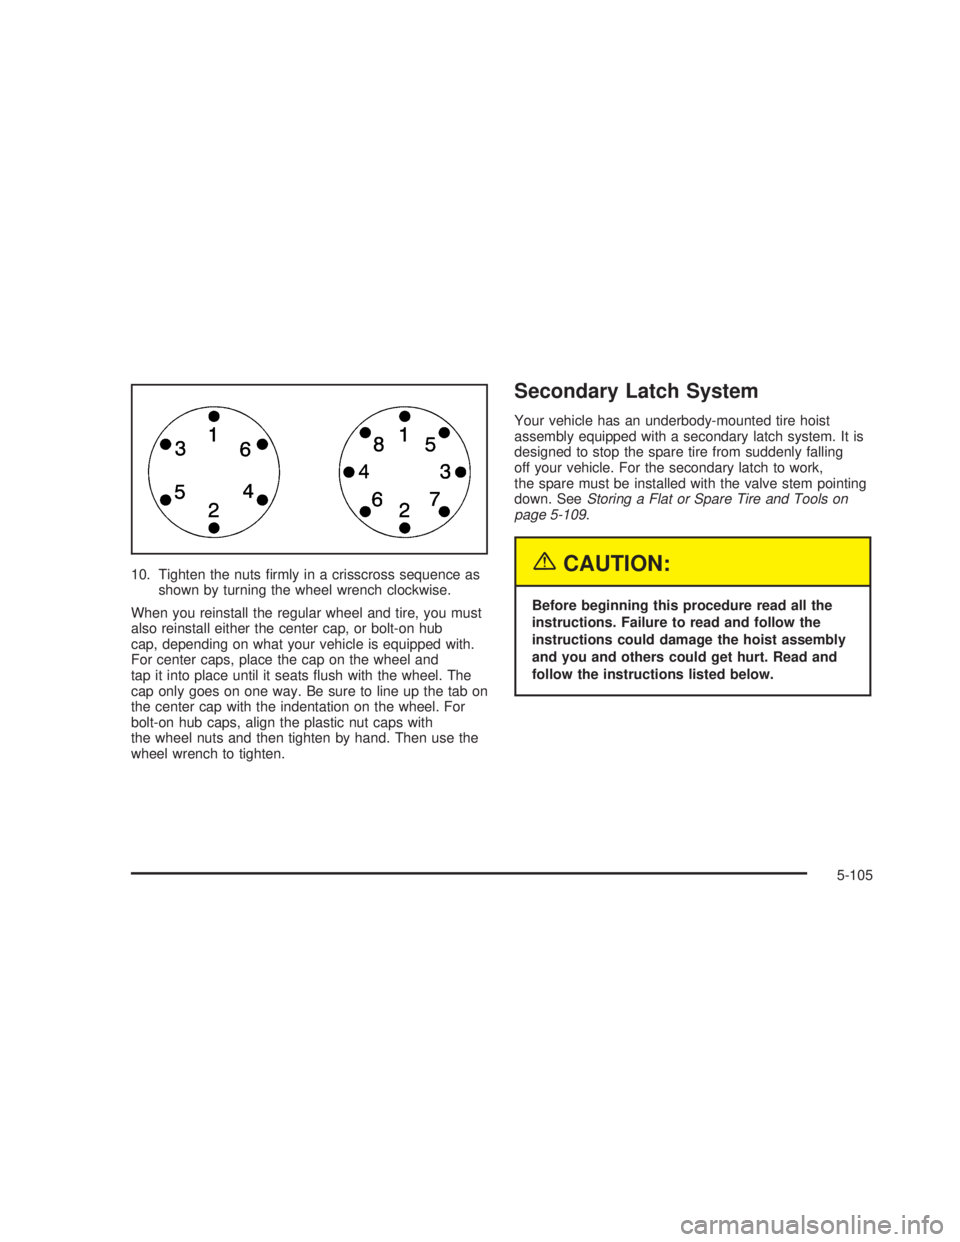
10. Tighten the nuts �rmly in a crisscross sequence as
shown by turning the wheel wrench clockwise.
When you reinstall the regular wheel and tire, you must
also reinstall either the center cap, or bolt-on hub
cap, depending on what your vehicle is equipped with.
For center caps, place the cap on the wheel and
tap it into place until it seats �ush with the wheel. The
cap only goes on one way. Be sure to line up the tab on
the center cap with the indentation on the wheel. For
bolt-on hub caps, align the plastic nut caps with
the wheel nuts and then tighten by hand. Then use the
wheel wrench to tighten.
Secondary Latch System
Your vehicle has an underbody-mounted tire hoist
assembly equipped with a secondary latch system. It is
designed to stop the spare tire from suddenly falling
off your vehicle. For the secondary latch to work,
the spare must be installed with the valve stem pointing
down. SeeStoring a Flat or Spare Tire and Tools on
page 5-109.
{CAUTION:
Before beginning this procedure read all the
instructions. Failure to read and follow the
instructions could damage the hoist assembly
and you and others could get hurt. Read and
follow the instructions listed below.
5-105
Page 500 of 574
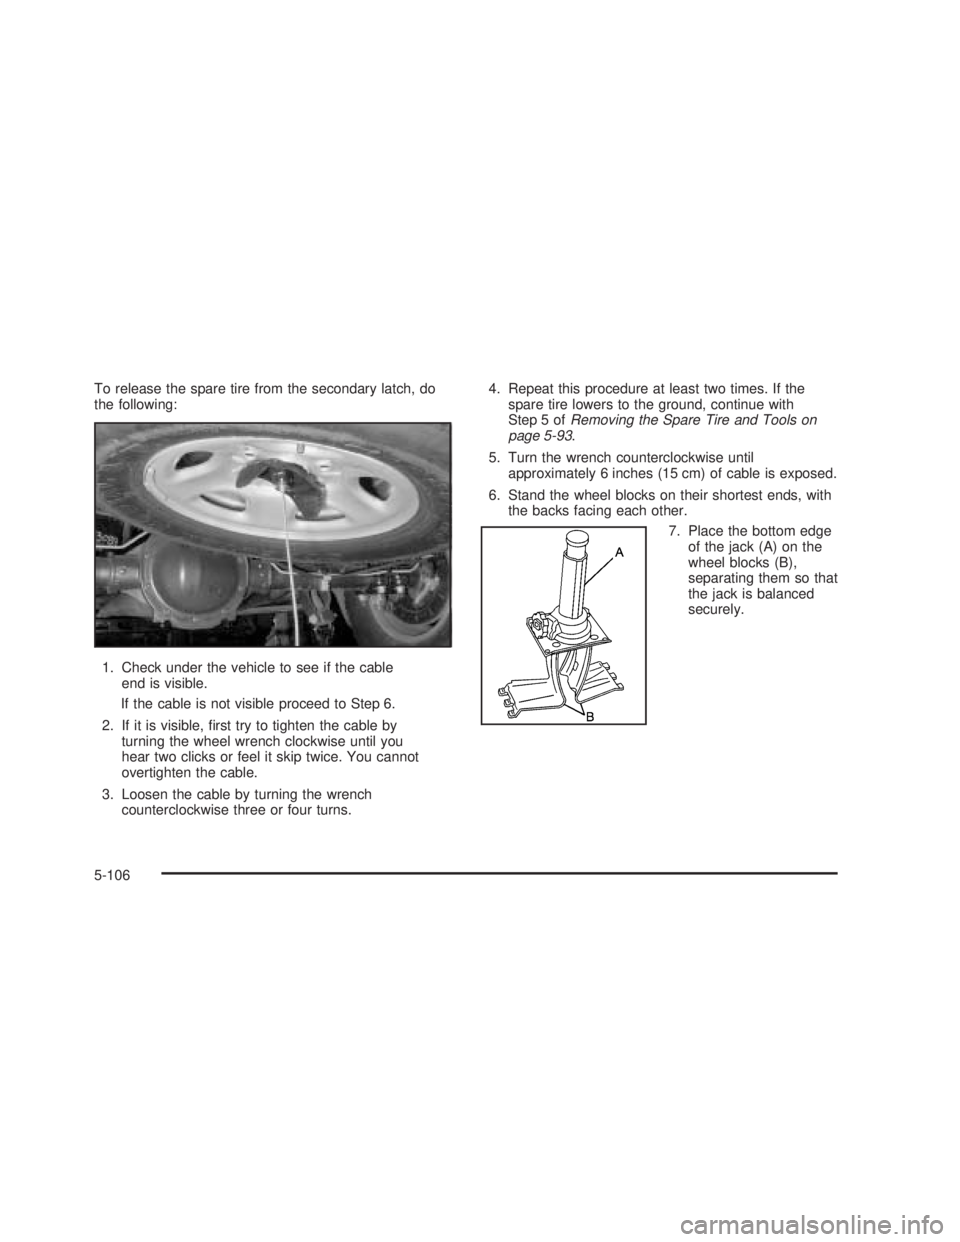
To release the spare tire from the secondary latch, do
the following:
1. Check under the vehicle to see if the cable
end is visible.
If the cable is not visible proceed to Step 6.
2. If it is visible, �rst try to tighten the cable by
turning the wheel wrench clockwise until you
hear two clicks or feel it skip twice. You cannot
overtighten the cable.
3. Loosen the cable by turning the wrench
counterclockwise three or four turns.4. Repeat this procedure at least two times. If the
spare tire lowers to the ground, continue with
Step 5 ofRemoving the Spare Tire and Tools on
page 5-93.
5. Turn the wrench counterclockwise until
approximately 6 inches (15 cm) of cable is exposed.
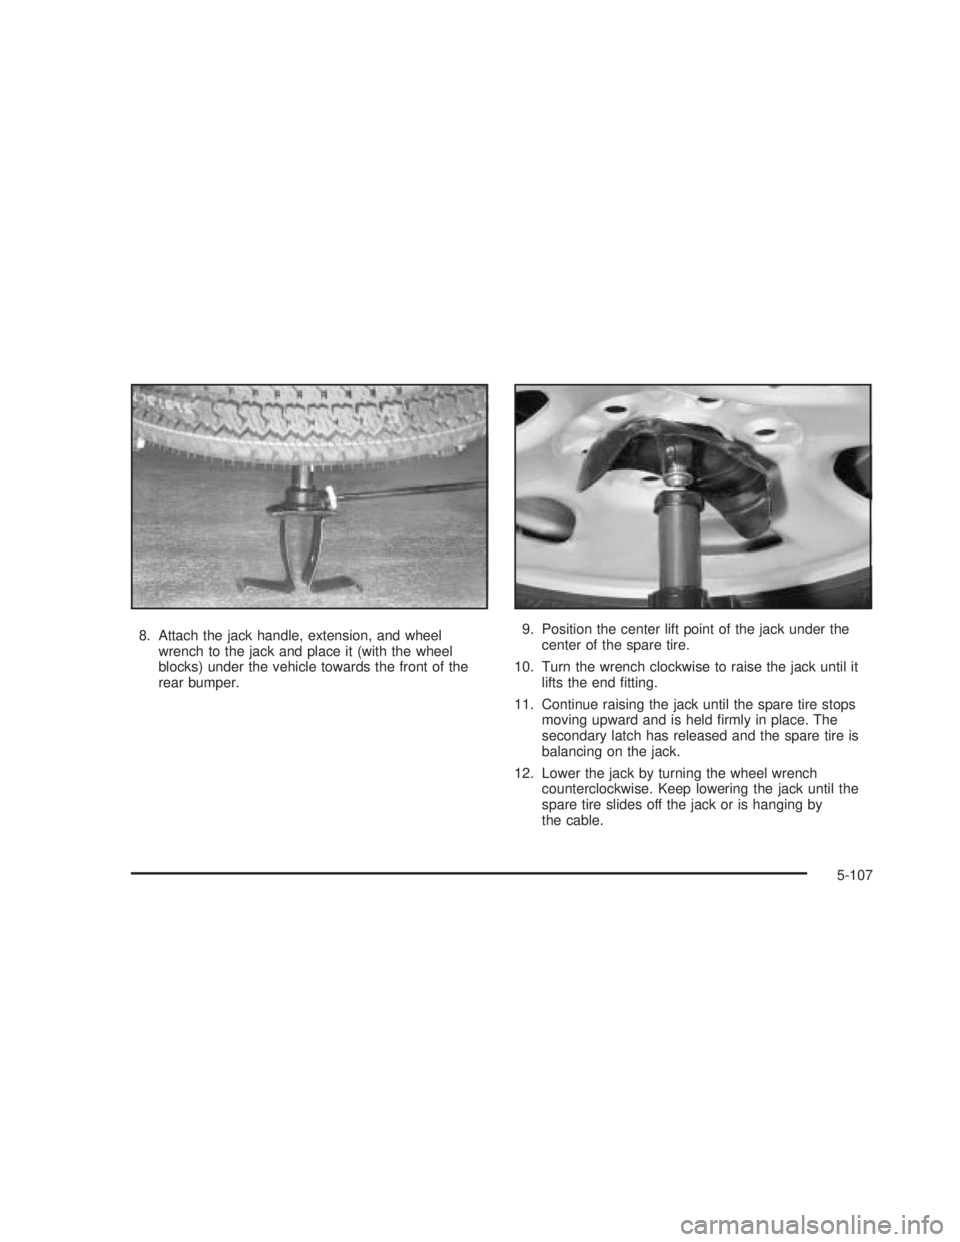
6. Stand the wheel blocks on their shortest ends, with
the backs facing each other.
7. Place the bottom edge
of the jack (A) on the
wheel blocks (B),
separating them so that
the jack is balanced
securely.
5-106
Page 501 of 574
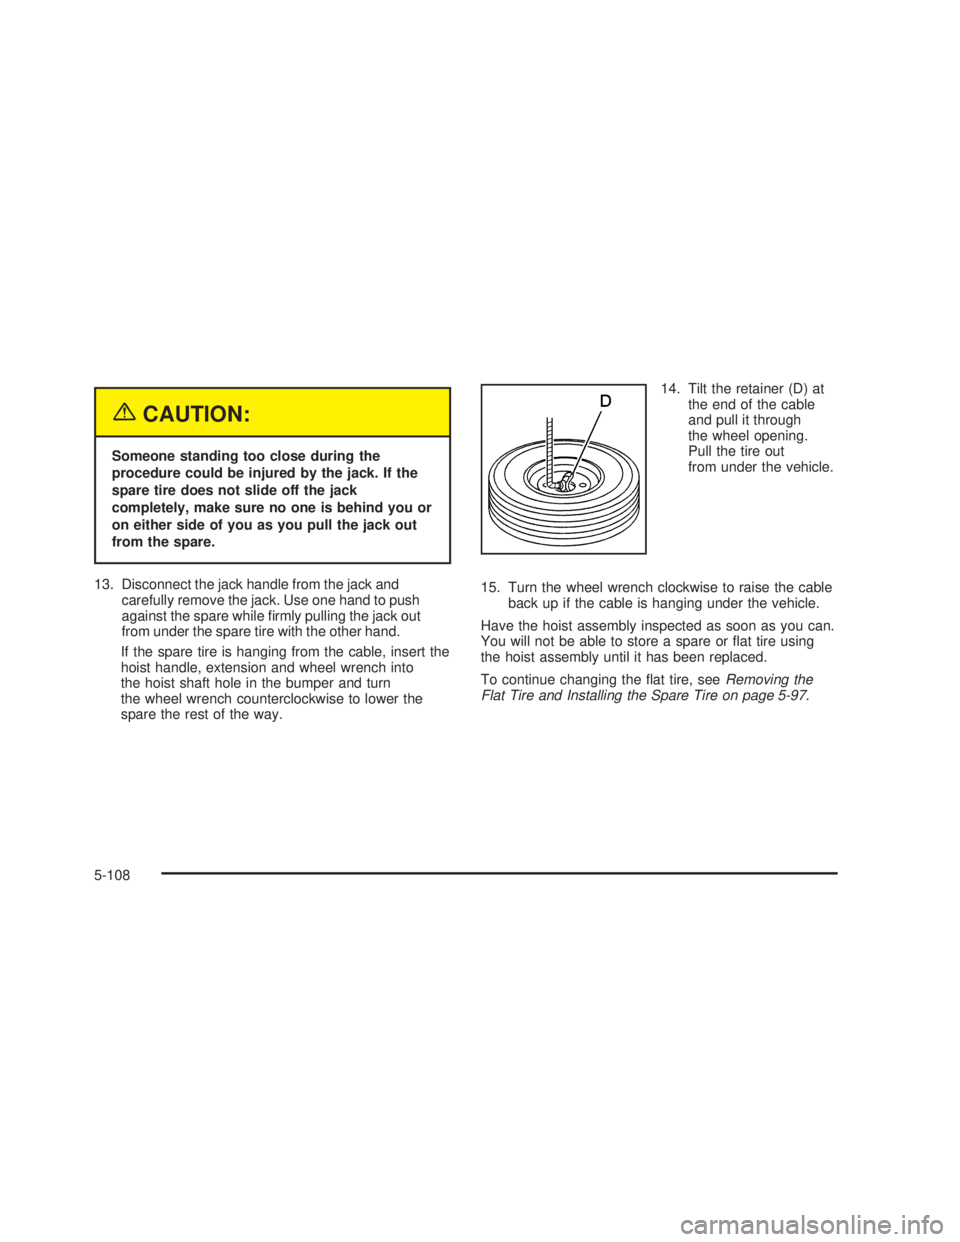
8. Attach the jack handle, extension, and wheel
wrench to the jack and place it (with the wheel
blocks) under the vehicle towards the front of the
rear bumper.9. Position the center lift point of the jack under the
center of the spare tire.
10. Turn the wrench clockwise to raise the jack until it
lifts the end �tting.
11. Continue raising the jack until the spare tire stops
moving upward and is held �rmly in place. The
secondary latch has released and the spare tire is
balancing on the jack.
12. Lower the jack by turning the wheel wrench
counterclockwise. Keep lowering the jack until the
spare tire slides off the jack or is hanging by
the cable.
5-107
Page 502 of 574
{CAUTION:
Someone standing too close during the
procedure could be injured by the jack. If the
spare tire does not slide off the jack
completely, make sure no one is behind you or
on either side of you as you pull the jack out
from the spare.
13. Disconnect the jack handle from the jack and
carefully remove the jack. Use one hand to push
against the spare while �rmly pulling the jack out
from under the spare tire with the other hand.
If the spare tire is hanging from the cable, insert the
hoist handle, extension and wheel wrench into
the hoist shaft hole in the bumper and turn
the wheel wrench counterclockwise to lower the
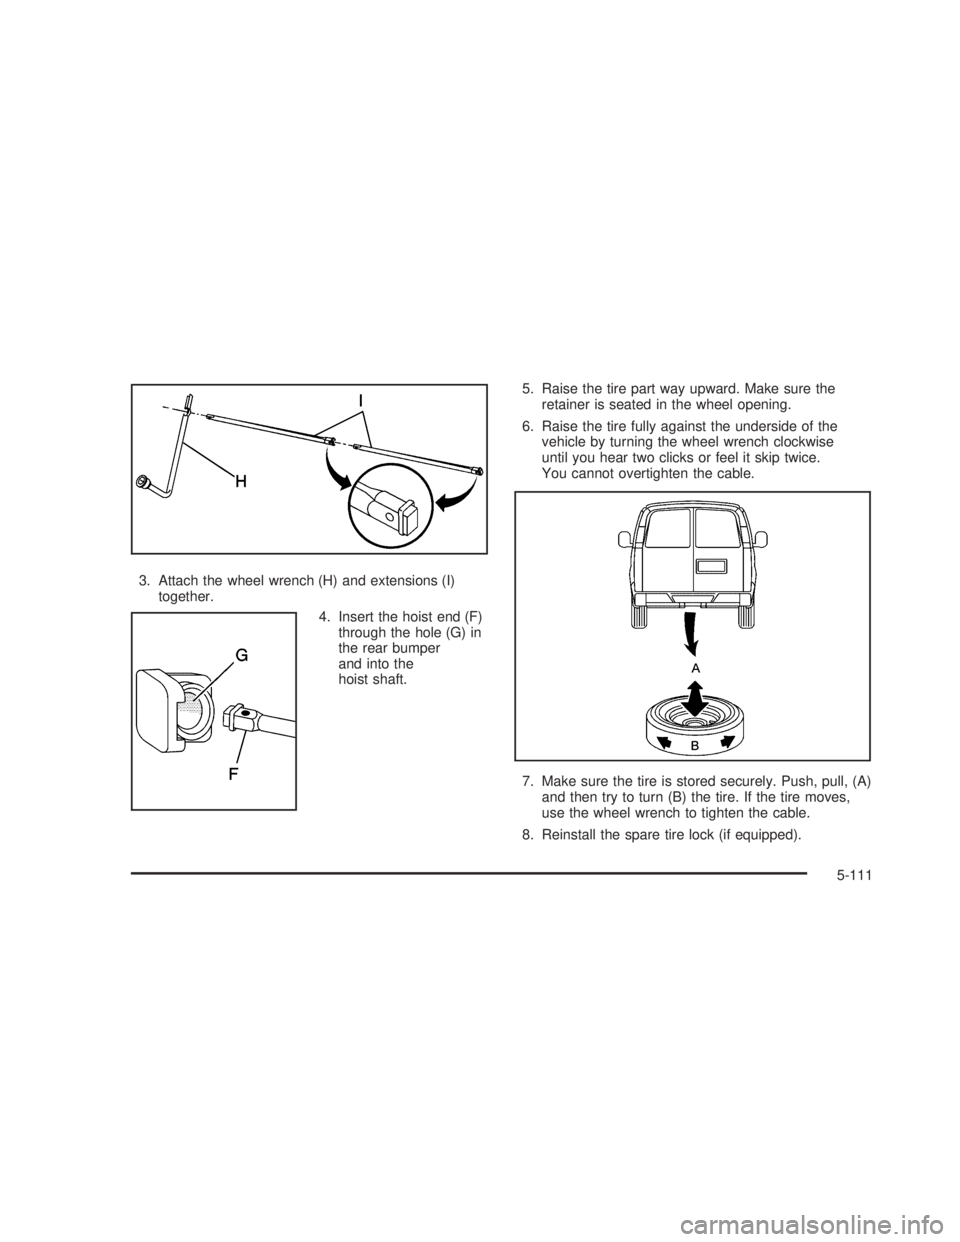
spare the rest of the way.14. Tilt the retainer (D) at
the end of the cable
and pull it through
the wheel opening.
Pull the tire out
from under the vehicle.
15. Turn the wheel wrench clockwise to raise the cable
back up if the cable is hanging under the vehicle.
Have the hoist assembly inspected as soon as you can.
You will not be able to store a spare or �at tire using
the hoist assembly until it has been replaced.
To continue changing the �at tire, seeRemoving the
Flat Tire and Installing the Spare Tire on page 5-97.
5-108
Page 505 of 574
3. Attach the wheel wrench (H) and extensions (I)
together.
4. Insert the hoist end (F)
through the hole (G) in
the rear bumper
and into the
hoist shaft.5. Raise the tire part way upward. Make sure the
retainer is seated in the wheel opening.
6. Raise the tire fully against the underside of the
vehicle by turning the wheel wrench clockwise
until you hear two clicks or feel it skip twice.
You cannot overtighten the cable.
7. Make sure the tire is stored securely. Push, pull, (A)
and then try to turn (B) the tire. If the tire moves,
use the wheel wrench to tighten the cable.
8. Reinstall the spare tire lock (if equipped).
5-111