engine GMC SIERRA 2009 Get To Know Guide
[x] Cancel search | Manufacturer: GMC, Model Year: 2009, Model line: SIERRA, Model: GMC SIERRA 2009Pages: 24, PDF Size: 1.4 MB
Page 4 of 24
Getting to Know Your Sierra4
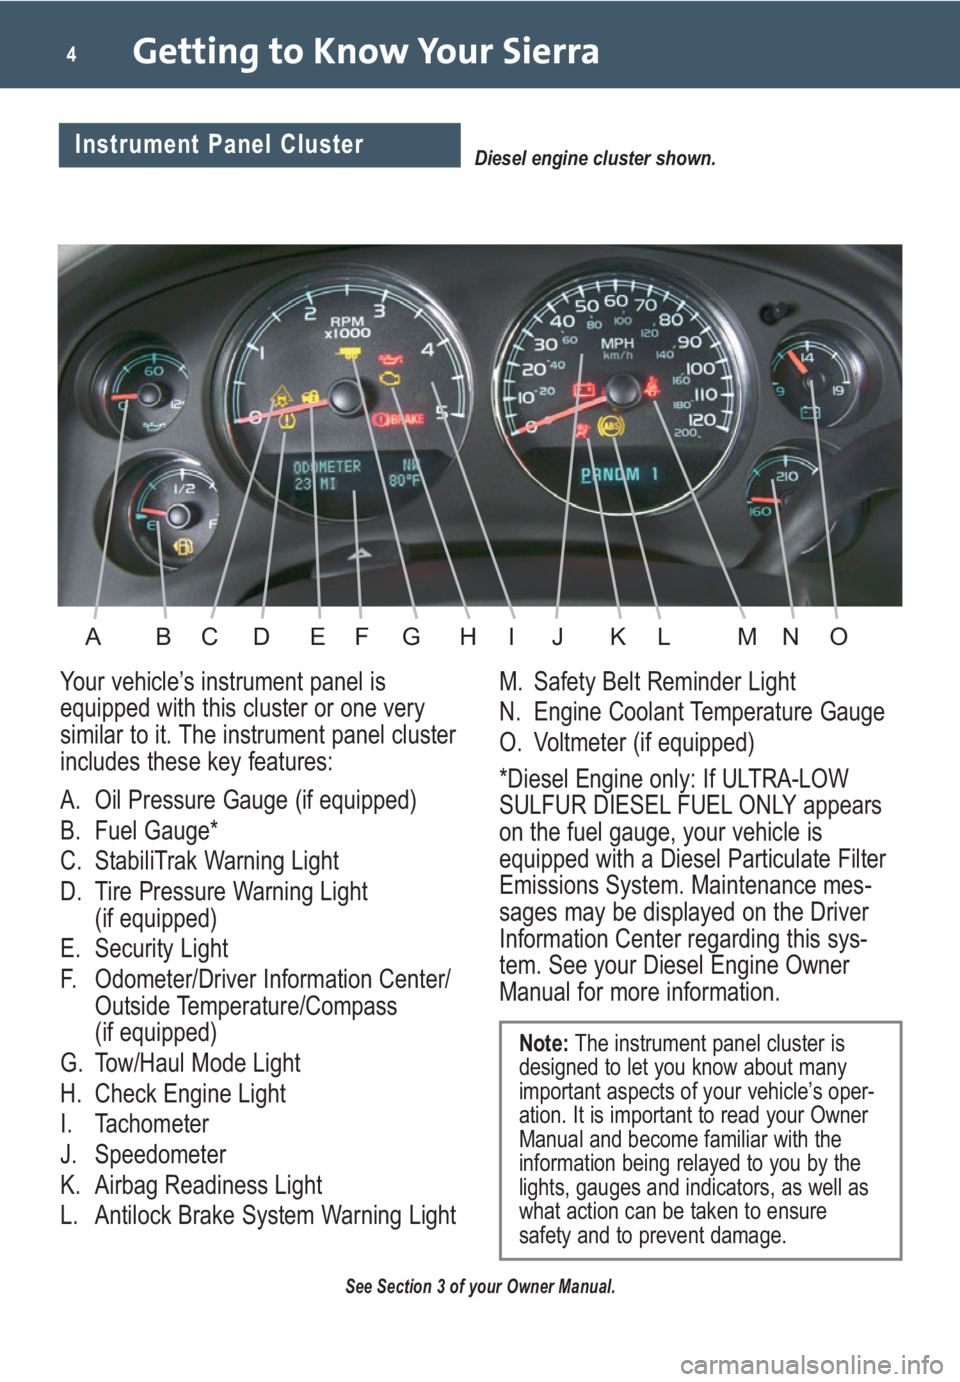
Your vehicle’s instrument panel is
equipped with this cluster or one very
similar to it. The instrument panel cluster
includes these key features:
A. Oil Pressure Gauge (if equipped)
B. Fuel Gauge*
C. StabiliTrak Warning Light
D. Tire Pressure Warning Light
(if equipped)
E. Security Light
F. Odometer/Driver Information Center/
Outside Temperature/Compass
(if equipped)
G. Tow/Haul Mode Light
H. Check Engine Light
I. Tachometer
J. Speedometer
K. Airbag Readiness Light
L. Antilock Brake System Warning LightM. Safety Belt Reminder Light
N. Engine Coolant Temperature Gauge
O. Voltmeter (if equipped)
*Diesel Engine only: If ULTRA-LOW
SULFUR DIESEL FUEL ONLY appears
on the fuel gauge, your vehicle is
equipped with a Diesel Particulate Filter
Emissions System. Maintenance mes-
sages may be displayed on the Driver
Information Center regarding this sys-
tem. See your Diesel Engine Owner
Manual for more information.
See Section 3 of your Owner Manual.
Note:The instrument panel cluster is
designed to let you know about many
important aspects of your vehicle’s oper-
ation. It is important to read your Owner
Manual and become familiar with the
information being relayed to you by the
lights, gauges and indicators, as well as
what action can be taken to ensure
safety and to prevent damage.
Diesel engine cluster shown.Instrument Panel Cluster
ABDFGHEIKLJNOMC
Page 5 of 24
5
Voltmeter Operation
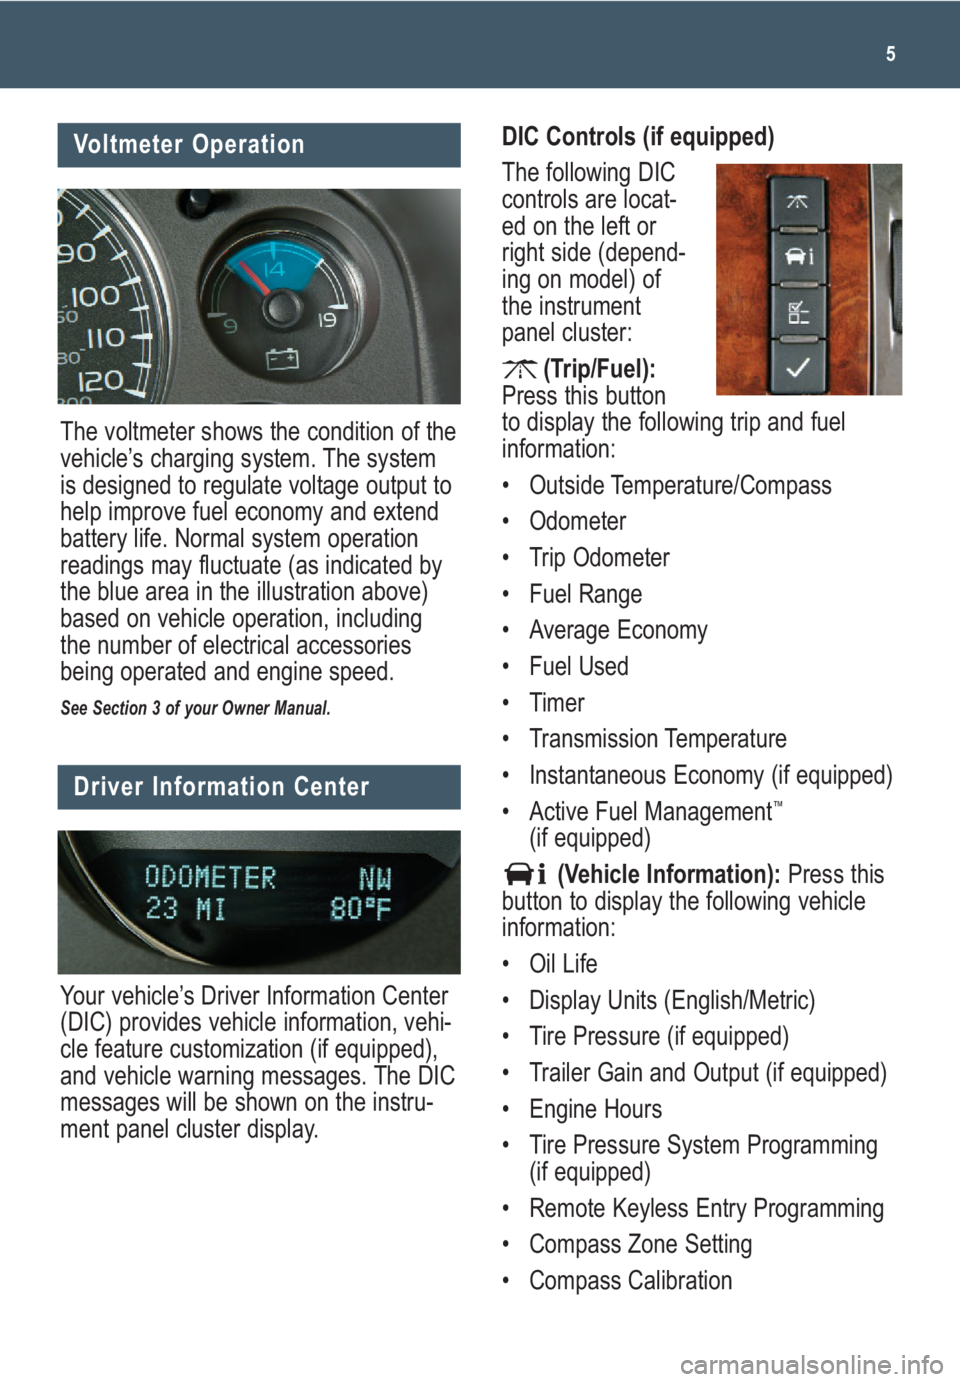
The voltmeter shows the condition of the
vehicle’s charging system. The system
is designed to regulate voltage output to
help improve fuel economy and extend
battery life. Normal system operation
readings may fluctuate (as indicated by
the blue area in the illustration above)
based on vehicle operation, including
the number of electrical accessories
being operated and engine speed.
See Section 3 of your Owner Manual.
Driver Information Center
Your vehicle’s Driver Information Center
(DIC) provides vehicle information, vehi-
cle feature customization (if equipped),
and vehicle warning messages. The DIC
messages will be shown on the instru-
ment panel cluster display.
DIC Controls (if equipped)
The following DIC
controls are locat-
ed on the left or
right side (depend-
ing on model) of
the instrument
panel cluster:
(Trip/Fuel):
Press this button
to display the following trip and fuel
information:
• Outside Temperature/Compass
• Odometer
• Trip Odometer
• Fuel Range
• Average Economy
• Fuel Used
• Timer
• Transmission Temperature
• Instantaneous Economy (if equipped)
• Active Fuel Management
™
(if equipped)
(Vehicle Information):Press this
button to display the following vehicle
information:
• Oil Life
• Display Units (English/Metric)
• Tire Pressure (if equipped)
• Trailer Gain and Output (if equipped)
• Engine Hours
• Tire Pressure System Programming
(if equipped)
• Remote Keyless Entry Programming
• Compass Zone Setting
• Compass Calibration
Page 7 of 24
7
Remote Keyless Entry
(if equipped)
SAFETY & SECURITY
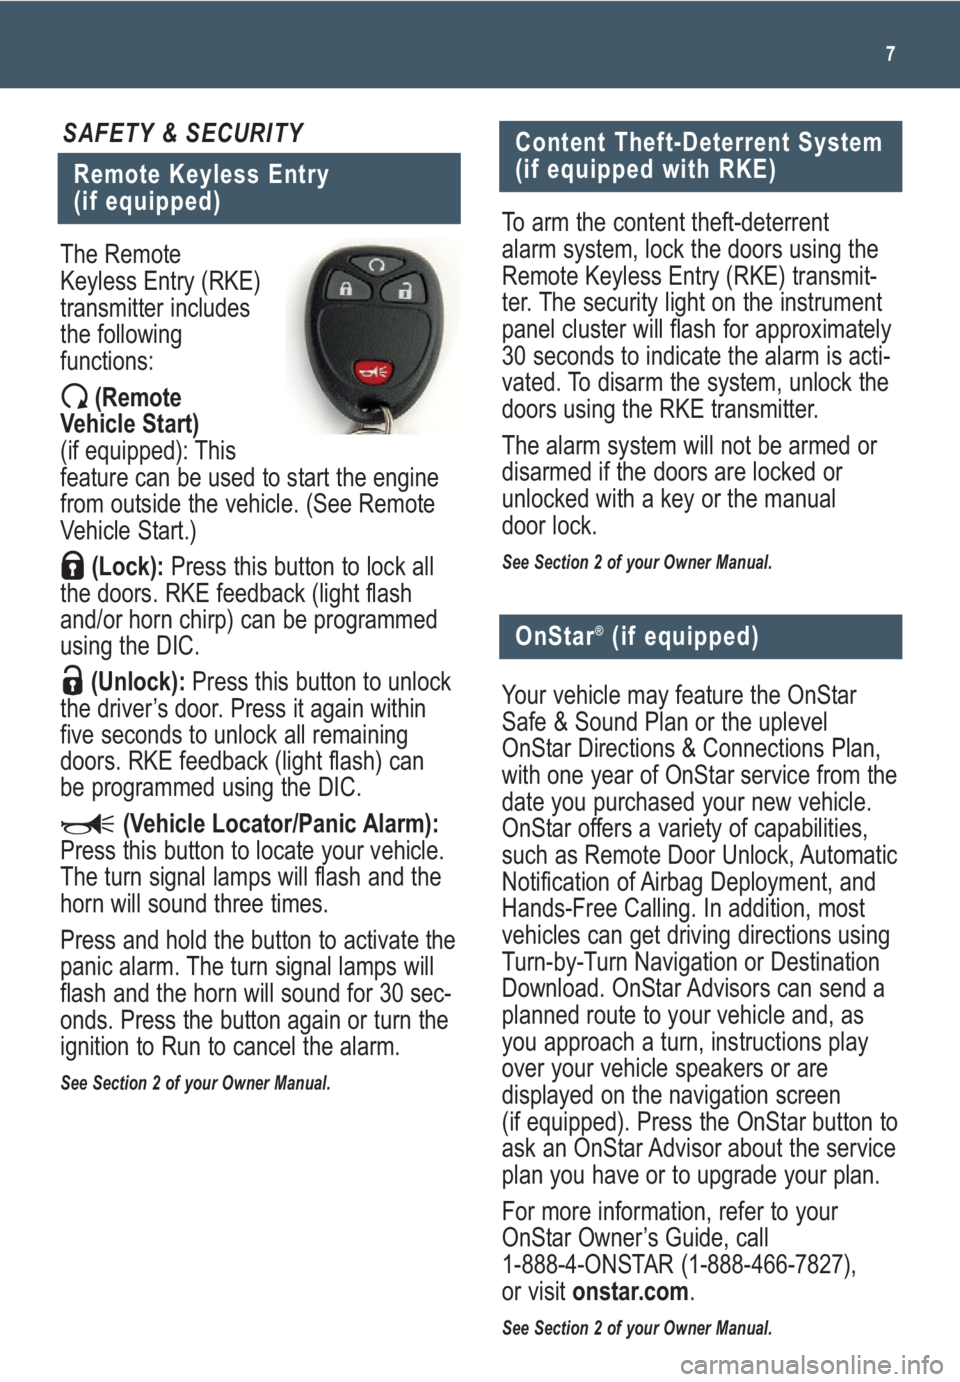
The Remote
Keyless Entry (RKE)
transmitter includes
the following
functions:
(Remote
Vehicle Start)
(if equipped): This
feature can be used to start the engine
from outside the vehicle. (See Remote
Vehicle Start.)
(Lock):Press this button to lock all
the doors. RKE feedback (light flash
and/or horn chirp) can be programmed
using the DIC.
(Unlock):Press this button to unlock
the driver’s door. Press it again within
five seconds to unlock all remaining
doors. RKE feedback (light flash) can
be programmed using the DIC.
(Vehicle Locator/Panic Alarm):
Press this button to locate your vehicle.
The turn signal lamps will flash and the
horn will sound three times.
Press and hold the button to activate the
panic alarm. The turn signal lamps will
flash and the horn will sound for 30 sec-
onds. Press the button again or turn the
ignition to Run to cancel the alarm.
See Section 2 of your Owner Manual.
Content Theft-Deterrent System
(if equipped with RKE)
To arm the content theft-deterrent
alarm system, lock the doors using the
Remote Keyless Entry (RKE) transmit-
ter. The security light on the instrument
panel cluster will flash for approximately
30 seconds to indicate the alarm is acti-
vated. To disarm the system, unlock the
doors using the RKE transmitter.
The alarm system will not be armed or
disarmed if the doors are locked or
unlocked with a key or the manual
door lock.
See Section 2 of your Owner Manual.
Your vehicle may feature the OnStar
Safe & Sound Plan or the uplevel
OnStar Directions & Connections Plan,
with one year of OnStar service from the
date you purchased your new vehicle.
OnStar offers a variety of capabilities,
such as Remote Door Unlock, Automatic
Notification of Airbag Deployment, and
Hands-Free Calling. In addition, most
vehicles can get driving directions using
Turn-by-Turn Navigation or Destination
Download. OnStar Advisors can send a
planned route to your vehicle and, as
you approach a turn, instructions play
over your vehicle speakers or are
displayed on the navigation screen
(if equipped). Press the OnStar button to
ask an OnStar Advisor about the service
plan you have or to upgrade your plan.
For more information, refer to your
OnStar Owner’s Guide, call
1-888-4-ONSTAR (1-888-466-7827),
or visit onstar.com.
See Section 2 of your Owner Manual.
OnStar®(if equipped)
Page 15 of 24
This feature allows you to start the
engine from outside the vehicle by
using the Remote Keyless Entry (RKE)
transmitter. The remote start capability
must be turned on using the Driver
Information Center.
The automatic climate control system
(if equipped) will default to a heating
or cooling mode based on outside tem-
perature, or the manual climate control
system will turn on at the same setting
as when the vehicle was last turned off.
Heated/cooled seats (if equipped)
will also turn on based on outside
temperature.
Starting the Vehicle
To remote-start the vehicle:
1. Aim the RKE transmitter at the vehi-
cle. (Remote Vehicle Start transmitter
range is within approximately 200 feet
of the vehicle.)
2. Press and release the (Lock)
button on the transmitter.
3. Immediately press and hold the
(Remote Vehicle Start) button for
about four seconds. When the park-
ing lights flash, release the button.
The engine will start and the parking
lamps will remain on. The engine will
continue running for 10 minutes.
4. Repeat these steps for a 10-minute
time extension. Only two consecutive
remote starts are allowed.
When you enter the vehicle after a
remote start, the key must be inserted in
the ignition and turned to the Run posi-
tion before driving.
15
Remote Vehicle Start
(if equipped)
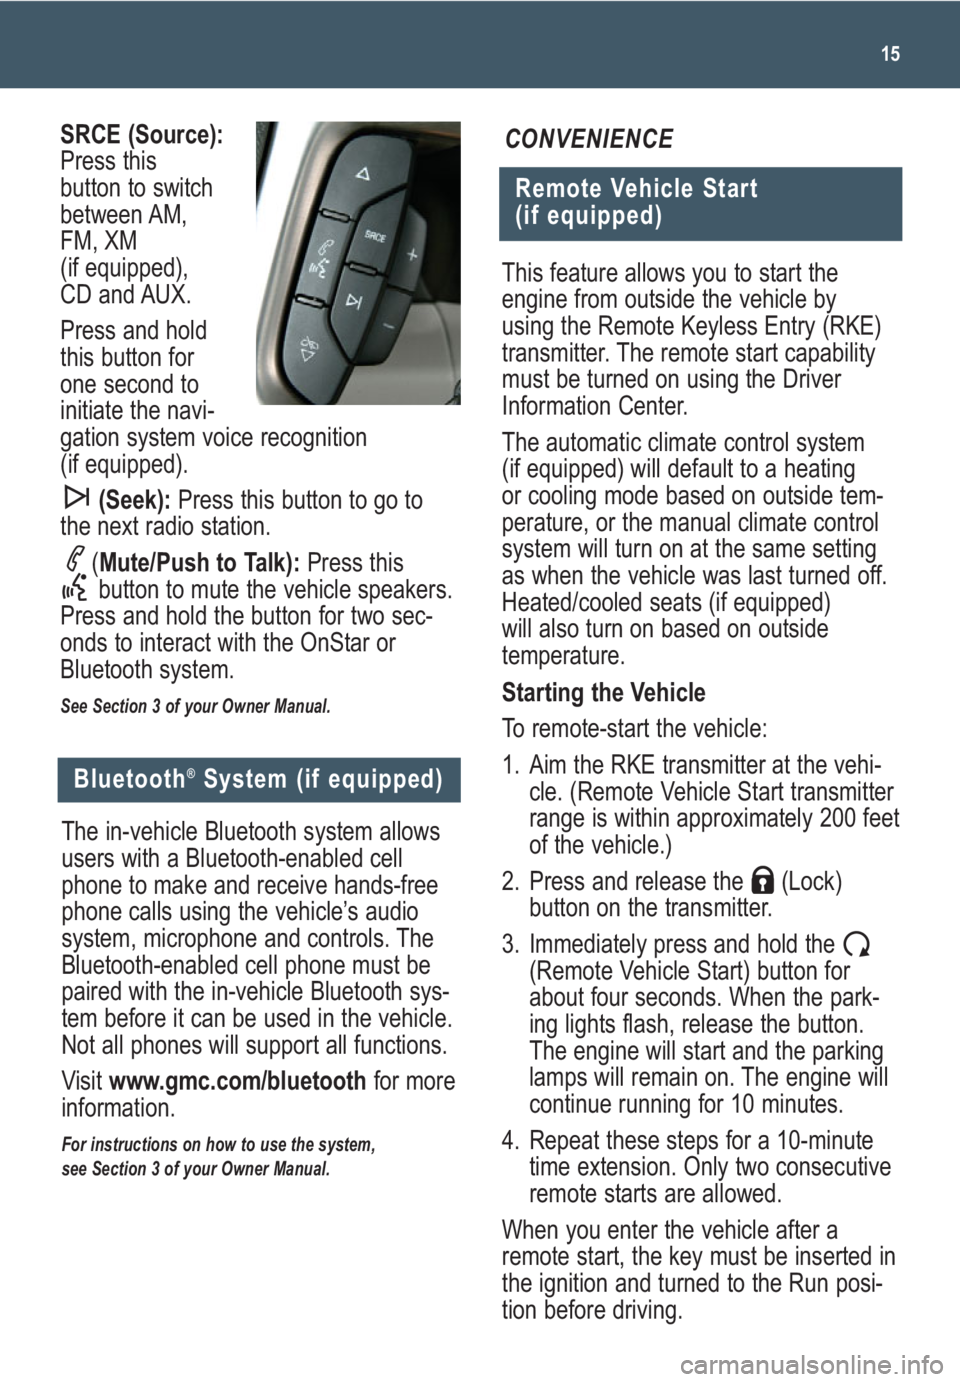
CONVENIENCESRCE (Source):
Press this
button to switch
between AM,
FM, XM
(if equipped),
CD and AUX.
Press and hold
this button for
one second to
initiate the navi-
gation system voice recognition
(if equipped).
(Seek):Press this button to go to
the next radio station.
(Mute/Push to Talk): Press this
button to mute the vehicle speakers.
Press and hold the button for two sec-
onds to interact with the OnStar or
Bluetooth system.
See Section 3 of your Owner Manual.
Bluetooth®System (if equipped)
The in-vehicle Bluetooth system allows
users with a Bluetooth-enabled cell
phone to make and receive hands-free
phone calls using the vehicle’s audio
system, microphone and controls. The
Bluetooth-enabled cell phone must be
paired with the in-vehicle Bluetooth sys-
tem before it can be used in the vehicle.
Not all phones will support all functions.
Visit www.gmc.com/bluetoothfor more
information.
For instructions on how to use the system,
see Section 3 of your Owner Manual.
Page 16 of 24
Getting to Know Your Sierra16
Cruise Control (if equipped)
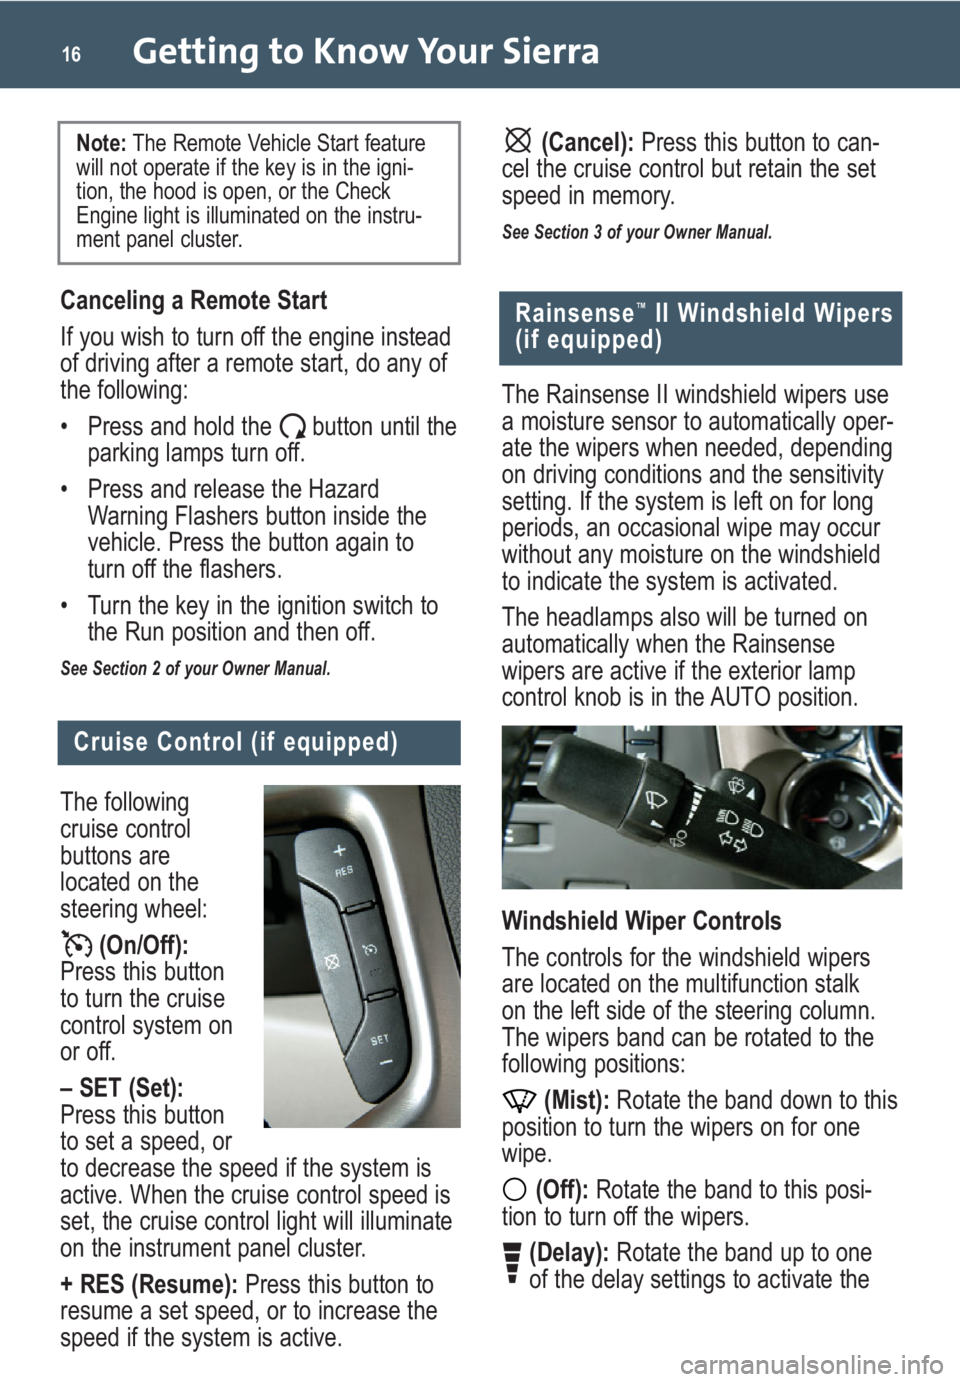
The following
cruise control
buttons are
located on the
steering wheel:
(On/Off):
Press this button
to turn the cruise
control system on
or off.
– SET (Set):
Press this button
to set a speed, or
to decrease the speed if the system is
active. When the cruise control speed is
set, the cruise control light will illuminate
on the instrument panel cluster.
+ RES (Resume):Press this button to
resume a set speed, or to increase the
speed if the system is active.
Rainsense™II Windshield Wipers
(if equipped)
The Rainsense II windshield wipers use
a moisture sensor to automatically oper-
ate the wipers when needed, depending
on driving conditions and the sensitivity
setting. If the system is left on for long
periods, an occasional wipe may occur
without any moisture on the windshield
to indicate the system is activated.
The headlamps also will be turned on
automatically when the Rainsense
wipers are active if the exterior lamp
control knob is in the AUTO position.
Windshield Wiper Controls
The controls for the windshield wipers
are located on the multifunction stalk
on the left side of the steering column.
The wipers band can be rotated to the
following positions:
(Mist):Rotate the band down to this
position to turn the wipers on for one
wipe.
(Off):Rotate the band to this posi-
tion to turn off the wipers.
(Delay):Rotate the band up to one
of the delay settings to activate the
Canceling a Remote Start
If you wish to turn off the engine instead
of driving after a remote start, do any of
the following:
• Press and hold the button until the
parking lamps turn off.
• Press and release the Hazard
Warning Flashers button inside the
vehicle. Press the button again to
turn off the flashers.
• Turn the key in the ignition switch to
the Run position and then off.
See Section 2 of your Owner Manual.
Note: The Remote Vehicle Start feature
will not operate if the key is in the igni-
tion, the hood is open, or the Check
Engine light is illuminated on the instru-
ment panel cluster.(Cancel):Press this button to can-
cel the cruise control but retain the set
speed in memory.
See Section 3 of your Owner Manual.
Page 19 of 24
19
Universal Home Remote
(if equipped)
Automatic Dimming
The automatic dimming feature is turned
on each time the vehicle is started. To
Automatic Dimming Rearview
Mirror (if equipped)
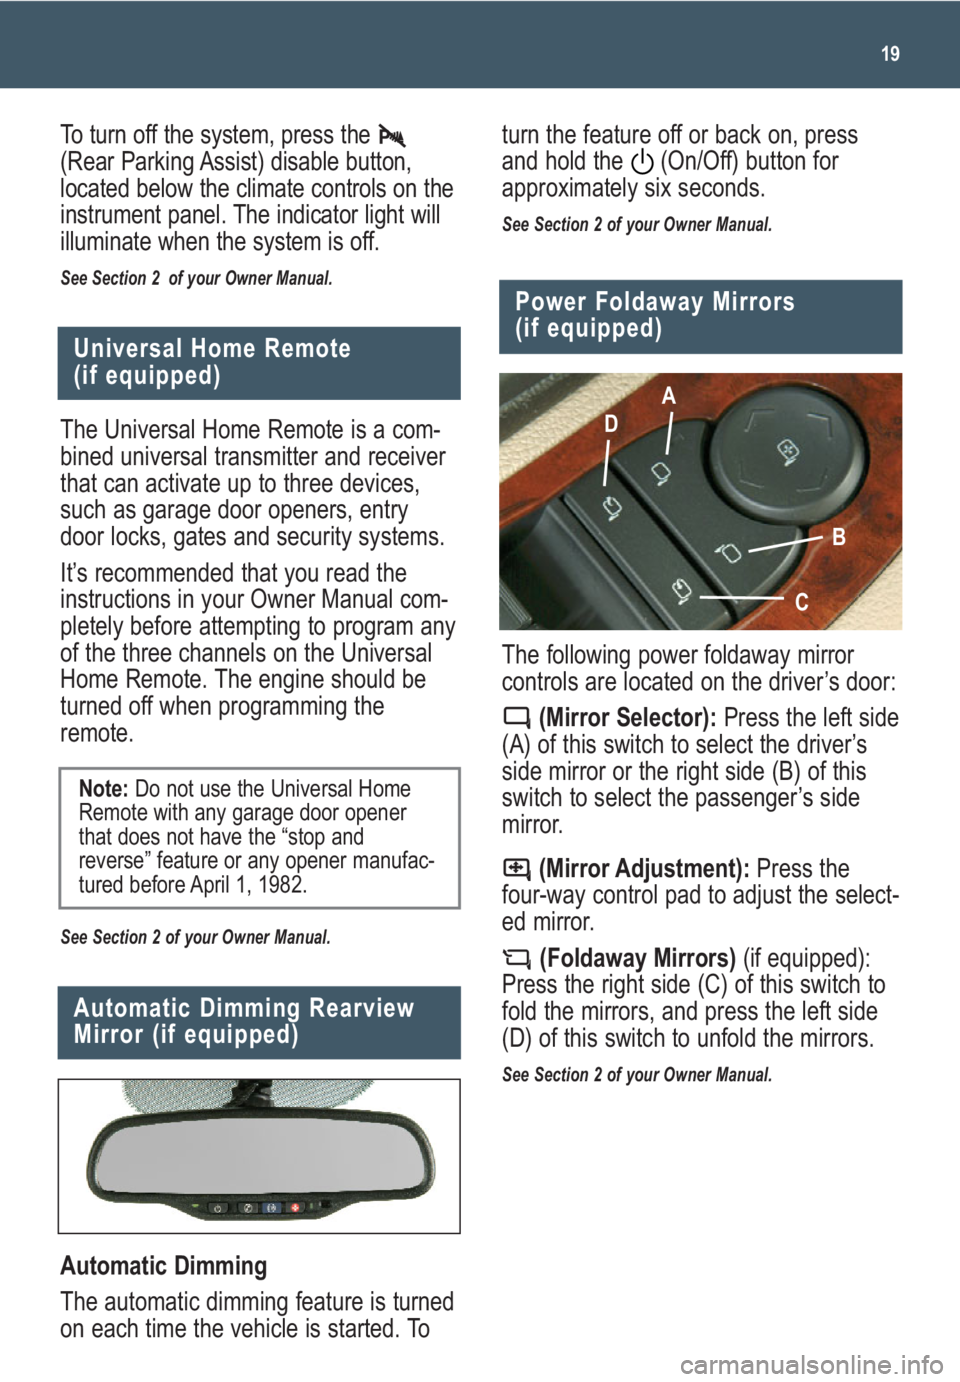
The following power foldaway mirror
controls are located on the driver’s door:
(Mirror Selector):Press the left side
(A) of this switch to select the driver’s
side mirror or the right side (B) of this
switch to select the passenger’s side
mirror.
(Mirror Adjustment):Press the
four-way control pad to adjust the select-
ed mirror.
(Foldaway Mirrors)(if equipped):
Press the right side (C) of this switch to
fold the mirrors, and press the left side
(D) of this switch to unfold the mirrors.
See Section 2 of your Owner Manual.
Power Foldaway Mirrors
(if equipped)
A
D
B
C
The Universal Home Remote is a com-
bined universal transmitter and receiver
that can activate up to three devices,
such as garage door openers, entry
door locks, gates and security systems.
It’s recommended that you read the
instructions in your Owner Manual com-
pletely before attempting to program any
of the three channels on the Universal
Home Remote. The engine should be
turned off when programming the
remote.
See Section 2 of your Owner Manual.
Note:Do not use the Universal Home
Remote with any garage door opener
that does not have the “stop and
reverse” feature or any opener manufac-
tured before April 1, 1982.
To turn off the system, press the
(Rear Parking Assist) disable button,
located below the climate controls on the
instrument panel. The indicator light will
illuminate when the system is off.
See Section 2 of your Owner Manual.
turn the feature off or back on, press
and hold the (On/Off) button for
approximately six seconds.
See Section 2 of your Owner Manual.
Page 22 of 24
The control panel allows you to adjust
the amount of output available to the
electric trailer brakes and to manually
apply the trailer brakes. ITBC system
information is displayed on the Driver
Information Center.
The system is pre-wired from the
factory.
See Section 4 of your Owner Manual.
Getting to Know Your Sierra22
Correcting the Tire Pressure
When the low tire pressure warning light
illuminates, you must inflate the tire to
the proper tire pressure (just as you
must refuel the vehicle when the low
fuel warning light illuminates). The Tire
and Loading Information label shows the
correct tire pressure for the tires when
they’re cold. “Cold” means your vehicle
has been sitting for at least three hours
or driven no more than one mile.
You can temporarily clear the DIC
message by acknowledging it with
your DIC controls. However, at the next
vehicle start-up, the DIC message will
reappear if the tire pressure has not
been corrected.
During cooler conditions, the low tire
pressure warning light may appear when
the vehicle is first started and then turn
off as you start to drive. This could be
an early indicator that your tire pres-
sures are getting low and the tires need
to be inflated to the proper pressure.
See Section 5 of your Owner Manual.
Note:The Tire Pressure Monitor can
alert you about low tire pressure, but it
doesn’t replace normal monthly tire
maintenance.
Integrated Trailer Brake Control
System (if equipped)
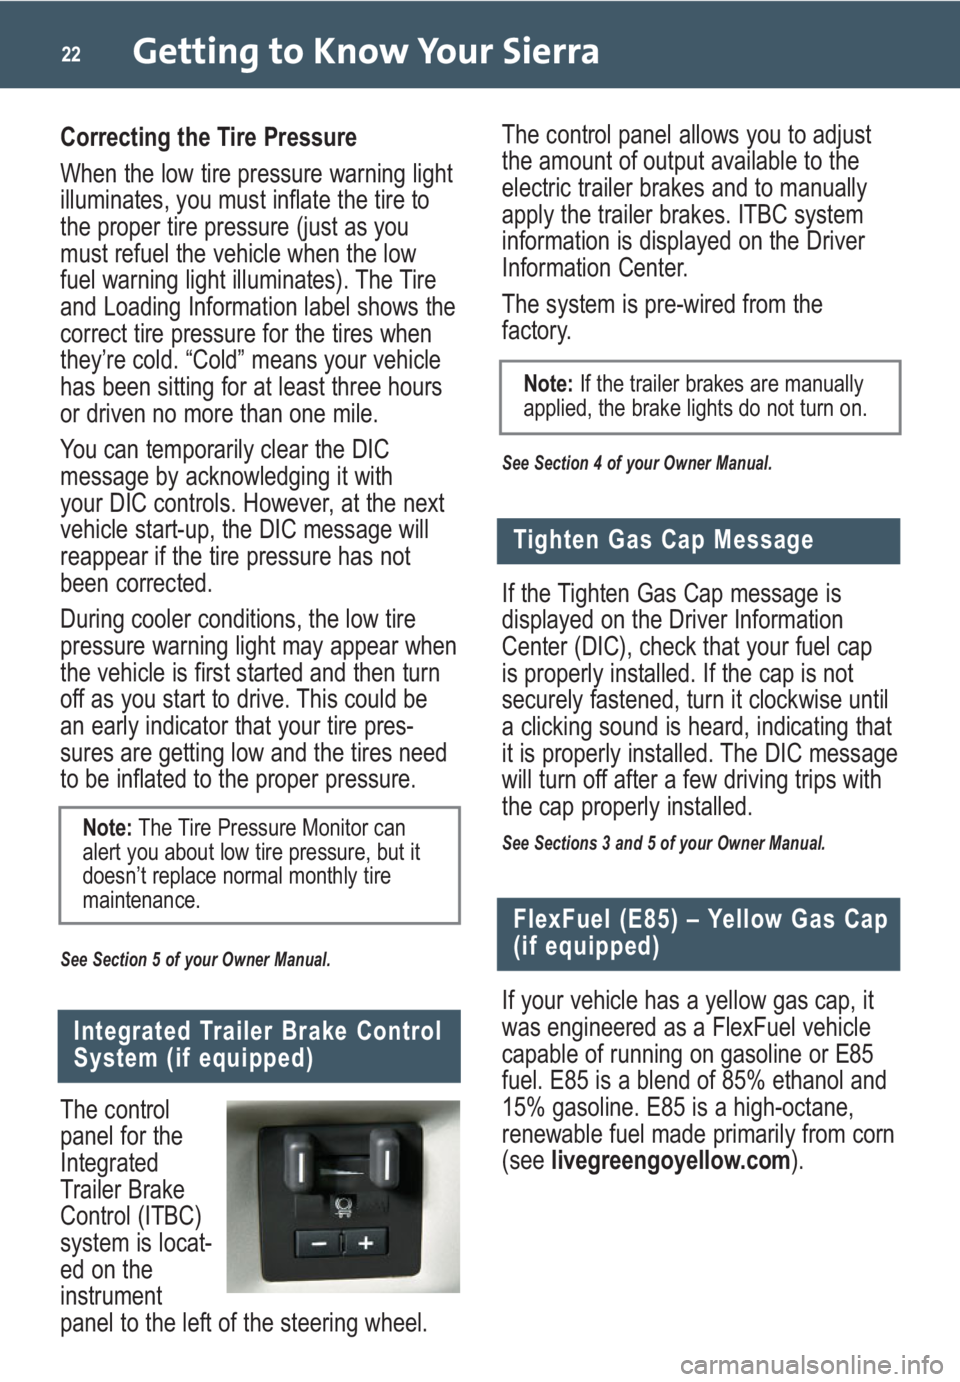
The control
panel for the
Integrated
Trailer Brake
Control (ITBC)
system is locat-
ed on the
instrument
panel to the left of the steering wheel.If the Tighten Gas Cap message is
displayed on the Driver Information
Center (DIC), check that your fuel cap
is properly installed. If the cap is not
securely fastened, turn it clockwise until
a clicking sound is heard, indicating that
it is properly installed. The DIC message
will turn off after a few driving trips with
the cap properly installed.
See Sections 3 and 5 of your Owner Manual.
Tighten Gas Cap Message
If your vehicle has a yellow gas cap, it
was engineered as a FlexFuel vehicle
capable of running on gasoline or E85
fuel. E85 is a blend of 85% ethanol and
15% gasoline. E85 is a high-octane,
renewable fuel made primarily from corn
(see livegreengoyellow.com).
FlexFuel (E85) – Yellow Gas Cap
(if equipped)
Note:If the trailer brakes are manually
applied, the brake lights do not turn on.
Page 23 of 24

Your FlexFuel vehicle automatically
detects the current fuel mixture in the
fuel tank and adjusts engine settings
accordingly. You can fill up with gasoline
or E85, regardless of which fuel is
already in the tank.
E85 is not yet available at all gas sta-
tions. E85 holds less energy per gallon
than gasoline, so drivers will experience
lower miles per gallon and cruising
range when running on E85.
See Section 5 of your Owner Manual.
23
Note: If your vehicle does not have the
yellow gas cap, do not use E85.
The Oil Life System calculates engine oil
life based on vehicle use and displays
CHANGE ENGINE OIL SOON on the
Driver Information Center (DIC) when it’s
necessary to change your engine oil and
filter. The Oil Life System should be
reset to 100% only following an oil
change.
To reset the Oil Life System:
1. Turn on the ignition.
2. Press the (Vehicle Information)
button until the DIC displays OIL LIFE
REMAINING.
3. Press and hold the (Set/Reset)
button until 100% is displayed.
4. Turn off the ignition.
See Section 5 of your Owner Manual.
Resetting the Oil Life System
OWNER INFORMATION
Sierra Accessories
A variety of GM accessories, such as
tubular assist steps, larger wheels and
tires, bedliners and bed extenders,
have been designed exclusively for
your Sierra to enhance its style and
functionality.
Accessories also are available for use
with the cargo management system,
including an overhead rack, sliding
metal toolbox, sliding metal bed divider,
and sliding metal side storage boxes.
Visit www.gmc.com, or see your GMC
dealer for information about the avail-
ability and installation of select Sierra
accessories.