keyless GMC SIERRA 2010 User Guide
[x] Cancel search | Manufacturer: GMC, Model Year: 2010, Model line: SIERRA, Model: GMC SIERRA 2010Pages: 630, PDF Size: 4.65 MB
Page 153 of 630
Sun Visors
Pull the sun visor down to block glare. Swing the sun
visor to the side to cover the side window.
The passenger's side sun visor may have a vanity
mirror.
Theft-Deterrent Systems
Vehicle theft is big business, especially in some cities.
This vehicle has theft-deterrent features, however, they
do not make it impossible to steal.
Content Theft-Deterrent
Your vehicle may have a content theft-deterrent alarm
system.
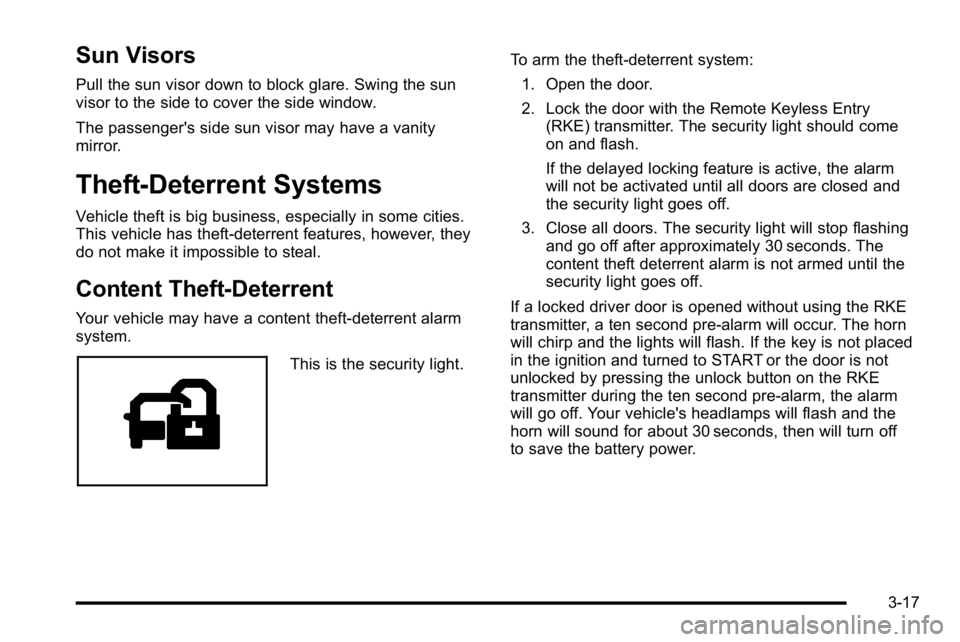
This is the security light.To arm the theft-deterrent system:
1. Open the door.
2. Lock the door with the Remote Keyless Entry (RKE) transmitter. The security light should come
on and flash.
If the delayed locking feature is active, the alarm
will not be activated until all doors are closed and
the security light goes off.
3. Close all doors. The security light will stop flashing and go off after approximately 30 seconds. The
content theft deterrent alarm is not armed until the
security light goes off.
If a locked driver door is opened without using the RKE
transmitter, a ten second pre-alarm will occur. The horn
will chirp and the lights will flash. If the key is not placed
in the ignition and turned to START or the door is not
unlocked by pressing the unlock button on the RKE
transmitter during the ten second pre-alarm, the alarm
will go off. Your vehicle's headlamps will flash and the
horn will sound for about 30 seconds, then will turn off
to save the battery power.
3-17
Page 231 of 630

If the vehicle is started in a dark garage, the automatic
headlamp system comes on immediately. Once the
vehicle leaves the garage, it takes approximately
one minute for the automatic headlamp system to
change to DRL if it is bright enough outside. During that
delay, the instrument panel cluster may not be as bright
as usual. Make sure the instrument panel brightness
control is in the full bright position. SeeInstrument
Panel Brightness on page 4‑14.
To idle the vehicle with the automatic headlamp system
off, turn the control to the off position.
The headlamps will also stay on after you exit the
vehicle. This feature can be programmed using the
Driver Information Center (DIC), if equipped. See DIC
Vehicle Customization (With DIC Buttons)
on
page 4‑75.
If the vehicle is not equipped with DIC buttons, exit
lighting is automatic. When it is dark enough outside,
the exterior lamps remain on for 30 seconds after the
ignition is moved from ON/RUN to LOCK/OFF.
For vehicles without a radio, the instrument panel light
remains on for 30 seconds with the driver's door closed.
For vehicles with a radio, the instrument panel light
remains on for 10 minutes with the driver's door closed.
See Retained Accessory Power (RAP) on page 3‑23.
The regular headlamp system can be turned on when
needed.
Puddle Lamps
If the vehicle has puddle lamps, they come on when the
unlock button on the Remote Keyless Entry (RKE)
Transmitter is pressed. The lamps time out or turn off
once the engine is started.
Fog Lamps
For vehicles with fog lamps, the control is located next
to the exterior lamps control on the instrument panel,
to the left of the steering column.
The ignition must be in the ON/RUN position for the
fog lamps to come on.
#(Fog Lamps): Press to turn the fog lamps on or off.
A light will come on in the instrument panel cluster.
When the fog lamps are turned on, the parking lamps
automatically turn on.
When the headlamps are changed to high-beam, the
fog lamps also go off. When the high-beam headlamps
are turned off, the fog lamps will come on again.
Some localities have laws that require the headlamps
to be on along with the fog lamps.
4-13
Page 270 of 630

DIC Buttons
The buttons are the
trip/fuel, vehicle
information,
customization, and
set/reset buttons.
The button functions
are detailed in the
following pages.
3(Trip/Fuel):Press this button to display the
odometer, trip odometer, fuel range, average economy,
fuel used, timer, instantaneous economy and Active
Fuel Management™ indicator, and transmission
temperature. The compass and outside temperature will
also be shown in the display. The temperature will be
shown in °F or °C depending on the units selected.
T(Vehicle Information): Press this button to display
the oil life, units, tire pressure readings for vehicles with
the Tire Pressure Monitor System (TPMS), trailer brake
gain and output information for vehicles with the Integrated Trailer Brake Control (ITBC) system, engine
hours, Remote Keyless Entry (RKE) transmitter
programming, compass zone setting, and compass
recalibration.
U(Customization):
Press this button to customize the
feature settings on your vehicle. See DIC Vehicle
Customization (With DIC Buttons)
on page 4‑75for
more information.
V(Set/Reset): Press this button to set or reset certain
functions and to turn off or acknowledge messages on
the DIC.
Trip/Fuel Menu Items
3
(Trip/Fuel): Press this button to scroll through the
following menu items:
Odometer
Press the trip/fuel button until ODOMETER displays.
This display shows the distance the vehicle has been
driven in either miles (mi) or kilometers (km). Pressing
the trip odometer reset stem will also display the
odometer.
To switch between English and metric measurements,
see “Units” later in this section.
4-52
Page 274 of 630
If the tire pressure display shows dashes instead of a
value, there may be a problem with your vehicle. If this
consistently occurs, see your dealer/retailer for service.
Trailer Gain and Output
On vehicles with the Integrated Trailer Brake Control
(ITBC) system, the trailer brake display appears in
the DIC. Press the vehicle information button until
TRAILER GAIN and OUTPUT display.
TRAILER GAIN shows the trailer gain setting. This
setting can be adjusted from 0.0 to 10.0 with either a
trailer connected or disconnected. To adjust this setting,
see“Integrated Trailer Brake Control System” under
Towing a Trailer
on page 5‑50for more information.
OUTPUT shows the power output to the trailer anytime
a trailer with electric brakes is connected. Output is
displayed in 0 to 10 bars. Dashes may appear in the
OUTPUT display. See “Integrated Trailer Brake Control
System” underTowing a Trailer
on page 5‑50for more
information.
Engine Hours
Press the vehicle information button until ENGINE
HOURS displays. This display shows the total number
of hours the engine has run.
Relearn Remote Key
This display allows you to match Remote Keyless Entry
(RKE) transmitters to your vehicle. This procedure will
erase all previously learned transmitters. Therefore,
they must be relearned as additional transmitters.
To match an RKE transmitter to your vehicle:
1. Press the vehicle information button until PRESS
VTO RELEARN REMOTE KEY displays.
2. Press the set/reset button until REMOTE KEY LEARNING ACTIVE is displayed.
3. Press and hold the lock and unlock buttons on the first transmitter at the same time for about
15 seconds.
On vehicles with memory recall seats, the first
transmitter learned will match driver 1 and the
second will match driver 2.
A chime will sound indicating that the transmitter
is matched.
4. To match additional transmitters at this time, repeat Step 3.
Each vehicle can have a maximum of eight
transmitters matched to it.
5. To exit the programming mode, you must cycle the key to LOCK/OFF.
4-56
Page 276 of 630

Language
This display allows you to select the language in which
the DIC messages will appear. To select a language:1. Press the trip odometer reset stem until ODOMETER displays.
2. While in the ODOMETER display, press and hold the trip odometer reset stem for three seconds until
the currently set language displays.
3. Continue to press and hold the trip odometer reset stem to scroll through all of the available
languages.
The available selections are ENGLISH (default),
FRANCAIS (French), ESPANOL (Spanish), and
NO CHANGE.
4. Once the desired language is displayed, release the trip odometer reset stem to set your choice.
Engine Hours
To display the ENGINE HOURS, place the ignition in
LOCK/OFF or ACC/ACCESSORY, then press and hold
the trip odometer reset stem for four seconds while
viewing the ODOMETER. This display shows the total
number of hours the engine has run.
DIC Operation and Displays
(Without DIC Buttons)
If your vehicle does not have DIC buttons, the
information below explains the operation of this system.
The DIC has different displays which can be accessed
by pressing the trip odometer reset stem located on the
instrument panel cluster. Pressing the trip odometer
reset stem will also turn off, or acknowledge, DIC
messages.
The DIC displays trip and vehicle system information,
and warning messages if a system problem is detected.
If the vehicle does not have DIC buttons, you can use
the trip odometer reset stem to view the following
displays: language selection, trip odometer,
transmission temperature, trailer brake gain and output
information for vehicles with the Integrated Trailer Brake
Control (ITBC) system, compass zone setting, compass
recalibration, oil life, Tire Pressure Monitor System
(TPMS) programming for vehicles with the TPMS, and
Remote Keyless Entry (RKE) transmitter programming.
4-58
Page 279 of 630

Remember, you must reset the OIL LIFE display
yourself after each oil change. It will not reset itself.
Also, be careful not to reset the OIL LIFE display
accidentally at any time other than when the oil has just
been changed. It cannot be reset accurately until the
next oil change. To reset the engine oil life system,
seeEngine Oil Life System on page 6‑20.
Relearn Tire Positions
Your vehicle may have this display. To access this
display, the vehicle must be in P (Park). If your vehicle
has the Tire Pressure Monitor System (TPMS), after
rotating the tires or after replacing a tire or sensor, the
system must re-learn the tire positions. To re-learn the
tire positions, see Tire Pressure Monitor System
on
page 6‑75. See Tire Inspection and Rotationon
page 6‑80and DIC Warnings and Messageson
page 4‑65for more information.
Relearn Remote Key
To access this display, the vehicle must be in P (Park).
This display allows you to match Remote Keyless Entry
(RKE) transmitters to your vehicle. This procedure will
erase all previously learned transmitters. Therefore,
they must be relearned as additional transmitters. To match an RKE transmitter to your vehicle:
1. Press the trip odometer reset stem until RELEARN REMOTE KEY displays.
2. Press and hold the trip odometer reset stem for three seconds.
The message REMOTE KEY LEARNING ACTIVE
will display.
3. Press and hold the lock and unlock buttons on the first transmitter at the same time for about
15 seconds.
On vehicles with memory recall seats, the first
transmitter learned will match driver 1 and the
second will match driver 2.
A chime will sound indicating that the transmitter
is matched.
4. To match additional transmitters at this time, repeat Step 3.
Each vehicle can have a maximum of eight
transmitters matched to it.
5. To exit the programming mode, you must cycle the key to LOCK/OFF.
4-61
Page 287 of 630
PASSENGER DOOR OPEN
This message displays and a chime may sound if the
front passenger door is not fully closed and the vehicle
is shifted out of P (Park). Stop and turn off the vehicle,
check the door for obstructions, and close the door
again. Check to see if the message still appears on
the DIC.
REMOTE KEY LEARNING ACTIVE
This message may display while you are matching a
Remote Keyless Entry (RKE) transmitter to your
vehicle. See“Matching Transmitter(s) to Your Vehicle”
under Remote Keyless Entry (RKE) System Operation
on page 3‑4andDIC Operation and Displays (With
DIC Buttons)on page 4‑51or DIC Operation and
Displays (Without DIC Buttons)on page 4‑58for more
information.
REPLACE BATTERY IN REMOTE KEY
This message displays if a Remote Keyless Entry
(RKE) transmitter battery is low. The battery needs to
be replaced in the transmitter. See “Battery
Replacement” underRemote Keyless Entry (RKE)
System Operation on page 3‑4.
RIGHT REAR DOOR OPEN (Crew Cab)
This message displays and a chime may sound if the
passenger side rear door is not fully closed and the
vehicle is shifted out of P (Park). Stop and turn off the
vehicle, check the door for obstructions, and close the
door again. Check to see if the message still appears
on the DIC.
SERVICE 4 WHEEL DRIVE
If the vehicle has four-wheel drive, this message may
display if a problem occurs with the four-wheel-drive
system. If this message appears, stop as soon as
possible and turn off the vehicle. Make sure the key is
in the LOCK/OFF position for at least one minute and
then restart the vehicle and check for the message on
the DIC display. If the message is still displayed or
appears again when you begin driving, the
four-wheel-drive system needs service. See your
dealer/retailer.
SERVICE AIR BAG
This message displays if there is a problem with the
airbag system. Have your dealer/retailer inspect the
system for problems. See Airbag Readiness Light
on
page 4‑33and Airbag Systemon page 2‑73for more
information.
4-69
Page 295 of 630
AUTO DOOR UNLOCK
This feature allows you to select whether or not to turn
off the automatic door unlocking feature. It also allows
you to select which doors and when the doors will
automatically unlock. SeeProgrammable Automatic
Door Locks
on page 3‑10for more information.
Press the customization button until AUTO DOOR
UNLOCK appears on the DIC display. Press the set/
reset button once to access the settings for this feature.
Then press the customization button to scroll through
the following settings:
OFF : None of the doors will automatically unlock.
DRIVER AT KEY OUT : Only the driver's door will
unlock when the key is taken out of the ignition.
DRIVER IN PARK : Only the driver's door will unlock
when the vehicle is shifted into P (Park) .
ALL AT KEY OUT : All of the doors will unlock when
the key is taken out of the ignition.
ALL IN PARK (default) : All of the doors will unlock
when the vehicle is shifted into P (Park).
NO CHANGE : No change will be made to this feature.
The current setting will remain.
To select a setting, press the set/reset button while the
desired setting is displayed on the DIC.
REMOTE DOOR LOCK
This feature allows you to select the type of feedback
you will receive when locking the vehicle with the
Remote Keyless Entry (RKE) transmitter. You will not
receive feedback when locking the vehicle with the
RKE transmitter if the doors are open. See Remote
Keyless Entry (RKE) System Operation
on page 3‑4for more information.
Press the customization button until REMOTE DOOR
LOCK appears on the DIC display. Press the set/reset
button once to access the settings for this feature.
Then press the customization button to scroll through
the following settings:
OFF : There will be no feedback when you press the
lock button on the RKE transmitter.
LIGHTS ONLY : The exterior lamps will flash when you
press the lock button on the RKE transmitter.
HORN ONLY : The horn will sound on the second press
of the lock button on the RKE transmitter.
HORN & LIGHTS (default) : The exterior lamps will
flash when you press the lock button on the RKE
transmitter, and the horn will sound when the lock
button is pressed again within five seconds of the
previous command.
4-77
Page 296 of 630
NO CHANGE :No change will be made to this feature.
The current setting will remain.
To select a setting, press the set/reset button while the
desired setting is displayed on the DIC.
REMOTE DOOR UNLOCK
This feature allows you to select the type of feedback
you will receive when unlocking the vehicle with the
Remote Keyless Entry (RKE) transmitter. You will not
receive feedback when unlocking the vehicle with the
RKE transmitter if the doors are open. See Remote
Keyless Entry (RKE) System Operation
on page 3‑4for more information.
Press the customization button until REMOTE DOOR
UNLOCK appears on the DIC display. Press the set/
reset button once to access the settings for this feature.
Then press the customization button to scroll through
the following settings:
LIGHTS OFF : The exterior lamps will not flash when
you press the unlock button on the RKE transmitter.
LIGHTS ON (default) : The exterior lamps will flash
when you press the unlock button on the RKE
transmitter.
NO CHANGE : No change will be made to this feature.
The current setting will remain.
To select a setting, press the set/reset button while the
desired setting is displayed on the DIC.
DELAY DOOR LOCK
On vehicles with a crew cab, this feature allows you to
select whether or not the locking of the vehicle's doors
will be delayed. When locking the doors with the power
door lock switch and a door is open, this feature will
delay locking the doors until five seconds after the last
door is closed. You will hear three chimes to signal that
the delayed locking feature is in use. The key must be
out of the ignition for this feature to work. You can
temporarily override delayed locking by pressing the
power door lock switch twice. See Delayed Locking
on
page 3‑10for more information.
Press the customization button until DELAY DOOR
LOCK appears on the DIC display. Press the set/reset
button once to access the settings for this feature.
Then press the customization button to scroll through
the following settings:
OFF : There will be no delayed locking of the vehicle's
doors.
ON (default) : The doors will not lock until five seconds
after the last door is closed.
NO CHANGE : No change will be made to this feature.
The current setting will remain.
To select a setting, press the set/reset button while the
desired setting is displayed on the DIC.
4-78
Page 297 of 630
EXIT LIGHTING
This feature allows you to select the amount of time you
want the exterior lamps to remain on when it is dark
enough outside. This happens after the key is turned
from ON/RUN to LOCK/OFF.
Press the customization button until EXIT LIGHTING
appears on the DIC display. Press the set/reset button
once to access the settings for this feature. Then press
the customization button to scroll through the following
settings:
OFF :The exterior lamps will not turn on.
30 SECONDS (default) : The exterior lamps will stay
on for 30 seconds.
1 MINUTE : The exterior lamps will stay on for
one minute.
2 MINUTES : The exterior lamps will stay on for
two minutes.
NO CHANGE : No change will be made to this feature.
The current setting will remain.
To select a setting, press the set/reset button while the
desired setting is displayed on the DIC.
APPROACH LIGHTING
This feature allows you to select whether or not to have
the exterior lights turn on briefly during low light periods
after unlocking the vehicle using the Remote Keyless
Entry (RKE) transmitter.
Press the customization button until APPROACH
LIGHTING appears on the DIC display. Press the
set/reset button once to access the settings for this
feature. Then press the customization button to scroll
through the following settings:
OFF : The exterior lights will not turn on when you
unlock the vehicle with the RKE transmitter.
ON (default) : If it is dark enough outside, the exterior
lights will turn on briefly when you unlock the vehicle
with the RKE transmitter.
The lights will remain on for 20 seconds or until the lock
button on the RKE transmitter is pressed, or the vehicle
is no longer off. See Remote Keyless Entry (RKE)
System Operation
on page 3‑4for more information.
NO CHANGE : No change will be made to this feature.
The current setting will remain.
To select a setting, press the set/reset button while the
desired setting is displayed on the DIC.
4-79