service schedule GMC SIERRA 2010 Owner's Manual
[x] Cancel search | Manufacturer: GMC, Model Year: 2010, Model line: SIERRA, Model: GMC SIERRA 2010Pages: 630, PDF Size: 4.65 MB
Page 2 of 630

2010 GMC Sierra Owner ManualM
Instrument Panel. . . . . . . . . . . . . . . . . . . . . . . . . . . . . . . . . 4-1
Instrument Panel Overview . . . . . . . . . . . . . . . . . . . . . . . 4-3
Climate Controls . . . . . . . . . . . . . . . . . . . . . . . . . . . . . . . . 4-18
Warning Lights, Gages, and Indicators . . . . . . . . . . 4-29
Driver Information Center (DIC) . . . . . . . . . . . . . . . . . 4-51
Audio System(s) . . . . . . . . . . . . . . . . . . . . . . . . . . . . . . . . 4-84
Driving Your Vehicle . . . . . . . . . . . . . . . . . . . . . . . . . . . . . . 5-1
Your Driving, the Road, and the Vehicle . . . . . . . . . . 5-2
Towing . . . . . . . . . . . . . . . . . . . . . . . . . . . . . . . . . . . . . . . . . . 5-43
Service and Appearance Care . . . . . . . . . . . . . . . . . . . 6-1
Service . . . . . . . . . . . . . . . . . . . . . . . . . . . . . . . . . . . . . . . . . . . 6-4
Fuel . . . . . . . . . . . . . . . . . . . . . . . . . . . . . . . . . . . . . . . . . . . . . . 6-6
Checking Things Under the Hood . . . . . . . . . . . . . . . 6-14
Rear Axle . . . . . . . . . . . . . . . . . . . . . . . . . . . . . . . . . . . . . . . 6-48
Four-Wheel Drive . . . . . . . . . . . . . . . . . . . . . . . . . . . . . . . 6-50
Front Axle . . . . . . . . . . . . . . . . . . . . . . . . . . . . . . . . . . . . . . . 6-52 Noise Control System . . . . . . . . . . . . . . . . . . . . . . . . . . . 6-53
Headlamp Aiming . . . . . . . . . . . . . . . . . . . . . . . . . . . . . . . 6-54
Bulb Replacement . . . . . . . . . . . . . . . . . . . . . . . . . . . . . . 6-57
Windshield Wiper Blade Replacement . . . . . . . . . . . 6-63
Tires . . . . . . . . . . . . . . . . . . . . . . . . . . . . . . . . . . . . . . . . . . . . 6-64
Appearance Care . . . . . . . . . . . . . . . . . . . . . . . . . . . . . . 6-110
Vehicle Identification . . . . . . . . . . . . . . . . . . . . . . . . . . . 6-117
Electrical System . . . . . . . . . . . . . . . . . . . . . . . . . . . . . . 6-117
Capacities and Specifications . . . . . . . . . . . . . . . . . . 6-126
Maintenance Schedule . . . . . . . . . . . . . . . . . . . . . . . . . . . 7-1
Maintenance Schedule . . . . . . . . . . . . . . . . . . . . . . . . . . . 7-2
Customer Assistance Information . . . . . . . . . . . . . . . 8-1
Customer Assistance and Information . . . . . . . . . . . . 8-2
Reporting Safety Defects . . . . . . . . . . . . . . . . . . . . . . . . 8-15
Vehicle Data Recording and Privacy . . . . . . . . . . . . . 8-18
Index . . . . . . . . . . . . . . . . . . . . . . . . . . . . . . . . . . . . i-1
Page 135 of 630
Restraint System Check
Checking the Restraint Systems
Safety Belts
Now and then, check that the safety belt reminder light,
safety belts, buckles, latch plates, retractors, and
anchorages are all working properly.
Look for any other loose or damaged safety belt system
parts that might keep a safety belt system from doing its
job. See your dealer/retailer to have it repaired. Torn or
frayed safety belts may not protect you in a crash. They
can rip apart under impact forces. If a belt is torn or
frayed, get a new one right away.
Make sure the safety belt reminder light is working.
SeeSafety Belt Reminders
on page 4‑32for more
information.
Keep safety belts clean and dry. See Care of Safety
Belts
on page 6‑112.
Airbags
The airbag system does not need regularly scheduled
maintenance or replacement. Make sure the airbag
readiness light is working. See Airbag Readiness Light
on page 4‑33for more information.
Notice: If an airbag covering is damaged, opened,
or broken, the airbag may not work properly. Do not
open or break the airbag coverings. If there are any
opened or broken airbag covers, have the airbag
covering and/or airbag module replaced. For the
location of the airbag modules, see What Makes an
Airbag Inflate?
on page 2‑79. See your dealer/
retailer for service.
2-93
Page 264 of 630
Oil Pressure Gage
United StatesCanada
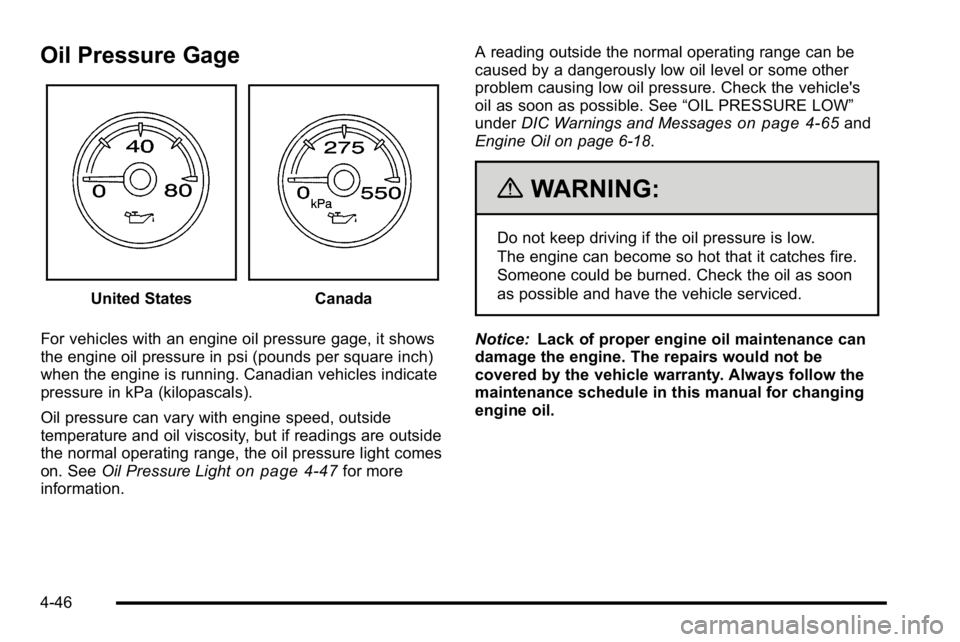
For vehicles with an engine oil pressure gage, it shows
the engine oil pressure in psi (pounds per square inch)
when the engine is running. Canadian vehicles indicate
pressure in kPa (kilopascals).
Oil pressure can vary with engine speed, outside
temperature and oil viscosity, but if readings are outside
the normal operating range, the oil pressure light comes
on. See Oil Pressure Light
on page 4‑47for more
information. A reading outside the normal operating range can be
caused by a dangerously low oil level or some other
problem causing low oil pressure. Check the vehicle's
oil as soon as possible. See
“OIL PRESSURE LOW”
under DIC Warnings and Messages
on page 4‑65and
Engine Oil on page 6‑18.
{WARNING:
Do not keep driving if the oil pressure is low.
The engine can become so hot that it catches fire.
Someone could be burned. Check the oil as soon
as possible and have the vehicle serviced.
Notice: Lack of proper engine oil maintenance can
damage the engine. The repairs would not be
covered by the vehicle warranty. Always follow the
maintenance schedule in this manual for changing
engine oil.
4-46
Page 265 of 630
Oil Pressure Light
{WARNING:
Do not keep driving if the oil pressure is low.
The engine can become so hot that it catches fire.
Someone could be burned. Check the oil as soon
as possible and have the vehicle serviced.Notice:
Lack of proper engine oil maintenance
can damage the engine. The repairs would not be
covered by the vehicle warranty. Always follow the
maintenance schedule in this manual for changing
engine oil.
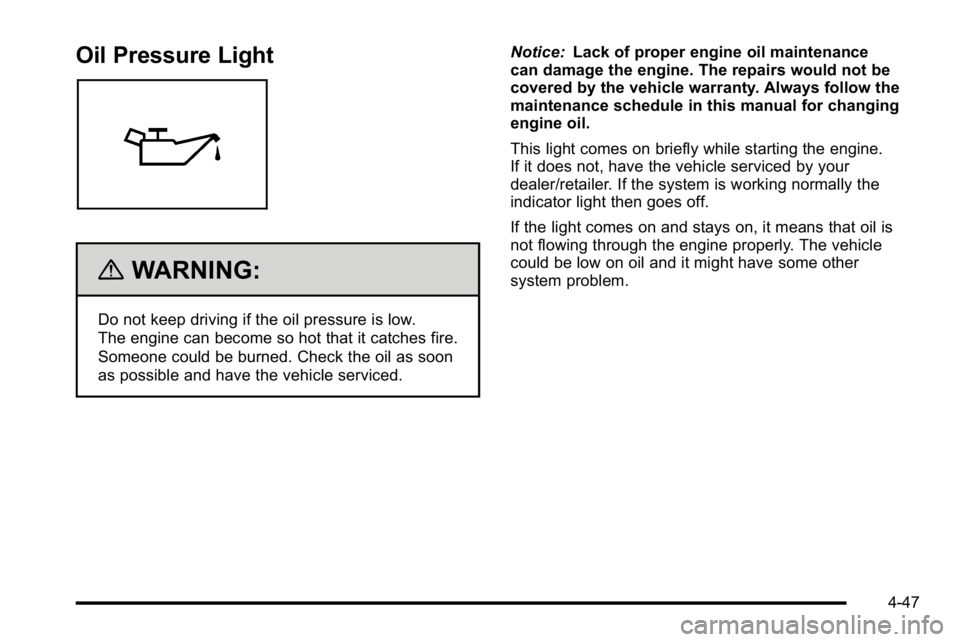
This light comes on briefly while starting the engine.
If it does not, have the vehicle serviced by your
dealer/retailer. If the system is working normally the
indicator light then goes off.
If the light comes on and stays on, it means that oil is
not flowing through the engine properly. The vehicle
could be low on oil and it might have some other
system problem.
4-47
Page 390 of 630
Driving in Water
{WARNING:
Driving through rushing water can be dangerous.
Deep water can sweep your vehicle downstream
and you and your passengers could drown. If it is
only shallow water, it can still wash away the
ground from under your tires, and you could lose
traction and roll the vehicle over. Do not drive
through rushing water.
Heavy rain can mean flash flooding, and flood waters
demand extreme caution.
Find out how deep the water is before driving through
it. Do not try it if it is deep enough to cover the wheel
hubs, axles, or exhaust pipe —you probably will not
get through. Deep water can damage the axle and
other vehicle parts. If the water is not too deep, drive slowly through it. At
faster speeds, water splashes on the ignition system
and the vehicle can stall. Stalling can also occur if you
get the tailpipe under water. If the tailpipe is under
water, you will never be able to start the engine. When
going through water, remember that when the brakes
get wet, it might take longer to stop. See
Driving in Rain
and on Wet Roads on page 5‑23.
After Off-Road Driving
Remove any brush or debris that has collected on the
underbody, chassis, or under the hood. These
accumulations can be a fire hazard.
After operation in mud or sand, have the brake linings
cleaned and checked. These substances can cause
glazing and uneven braking. Check the body structure,
steering, suspension, wheels, tires, and exhaust system
for damage and check the fuel lines and cooling system
for any leakage.
The vehicle requires more frequent service due to
off-road use. Refer to the Maintenance Schedule for
additional information.
5-22
Page 442 of 630
Maintenance When Trailer Towing
The vehicle needs service more often when pulling a
trailer. See this manual's Maintenance Schedule or
Index for more information. Things that are especially
important in trailer operation are automatic transmission
fluid, engine oil, axle lubricant, belts, cooling system
and brake system. It is a good idea to inspect these
before and during the trip.
Check periodically to see that all hitch nuts and bolts
are tight.
Trailer Wiring Harness
The vehicle is equipped with one of the following wiring
harnesses for towing a trailer or hauling a slide-in
camper.
Basic Trailer Wiring
All regular, extended cab and crew cab pickups have a
seven‐wire trailer towing harness.
For vehicles not equipped with heavy duty trailering, the
harness is secured to the vehicle's frame behind the
spare tire mount. The harness requires the installation
of a trailer connector, which is available through your
dealer/retailer.
If towing a light‐duty trailer with a standard four‐way
round pin connector, an adapter is available from your
dealer/retailer.
Heavy-DutyTrailer Wiring Harness
Package
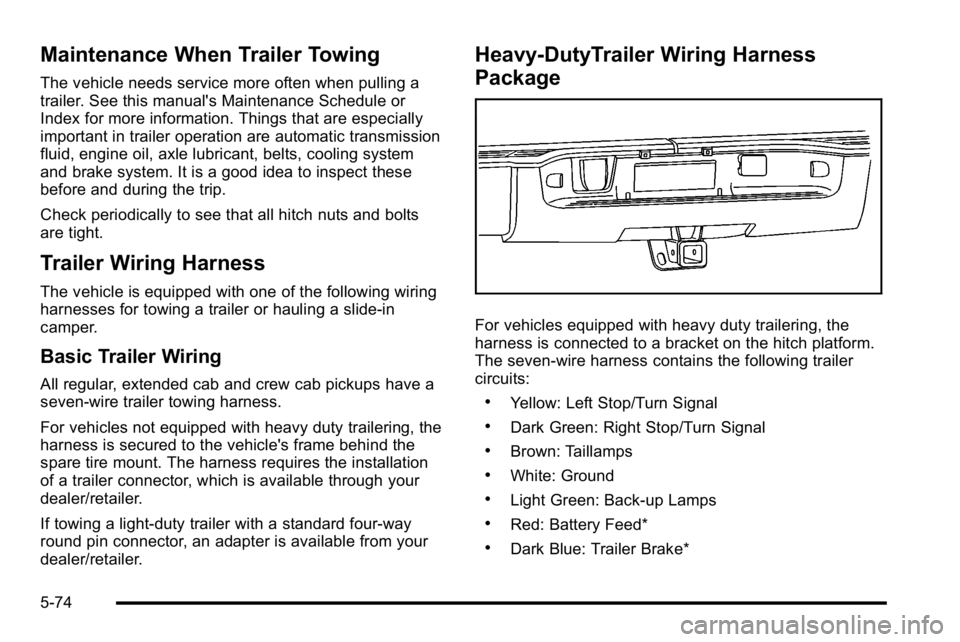
For vehicles equipped with heavy duty trailering, the
harness is connected to a bracket on the hitch platform.
The seven-wire harness contains the following trailer
circuits:
.Yellow: Left Stop/Turn Signal
.Dark Green: Right Stop/Turn Signal
.Brown: Taillamps
.White: Ground
.Light Green: Back-up Lamps
.Red: Battery Feed*
.Dark Blue: Trailer Brake*
5-74
Page 472 of 630
How to Add Automatic Transmission
Fluid
Refer to the Maintenance Schedule to determine what
kind of transmission fluid to use. SeeRecommended
Fluids and Lubricants on page 7‑12.
Using a funnel, add fluid down the transmission dipstick
tube only after checking the transmission fluid while it is
hot. A cold check is used only as a reference. If the fluid
level is low, add only enough of the proper fluid to bring
the level up to the HOT area for a hot check. It does
not take much fluid, generally less than 0.5 Liter (1 Pint).
Do not overfill.
Notice: Use of the incorrect automatic transmission
fluid may damage the vehicle, and the damages may
not be covered by the vehicle's warranty. Always
use the automatic transmission fluid listed in
Recommended Fluids and Lubricants on page 7‑12.
.After adding fluid, recheck the fluid level as
described under “How to Check Automatic
Transmission Fluid,” earlier in this section.
.When the correct fluid level is obtained, push the
dipstick back in all the way; then flip the handle
down to lock the dipstick in place.
Automatic Transmission Fluid
(6-Speed Transmission)
When to Check and Change Automatic
Transmission Fluid
It is usually not necessary to check the transmission
fluid level. The only reason for fluid loss is a
transmission leak or overheating the transmission.
If you suspect a small leak, then use the following
checking procedures to check the fluid level. However,
if there is a large leak, then it may be necessary to have
the vehicle towed to a dealer/retailer service department
and have it repaired before driving the vehicle further.
Notice:Use of the incorrect automatic transmission
fluid may damage the vehicle, and the damages may
not be covered by the vehicle's warranty. Always
use the automatic transmission fluid listed in
Recommended Fluids and Lubricants on page 7‑12.
Change the fluid and filter at the intervals listed in the
Maintenance Schedule. See Scheduled Maintenance
on page 7‑3. Be sure to use the transmission fluid
listed in Recommended Fluids and Lubricantson
page 7‑12.
6-26
Page 488 of 630
Properly torqued wheel nuts are necessary to help
prevent brake pulsation. When tires are rotated, inspect
brake pads for wear and evenly tighten wheel nuts in
the proper sequence to torque specifications in
Capacities and Specifications on page 6‑126.
If the vehicle has rear drum brakes, they do not have
wear indicators, but if a rear brake rubbing noise is
heard, have the rear brake linings inspected
immediately. Rear brake drums should be removed and
inspected each time the tires are removed for rotation or
changing. Drum brakes have an inspection hole to
inspect lining wear during scheduled maintenance.
When the front brake pads are replaced, have the rear
brakes inspected, too.
Brake linings should always be replaced as complete
axle sets.
Brake Pedal Travel
See your dealer/retailer if the brake pedal does not
return to normal height, or if there is a rapid increase in
pedal travel. This could be a sign that brake service
might be required.
Brake Adjustment
Every brake stop, the brakes adjust for wear.
Replacing Brake System Parts
The braking system on a vehicle is complex. Its many
parts have to be of top quality and work well together if
the vehicle is to have really good braking. The vehicle
was designed and tested with top-quality brake parts.
When parts of the braking system are replaced—for
example, when the brake linings wear down and new
ones are installed —be sure to get new approved
replacement parts. If this is not done, the brakes might
not work properly. For example, if someone puts in
brake linings that are wrong for the vehicle, the balance
between the front and rear brakes can change —for the
worse. The braking performance expected can change
in many other ways if the wrong replacement brake
parts are installed.
6-42
Page 575 of 630
Section 7 Maintenance Schedule
Maintenance Schedule. . . . . . . . . . . . . . . . . . . . . . . . . . . . 7-2
Introduction . . . . . . . . . . . . . . . . . . . . . . . . . . . . . . . . . . . . . 7-2
Scheduled Maintenance . . . . . . . . . . . . . . . . . . . . . . . . 7-3
Owner Checks and Services . . . . . . . . . . . . . . . . . . . 7-11 Recommended Fluids and Lubricants . . . . . . . . . . 7-12
Maintenance Replacement Parts . . . . . . . . . . . . . . 7-15
Engine Drive Belt Routing . . . . . . . . . . . . . . . . . . . . . 7-16
Maintenance Record . . . . . . . . . . . . . . . . . . . . . . . . . . . 7-17
7-1
Page 576 of 630
Maintenance Schedule
Introduction
This maintenance section applies to vehicles with a
gasoline engine. For diesel engine vehicles, see the
maintenance schedule section in the DURAMAX Diesel
manual.
Notice:Maintenance intervals, checks, inspections,
recommended fluids, and lubricants are necessary
to keep this vehicle in good working condition.
Damage caused by failure to follow scheduled
maintenance might not be covered by the vehicle
warranty.
Proper vehicle maintenance helps to keep the vehicle
in good working condition, improves fuel economy, and
reduces vehicle emissions for better air quality. Because of all the different ways people use vehicles,
maintenance needs vary. The vehicle might need
more frequent checks and services. Please read the
information under Scheduled Maintenance. To keep the
vehicle in good condition, see your dealer/retailer.
The maintenance schedule is for vehicles that:
.carry passengers and cargo within recommended
limits on the Tire and Loading Information label.
See
Loading the Vehicle on page 5‑30.
.are driven on reasonable road surfaces within legal
driving limits.
.are driven off‐road in the recommended manner.
SeeOff-Road Driving on page 5‑11.
.use the recommended fuel. See Gasoline Octaneon page 6‑7.
7-2