ABS GMC SIERRA 2010 Owner's Manual
[x] Cancel search | Manufacturer: GMC, Model Year: 2010, Model line: SIERRA, Model: GMC SIERRA 2010Pages: 630, PDF Size: 4.65 MB
Page 5 of 630
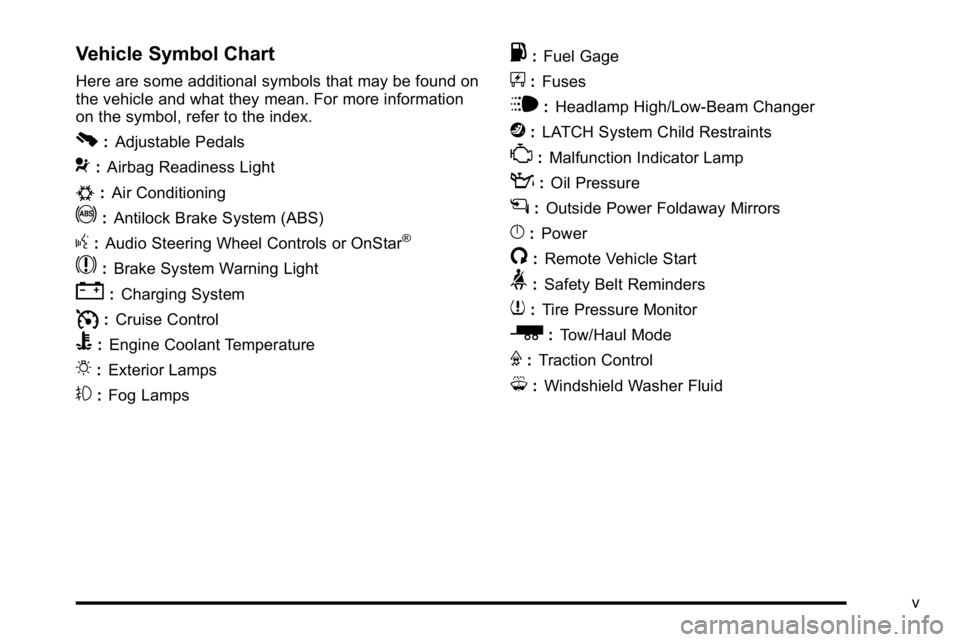
Vehicle Symbol Chart
Here are some additional symbols that may be found on
the vehicle and what they mean. For more information
on the symbol, refer to the index.
0:Adjustable Pedals
9:Airbag Readiness Light
#:Air Conditioning
!:Antilock Brake System (ABS)
g:Audio Steering Wheel Controls or OnStar®
$: Brake System Warning Light
":Charging System
I:Cruise Control
B: Engine Coolant Temperature
O:Exterior Lamps
#:Fog Lamps
.: Fuel Gage
+:Fuses
i: Headlamp High/Low-Beam Changer
j:LATCH System Child Restraints
*: Malfunction Indicator Lamp
::Oil Pressure
g:Outside Power Foldaway Mirrors
}:Power
/:Remote Vehicle Start
>:Safety Belt Reminders
7:Tire Pressure Monitor
_: Tow/Haul Mode
F:Traction Control
M:Windshield Washer Fluid
v
Page 30 of 630
Vehicle Features
Radio(s)
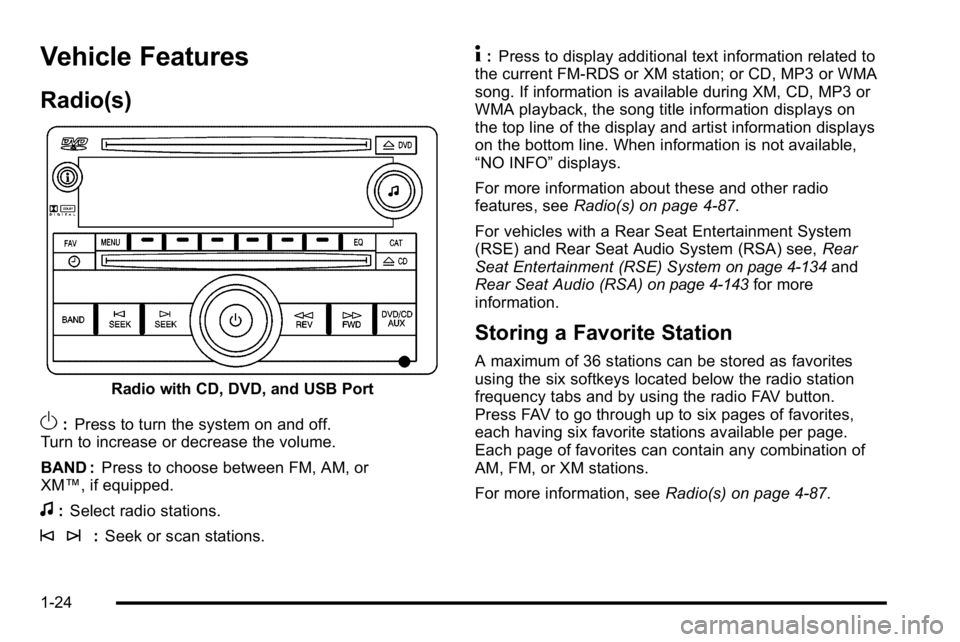
Radio with CD, DVD, and USB Port
O:Press to turn the system on and off.
Turn to increase or decrease the volume.
BAND : Press to choose between FM, AM, or
XM™, if equipped.
f: Select radio stations.
© ¨: Seek or scan stations.
4:Press to display additional text information related to
the current FM-RDS or XM station; or CD, MP3 or WMA
song. If information is available during XM, CD, MP3 or
WMA playback, the song title information displays on
the top line of the display and artist information displays
on the bottom line. When information is not available,
“NO INFO” displays.
For more information about these and other radio
features, see Radio(s) on page 4‑87.
For vehicles with a Rear Seat Entertainment System
(RSE) and Rear Seat Audio System (RSA) see, Rear
Seat Entertainment (RSE) System
on page 4‑134and
Rear Seat Audio (RSA)on page 4‑143for more
information.
Storing a Favorite Station
A maximum of 36 stations can be stored as favorites
using the six softkeys located below the radio station
frequency tabs and by using the radio FAV button.
Press FAV to go through up to six pages of favorites,
each having six favorite stations available per page.
Each page of favorites can contain any combination of
AM, FM, or XM stations.
For more information, see Radio(s) on page 4‑87.
1-24
Page 75 of 630
Shoulder Belt Height Adjuster
The vehicle has a shoulder belt height adjuster for the
driver and right front passenger.
Adjust the height so that the shoulder portion of the belt
is centered on the shoulder. The belt should be away
from the face and neck, but not falling off the shoulder.
Improper shoulder belt height adjustment could reduce
the effectiveness of the safety belt in a crash.
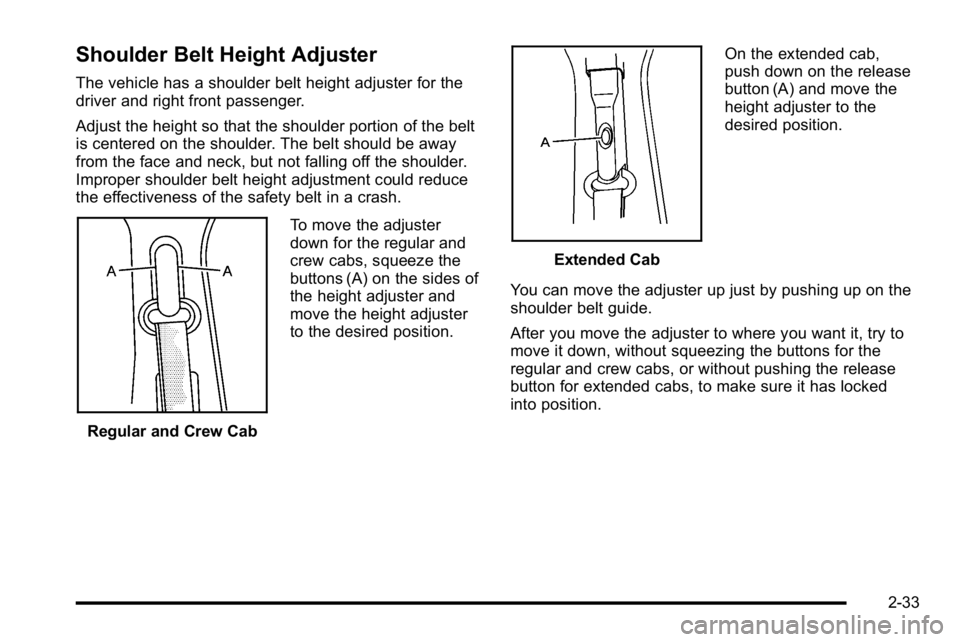
Regular and Crew CabTo move the adjuster
down for the regular and
crew cabs, squeeze the
buttons (A) on the sides of
the height adjuster and
move the height adjuster
to the desired position.
Extended CabOn the extended cab,
push down on the release
button (A) and move the
height adjuster to the
desired position.
You can move the adjuster up just by pushing up on the
shoulder belt guide.
After you move the adjuster to where you want it, try to
move it down, without squeezing the buttons for the
regular and crew cabs, or without pushing the release
button for extended cabs, to make sure it has locked
into position.
2-33
Page 97 of 630
{WARNING:
Do not attach more than one child restraint to a
single anchor, except for the center top tether
anchors in the crew and extended cabs. Attaching
more than one child restraint to a single anchor
could cause the anchor or attachment to come
loose or even break during a crash. A child or
others could be injured. To reduce the risk of
serious or fatal injuries during a crash, attach only
one child restraint per anchor.
{WARNING:
Children can be seriously injured or strangled if a
shoulder belt is wrapped around their neck and
the safety belt continues to tighten. Buckle any
unused safety belts behind the child restraint so
children cannot reach them. Pull the shoulder belt
all the way out of the retractor to set the lock,
if your vehicle has one, after the child restraint
has been installed.Notice:
Do not let the LATCH attachments rub
against the vehicle’ s safety belts. This may damage
these parts. If necessary, move buckled safety belts
to avoid rubbing the LATCH attachments.
Do not fold the empty rear seat with a safety belt
buckled. This could damage the safety belt or the
seat. Unbuckle and return the safety belt to its
stowed position, before folding the seat.
Regular Cab Models
1. If the child restraint manufacturer recommends that the top tether be attached, attach and tighten the
top tether to the top tether anchor, if your vehicle
has one. Refer to the child restraint instructions
and the following steps:
1. 1. Pull the passenger seatback forward by pulling the recliner handle upward to access
the top tether anchor. See Reclining
Seatbacks
on page 2‑10for additional
information.
1. 2. Find the top tether anchor.
2-55
Page 148 of 630
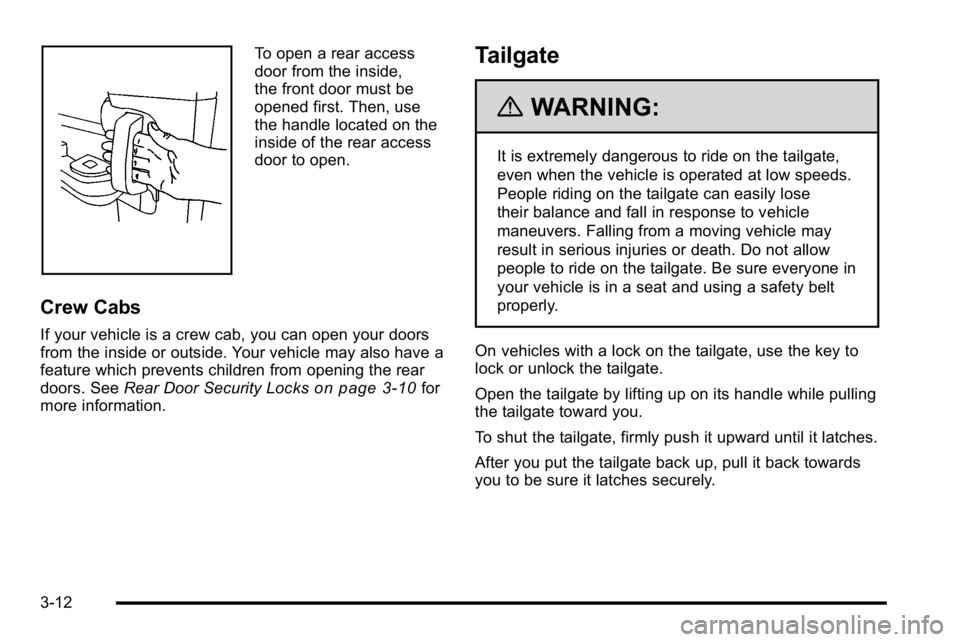
To open a rear access
door from the inside,
the front door must be
opened first. Then, use
the handle located on the
inside of the rear access
door to open.
Crew Cabs
If your vehicle is a crew cab, you can open your doors
from the inside or outside. Your vehicle may also have a
feature which prevents children from opening the rear
doors. SeeRear Door Security Locks
on page 3‑10for
more information.
Tailgate
{WARNING:
It is extremely dangerous to ride on the tailgate,
even when the vehicle is operated at low speeds.
People riding on the tailgate can easily lose
their balance and fall in response to vehicle
maneuvers. Falling from a moving vehicle may
result in serious injuries or death. Do not allow
people to ride on the tailgate. Be sure everyone in
your vehicle is in a seat and using a safety belt
properly.
On vehicles with a lock on the tailgate, use the key to
lock or unlock the tailgate.
Open the tailgate by lifting up on its handle while pulling
the tailgate toward you.
To shut the tailgate, firmly push it upward until it latches.
After you put the tailgate back up, pull it back towards
you to be sure it latches securely.
3-12
Page 219 of 630
Section 4 Instrument Panel
Instrument Panel Overview. . . . . . . . . . . . . . . . . . . . . . . .4-3
Hazard Warning Flashers . . . . . . . . . . . . . . . . . . . . . . . 4-3
Horn . . . . . . . . . . . . . . . . . . . . . . . . . . . . . . . . . . . . . . . . . . . . 4-3
Tilt Wheel . . . . . . . . . . . . . . . . . . . . . . . . . . . . . . . . . . . . . . . 4-3
Turn Signal/Multifunction Lever . . . . . . . . . . . . . . . . . . 4-4
Turn and Lane-Change Signals . . . . . . . . . . . . . . . . . 4-4
Headlamp High/Low-Beam Changer . . . . . . . . . . . . 4-5
Flash-to-Pass . . . . . . . . . . . . . . . . . . . . . . . . . . . . . . . . . . . 4-5
Windshield Wipers . . . . . . . . . . . . . . . . . . . . . . . . . . . . . . 4-6
Windshield Washer . . . . . . . . . . . . . . . . . . . . . . . . . . . . . 4-6
Cruise Control . . . . . . . . . . . . . . . . . . . . . . . . . . . . . . . . . . 4-7
Exterior Lamps . . . . . . . . . . . . . . . . . . . . . . . . . . . . . . . . 4-10
Headlamps on Reminder . . . . . . . . . . . . . . . . . . . . . . . 4-11
Daytime Running Lamps (DRL) . . . . . . . . . . . . . . . . 4-12
Automatic Headlamp System . . . . . . . . . . . . . . . . . . 4-12
Puddle Lamps . . . . . . . . . . . . . . . . . . . . . . . . . . . . . . . . . 4-13
Fog Lamps . . . . . . . . . . . . . . . . . . . . . . . . . . . . . . . . . . . . 4-13
Auxiliary Roof-Mounted Lamp . . . . . . . . . . . . . . . . . 4-14
Instrument Panel Brightness . . . . . . . . . . . . . . . . . . . 4-14
Dome Lamps . . . . . . . . . . . . . . . . . . . . . . . . . . . . . . . . . . 4-14
Dome Lamp Override . . . . . . . . . . . . . . . . . . . . . . . . . . 4-15
Entry Lighting . . . . . . . . . . . . . . . . . . . . . . . . . . . . . . . . . . 4-15
Exit Lighting . . . . . . . . . . . . . . . . . . . . . . . . . . . . . . . . . . . 4-15
Reading Lamps . . . . . . . . . . . . . . . . . . . . . . . . . . . . . . . . 4-15
Cargo Lamp . . . . . . . . . . . . . . . . . . . . . . . . . . . . . . . . . . . 4-15 Electric Power Management . . . . . . . . . . . . . . . . . . . 4-16
Battery Run-Down Protection . . . . . . . . . . . . . . . . . . 4-16
Accessory Power Outlet(s) . . . . . . . . . . . . . . . . . . . . . 4-17
Ashtray(s) and Cigarette Lighter . . . . . . . . . . . . . . . 4-18
Climate Controls . . . . . . . . . . . . . . . . . . . . . . . . . . . . . . . . . . 4-18
Climate Control System (With Heater Only) . . . . 4-18
Climate Control System (With Air Conditioning) . . . . . . . . . . . . . . . . . . . . . . . 4-20
Dual Automatic Climate Control System . . . . . . . 4-22
Outlet Adjustment . . . . . . . . . . . . . . . . . . . . . . . . . . . . . . 4-29
Warning Lights, Gages, and Indicators . . . . . . . . . .4-29
Instrument Panel Cluster . . . . . . . . . . . . . . . . . . . . . . . 4-30
Speedometer and Odometer . . . . . . . . . . . . . . . . . . . 4-31
Trip Odometer . . . . . . . . . . . . . . . . . . . . . . . . . . . . . . . . . 4-31
Tachometer . . . . . . . . . . . . . . . . . . . . . . . . . . . . . . . . . . . . 4-31
Safety Belt Reminders . . . . . . . . . . . . . . . . . . . . . . . . . 4-32
Airbag Readiness Light . . . . . . . . . . . . . . . . . . . . . . . . 4-33
Airbag Off Light . . . . . . . . . . . . . . . . . . . . . . . . . . . . . . . . 4-34
Passenger Airbag Status Indicator . . . . . . . . . . . . . 4-36
Charging System Light . . . . . . . . . . . . . . . . . . . . . . . . 4-37
Voltmeter Gage . . . . . . . . . . . . . . . . . . . . . . . . . . . . . . . . 4-38
Brake System Warning Light . . . . . . . . . . . . . . . . . . . 4-39
Antilock Brake System (ABS) Warning Light . . . 4-40
StabiliTrak
®Indicator Light . . . . . . . . . . . . . . . . . . . . . 4-41
Engine Coolant Temperature Gage . . . . . . . . . . . . 4-41
4-1
Page 258 of 630
Antilock Brake System (ABS)
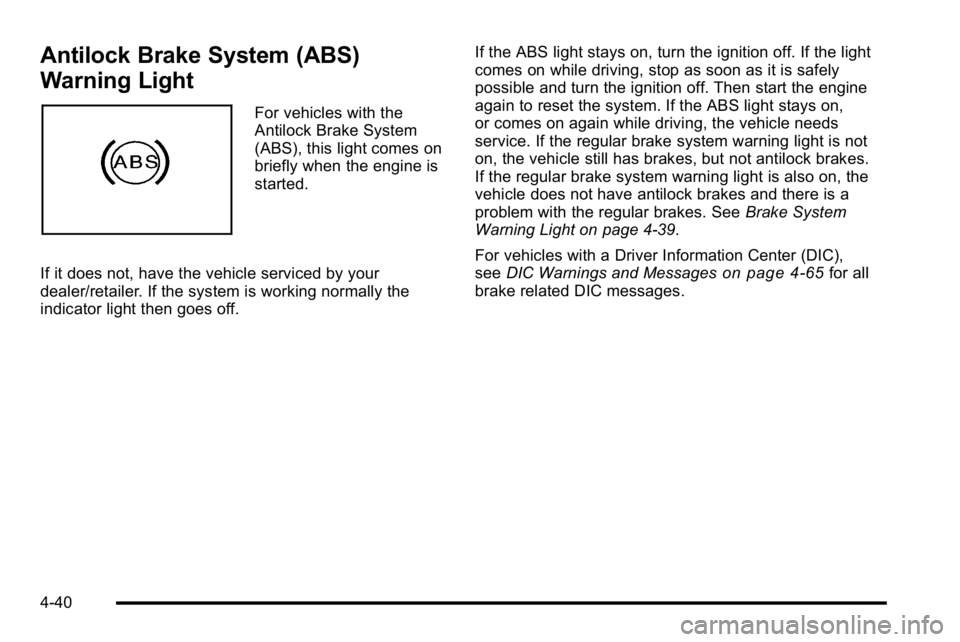
Warning Light
For vehicles with the
Antilock Brake System
(ABS), this light comes on
briefly when the engine is
started.
If it does not, have the vehicle serviced by your
dealer/retailer. If the system is working normally the
indicator light then goes off. If the ABS light stays on, turn the ignition off. If the light
comes on while driving, stop as soon as it is safely
possible and turn the ignition off. Then start the engine
again to reset the system. If the ABS light stays on,
or comes on again while driving, the vehicle needs
service. If the regular brake system warning light is not
on, the vehicle still has brakes, but not antilock brakes.
If the regular brake system warning light is also on, the
vehicle does not have antilock brakes and there is a
problem with the regular brakes. See
Brake System
Warning Light on page 4‑39.
For vehicles with a Driver Information Center (DIC),
see DIC Warnings and Messages
on page 4‑65for all
brake related DIC messages.
4-40
Page 303 of 630
3. Press theHbutton until the minute numbers begin
to flash, then turn the
fknob to increase or
decrease the minutes.
4. Press the
Hbutton until the 12HR or 24HR time
format begins to flash, then turn the
fknob to
change the time format.
5. Press the
Hbutton again until the clock display
stops flashing to set the currently displayed time,
or wait until the flashing stops after five seconds
and the current time displayed automatically sets.
MP3 Radios with a Single CD or a
Single CD and DVD Player
To set the time and date:
1. Turn the ignition key to ACC/ACCESSORY or ON/RUN, then press the
Obutton to turn the
radio on.
2. Press the
Hbutton to display HR, MIN, MM, DD,
YYYY (hour, minute, month, day, and year).
3. Press the softkey located under any one of the tabs to change that setting. 4. To increase the time or date, do one of the
following:
.Press the softkey below the selected tab.
.Press the¨SEEK button.
.Press the\FWD button.
.Turn thefknob clockwise.
5. To decrease the time or date, do one of the following:
.Press the©SEEK button.
.Press thesREV button.
.Turn thefknob counterclockwise.
To change the time default setting from 12 hour to
24 hour or to change the date default setting from
month/day/year to day/month/year:
1. Press the
Hbutton and then the softkey located
below the forward arrow tab. 12H, 24H, the date
MM/DD (month and day), and DD/MM (day and
month) displays.
2. Press the softkey located below the desired option.
3. Press the
Hbutton again to apply the desired
option, or let the screen time out.
4-85
Page 304 of 630
MP3 Radio with a Six-Disc CD Player
To set the time and date:1. Turn the ignition key to ACC/ACCESSORY or ON/RUN, then press the
Obutton to turn the
radio on.
2. Press the MENU button.
3. Press the
Hbutton to display HR, MIN, MM, DD,
YYYY (hour, minute, month, day, and year).
4. Press the softkey located under any one of the tabs to change that setting.
5. To increase the time or date, do one of the following:
.Press the softkey below the selected tab.
.Press the¨SEEK button.
.Press the\FWD button.
.Turn thefknob clockwise. 6. To decrease the time or date, do one of the
following:
.Press the©SEEK button.
.Press thesREV button.
.Turn thefknob counterclockwise.
To change the time default setting from 12 hour to
24 hour or to change the date default setting from
month/day to day/month: 1. Press the MENU button and then the softkey under the
Htab.
2. Press the softkey located below the forward arrow tab. 12H, 24H, the date MM/DD (month and day),
and DD/MM/ (day and month) displays.
3. Press the softkey located below the desired option.
4. Press the MENU button again to apply the desired option, or let the screen time out.
4-86
Page 309 of 630
Storing a Radio Station as a Favorite
Radios that have a FAV button store radio stations
as favorites.
Drivers are encouraged to set up their radio station
favorites while the vehicle is parked. Tune to favorite
stations using the presets, favorites button, and steering
wheel controls, if the vehicle has this feature.
SeeDefensive Driving on page 5‑2.
FAV (Favorites) : If the vehicle has a FAV button,
a maximum of 36 stations can be programmed as
favorites using the six softkeys below the radio station
frequency tabs and by using the FAV button. Press the
FAV button to go through up to six pages of favorites,
each having six favorite stations available per page.
Each page of favorites can contain any combination
of AM, FM, or XM, if equipped, stations.
The balance/fade and tone settings that were previously
adjusted, are stored with the favorite stations.
To store a station as a favorite:
1. Tune to the desired radio station.
2. Press the FAV button to display the page where the station will be stored. 3. Press and hold one of the six softkeys until a
beep sounds. When that softkey is pressed and
released, the station that was set, returns.
4. Repeat the steps for each softkey radio station to store as a favorite.
The number of favorites pages can be setup using the
MENU button. To setup the number of favorites pages: 1. Press the MENU button to display the radio setup menu.
2. Press the softkey located below the FAV 1-6 tab.
3. Select the desired number of favorites pages by pressing the softkey located below the displayed
page numbers.
4. Press the FAV button, or let the menu time out, to return to the original main radio screen showing
the radio station frequency tabs and to begin the
process of programming favorites for the chosen
amount of numbered pages.
4-91