manual transmission GMC SIERRA 2010 Owner's Manual
[x] Cancel search | Manufacturer: GMC, Model Year: 2010, Model line: SIERRA, Model: GMC SIERRA 2010Pages: 630, PDF Size: 4.65 MB
Page 27 of 630
Transmission
Range Selection Mode
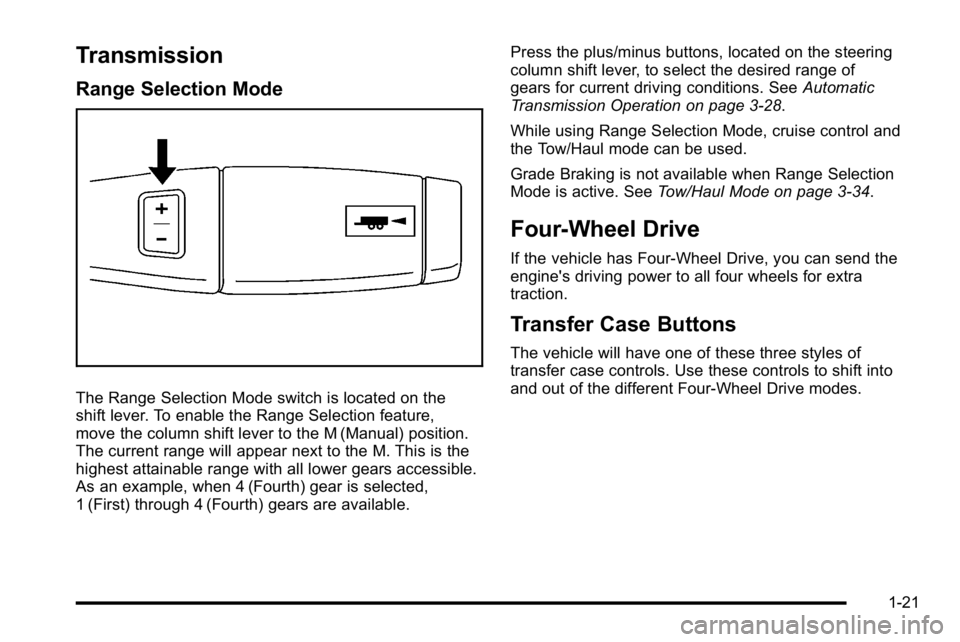
The Range Selection Mode switch is located on the
shift lever. To enable the Range Selection feature,
move the column shift lever to the M (Manual) position.
The current range will appear next to the M. This is the
highest attainable range with all lower gears accessible.
As an example, when 4 (Fourth) gear is selected,
1 (First) through 4 (Fourth) gears are available.Press the plus/minus buttons, located on the steering
column shift lever, to select the desired range of
gears for current driving conditions. See
Automatic
Transmission Operation on page 3‑28.
While using Range Selection Mode, cruise control and
the Tow/Haul mode can be used.
Grade Braking is not available when Range Selection
Mode is active. See Tow/Haul Mode on page 3‑34.
Four-Wheel Drive
If the vehicle has Four-Wheel Drive, you can send the
engine's driving power to all four wheels for extra
traction.
Transfer Case Buttons
The vehicle will have one of these three styles of
transfer case controls. Use these controls to shift into
and out of the different Four-Wheel Drive modes.
1-21
Page 137 of 630
Section 3 Features and Controls
Keys. . . . . . . . . . . . . . . . . . . . . . . . . . . . . . . . . . . . . . . . . . . . . . . . 3-3
Remote Keyless Entry (RKE) System . . . . . . . . . . . 3-4
Remote Keyless Entry (RKE) System Operation . . . . . . . . . . . . . . . . . . . . . . . . . . . . . . . . . . . . . 3-4
Remote Vehicle Start . . . . . . . . . . . . . . . . . . . . . . . . . . . 3-7
Doors and Locks . . . . . . . . . . . . . . . . . . . . . . . . . . . . . . . . . . 3-9
Door Locks . . . . . . . . . . . . . . . . . . . . . . . . . . . . . . . . . . . . . 3-9
Power Door Locks . . . . . . . . . . . . . . . . . . . . . . . . . . . . . . 3-9
Delayed Locking . . . . . . . . . . . . . . . . . . . . . . . . . . . . . . . 3-10
Programmable Automatic Door Locks . . . . . . . . . . 3-10
Rear Door Security Locks . . . . . . . . . . . . . . . . . . . . . 3-10
Lockout Protection . . . . . . . . . . . . . . . . . . . . . . . . . . . . . 3-11
Rear Doors . . . . . . . . . . . . . . . . . . . . . . . . . . . . . . . . . . . . 3-11
Tailgate . . . . . . . . . . . . . . . . . . . . . . . . . . . . . . . . . . . . . . . . 3-12
Windows . . . . . . . . . . . . . . . . . . . . . . . . . . . . . . . . . . . . . . . . . . 3-14
Manual Windows . . . . . . . . . . . . . . . . . . . . . . . . . . . . . . 3-15
Power Windows . . . . . . . . . . . . . . . . . . . . . . . . . . . . . . . 3-15
Power Sliding Rear Window . . . . . . . . . . . . . . . . . . . 3-16
Sun Visors . . . . . . . . . . . . . . . . . . . . . . . . . . . . . . . . . . . . . 3-17 Theft-Deterrent Systems
. . . . . . . . . . . . . . . . . . . . . . . . .3-17
Content Theft-Deterrent . . . . . . . . . . . . . . . . . . . . . . . . 3-17
PASS-Key
®III+ Electronic Immobilizer . . . . . . . . . 3-19
PASS-Key®III+ Electronic Immobilizer
Operation . . . . . . . . . . . . . . . . . . . . . . . . . . . . . . . . . . . . 3-19
Starting and Operating Your Vehicle . . . . . . . . . . . .3-21
New Vehicle Break-In . . . . . . . . . . . . . . . . . . . . . . . . . . 3-21
Ignition Positions . . . . . . . . . . . . . . . . . . . . . . . . . . . . . . 3-22
Retained Accessory Power (RAP) . . . . . . . . . . . . . 3-23
Starting the Engine . . . . . . . . . . . . . . . . . . . . . . . . . . . . 3-23
Fast Idle System . . . . . . . . . . . . . . . . . . . . . . . . . . . . . . . 3-25
Adjustable Throttle and Brake Pedal . . . . . . . . . . . 3-26
Engine Coolant Heater . . . . . . . . . . . . . . . . . . . . . . . . . 3-26
Active Fuel Management™ . . . . . . . . . . . . . . . . . . . . 3-27
Automatic Transmission Operation . . . . . . . . . . . . . 3-28
Tow/Haul Mode . . . . . . . . . . . . . . . . . . . . . . . . . . . . . . . . 3-34
Four-Wheel Drive . . . . . . . . . . . . . . . . . . . . . . . . . . . . . . 3-36
Parking Brake . . . . . . . . . . . . . . . . . . . . . . . . . . . . . . . . . 3-50
Shifting Into Park . . . . . . . . . . . . . . . . . . . . . . . . . . . . . . 3-51
Shifting Out of Park . . . . . . . . . . . . . . . . . . . . . . . . . . . . 3-53
Parking Over Things That Burn . . . . . . . . . . . . . . . . 3-53
Engine Exhaust . . . . . . . . . . . . . . . . . . . . . . . . . . . . . . . . 3-54
Running the Vehicle While Parked . . . . . . . . . . . . . 3-55
3-1
Page 159 of 630
D (START) :This is the position that starts the engine.
When the engine starts, release the key. The ignition
switch returns to ON/RUN for driving.
A warning tone will sound when the driver door is
opened, the ignition is in ACC/ACCESSORY or
LOCK/OFF and the key is in the ignition.
Retained Accessory Power (RAP)
The following vehicle accessories can be used for up to
10 minutes after the engine is turned off:
.Audio System
.Power Windows
.OnStar®System (if equipped)
.Sunroof (if equipped)
These features work when the key is in ON/RUN or
ACC/ACCESSORY. Once the key is turned from
ON/RUN to LOCK/OFF, the windows and sunroof
continue to work up to 10 minutes until any door is
opened. The radio continues to work for up to
10 minutes or until the driver door is opened.
Starting the Engine
If the vehicle has the DURAMAX®Diesel engine, see
the DURAMAX®Diesel manual for more information.
If the vehicle is a Two-mode Hybrid, see the Two-mode
Hybrid manual for more information.
Notice: Do not try to shift to P (Park) if the vehicle
is moving. If you do, you could damage the
transmission. Shift to P (Park) only when the
vehicle is stopped.
Move the shift lever to P (Park) or N (Neutral).
The engine will not start in any other position.
To restart the engine when the vehicle is already
moving, use N (Neutral) only.
3-23
Page 161 of 630
Fast Idle System
Fast Idle System with Switch
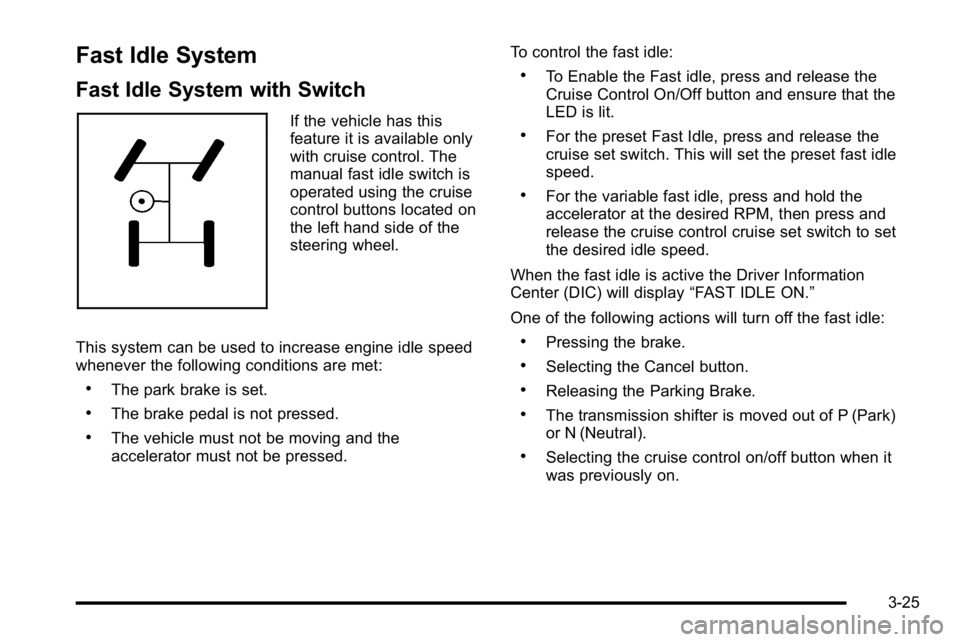
If the vehicle has this
feature it is available only
with cruise control. The
manual fast idle switch is
operated using the cruise
control buttons located on
the left hand side of the
steering wheel.
This system can be used to increase engine idle speed
whenever the following conditions are met:
.The park brake is set.
.The brake pedal is not pressed.
.The vehicle must not be moving and the
accelerator must not be pressed. To control the fast idle:
.To Enable the Fast idle, press and release the
Cruise Control On/Off button and ensure that the
LED is lit.
.For the preset Fast Idle, press and release the
cruise set switch. This will set the preset fast idle
speed.
.For the variable fast idle, press and hold the
accelerator at the desired RPM, then press and
release the cruise control cruise set switch to set
the desired idle speed.
When the fast idle is active the Driver Information
Center (DIC) will display “FAST IDLE ON.”
One of the following actions will turn off the fast idle:
.Pressing the brake.
.Selecting the Cancel button.
.Releasing the Parking Brake.
.The transmission shifter is moved out of P (Park)
or N (Neutral).
.Selecting the cruise control on/off button when it
was previously on.
3-25
Page 164 of 630
Automatic Transmission Operation
If the vehicle is a Two-mode Hybrid, see the Two-mode
Hybrid manual for more information.
Vehicles with an automatic transmission have an
electronic shift position indicator within the instrument
panel cluster. This display comes on when the ignition
key is turned to the ON/RUN position.
There are several different positions for the shift lever.
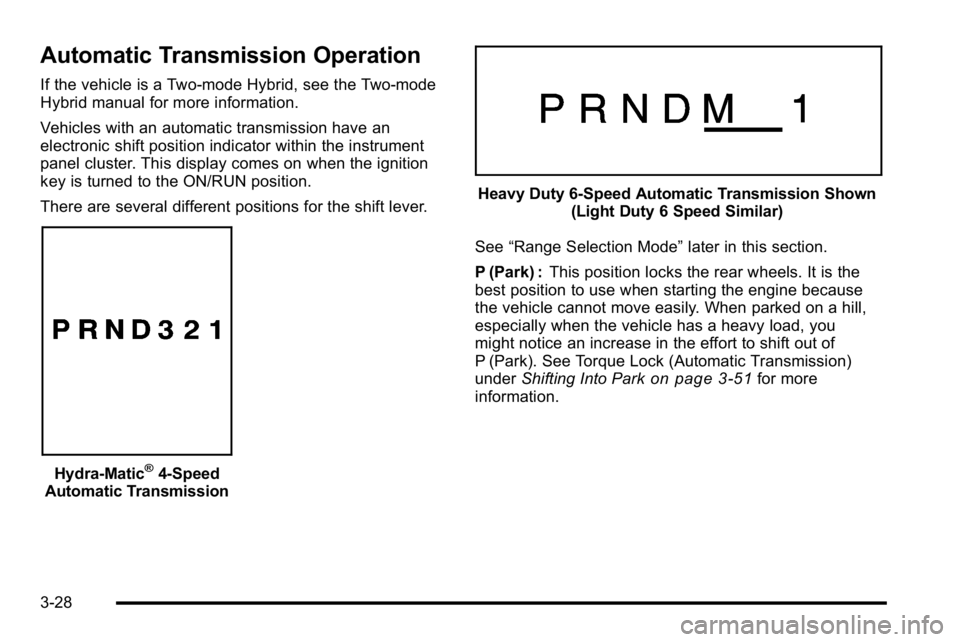
Hydra-Matic®4-Speed
Automatic Transmission
Heavy Duty 6-Speed Automatic Transmission Shown (Light Duty 6 Speed Similar)
See “Range Selection Mode” later in this section.
P (Park) : This position locks the rear wheels. It is the
best position to use when starting the engine because
the vehicle cannot move easily. When parked on a hill,
especially when the vehicle has a heavy load, you
might notice an increase in the effort to shift out of
P (Park). See Torque Lock (Automatic Transmission)
under Shifting Into Park
on page 3‑51for more
information.
3-28
Page 167 of 630
If the shift stabilization feature determines that a current
vehicle speed cannot be maintained, the transmission
does not upshift and instead holds the current gear.
In some cases, this could appear to be a delayed shift,
however the transmission is operating normally.
The transmission uses adaptive shift controls.
Adaptive shift controls continually compares key shift
parameters to pre-programmed ideal shifts stored in the
transmissions computer. The transmission constantly
makes adjustments to improve vehicle performance
according to how the vehicle is being used, such as
with a heavy load or when temperature changes.
During this adaptive shift control process, shifting
might feel different as the transmission determines
the best settings.
When temperatures are very cold, the Allison
Transmission
®and Hydra-Matic®6-Speed
transmission's gear shifting could be delayed
providing more stable shifts until the engine
warms up. Shifts could be more noticeable with a
cold transmission. This difference in shifting is normal. M (Manual Mode) :
This position is available on
vehicles with the Allison Transmission
®or Hydra-Matic®
6-Speed transmission. It lets drivers select the range of
gears appropriate for current driving conditions. If the
vehicle has this feature, see Range Select Mode
(Allison Transmission
®or Hydra-Matic®6-Speed
transmission) later in this section.
3 (Third) : This position is also used for normal driving.
It reduces vehicle speed more than D (Drive) without
using the brakes. You might choose 3 (Third) instead of
D (Drive) when driving on hilly, winding roads, when
towing a trailer, so there is less shifting between gears
and when going down a steep hill.
2 (Second) : This position reduces vehicle speed even
more than 3 (Third) without using the brakes. You can
use 2 (Second) on hills. It can help control vehicle
speed as you go down steep mountain roads, but then
you would also want to use the brakes off and on.
If you manually select 2 (Second) in an automatic
transmission, the transmission will start in second gear.
You can use this feature for reducing the speed of the
rear wheels when you are trying to start the vehicle
from a stop on slippery road surfaces.
3-31
Page 169 of 630
To use this feature, do the following:1. Move the shift lever to M (Manual Mode).
2. Press the plus/minus buttons, located on the steering column shift lever, to select the desired
range of gears for current driving conditions.
When M (Manual Mode) is selected a number displays
next to the M, indicating the current gear.
This number is the highest gear that can be used.
However, the vehicle can automatically shift to lower
gears as it adjusts to driving conditions. This means
that all gears below that number are available. When
5 (Fifth) is selected, 1 (First) through 5 (Fifth) gears are
automatically shifted by the vehicle, but 6 (Sixth) cannot
be used until the plus/minus button located on the
steering column lever is used to change to the gear.
Grade Braking is not available when Range Selection
Mode is active. See Tow/Haul Mode on page 3‑34.
While using Range Selection Mode, cruise control and
the Tow/Haul mode can be used. Notice:
Spinning the tires or holding the vehicle in
one place on a hill using only the accelerator pedal
may damage the transmission. The repair will not be
covered by the vehicle warranty. If you are stuck, do
not spin the tires. When stopping on a hill, use the
brakes to hold the vehicle in place.
Low Traction Mode
If your vehicle has the Allison Transmission®, or the
Hydra-Matic®6-Speed Automatic Transmission,
it has a Low Traction Mode that can assist in vehicle
acceleration when road conditions are slippery, such as
with ice or snow. While the vehicle is at a stop, select
the second gear range using Range Selection Mode.
This will limit torque to the wheels after it detects wheel
slip, preventing the tires from spinning.
3-33
Page 175 of 630
When Using the Manual Transfer Case
.Shifting should be made using quick motions.
Shifting slowly may make it more difficult to shift.
.You may notice that it is harder to shift when the
vehicle is cold. After the vehicle warms up the
shifting will return to normal.
.While in Four-Wheel High or Four-Wheel-Drive
Low you may experience reduced fuel economy.
.Avoid driving in Four-Wheel Drive on clean, dry
pavement. It may cause your tires to wear faster,
make the transfer case harder to shift, and run
noisier.
.If the transfer case shifter is in the N (Neutral)
position and you have difficulty reaching the
selected transfer case mode, with the engine
running, shift the transmission momentarily to drive
and then back to N (Neutral). This will realign the
gear teeth in the transfer case and allow you to
complete the shift.
Shifting from Two-Wheel-Drive High to
Four-Wheel-Drive High
.Shifts between Two-Wheel-Drive High and
Four-Wheel-Drive High can be made at any
vehicle speed.
.Shift the transfer case lever in one continuous
motion into either the Four-Wheel-Drive High or
Two-Wheel-Drive High position.
.In extremely cold weather, it may be necessary
to slow or stop the vehicle to shift into
Four-Wheel-Drive High until the vehicle has
warmed up.
.While in Four-Wheel-Drive High, the vehicle can be
driven at any posted legal speed limit.
3-39
Page 278 of 630
Transmission Temperature
Press the trip odometer reset stem until TRANS TEMP
displays. This display shows the temperature of the
automatic transmission fluid in either degrees
Fahrenheit (°F) or degrees Celsius (°C).
Trailer Gain and Output
On vehicles with the Integrated Trailer Brake
Control (ITBC) system, the trailer brake display
appears in the DIC. Press the trip odometer reset
stem until TRAILER GAIN and OUTPUT display.
TRAILER GAIN shows the trailer gain setting. This
setting can be adjusted from 0.0 to 10.0 with either a
trailer connected or disconnected. To adjust this setting,
see“Integrated Trailer Brake Control System” under
Towing a Trailer
on page 5‑50for more information.
OUTPUT shows the power output to the trailer anytime
a trailer with electric brakes is connected. Output is
displayed in 0 to 10 bars. Dashes may appear in the
OUTPUT display. See “Integrated Trailer Brake Control
System” underTowing a Trailer
on page 5‑50for
more information.
Compass Zone Setting
This display allows for setting the compass zone.
See DIC Compasson page 4‑62for more information.
Compass Recalibration
This display allows for calibrating the compass.
SeeDIC Compasson page 4‑62for more information.
Oil Life
To access this display, the vehicle must be in P (Park).
Press the trip odometer reset stem until OIL LIFE
REMAINING displays. This display shows an estimate
of the oil's remaining useful life. If you see 99% OIL
LIFE REMAINING on the display, that means 99% of
the current oil life remains. The engine oil life system
will alert you to change the oil on a schedule consistent
with your driving conditions.
When the remaining oil life is low, the CHANGE
ENGINE OIL SOON message will appear on the
display. See “CHANGE ENGINE OIL SOON” underDIC
Warnings and Messages
on page 4‑65. You should
change the oil as soon as you can. See Engine Oilon
page 6‑18. In addition to the engine oil life system
monitoring the oil life, additional maintenance is
recommended in the Maintenance Schedule in this
manual. See Scheduled Maintenance
on page 7‑3for more information.
4-60
Page 376 of 630
In this mode, engine power is not reduced automatically
and the driven wheels can spin more freely. This can
cause the brake-traction control to activate constantly.
Notice:If the wheel(s) of one axle is allowed to spin
excessively while the StabiliTrak, ABS and brake
warning lights and any relevant DIC messages are
displayed, the transfer case could be damaged.
The repairs would not be covered by the vehicle
warranty. Reduce engine power and do not spin the
wheel(s) excessively while these lights and
messages are displayed.
The traction control system may activate on dry or
rough roads or under conditions such as heavy
acceleration while turning or abrupt upshifts/downshifts
of the transmission. When this happens, a reduction in
acceleration may be noticed, or a noise or vibration may
be heard. This is normal.
If cruise control is being used when the system
activates, the StabiliTrak light will flash and cruise
control will automatically disengage. Cruise control may
be reengaged when road conditions allow. See Cruise
Control on page 4‑7.
StabiliTrak may also turn off automatically if it
determines that a problem exists with the system.
If the problem does not clear itself after restarting the
vehicle, see your dealer/retailer for service.Locking Rear Axle
Vehicles with a locking rear axle can give more traction
on snow, mud, ice, sand or gravel. It works like a
standard axle most of the time, but when traction is low,
this feature will allow the rear wheel with the most
traction to move the vehicle.
Steering
Power Steering
If the vehicle is a Two‐mode Hybrid, see the Two‐mode
Hybrid manual for more information.
If power steering assist is lost because the engine stops
or the system is not functioning, the vehicle can be
steered but it will take more effort.
Steering Tips
It is important to take curves at a reasonable speed.
Traction in a curve depends on the condition of the tires
and the road surface, the angle at which the curve is
banked, and vehicle speed. While in a curve, speed is
the one factor that can be controlled.
If there is a need to reduce speed, do it before entering
the curve, while the front wheels are straight.
5-8