oil level GMC SIERRA 2010 Owner's Manual
[x] Cancel search | Manufacturer: GMC, Model Year: 2010, Model line: SIERRA, Model: GMC SIERRA 2010Pages: 630, PDF Size: 4.65 MB
Page 7 of 630
Section 1 In Brief
Instrument Panel. . . . . . . . . . . . . . . . . . . . . . . . . . . . . . . . . . . 1-2
Instrument Panel (Base/Uplevel Version) . . . . . . . . 1-2
Instrument Panel (Premium Version) . . . . . . . . . . . . 1-4
Initial Drive Information . . . . . . . . . . . . . . . . . . . . . . . . . . . 1-6
Remote Keyless Entry (RKE) System . . . . . . . . . . . 1-6
Remote Vehicle Start . . . . . . . . . . . . . . . . . . . . . . . . . . . 1-7
Door Locks . . . . . . . . . . . . . . . . . . . . . . . . . . . . . . . . . . . . . 1-7
Windows . . . . . . . . . . . . . . . . . . . . . . . . . . . . . . . . . . . . . . . . 1-8
Seat Adjustment . . . . . . . . . . . . . . . . . . . . . . . . . . . . . . . . 1-9
Heated Seats . . . . . . . . . . . . . . . . . . . . . . . . . . . . . . . . . . 1-13
Head Restraint Adjustment . . . . . . . . . . . . . . . . . . . . 1-13
Safety Belt . . . . . . . . . . . . . . . . . . . . . . . . . . . . . . . . . . . . . 1-13
Sensing System for Passenger Airbag . . . . . . . . . 1-14
Mirror Adjustment . . . . . . . . . . . . . . . . . . . . . . . . . . . . . . 1-15
Steering Wheel Adjustment . . . . . . . . . . . . . . . . . . . . 1-16
Throttle and Brake Pedal Adjustment . . . . . . . . . . 1-17
Interior Lighting . . . . . . . . . . . . . . . . . . . . . . . . . . . . . . . . 1-17
Exterior Lighting . . . . . . . . . . . . . . . . . . . . . . . . . . . . . . . 1-18
Windshield Wiper/Washer . . . . . . . . . . . . . . . . . . . . . . 1-19
Climate Controls . . . . . . . . . . . . . . . . . . . . . . . . . . . . . . . 1-19
Transmission . . . . . . . . . . . . . . . . . . . . . . . . . . . . . . . . . . 1-21
Four-Wheel Drive . . . . . . . . . . . . . . . . . . . . . . . . . . . . . . 1-21 Vehicle Features
. . . . . . . . . . . . . . . . . . . . . . . . . . . . . . . . . . 1-24
Radio(s) . . . . . . . . . . . . . . . . . . . . . . . . . . . . . . . . . . . . . . . 1-24
Satellite Radio . . . . . . . . . . . . . . . . . . . . . . . . . . . . . . . . . 1-25
Portable Audio Devices . . . . . . . . . . . . . . . . . . . . . . . . 1-25
Steering Wheel Controls . . . . . . . . . . . . . . . . . . . . . . . 1-26
Bluetooth
®. . . . . . . . . . . . . . . . . . . . . . . . . . . . . . . . . . . . . 1-26
Navigation System . . . . . . . . . . . . . . . . . . . . . . . . . . . . . 1-26
Driver Information Center (DIC) . . . . . . . . . . . . . . . . 1-27
Cruise Control . . . . . . . . . . . . . . . . . . . . . . . . . . . . . . . . . 1-28
Rear Vision Camera (RVC) . . . . . . . . . . . . . . . . . . . . 1-29
Ultrasonic Parking Assist . . . . . . . . . . . . . . . . . . . . . . 1-29
Power Outlets . . . . . . . . . . . . . . . . . . . . . . . . . . . . . . . . . 1-29
Universal Remote System . . . . . . . . . . . . . . . . . . . . . 1-30
Sunroof . . . . . . . . . . . . . . . . . . . . . . . . . . . . . . . . . . . . . . . . 1-30
Performance and Maintenance . . . . . . . . . . . . . . . . . .1-31
StabiliTrak
®. . . . . . . . . . . . . . . . . . . . . . . . . . . . . . . . . . . . 1-31
Tire Pressure Monitor . . . . . . . . . . . . . . . . . . . . . . . . . . 1-32
Engine Oil Life System . . . . . . . . . . . . . . . . . . . . . . . . 1-32
Fuel E85 (85% Ethanol) . . . . . . . . . . . . . . . . . . . . . . . 1-33
Driving for Better Fuel Economy . . . . . . . . . . . . . . . 1-33
Roadside Assistance Program . . . . . . . . . . . . . . . . . 1-34
OnStar
®. . . . . . . . . . . . . . . . . . . . . . . . . . . . . . . . . . . . . . . 1-34
1-1
Page 264 of 630
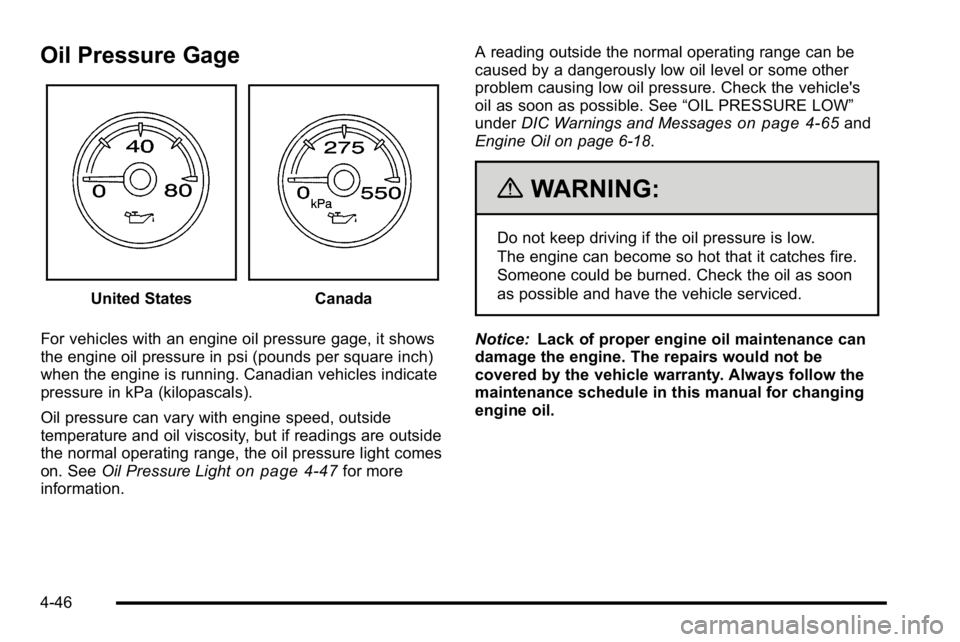
Oil Pressure Gage
United StatesCanada
For vehicles with an engine oil pressure gage, it shows
the engine oil pressure in psi (pounds per square inch)
when the engine is running. Canadian vehicles indicate
pressure in kPa (kilopascals).
Oil pressure can vary with engine speed, outside
temperature and oil viscosity, but if readings are outside
the normal operating range, the oil pressure light comes
on. See Oil Pressure Light
on page 4‑47for more
information. A reading outside the normal operating range can be
caused by a dangerously low oil level or some other
problem causing low oil pressure. Check the vehicle's
oil as soon as possible. See
“OIL PRESSURE LOW”
under DIC Warnings and Messages
on page 4‑65and
Engine Oil on page 6‑18.
{WARNING:
Do not keep driving if the oil pressure is low.
The engine can become so hot that it catches fire.
Someone could be burned. Check the oil as soon
as possible and have the vehicle serviced.
Notice: Lack of proper engine oil maintenance can
damage the engine. The repairs would not be
covered by the vehicle warranty. Always follow the
maintenance schedule in this manual for changing
engine oil.
4-46
Page 286 of 630
HOOD OPEN
This message displays and a chime may sound if the
hood is not fully closed. Stop and turn off the vehicle,
check the hood for obstructions, and close the hood
again. Check to see if the message still appears on
the DIC.
ICE POSSIBLE DRIVE WITH CARE
This message displays when ice conditions are
possible.
LEFT REAR DOOR OPEN (Crew Cab)
This message displays and a chime may sound if the
driver side rear door is not fully closed and the vehicle
is shifted out of P (Park). Stop and turn off the vehicle,
check the door for obstructions, and close the door
again. Check to see if the message still appears on
the DIC.
OIL PRESSURE LOW STOP ENGINE
Notice:If you drive your vehicle while the engine oil
pressure is low, severe engine damage may occur.
If a low oil pressure warning appears on the Driver
Information Center (DIC), stop the vehicle as soon
as possible. Do not drive the vehicle until the cause
of the low oil pressure is corrected. See Engine Oil
on page 6‑18for more information. This message displays if low oil pressure levels occur.
Stop the vehicle as soon as safely possible and do not
operate it until the cause of the low oil pressure has
been corrected. Check the oil as soon as possible
and have your vehicle serviced by your dealer/retailer.
See
Engine Oil on page 6‑18.
PARK ASST BLOCKED SEE OWNERS
MANUAL
If your vehicle has the Ultrasonic Rear Parking Assist
(URPA) system, this message displays if there is
something interfering with the park assist system.
SeeUltrasonic Rear Parking Assist (URPA)
on
page 3‑60for more information.
PARK ASSIST OFF
If your vehicle has the Ultrasonic Rear Parking Assist
(URPA) system, after the vehicle has been started, this
message displays to remind the driver that the URPA
system has been turned off. Press the set/reset button
or the trip odometer reset stem to acknowledge this
message and clear it from the DIC display. To turn the
URPA system back on, see Ultrasonic Rear Parking
Assist (URPA) on page 3‑60.
4-68
Page 392 of 630
Hydroplaning
Hydroplaning is dangerous. Water can build up under
your vehicle's tires so they actually ride on the water.
This can happen if the road is wet enough and you are
going fast enough. When your vehicle is hydroplaning, it
has little or no contact with the road.
There is no hard and fast rule about hydroplaning.
The best advice is to slow down when the road is wet.
Other Rainy Weather Tips
Besides slowing down, other wet weather driving
tips include:
.Allow extra following distance.
.Pass with caution.
.Keep windshield wiping equipment in good shape.
.Keep the windshield washer fluid reservoir filled.
.Have good tires with proper tread depth. SeeTireson page 6‑64.
.Turn off cruise control.
Before Leaving on a Long Trip
To prepare your vehicle for a long trip, consider
having it serviced by your dealer/retailer before
departing. Things to check on your own include:
.Windshield Washer Fluid:
Reservoir full? Windows
clean —inside and outside?
.Wiper Blades: In good shape?
.Fuel, Engine Oil, Other Fluids: All levels checked?
.Lamps:Do they all work and are lenses clean?
.Tires:Are treads good? Are tires inflated to
recommended pressure?
.Weather and Maps: Safe to travel? Have
up-to-date maps?
Highway Hypnosis
Always be alert and pay attention to your surroundings
while driving. If you become tired or sleepy, find a safe
place to park your vehicle and rest.
Other driving tips include:
.Keep the vehicle well ventilated.
.Keep interior temperature cool.
.Keep your eyes moving —scan the road ahead
and to the sides.
.Check the rearview mirror and vehicle instruments
often.
5-24
Page 440 of 630
Making Turns
Notice:Making very sharp turns while trailering
could cause the trailer to come in contact with the
vehicle. The vehicle could be damaged. Avoid
making very sharp turns while trailering.
When turning with a trailer, make wider turns than
normal. Do this so the trailer will not strike soft
shoulders, curbs, road signs, trees or other objects.
Avoid jerky or sudden maneuvers. Signal well in
advance.
If the trailer turn signal bulbs burn out, the arrows on the
instrument panel will still flash for turns. It is important to
check occasionally to be sure the trailer bulbs are still
working.
Driving On Grades
Reduce speed and shift to a lower gear beforestarting
down a long or steep downgrade. If the transmission is
not shifted down, the brakes might get hot and no
longer work well.
Vehicles can tow in D (Drive). Shift the transmission to
a lower gear if the transmission shifts too often under
heavy loads and/or hilly conditions.
The tow/haul mode may be used if the transmission
shifts too often. See Tow/Haul Mode on page 3‑34. When towing at high altitude on steep uphill grades,
consider the following: Engine coolant will boil at a
lower temperature than at normal altitudes. If the engine
is turned off immediately after towing at high altitude on
steep uphill grades, the vehicle may show signs similar
to engine overheating. To avoid this, let the engine run
while parked, preferably on level ground, with the
automatic transmission in P (Park) for a few minutes
before turning the engine off. If the overheat warning
comes on, see
Engine Overheating on page 6‑34.
Parking on Hills
{WARNING:
Parking the vehicle on a hill with the trailer
attached can be dangerous. If something goes
wrong, the rig could start to move. People can be
injured, and both the vehicle and the trailer can be
damaged. When possible, always park the rig on
a flat surface.
If parking the rig on a hill: 1. Press the brake pedal, but do not shift into P (Park) yet. Turn the wheels into the curb if facing downhill
or into traffic if facing uphill.
5-72
Page 463 of 630

A.Engine Air Cleaner/Filter on page 6‑21.
B. Coolant Surge Tank and Pressure Cap. See Cooling System on page 6‑30.
C. Positive (+) Terminal. See Jump Starting
on
page 6‑44.
D. Battery on page 6‑43.
E. Engine Oil Fill Cap. See “When to Add Engine Oil”
under Engine Oil on page 6‑18.
F. Automatic Transmission Dipstick. See “Checking
the Fluid Level” underAutomatic Transmission
Fluid (4-Speed Transmission)
on page 6‑23or
Automatic Transmission Fluid (6-Speed
Transmission) on page 6‑26.
G. Remote Negative (−) Terminal (Out of View). See Jump Starting on page 6‑44. H. Engine Oil Dipstick (Out of View). See
“Checking
Engine Oil” underEngine Oil on page 6‑18.
I. Engine Cooling Fan. See Cooling System
on
page 6‑30.
J. Power Steering Fluid Reservoir. See Power
Steering Fluid on page 6‑37.
K. Brake Master Cylinder Reservoir. See “Brake
Fluid” under Brakes on page 6‑39.
L. Underhood Fuse Block on page 6‑122.
M. Windshield Washer Fluid Reservoir. See “Adding
Washer Fluid” underWindshield Washer Fluid
on
page 6‑38.
6-17
Page 464 of 630
Engine Oil
For diesel engine vehicles, see“Engine Oil”in the
DURAMAX®Diesel manual.
Checking Engine Oil
It is a good idea to check the engine oil level at each
fuel fill. In order to get an accurate reading, the oil must
be warm and the vehicle must be on level ground.
The engine oil dipstick handle is a yellow loop. See
Engine Compartment Overview
on page 6‑16for the
location of the engine oil dipstick.
1. Turn off the engine and give the oil several minutes to drain back into the oil pan. If this is not done, the
oil dipstick might not show the actual level.
2. Pull out the dipstick and clean it with a paper towel or cloth, then push it back in all the way. Remove it
again, keeping the tip down, and check the level.
When to Add Engine Oil
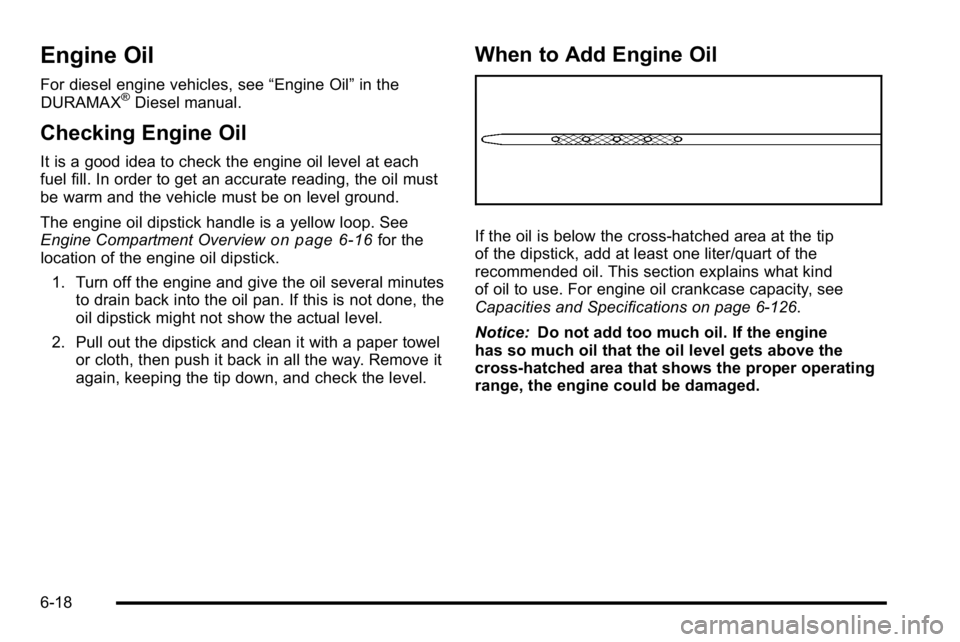
If the oil is below the cross-hatched area at the tip
of the dipstick, add at least one liter/quart of the
recommended oil. This section explains what kind
of oil to use. For engine oil crankcase capacity, see
Capacities and Specifications on page 6‑126.
Notice: Do not add too much oil. If the engine
has so much oil that the oil level gets above the
cross-hatched area that shows the proper operating
range, the engine could be damaged.
6-18
Page 465 of 630
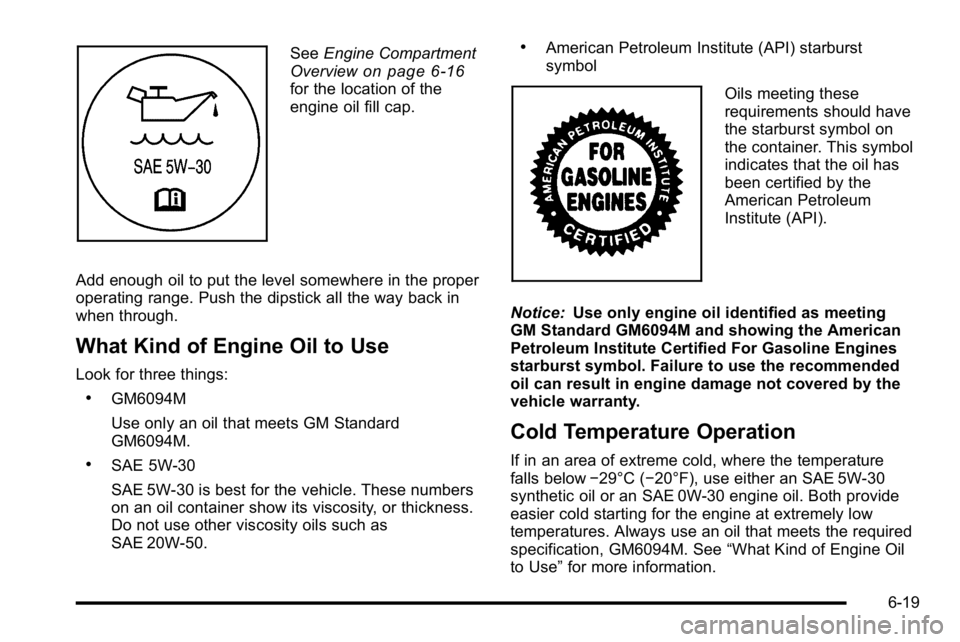
SeeEngine Compartment
Overviewon page 6‑16for the location of the
engine oil fill cap.
Add enough oil to put the level somewhere in the proper
operating range. Push the dipstick all the way back in
when through.
What Kind of Engine Oil to Use
Look for three things:
.GM6094M
Use only an oil that meets GM Standard
GM6094M.
.SAE 5W-30
SAE 5W-30 is best for the vehicle. These numbers
on an oil container show its viscosity, or thickness.
Do not use other viscosity oils such as
SAE 20W-50.
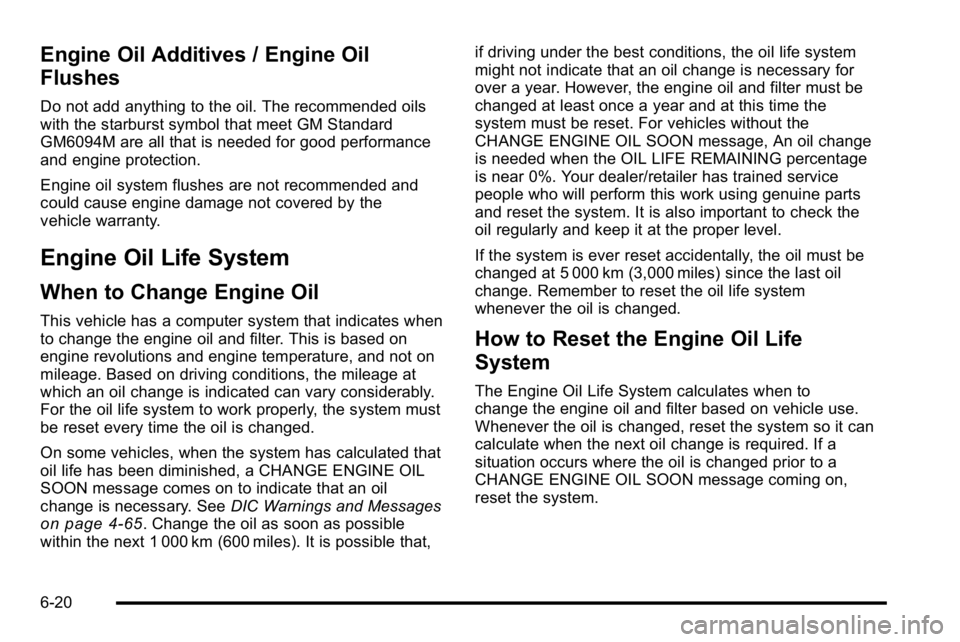
.American Petroleum Institute (API) starburst
symbol
Oils meeting these
requirements should have
the starburst symbol on
the container. This symbol
indicates that the oil has
been certified by the
American Petroleum
Institute (API).
Notice: Use only engine oil identified as meeting
GM Standard GM6094M and showing the American
Petroleum Institute Certified For Gasoline Engines
starburst symbol. Failure to use the recommended
oil can result in engine damage not covered by the
vehicle warranty.
Cold Temperature Operation
If in an area of extreme cold, where the temperature
falls below −29°C (−20°F), use either an SAE 5W-30
synthetic oil or an SAE 0W-30 engine oil. Both provide
easier cold starting for the engine at extremely low
temperatures. Always use an oil that meets the required
specification, GM6094M. See “What Kind of Engine Oil
to Use” for more information.
6-19
Page 466 of 630
Engine Oil Additives / Engine Oil
Flushes
Do not add anything to the oil. The recommended oils
with the starburst symbol that meet GM Standard
GM6094M are all that is needed for good performance
and engine protection.
Engine oil system flushes are not recommended and
could cause engine damage not covered by the
vehicle warranty.
Engine Oil Life System
When to Change Engine Oil
This vehicle has a computer system that indicates when
to change the engine oil and filter. This is based on
engine revolutions and engine temperature, and not on
mileage. Based on driving conditions, the mileage at
which an oil change is indicated can vary considerably.
For the oil life system to work properly, the system must
be reset every time the oil is changed.
On some vehicles, when the system has calculated that
oil life has been diminished, a CHANGE ENGINE OIL
SOON message comes on to indicate that an oil
change is necessary. SeeDIC Warnings and Messages
on page 4‑65. Change the oil as soon as possible
within the next 1 000 km (600 miles). It is possible that, if driving under the best conditions, the oil life system
might not indicate that an oil change is necessary for
over a year. However, the engine oil and filter must be
changed at least once a year and at this time the
system must be reset. For vehicles without the
CHANGE ENGINE OIL SOON message, An oil change
is needed when the OIL LIFE REMAINING percentage
is near 0%. Your dealer/retailer has trained service
people who will perform this work using genuine parts
and reset the system. It is also important to check the
oil regularly and keep it at the proper level.
If the system is ever reset accidentally, the oil must be
changed at 5 000 km (3,000 miles) since the last oil
change. Remember to reset the oil life system
whenever the oil is changed.
How to Reset the Engine Oil Life
System
The Engine Oil Life System calculates when to
change the engine oil and filter based on vehicle use.
Whenever the oil is changed, reset the system so it can
calculate when the next oil change is required. If a
situation occurs where the oil is changed prior to a
CHANGE ENGINE OIL SOON message coming on,
reset the system.
6-20
Page 469 of 630
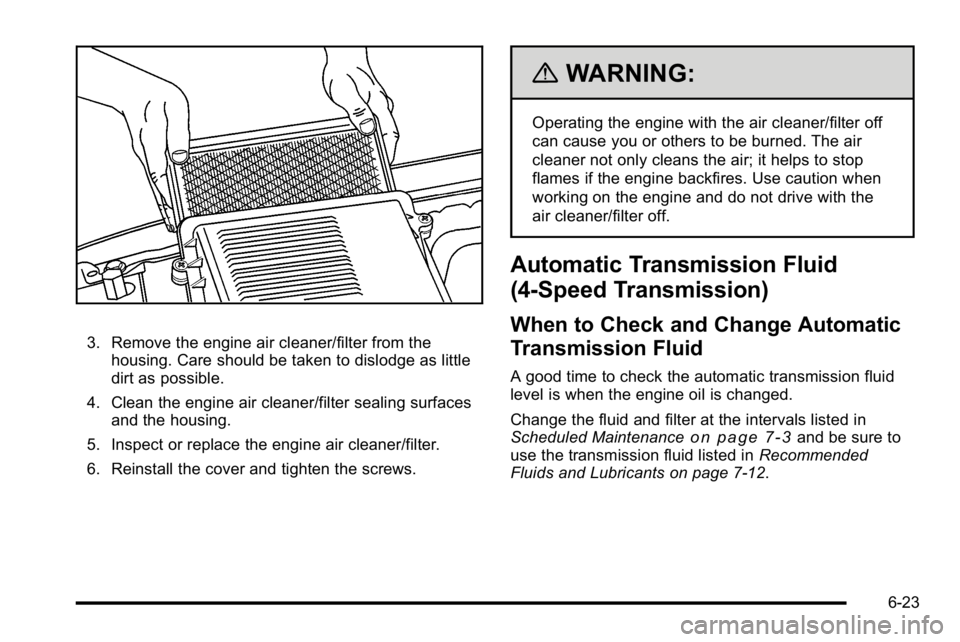
3. Remove the engine air cleaner/filter from thehousing. Care should be taken to dislodge as little
dirt as possible.
4. Clean the engine air cleaner/filter sealing surfaces and the housing.
5. Inspect or replace the engine air cleaner/filter.
6. Reinstall the cover and tighten the screws.
{WARNING:
Operating the engine with the air cleaner/filter off
can cause you or others to be burned. The air
cleaner not only cleans the air; it helps to stop
flames if the engine backfires. Use caution when
working on the engine and do not drive with the
air cleaner/filter off.
Automatic Transmission Fluid
(4-Speed Transmission)
When to Check and Change Automatic
Transmission Fluid
A good time to check the automatic transmission fluid
level is when the engine oil is changed.
Change the fluid and filter at the intervals listed in
Scheduled Maintenance
on page 7‑3and be sure to
use the transmission fluid listed in Recommended
Fluids and Lubricants on page 7‑12.
6-23