ECL GMC SIERRA 2014 Owner's Manual
[x] Cancel search | Manufacturer: GMC, Model Year: 2014, Model line: SIERRA, Model: GMC SIERRA 2014Pages: 544, PDF Size: 13.79 MB
Page 15 of 544
Black plate (9,1)GMC Sierra Owner Manual (GMNA-Localizing-U.S./Canada/Mexico-
5853626) - 2014 - 3rd crc - 6/6/14
In Brief 1-9
.If equipped, press and hold the
control up to increase upper
lumbar support and decrease
lower lumbar support.
Press and hold the control down
to increase lower lumbar support
and decrease upper lumbar
support.
See Lumbar Adjustment on
page 3-4.
Reclining Seatbacks
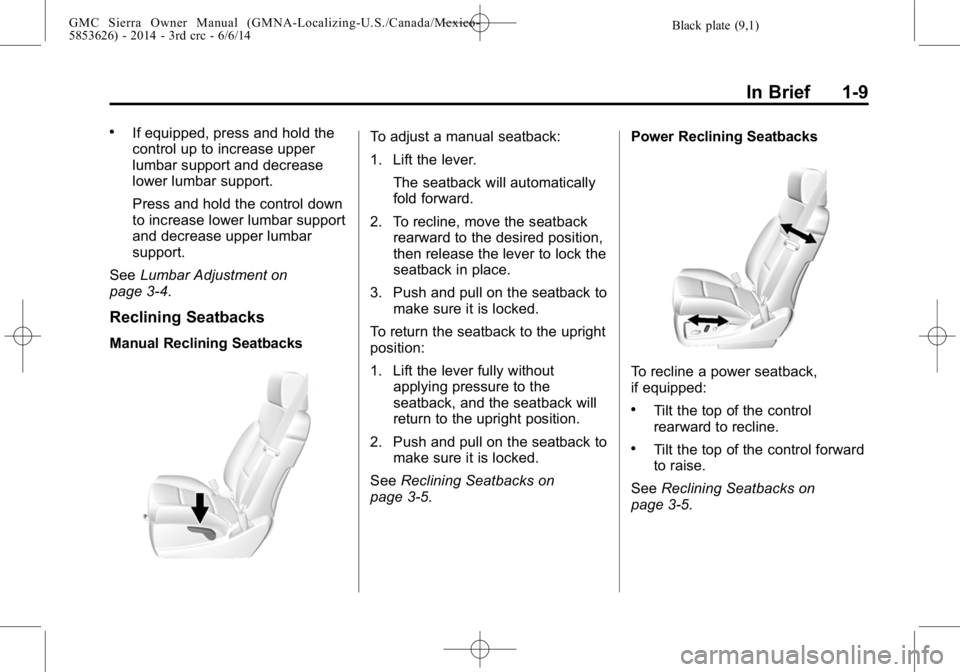
Manual Reclining Seatbacks
To adjust a manual seatback:
1. Lift the lever.
The seatback will automatically
fold forward.
2. To recline, move the seatback rearward to the desired position,
then release the lever to lock the
seatback in place.
3. Push and pull on the seatback to make sure it is locked.
To return the seatback to the upright
position:
1. Lift the lever fully without applying pressure to the
seatback, and the seatback will
return to the upright position.
2. Push and pull on the seatback to make sure it is locked.
See Reclining Seatbacks on
page 3-5. Power Reclining Seatbacks
To recline a power seatback,
if equipped:
.Tilt the top of the control
rearward to recline.
.Tilt the top of the control forward
to raise.
See Reclining Seatbacks on
page 3-5.
Page 16 of 544
Black plate (10,1)GMC Sierra Owner Manual (GMNA-Localizing-U.S./Canada/Mexico-
5853626) - 2014 - 3rd crc - 6/6/14
1-10 In Brief
Memory Features
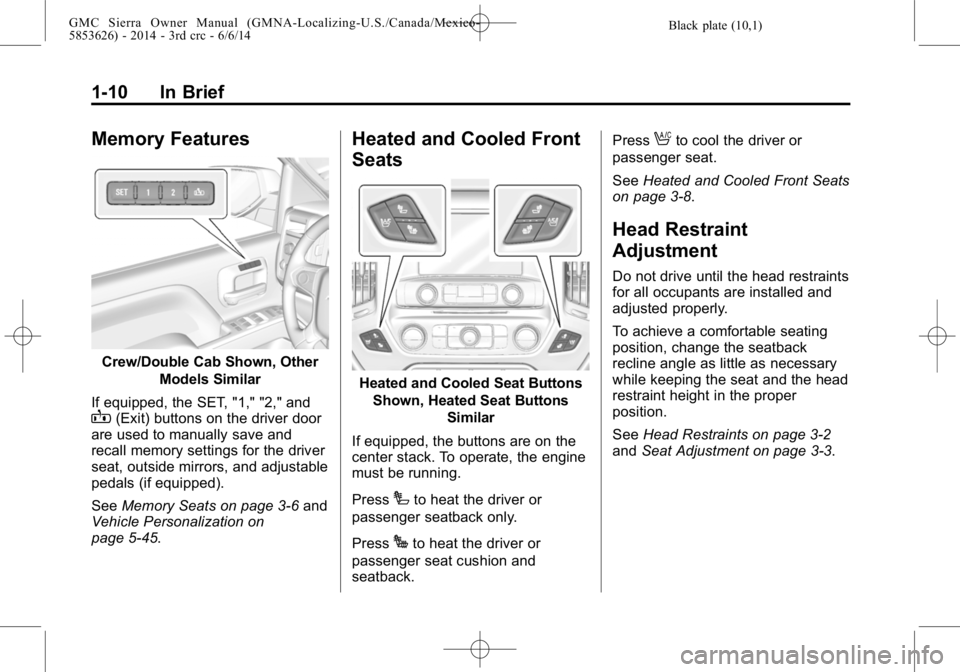
Crew/Double Cab Shown, OtherModels Similar
If equipped, the SET, "1," "2," and
B(Exit) buttons on the driver door
are used to manually save and
recall memory settings for the driver
seat, outside mirrors, and adjustable
pedals (if equipped).
See Memory Seats on page 3-6 and
Vehicle Personalization on
page 5-45.
Heated and Cooled Front
Seats
Heated and Cooled Seat Buttons
Shown, Heated Seat Buttons Similar
If equipped, the buttons are on the
center stack. To operate, the engine
must be running.
Press
Ito heat the driver or
passenger seatback only.
Press
Jto heat the driver or
passenger seat cushion and
seatback. Press
Ato cool the driver or
passenger seat.
See Heated and Cooled Front Seats
on page 3-8.
Head Restraint
Adjustment
Do not drive until the head restraints
for all occupants are installed and
adjusted properly.
To achieve a comfortable seating
position, change the seatback
recline angle as little as necessary
while keeping the seat and the head
restraint height in the proper
position.
See Head Restraints on page 3-2
and Seat Adjustment on page 3-3.
Page 28 of 544
Black plate (22,1)GMC Sierra Owner Manual (GMNA-Localizing-U.S./Canada/Mexico-
5853626) - 2014 - 3rd crc - 6/6/14
1-22 In Brief
Storing Radio Station Presets
Up to 25 preset stations from all
bands can be stored in the favorite
lists in any order. Up to five stations
can be stored in each favorite page
and the number of favorite pages
can be set.
To store the station to a position in
the list, while on the active source
main page, such as AM, FM,
or SiriusXM (if equipped), press and
hold a Favorites/Soft Key button on
the faceplate.
See“Storing Radio Station Presets”
under AM-FM Radio on page 7-9.
Setting the Clock
SeeClock on page 5-5.
Satellite Radio
Vehicles with a SiriusXM®satellite
radio tuner and a valid SiriusXM
satellite radio subscription can
receive SiriusXM programming.
SiriusXM Satellite Radio
Service
SiriusXM is a satellite radio service
based in the 48 contiguous United
States and 10 Canadian provinces.
SiriusXM satellite radio has a wide
variety of programming and
commercial-free music, coast to
coast, and in digital-quality sound.
A fee is required to receive the
SiriusXM service.
For more information refer to:
.www.siriusxm.com or call
1-866-635-2349 (U.S.).
.www.xmradio.ca or call
1-877-209-0079 (Canada).
See Satellite Radio on page 7-10.
Portable Audio Devices
This vehicle has a 3.5 mm (1/8 in)
auxiliary input jack, SD card reader,
and USB ports in the center
console. External devices such as
iPods
®, laptop computers, MP3
players, CD changers, and USB
storage devices may be connected,
depending on the audio system.
See USB Port on page 7-19, SD
Card Reader on page 7-21,
Auxiliary Jack on page 7-22.
Bluetooth®
The Bluetooth®system allows users
with a Bluetooth-enabled cell phone
to make and receive hands-free
calls using the vehicle audio system
and controls.
The Bluetooth-enabled cell phone
must be paired with the in-vehicle
Bluetooth system before it can be
used in the vehicle. Not all phones
will support all functions.
Page 61 of 544
Black plate (1,1)GMC Sierra Owner Manual (GMNA-Localizing-U.S./Canada/Mexico-
5853626) - 2014 - 3rd crc - 6/6/14
Seats and Restraints 3-1
Seats and
Restraints
Head Restraints
Head Restraints . . . . . . . . . . . . . . . 3-2
Front Seats
Seat Adjustment . . . . . . . . . . . . . . 3-3
Center Seat . . . . . . . . . . . . . . . . . . . 3-3
Power Seat Adjustment . . . . . . . 3-4
Lumbar Adjustment . . . . . . . . . . . 3-4
Reclining Seatbacks . . . . . . . . . . 3-5
Memory Seats . . . . . . . . . . . . . . . . 3-6
Heated and Cooled FrontSeats . . . . . . . . . . . . . . . . . . . . . . . . 3-8
Rear Seats
Rear Seats (Extended CabFull Bench) . . . . . . . . . . . . . . . . . 3-10
Rear Seats (Split Bench) . . . . . 3-11
Safety Belts
Safety Belts . . . . . . . . . . . . . . . . . . 3-12
How to Wear Safety Belts Properly . . . . . . . . . . . . . . . . . . . . 3-13 Lap-Shoulder Belt . . . . . . . . . . . 3-14
Safety Belt Use During
Pregnancy . . . . . . . . . . . . . . . . . . 3-19
Lap Belt . . . . . . . . . . . . . . . . . . . . . 3-19
Safety Belt Extender . . . . . . . . . 3-20
Safety System Check . . . . . . . . 3-20
Safety Belt Care . . . . . . . . . . . . . 3-20
Replacing Safety Belt System Parts after a Crash . . . . . . . . . 3-21
Airbag System
Airbag System . . . . . . . . . . . . . . . 3-21
Where Are the Airbags? . . . . . 3-23
When Should an AirbagInflate? . . . . . . . . . . . . . . . . . . . . . 3-25
What Makes an Airbag Inflate? . . . . . . . . . . . . . . . . . . . . . 3-26
How Does an Airbag Restrain? . . . . . . . . . . . . . . . . . . . 3-27
What Will You See after an Airbag Inflates? . . . . . . . . . . . . 3-27
Airbag On-Off Switch . . . . . . . . 3-28
Passenger Sensing System . . . . . . . . . . . . . . . . . . . . . 3-31
Servicing the Airbag-Equipped Vehicle . . . . . . . . . . . . . . . . . . . . . 3-35 Adding Equipment to the
Airbag-Equipped Vehicle . . . 3-36
Airbag System Check . . . . . . . . 3-37
Replacing Airbag System Parts after a Crash . . . . . . . . . 3-37
Child Restraints
Older Children . . . . . . . . . . . . . . . 3-38
Infants and Young
Children . . . . . . . . . . . . . . . . . . . . 3-40
Child Restraint Systems . . . . . 3-42
Where to Put the Restraint . . . 3-44
Lower Anchors and Tethers for Children (LATCH
System) . . . . . . . . . . . . . . . . . . . . 3-46
Replacing LATCH System Parts After a Crash . . . . . . . . . 3-58
Securing Child Restraints (Center Front Seat) . . . . . . . . . 3-58
Securing Child Restraints (Front Outboard
Passenger Seat) . . . . . . . . . . . 3-58
Securing Child Restraints (Rear Seat) . . . . . . . . . . . . . . . . . 3-68
Page 63 of 544
Black plate (3,1)GMC Sierra Owner Manual (GMNA-Localizing-U.S./Canada/Mexico-
5853626) - 2014 - 3rd crc - 6/6/14
Seats and Restraints 3-3
restraint forward, grasp the head
restraint and pull forward to the
desired locking position. To adjust
the head restraint rearward, grasp
the head restraint and pull forward
fully until the mechanism releases
and allows the head restraint to
return to the full rear position.
The front seat outboard head
restraints are not designed to be
removed.
Rear Seats
The rear seat has adjustable
headrests in the outboard seating
positions.
The height of the headrest can be
adjusted. Pull the headrest up to
raise it. To lower the headrest, push
the headrest down.
If you are installing a child restraint
in the rear seat, see“Securing a
Child Restraint Designed for the
LATCH System” underLower
Anchors and Tethers for Children
(LATCH System) on page 3-46.
Front Seats
Seat Adjustment
{Warning
You can lose control of the
vehicle if you try to adjust a driver
seat while the vehicle is moving.
Adjust the driver seat only when
the vehicle is not moving.
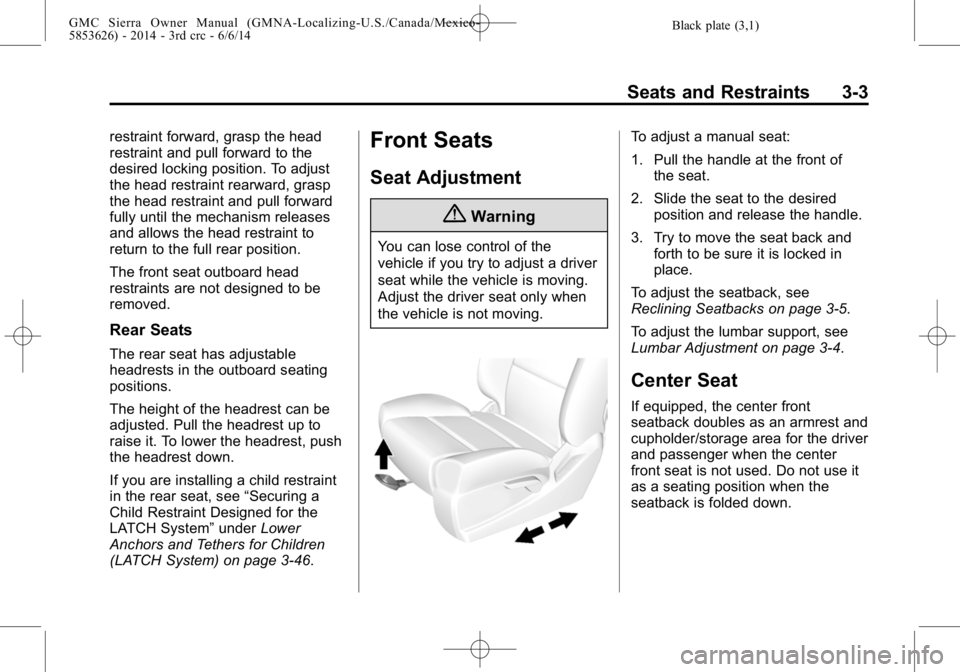
To adjust a manual seat:
1. Pull the handle at the front of the seat.
2. Slide the seat to the desired position and release the handle.
3. Try to move the seat back and forth to be sure it is locked in
place.
To adjust the seatback, see
Reclining Seatbacks on page 3-5.
To adjust the lumbar support, see
Lumbar Adjustment on page 3-4.
Center Seat
If equipped, the center front
seatback doubles as an armrest and
cupholder/storage area for the driver
and passenger when the center
front seat is not used. Do not use it
as a seating position when the
seatback is folded down.
Page 64 of 544
Black plate (4,1)GMC Sierra Owner Manual (GMNA-Localizing-U.S./Canada/Mexico-
5853626) - 2014 - 3rd crc - 6/6/14
3-4 Seats and Restraints
Power Seat Adjustment
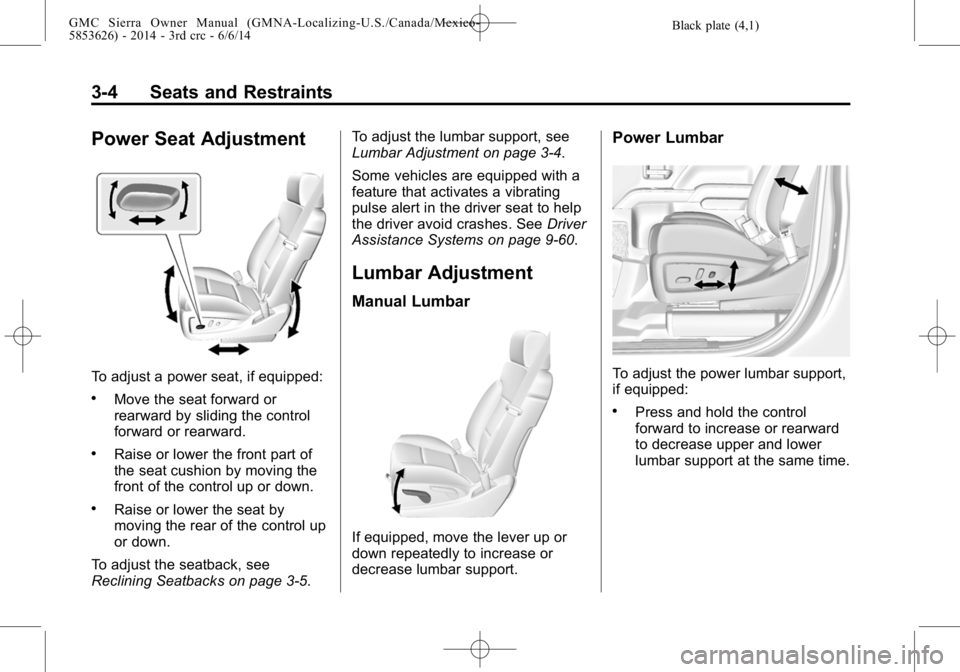
To adjust a power seat, if equipped:
.Move the seat forward or
rearward by sliding the control
forward or rearward.
.Raise or lower the front part of
the seat cushion by moving the
front of the control up or down.
.Raise or lower the seat by
moving the rear of the control up
or down.
To adjust the seatback, see
Reclining Seatbacks on page 3-5. To adjust the lumbar support, see
Lumbar Adjustment on page 3-4.
Some vehicles are equipped with a
feature that activates a vibrating
pulse alert in the driver seat to help
the driver avoid crashes. See
Driver
Assistance Systems on page 9-60.
Lumbar Adjustment
Manual Lumbar
If equipped, move the lever up or
down repeatedly to increase or
decrease lumbar support.
Power Lumbar
To adjust the power lumbar support,
if equipped:
.Press and hold the control
forward to increase or rearward
to decrease upper and lower
lumbar support at the same time.
Page 65 of 544
Black plate (5,1)GMC Sierra Owner Manual (GMNA-Localizing-U.S./Canada/Mexico-
5853626) - 2014 - 3rd crc - 6/6/14
Seats and Restraints 3-5
.If equipped, press and hold the
control up to increase upper
lumbar support and decrease
lower lumbar support.
Press and hold the control down
to increase lower lumbar support
and decrease upper lumbar
support.
Reclining Seatbacks
{Warning
Sitting in a reclined position when
the vehicle is in motion can be
dangerous. Even when buckled
up, the safety belts cannot do
their job.
The shoulder belt will not be
against your body. Instead, it will
be in front of you. In a crash, you
could go into it, receiving neck or
other injuries.(Continued)
Warning (Continued)
The lap belt could go up over
your abdomen. The belt forces
would be there, not at your pelvic
bones. This could cause serious
internal injuries.
For proper protection when the
vehicle is in motion, have the
seatback upright. Then sit well
back in the seat and wear the
safety belt properly.
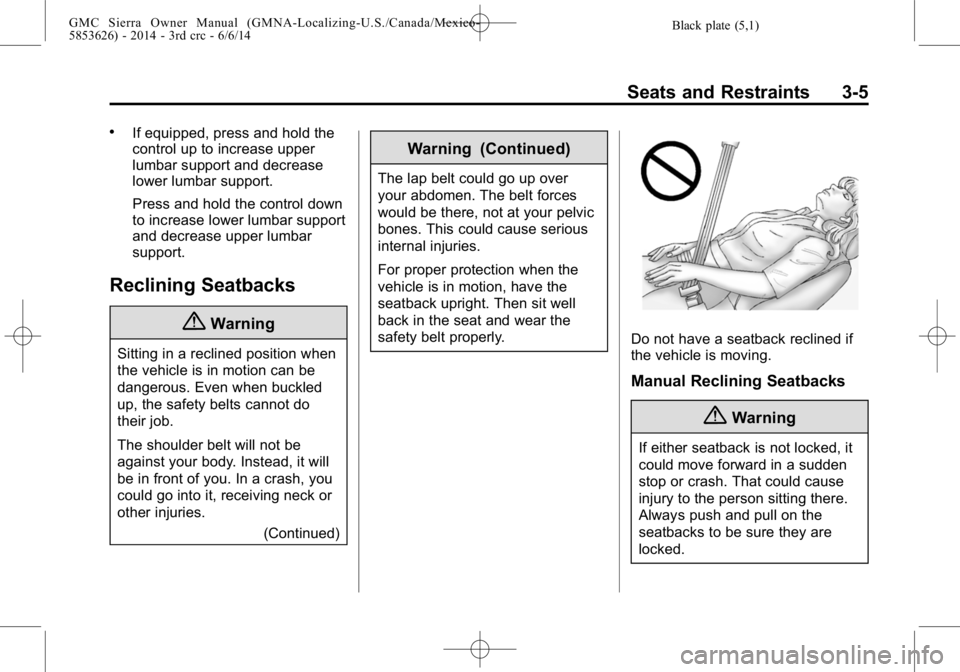
Do not have a seatback reclined if
the vehicle is moving.
Manual Reclining Seatbacks
{Warning
If either seatback is not locked, it
could move forward in a sudden
stop or crash. That could cause
injury to the person sitting there.
Always push and pull on the
seatbacks to be sure they are
locked.
Page 66 of 544
Black plate (6,1)GMC Sierra Owner Manual (GMNA-Localizing-U.S./Canada/Mexico-
5853626) - 2014 - 3rd crc - 6/6/14
3-6 Seats and Restraints
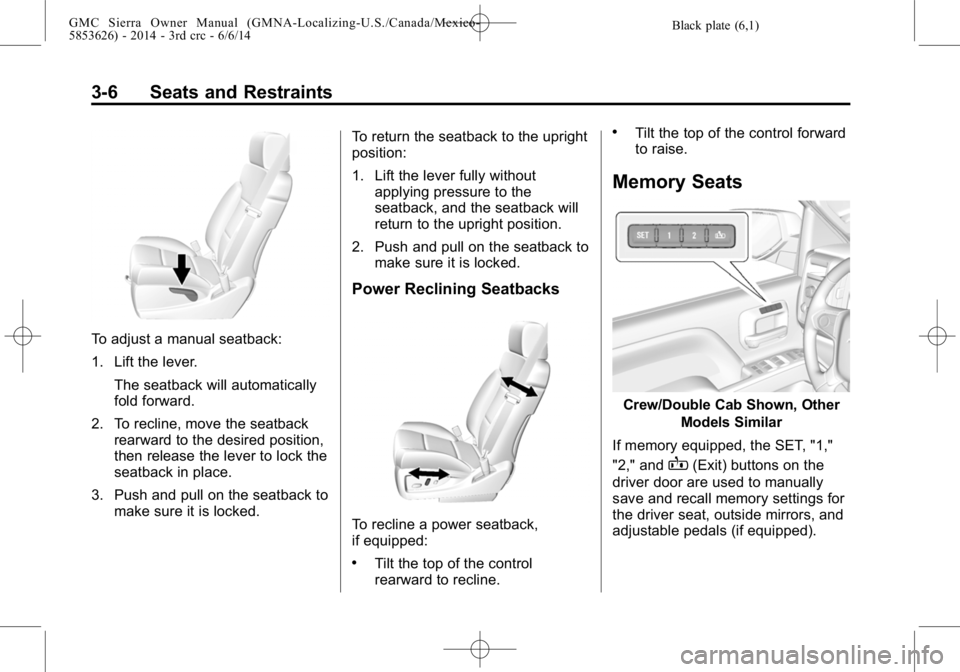
To adjust a manual seatback:
1. Lift the lever.The seatback will automatically
fold forward.
2. To recline, move the seatback rearward to the desired position,
then release the lever to lock the
seatback in place.
3. Push and pull on the seatback to make sure it is locked. To return the seatback to the upright
position:
1. Lift the lever fully without
applying pressure to the
seatback, and the seatback will
return to the upright position.
2. Push and pull on the seatback to make sure it is locked.
Power Reclining Seatbacks
To recline a power seatback,
if equipped:
.Tilt the top of the control
rearward to recline.
.Tilt the top of the control forward
to raise.
Memory Seats
Crew/Double Cab Shown, Other
Models Similar
If memory equipped, the SET, "1,"
"2," and
B(Exit) buttons on the
driver door are used to manually
save and recall memory settings for
the driver seat, outside mirrors, and
adjustable pedals (if equipped).
Page 94 of 544
Black plate (34,1)GMC Sierra Owner Manual (GMNA-Localizing-U.S./Canada/Mexico-
5853626) - 2014 - 3rd crc - 6/6/14
3-34 Seats and Restraints
5. If, after reinstalling the childrestraint and restarting the
vehicle, the on indicator is still lit,
turn the vehicle off. Then slightly
recline the vehicle seatback and
adjust the seat cushion,
if adjustable, to make sure that
the vehicle seatback is not
pushing the child restraint into
the seat cushion.
Also make sure the child
restraint is not trapped under the
vehicle head restraint. If this
happens, adjust the head
restraint. See Head Restraints
on page 3-2.
6. Restart the vehicle.
The passenger sensing system may
or may not turn off the airbag for a
child in a child restraint depending
upon the child’s size. It is better to
secure the child restraint in a
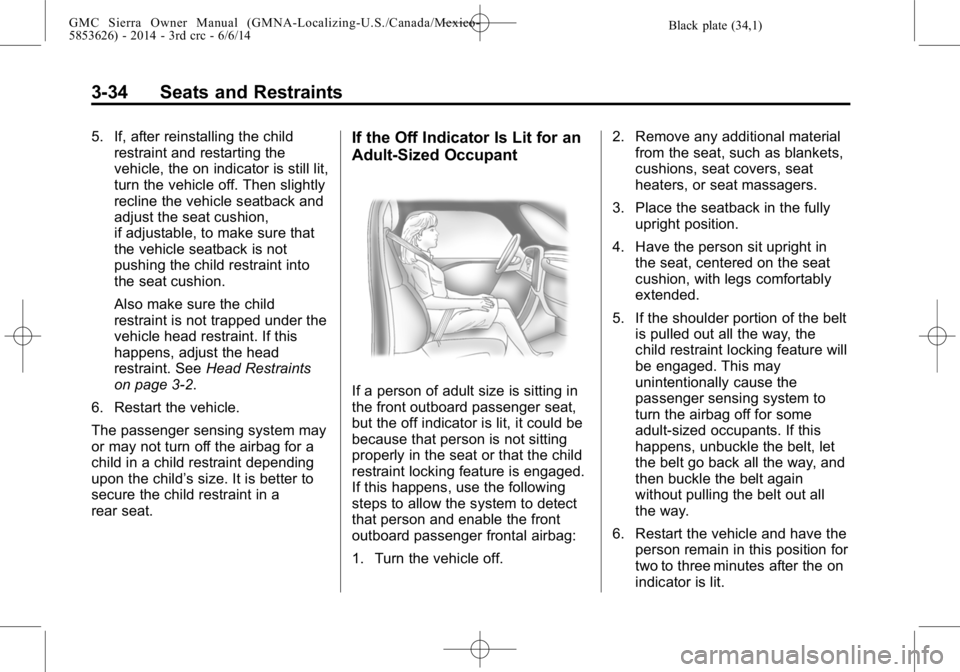
rear seat.If the Off Indicator Is Lit for an
Adult-Sized Occupant
If a person of adult size is sitting in
the front outboard passenger seat,
but the off indicator is lit, it could be
because that person is not sitting
properly in the seat or that the child
restraint locking feature is engaged.
If this happens, use the following
steps to allow the system to detect
that person and enable the front
outboard passenger frontal airbag:
1. Turn the vehicle off. 2. Remove any additional material
from the seat, such as blankets,
cushions, seat covers, seat
heaters, or seat massagers.
3. Place the seatback in the fully upright position.
4. Have the person sit upright in the seat, centered on the seat
cushion, with legs comfortably
extended.
5. If the shoulder portion of the belt is pulled out all the way, the
child restraint locking feature will
be engaged. This may
unintentionally cause the
passenger sensing system to
turn the airbag off for some
adult-sized occupants. If this
happens, unbuckle the belt, let
the belt go back all the way, and
then buckle the belt again
without pulling the belt out all
the way.
6. Restart the vehicle and have the person remain in this position for
two to three minutes after the on
indicator is lit.
Page 111 of 544
Black plate (51,1)GMC Sierra Owner Manual (GMNA-Localizing-U.S./Canada/Mexico-
5853626) - 2014 - 3rd crc - 6/6/14
Seats and Restraints 3-51
{Warning
Children can be seriously injured
or strangled if a shoulder belt is
wrapped around their neck and
the safety belt continues to
tighten. Buckle any unused safety
belts behind the child restraint so
children cannot reach them. Pull
the shoulder belt all the way out
of the retractor to set the lock,
if the vehicle has one, after the
child restraint has been installed.
{Caution
Do not let the LATCH
attachments rub against the
vehicle’s safety belts. This may
damage these parts. If necessary,
move buckled safety belts to
avoid rubbing the LATCH
attachments.(Continued)
Caution (Continued)
Do not fold the empty rear seat
with a safety belt buckled. This
could damage the safety belt or
the seat. Unbuckle and return the
safety belt to its stowed position,
before folding the seat.
If you need to secure more than one
child restraint in the rear seat, see
Where to Put the Restraint on
page 3-44.
This system is designed to make
installation of child restraints easier.
When using lower anchors, do not
use the vehicle's safety belts.
Instead use the vehicle's anchors
and child restraint attachments to
secure the restraints. Some
restraints also use another vehicle
anchor to secure a top tether. Regular Cab Models
1. For models without a rear seat,
forward-facing child restraints
should only be installed in the
right front seating position with
safety belts and a top tether.
See Securing Child Restraints
(Center Front Seat) on
page 3-58 orSecuring Child
Restraints (Front Outboard
Passenger Seat) on page 3-58
or Securing Child Restraints
(Rear Seat) on page 3-68.
If the child restraint manufacturer
recommends that the top tether
be attached, attach and tighten
the top tether to the top tether
anchor, if your vehicle has one.
Refer to the child restraint
instructions and the following
steps:
1.1. Fold the passenger seatback forward to access
the top tether anchor. See
Reclining Seatbacks on
page 3-5.