Page%% GMC SIERRA 2014 Owner's Manual
[x] Cancel search | Manufacturer: GMC, Model Year: 2014, Model line: SIERRA, Model: GMC SIERRA 2014Pages: 544, PDF Size: 13.79 MB
Page 363 of 544
Black plate (93,1)GMC Sierra Owner Manual (GMNA-Localizing-U.S./Canada/Mexico-
5853626) - 2014 - CRC - 6/6/14
Driving and Operating 9-93
If the vehicle is equipped with the
heavy-duty trailering option, see
“Heavy-Duty Trailer Wiring Harness
Package”earlier in this section.
When the camper-wiring harness is
ordered without the heavy-duty
trailering package, a seven-wire
harness with a seven-pin connector
is at the rear of the vehicle and is
tied to the vehicle's frame.
Electric Brake Control Wiring
Provisions
These wiring provisions are
included with the vehicle as part of
the trailer wiring package. These
provisions are for an electric brake
controller.
The harness should be installed by
your dealer or a qualified service
center.
Tow/Haul Mode
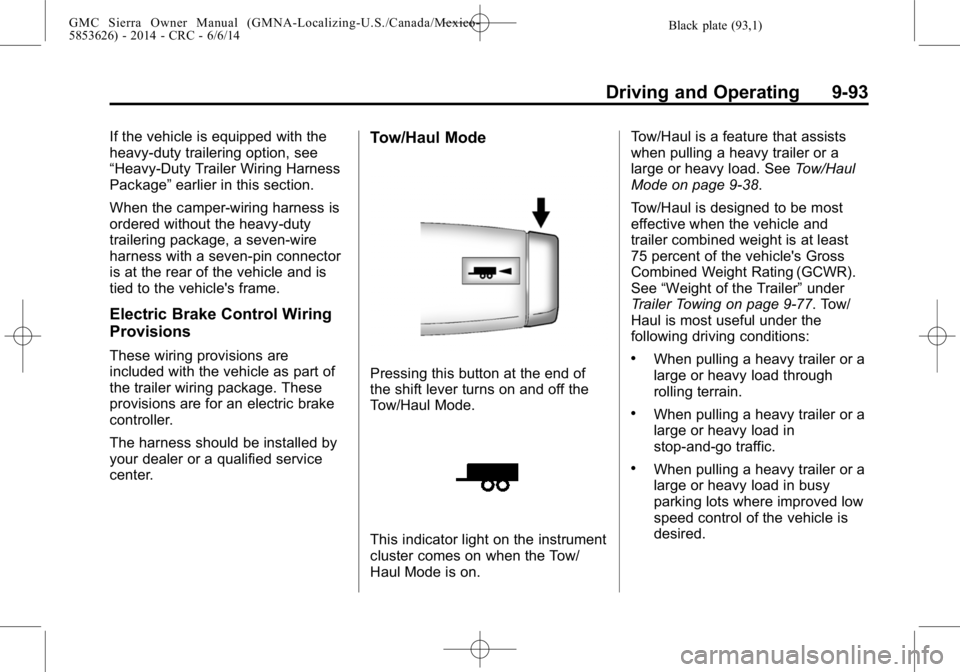
Pressing this button at the end of
the shift lever turns on and off the
Tow/Haul Mode.
This indicator light on the instrument
cluster comes on when the Tow/
Haul Mode is on. Tow/Haul is a feature that assists
when pulling a heavy trailer or a
large or heavy load. See
Tow/Haul
Mode on page 9-38.
Tow/Haul is designed to be most
effective when the vehicle and
trailer combined weight is at least
75 percent of the vehicle's Gross
Combined Weight Rating (GCWR).
See “Weight of the Trailer” under
Trailer Towing on page 9-77. Tow/
Haul is most useful under the
following driving conditions:
.When pulling a heavy trailer or a
large or heavy load through
rolling terrain.
.When pulling a heavy trailer or a
large or heavy load in
stop-and-go traffic.
.When pulling a heavy trailer or a
large or heavy load in busy
parking lots where improved low
speed control of the vehicle is
desired.
Page 365 of 544
Black plate (95,1)GMC Sierra Owner Manual (GMNA-Localizing-U.S./Canada/Mexico-
5853626) - 2014 - CRC - 6/6/14
Driving and Operating 9-95
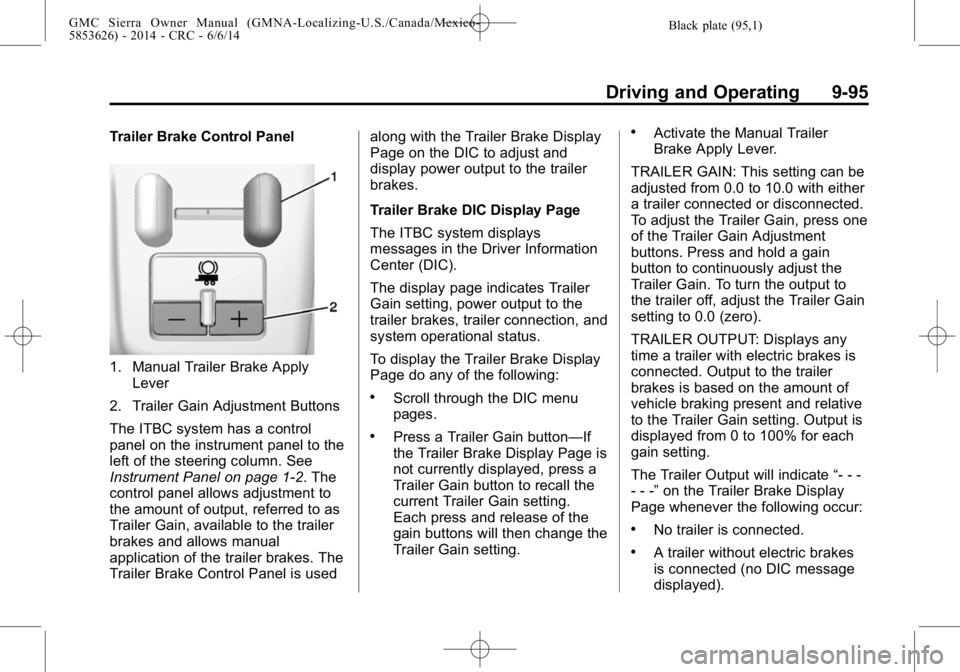
Trailer Brake Control Panel
1. Manual Trailer Brake ApplyLever
2. Trailer Gain Adjustment Buttons
The ITBC system has a control
panel on the instrument panel to the
left of the steering column. See
Instrument Panel on page 1-2. The
control panel allows adjustment to
the amount of output, referred to as
Trailer Gain, available to the trailer
brakes and allows manual
application of the trailer brakes. The
Trailer Brake Control Panel is used along with the Trailer Brake Display
Page on the DIC to adjust and
display power output to the trailer
brakes.
Trailer Brake DIC Display Page
The ITBC system displays
messages in the Driver Information
Center (DIC).
The display page indicates Trailer
Gain setting, power output to the
trailer brakes, trailer connection, and
system operational status.
To display the Trailer Brake Display
Page do any of the following:
.Scroll through the DIC menu
pages.
.Press a Trailer Gain button—If
the Trailer Brake Display Page is
not currently displayed, press a
Trailer Gain button to recall the
current Trailer Gain setting.
Each press and release of the
gain buttons will then change the
Trailer Gain setting.
.Activate the Manual Trailer
Brake Apply Lever.
TRAILER GAIN: This setting can be
adjusted from 0.0 to 10.0 with either
a trailer connected or disconnected.
To adjust the Trailer Gain, press one
of the Trailer Gain Adjustment
buttons. Press and hold a gain
button to continuously adjust the
Trailer Gain. To turn the output to
the trailer off, adjust the Trailer Gain
setting to 0.0 (zero).
TRAILER OUTPUT: Displays any
time a trailer with electric brakes is
connected. Output to the trailer
brakes is based on the amount of
vehicle braking present and relative
to the Trailer Gain setting. Output is
displayed from 0 to 100% for each
gain setting.
The Trailer Output will indicate “- - -
- - -” on the Trailer Brake Display
Page whenever the following occur:
.No trailer is connected.
.A trailer without electric brakes
is connected (no DIC message
displayed).
Page 368 of 544
Black plate (98,1)GMC Sierra Owner Manual (GMNA-Localizing-U.S./Canada/Mexico-
5853626) - 2014 - CRC - 6/6/14
9-98 Driving and Operating
continues over multiple ignition
cycles, there is a problem with the
ITBC system. Have the vehicle
serviced.
If either the CHECK TRAILER
WIRING or SERVICE TRAILER
BRAKE SYSTEM message displays
while driving, the ITBC system may
not be fully functional or may not
function at all. When traffic
conditions allow, carefully pull the
vehicle over to the side of the road
and turn the ignition off. Check the
wiring connection to the trailer and
turn the ignition back on. If either of
these messages continues, either
the vehicle or trailer needs service.
A GM dealer may be able to
diagnose and repair problems with
the trailer. However, any diagnosis
and repair of the trailer is not
covered under the vehicle warranty.
Contact your trailer dealer for
assistance with trailer repairs and
trailer warranty information.Trailer Sway
Control (TSC)
Vehicles with StabiliTrak have a
TSC feature. Trailer sway is
unintended side-to-side motion of a
trailer while being towed. If the
vehicle is towing a trailer and the
TSC detects that sway is increasing,
the vehicle brakes are selectively
applied at each wheel, to help
reduce excessive trailer sway. If the
vehicle is equipped with the
Integrated Trailer Brake Control
(ITBC) system, and the trailer has
the electric actuated brake system,
StabiliTrak may also apply the trailer
brakes.
If TSC is enabled, the Traction
Control System (TCS)/StabiliTrak
warning light will flash on the
instrument cluster. Vehicle speed
must be reduced. If trailer sway
continues, StabiliTrak can reduce
engine torque to help slow the
vehicle. SeeTraction Control/
Electronic Stability Control on
page 9-54.
{Warning
Even if the vehicle is equipped
with TSC, trailer sway could result
in loss of control and the vehicle
could crash. If excessive trailer
sway is detected, slow down to a
safe speed. Check the trailer and
vehicle to help correct possible
causes. These could include an
improperly or overloaded trailer,
unrestrained cargo, improper
trailer hitch configuration,
excessive vehicle-trailer speed,
or improperly inflated or incorrect
vehicle or trailer tires. See Towing
Equipment on page 9-89 for
trailer ratings and hitch setup
recommendations.
Adding non-dealer accessories can
affect the vehicle performance. See
Accessories and Modifications on
page 10-3.
Page 369 of 544
Black plate (99,1)GMC Sierra Owner Manual (GMNA-Localizing-U.S./Canada/Mexico-
5853626) - 2014 - CRC - 6/6/14
Driving and Operating 9-99
Conversions and
Add-Ons
Add-On Electrical
Equipment
{Caution
Some electrical equipment can
damage the vehicle or cause
components to not work and
would not be covered by the
warranty. Always check with your
dealer before adding electrical
equipment.
Add-on equipment can drain the
vehicle's 12-volt battery, even if the
vehicle is not operating.
The vehicle has an airbag system.
Before attempting to add anything
electrical to the vehicle, see
Servicing the Airbag-Equipped
Vehicle on page 3-35 andAdding
Equipment to the Airbag-Equipped
Vehicle on page 3-36.
Adding a Snow Plow or
Similar Equipment
{Caution
Do not exceed 64 km/h (40 mph)
with a snow plow mounted to the
vehicle. The vehicle could
overheat and be damaged.
Before installing a snow plow on the
vehicle, here are some things you
need to know:
{Caution
If the vehicle does not have the
snow plow prep package, adding
a plow can damage the vehicle,
and the repairs would not be
covered by warranty. (Continued)
Caution (Continued)
Unless the vehicle was built to
carry a snow plow, do not add
one to the vehicle. If the vehicle
has the snow plow prep package,
called RPO VYU, then the
payload the vehicle can carry will
be reduced when a snow plow is
installed. The vehicle can be
damaged if either the front or rear
axle ratings or the Gross Vehicle
Weight Rating (GVWR) are
exceeded.
Some vehicles are built with a
special snow plow prep package,
called RPO VYU. If the vehicle has
this option, you can add a plow to it,
provided certain weights, such as
the weights on the vehicle's axles
and the Gross Vehicle Weight
Rating (GVWR), are not exceeded.
Page 372 of 544
Black plate (102,1)GMC Sierra Owner Manual (GMNA-Localizing-U.S./Canada/Mexico-
5853626) - 2014 - CRC - 6/6/14
9-102 Driving and Operating
{Warning
On some vehicles that have
certain front mounted equipment,
such as a snow plow, it may be
possible to load the front axle to
the front gross axle weight rating
(GAWR) but not have enough
weight on the rear axle to have
proper braking performance. If the
brakes cannot work properly, you
could have a crash. To help the
brakes work properly when a
snow plow is installed, always
follow the snow plow
manufacturer or installer's
recommendation for rear ballast
to ensure a proper front and rear
weight distribution ratio, even
though the actual front weight
may be less than the front
GAWR, and the total vehicle
weight is less than the gross
vehicle weight rating (GVWR).(Continued)
Warning (Continued)
Maintaining a proper front and
rear weight distribution ratio is
necessary to provide proper
braking performance.
Total vehicle reserve capacity is the
difference between the GVWR and
the weight of the truck with full fuel
and passengers. It is the amount of
weight that can be added to the
vehicle before reaching the GVWR.
Keep in mind that reserve capacity
numbers are intended as a guide
when selecting the amount of
equipment or cargo the truck can
carry. If unsure of the vehicle's front,
rear, or total weight, go to a weigh
station and weigh the vehicle. Your
dealer can also help with this. The total vehicle reserve capacity
for the vehicle can be found in the
lower right corner of the
Certification/Tire label as shown
previously.
See your dealer for additional
advice and information about using
a snow plow on the vehicle. Also,
see
Vehicle Load Limits on
page 9-15.
Emergency Roof Lamp
Provisions
Vehicles with the RPO VYU snow
plow prep package also have an
emergency roof lamp provision
package, RPO TRW. Wiring for the
emergency roof lamp is provided
above the overhead console. See
Auxiliary Roof-Mounted Lamp on
page 6-6 for switch location.
Page 377 of 544
Black plate (3,1)GMC Sierra Owner Manual (GMNA-Localizing-U.S./Canada/Mexico-
5853626) - 2014 - 3rd crc - 6/6/14
Vehicle Care 10-3
cause cancer and birth defects or
other reproductive harm. Engine
exhaust, many parts and systems,
many fluids, and some component
wear by-products contain and/or
emit these chemicals.
California Perchlorate
Materials Requirements
Certain types of automotive
applications, such as airbag
initiators, safety belt pretensioners,
and lithium batteries contained in
Remote Keyless Entry transmitters,
may contain perchlorate materials.
Special handling may be necessary.
For additional information, see
www.dtsc.ca.gov/hazardouswaste/
perchlorate.
Accessories and
Modifications
Adding non‐dealer accessories or
making modifications to the vehicle
can affect vehicle performance and
safety, including such things as
airbags, braking, stability, ride andhandling, emissions systems,
aerodynamics, durability, and
electronic systems like antilock
brakes, traction control, and stability
control. These accessories or
modifications could even cause
malfunction or damage not covered
by the vehicle warranty.
Damage to vehicle components
resulting from modifications or the
installation or use of non‐GM
certified parts, including control
module or software modifications, is
not covered under the terms of the
vehicle warranty and may affect
remaining warranty coverage for
affected parts.
GM Accessories are designed to
complement and function with other
systems on the vehicle. See your
dealer to accessorize the vehicle
using genuine GM Accessories
installed by a dealer technician.
Also, see
Adding Equipment to the
Airbag-Equipped Vehicle on
page 3-36.
Vehicle Checks
Doing Your Own
Service Work
{Warning
It can be dangerous to work on
your vehicle if you do not have
the proper knowledge, service
manual, tools, or parts. Always
follow owner manual procedures
and consult the service manual
for your vehicle before doing any
service work.
If doing some of your own service
work, use the proper service
manual. It tells you much more
about how to service the vehicle
than this manual can. To order the
proper service manual, see Service
Publications Ordering Information
on page 13-11.
Page 378 of 544
Black plate (4,1)GMC Sierra Owner Manual (GMNA-Localizing-U.S./Canada/Mexico-
5853626) - 2014 - 3rd crc - 6/6/14
10-4 Vehicle Care
This vehicle has an airbag system.
Before attempting to do your own
service work, seeServicing the
Airbag-Equipped Vehicle on
page 3-35.
Keep a record with all parts receipts
and list the mileage and the date of
any service work performed. See
Maintenance Records on
page 11-16.
{Caution
Even small amounts of
contamination can cause damage
to vehicle systems. Do not allow
contaminants to contact the fluids,
reservoir caps, or dipsticks.
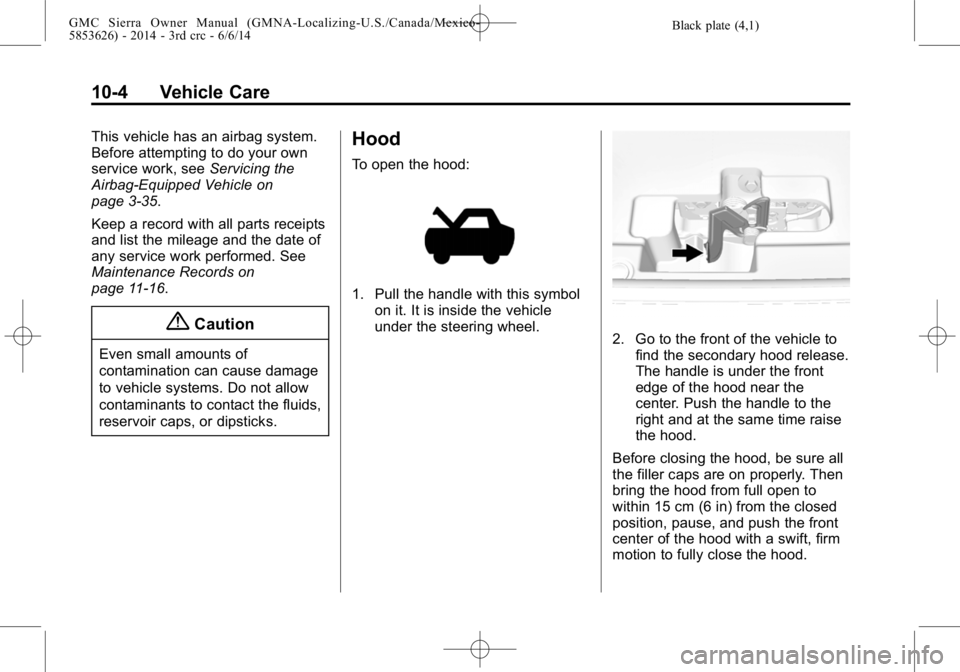
Hood
To open the hood:
1. Pull the handle with this symbol on it. It is inside the vehicle
under the steering wheel.
2. Go to the front of the vehicle tofind the secondary hood release.
The handle is under the front
edge of the hood near the
center. Push the handle to the
right and at the same time raise
the hood.
Before closing the hood, be sure all
the filler caps are on properly. Then
bring the hood from full open to
within 15 cm (6 in) from the closed
position, pause, and push the front
center of the hood with a swift, firm
motion to fully close the hood.
Page 380 of 544

Black plate (6,1)GMC Sierra Owner Manual (GMNA-Localizing-U.S./Canada/Mexico-
5853626) - 2014 - 3rd crc - 6/6/14
10-6 Vehicle Care
1. Positive (+) Terminal. SeeJump
Starting on page 10-89.
2. Battery on page 10-31.
3. Coolant Surge Tank and Pressure Cap. See Cooling
System on page 10-19.
4. Engine Air Cleaner/Filter on
page 10-17.
5. Automatic Transmission Dipstick (If Equipped). See “How to
Check Automatic Transmission
Fluid” under Automatic
Transmission Fluid on
page 10-14. 6. Remote Negative (–) Location.
See Jump Starting on
page 10-89.
7. Engine Cooling Fans (Out of View). See Cooling System on
page 10-19.
8. Engine Oil Fill Cap. See “When
to Add Engine Oil” underEngine
Oil on page 10-10.
9. Engine Oil Dipstick. See “Checking Engine Oil” under
Engine Oil on page 10-10.
10. Brake Fluid Reservoir. See Brake Fluid on page 10-29. 11. Windshield Washer Fluid
Reservoir. See “Adding Washer
Fluid” under Washer Fluid on
page 10-27.
12. Clutch Fluid Reservoir (If Equipped).
13. Engine Compartment Fuse
Block on page 10-43.
Page 382 of 544

Black plate (8,1)GMC Sierra Owner Manual (GMNA-Localizing-U.S./Canada/Mexico-
5853626) - 2014 - 3rd crc - 6/6/14
10-8 Vehicle Care
1. Positive (+) Terminal. SeeJump
Starting on page 10-89.
2. Battery on page 10-31.
3. Coolant Surge Tank and Pressure Cap. See Cooling
System on page 10-19.
4. Engine Air Cleaner/Filter on
page 10-17.
5. Automatic Transmission Dipstick. See “How to Check
Automatic Transmission Fluid”
under Automatic Transmission
Fluid on page 10-14. 6. Remote Negative (–) Location
(Out of View). See Jump Starting
on page 10-89.
7. Engine Cooling Fans (Out of View). See Cooling System on
page 10-19.
8. Engine Oil Fill Cap. See “When
to Add Engine Oil” underEngine
Oil on page 10-10.
9. Engine Oil Dipstick. See “Checking Engine Oil” under
Engine Oil on page 10-10. 10. Windshield Washer Fluid
Reservoir. See “Adding Washer
Fluid” under Washer Fluid on
page 10-27.
11. Brake Fluid Reservoir. See Brake Fluid on page 10-29.
12. Engine Compartment Fuse
Block on page 10-43.
Page 384 of 544
Black plate (10,1)GMC Sierra Owner Manual (GMNA-Localizing-U.S./Canada/Mexico-
5853626) - 2014 - 3rd crc - 6/6/14
10-10 Vehicle Care
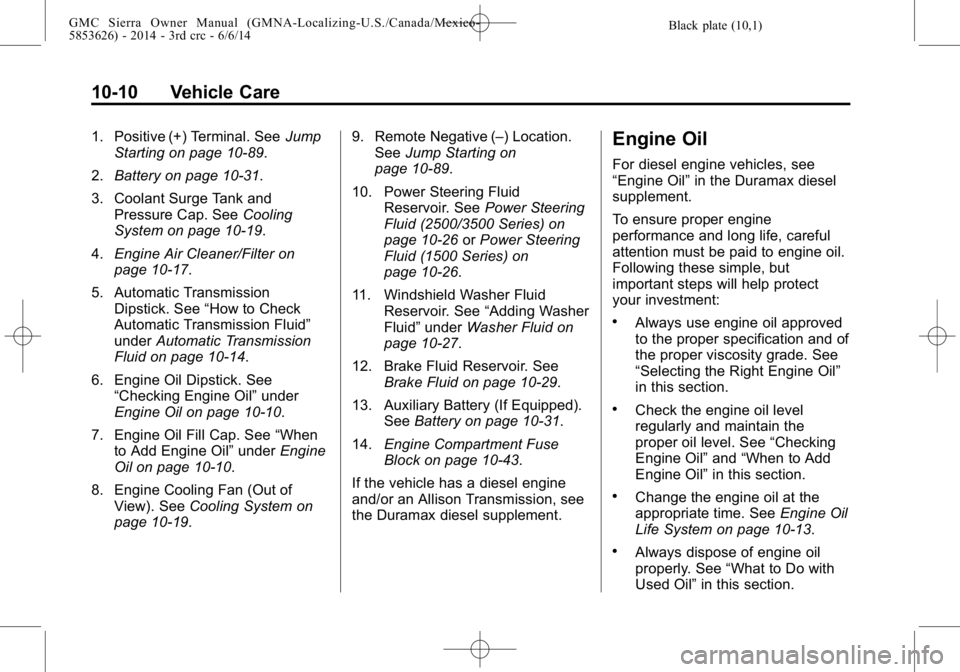
1. Positive (+) Terminal. SeeJump
Starting on page 10-89.
2. Battery on page 10-31.
3. Coolant Surge Tank and Pressure Cap. See Cooling
System on page 10-19.
4. Engine Air Cleaner/Filter on
page 10-17.
5. Automatic Transmission Dipstick. See “How to Check
Automatic Transmission Fluid”
under Automatic Transmission
Fluid on page 10-14.
6. Engine Oil Dipstick. See “Checking Engine Oil” under
Engine Oil on page 10-10.
7. Engine Oil Fill Cap. See “When
to Add Engine Oil” underEngine
Oil on page 10-10.
8. Engine Cooling Fan (Out of View). See Cooling System on
page 10-19. 9. Remote Negative (–) Location.
See Jump Starting on
page 10-89.
10. Power Steering Fluid Reservoir. See Power Steering
Fluid (2500/3500 Series) on
page 10-26 orPower Steering
Fluid (1500 Series) on
page 10-26.
11. Windshield Washer Fluid Reservoir. See “Adding Washer
Fluid” under Washer Fluid on
page 10-27.
12. Brake Fluid Reservoir. See Brake Fluid on page 10-29.
13. Auxiliary Battery (If Equipped). SeeBattery on page 10-31.
14. Engine Compartment Fuse
Block on page 10-43.
If the vehicle has a diesel engine
and/or an Allison Transmission, see
the Duramax diesel supplement.Engine Oil
For diesel engine vehicles, see
“Engine Oil” in the Duramax diesel
supplement.
To ensure proper engine
performance and long life, careful
attention must be paid to engine oil.
Following these simple, but
important steps will help protect
your investment:
.Always use engine oil approved
to the proper specification and of
the proper viscosity grade. See
“Selecting the Right Engine Oil”
in this section.
.Check the engine oil level
regularly and maintain the
proper oil level. See “Checking
Engine Oil” and“When to Add
Engine Oil” in this section.
.Change the engine oil at the
appropriate time. See Engine Oil
Life System on page 10-13.
.Always dispose of engine oil
properly. See “What to Do with
Used Oil” in this section.