Manual mode GMC SIERRA 2014 Owner's Guide
[x] Cancel search | Manufacturer: GMC, Model Year: 2014, Model line: SIERRA, Model: GMC SIERRA 2014Pages: 544, PDF Size: 13.79 MB
Page 87 of 544
Black plate (27,1)GMC Sierra Owner Manual (GMNA-Localizing-U.S./Canada/Mexico-
5853626) - 2014 - 3rd crc - 6/6/14
Seats and Restraints 3-27
How Does an Airbag
Restrain?
In moderate to severe frontal or
near frontal collisions, even belted
occupants can contact the steering
wheel or the instrument panel. In
moderate to severe side collisions,
even belted occupants can contact
the inside of the vehicle.
Airbags supplement the protection
provided by safety belts by
distributing the force of the impact
more evenly over the
occupant's body.
Rollover capable roof-rail airbags
are designed to help contain the
head and chest of occupants in the
outboard seating positions in the
first and second rows. The rollover
capable roof-rail airbags are
designed to help reduce the risk of
full or partial ejection in rollover
events, although no system can
prevent all such ejections.But airbags would not help in many
types of collisions, primarily
because the occupant's motion is
not toward those airbags. See
When
Should an Airbag Inflate? on
page 3-25.
Airbags should never be regarded
as anything more than a supplement
to safety belts.
What Will You See after
an Airbag Inflates?
After the frontal airbags and
seat-mounted side impact airbags
inflate, they quickly deflate, so
quickly that some people may not
even realize an airbag inflated.
Roof-rail airbags may still be at least
partially inflated for some time after
they inflate. Some components of
the airbag module may be hot for
several minutes. For location of the
airbags, see Where Are the
Airbags? on page 3-23.
The parts of the airbag that come
into contact with you may be warm,
but not too hot to touch. There may be some smoke and dust coming
from the vents in the deflated
airbags. Airbag inflation does not
prevent the driver from seeing out of
the windshield or being able to steer
the vehicle, nor does it prevent
people from leaving the vehicle.
{Warning
When an airbag inflates, there
may be dust in the air. This dust
could cause breathing problems
for people with a history of
asthma or other breathing trouble.
To avoid this, everyone in the
vehicle should get out as soon as
it is safe to do so. If you have
breathing problems but cannot
get out of the vehicle after an
airbag inflates, then get fresh air
by opening a window or a door.
If you experience breathing
problems following an airbag
deployment, you should seek
medical attention.
Page 88 of 544
Black plate (28,1)GMC Sierra Owner Manual (GMNA-Localizing-U.S./Canada/Mexico-
5853626) - 2014 - 3rd crc - 6/6/14
3-28 Seats and Restraints
The vehicle has a feature that may
automatically unlock the doors, turn
on the interior lamps, turn on the
hazard warning flashers, and shut
off the fuel system after the airbags
inflate. You can lock the doors, turn
off the interior lamps, and turn off
the hazard warning flashers by
using the controls for those
features.
{Warning
A crash severe enough to inflate
the airbags may have also
damaged important functions in
the vehicle, such as the fuel
system, brake and steering
systems, etc. Even if the vehicle
appears to be drivable after a
moderate crash, there may be
concealed damage that could
make it difficult to safely operate
the vehicle.
Use caution if you should attempt
to restart the engine after a crash
has occurred.In many crashes severe enough to
inflate the airbag, windshields are
broken by vehicle deformation.
Additional windshield breakage may
also occur from the front outboard
passenger airbag.
.Airbags are designed to inflate
only once. After an airbag
inflates, you will need some new
parts for the airbag system.
If you do not get them, the
airbag system will not be there
to help protect you in another
crash. A new system will include
airbag modules and possibly
other parts. The service manual
for the vehicle covers the need
to replace other parts.
.The vehicle has a crash sensing
and diagnostic module which
records information after a
crash. See
Vehicle Data
Recording and Privacy on
page 13-14 andEvent Data
Recorders on page 13-14.
.Let only qualified technicians
work on the airbag systems.
Improper service can mean that
an airbag system will not work
properly. See your dealer for
service.
Airbag On-Off Switch
If the passenger side instrument
panel endcap has the switch
pictured in the following illustration,
the vehicle has an airbag on-off
switch that you can use to manually
turn on or off the front outboard
passenger frontal airbag. See
Instrument Panel on page 1-2.
Page 101 of 544
Black plate (41,1)GMC Sierra Owner Manual (GMNA-Localizing-U.S./Canada/Mexico-
5853626) - 2014 - 3rd crc - 6/6/14
Seats and Restraints 3-41
Warning (Continued)
seat, always move the front
passenger seat as far back as it
will go.
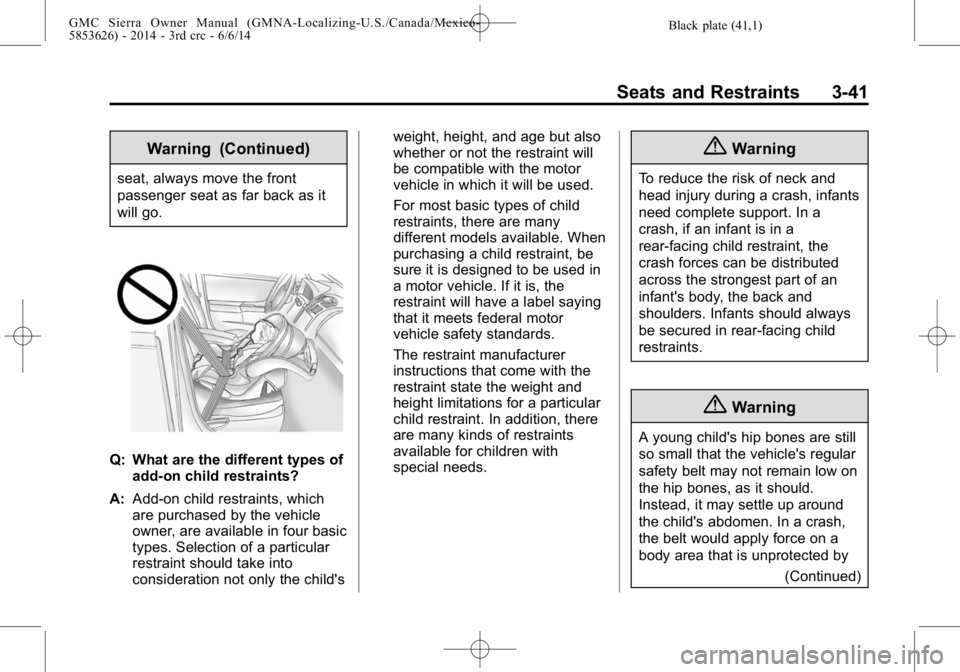
Q: What are the different types ofadd-on child restraints?
A: Add-on child restraints, which
are purchased by the vehicle
owner, are available in four basic
types. Selection of a particular
restraint should take into
consideration not only the child's weight, height, and age but also
whether or not the restraint will
be compatible with the motor
vehicle in which it will be used.
For most basic types of child
restraints, there are many
different models available. When
purchasing a child restraint, be
sure it is designed to be used in
a motor vehicle. If it is, the
restraint will have a label saying
that it meets federal motor
vehicle safety standards.
The restraint manufacturer
instructions that come with the
restraint state the weight and
height limitations for a particular
child restraint. In addition, there
are many kinds of restraints
available for children with
special needs.
{Warning
To reduce the risk of neck and
head injury during a crash, infants
need complete support. In a
crash, if an infant is in a
rear-facing child restraint, the
crash forces can be distributed
across the strongest part of an
infant's body, the back and
shoulders. Infants should always
be secured in rear-facing child
restraints.
{Warning
A young child's hip bones are still
so small that the vehicle's regular
safety belt may not remain low on
the hip bones, as it should.
Instead, it may settle up around
the child's abdomen. In a crash,
the belt would apply force on a
body area that is unprotected by
(Continued)
Page 108 of 544
Black plate (48,1)GMC Sierra Owner Manual (GMNA-Localizing-U.S./Canada/Mexico-
5853626) - 2014 - 3rd crc - 6/6/14
3-48 Seats and Restraints
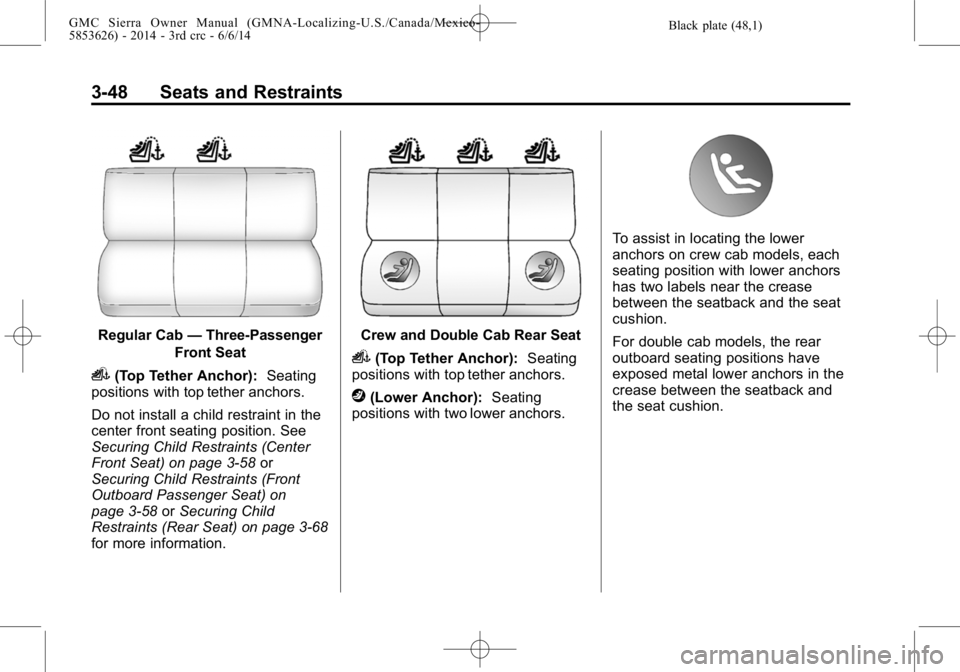
Regular Cab—Three-Passenger
Front Seat
i(Top Tether Anchor): Seating
positions with top tether anchors.
Do not install a child restraint in the
center front seating position. See
Securing Child Restraints (Center
Front Seat) on page 3-58 or
Securing Child Restraints (Front
Outboard Passenger Seat) on
page 3-58 orSecuring Child
Restraints (Rear Seat) on page 3-68
for more information.
Crew and Double Cab Rear Seat
i(Top Tether Anchor): Seating
positions with top tether anchors.
j(Lower Anchor): Seating
positions with two lower anchors.
To assist in locating the lower
anchors on crew cab models, each
seating position with lower anchors
has two labels near the crease
between the seatback and the seat
cushion.
For double cab models, the rear
outboard seating positions have
exposed metal lower anchors in the
crease between the seatback and
the seat cushion.
Page 109 of 544
Black plate (49,1)GMC Sierra Owner Manual (GMNA-Localizing-U.S./Canada/Mexico-
5853626) - 2014 - 3rd crc - 6/6/14
Seats and Restraints 3-49
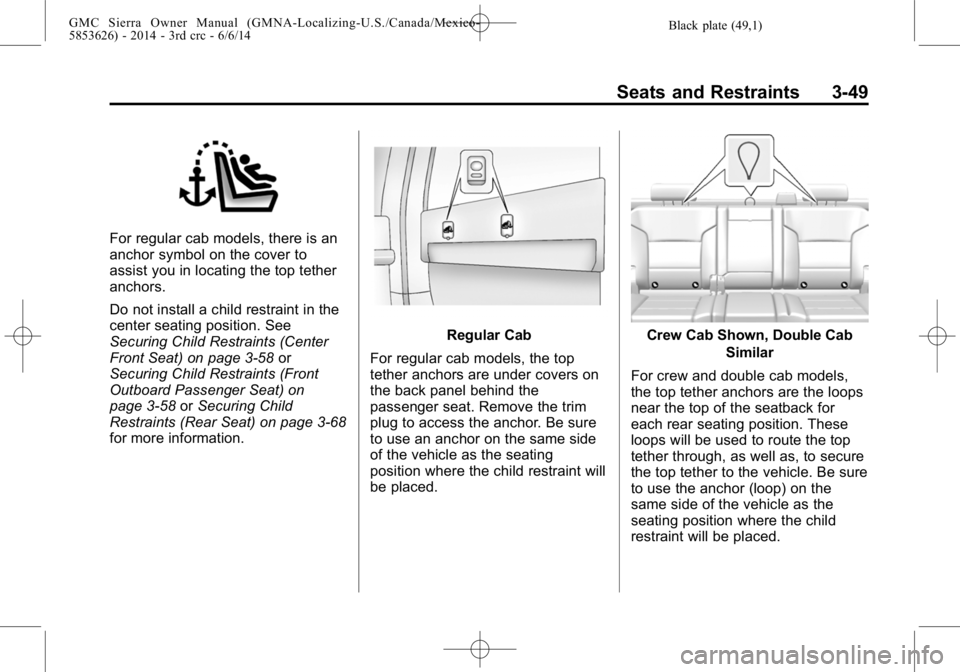
For regular cab models, there is an
anchor symbol on the cover to
assist you in locating the top tether
anchors.
Do not install a child restraint in the
center seating position. See
Securing Child Restraints (Center
Front Seat) on page 3-58or
Securing Child Restraints (Front
Outboard Passenger Seat) on
page 3-58 orSecuring Child
Restraints (Rear Seat) on page 3-68
for more information.
Regular Cab
For regular cab models, the top
tether anchors are under covers on
the back panel behind the
passenger seat. Remove the trim
plug to access the anchor. Be sure
to use an anchor on the same side
of the vehicle as the seating
position where the child restraint will
be placed.Crew Cab Shown, Double Cab Similar
For crew and double cab models,
the top tether anchors are the loops
near the top of the seatback for
each rear seating position. These
loops will be used to route the top
tether through, as well as, to secure
the top tether to the vehicle. Be sure
to use the anchor (loop) on the
same side of the vehicle as the
seating position where the child
restraint will be placed.
Page 111 of 544
Black plate (51,1)GMC Sierra Owner Manual (GMNA-Localizing-U.S./Canada/Mexico-
5853626) - 2014 - 3rd crc - 6/6/14
Seats and Restraints 3-51
{Warning
Children can be seriously injured
or strangled if a shoulder belt is
wrapped around their neck and
the safety belt continues to
tighten. Buckle any unused safety
belts behind the child restraint so
children cannot reach them. Pull
the shoulder belt all the way out
of the retractor to set the lock,
if the vehicle has one, after the
child restraint has been installed.
{Caution
Do not let the LATCH
attachments rub against the
vehicle’s safety belts. This may
damage these parts. If necessary,
move buckled safety belts to
avoid rubbing the LATCH
attachments.(Continued)
Caution (Continued)
Do not fold the empty rear seat
with a safety belt buckled. This
could damage the safety belt or
the seat. Unbuckle and return the
safety belt to its stowed position,
before folding the seat.
If you need to secure more than one
child restraint in the rear seat, see
Where to Put the Restraint on
page 3-44.
This system is designed to make
installation of child restraints easier.
When using lower anchors, do not
use the vehicle's safety belts.
Instead use the vehicle's anchors
and child restraint attachments to
secure the restraints. Some
restraints also use another vehicle
anchor to secure a top tether. Regular Cab Models
1. For models without a rear seat,
forward-facing child restraints
should only be installed in the
right front seating position with
safety belts and a top tether.
See Securing Child Restraints
(Center Front Seat) on
page 3-58 orSecuring Child
Restraints (Front Outboard
Passenger Seat) on page 3-58
or Securing Child Restraints
(Rear Seat) on page 3-68.
If the child restraint manufacturer
recommends that the top tether
be attached, attach and tighten
the top tether to the top tether
anchor, if your vehicle has one.
Refer to the child restraint
instructions and the following
steps:
1.1. Fold the passenger seatback forward to access
the top tether anchor. See
Reclining Seatbacks on
page 3-5.
Page 113 of 544
Black plate (53,1)GMC Sierra Owner Manual (GMNA-Localizing-U.S./Canada/Mexico-
5853626) - 2014 - 3rd crc - 6/6/14
Seats and Restraints 3-53
Crew Cab Models
1. Attach and tighten the lowerattachments to the lower
anchors. If the child restraint
does not have lower
attachments or the desired
seating position does not have
lower anchors, secure the child
restraint with the top tether and
the safety belts. Refer to your
child restraint manufacturer
instructions and the instructions
in this manual.
1.1. Find the lower anchors for the desired seating
position.
1.2. Put the child restraint on the seat.
1.3. Attach and tighten the lower attachments on the child
restraint to the lower
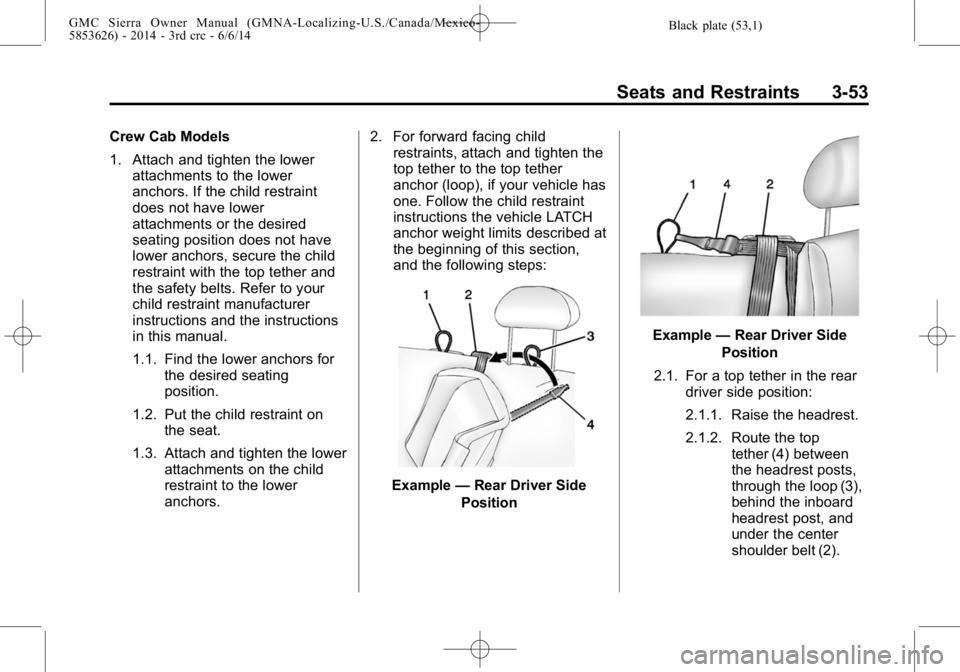
anchors. 2. For forward facing child
restraints, attach and tighten the
top tether to the top tether
anchor (loop), if your vehicle has
one. Follow the child restraint
instructions the vehicle LATCH
anchor weight limits described at
the beginning of this section,
and the following steps:
Example —Rear Driver Side
Position
Example —Rear Driver Side
Position
2.1. For a top tether in the rear driver side position:
2.1.1. Raise the headrest.
2.1.2. Route the top tether (4) between
the headrest posts,
through the loop (3),
behind the inboard
headrest post, and
under the center
shoulder belt (2).
Page 114 of 544
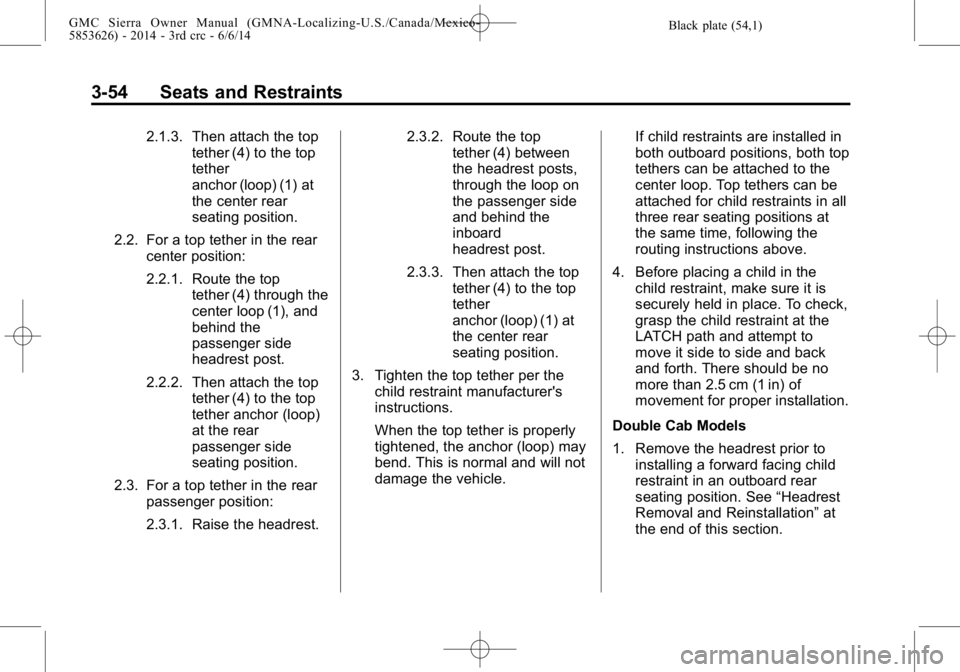
Black plate (54,1)GMC Sierra Owner Manual (GMNA-Localizing-U.S./Canada/Mexico-
5853626) - 2014 - 3rd crc - 6/6/14
3-54 Seats and Restraints
2.1.3. Then attach the toptether (4) to the top
tether
anchor (loop) (1) at
the center rear
seating position.
2.2. For a top tether in the rear center position:
2.2.1. Route the top tether (4) through the
center loop (1), and
behind the
passenger side
headrest post.
2.2.2. Then attach the top tether (4) to the top
tether anchor (loop)
at the rear
passenger side
seating position.
2.3. For a top tether in the rear passenger position:
2.3.1. Raise the headrest. 2.3.2. Route the top
tether (4) between
the headrest posts,
through the loop on
the passenger side
and behind the
inboard
headrest post.
2.3.3. Then attach the top tether (4) to the top
tether
anchor (loop) (1) at
the center rear
seating position.
3. Tighten the top tether per the child restraint manufacturer's
instructions.
When the top tether is properly
tightened, the anchor (loop) may
bend. This is normal and will not
damage the vehicle. If child restraints are installed in
both outboard positions, both top
tethers can be attached to the
center loop. Top tethers can be
attached for child restraints in all
three rear seating positions at
the same time, following the
routing instructions above.
4. Before placing a child in the child restraint, make sure it is
securely held in place. To check,
grasp the child restraint at the
LATCH path and attempt to
move it side to side and back
and forth. There should be no
more than 2.5 cm (1 in) of
movement for proper installation.
Double Cab Models
1. Remove the headrest prior to installing a forward facing child
restraint in an outboard rear
seating position. See “Headrest
Removal and Reinstallation” at
the end of this section.
Page 116 of 544
Black plate (56,1)GMC Sierra Owner Manual (GMNA-Localizing-U.S./Canada/Mexico-
5853626) - 2014 - 3rd crc - 6/6/14
3-56 Seats and Restraints
3.1.3. Then attach the toptether (4) to the top
tether
anchor (loop) (1) at
the center rear
seating position.
3.2. For a top tether in the rear center position:
3.2.1. Route the top tether (4) through the
center loop (1), and
behind the
passenger side
headrest post.
3.2.2. Then attach the top tether (4) to the top
tether anchor (loop)
at the rear
passenger side
seating position.
3.3. For a top tether in the rear passenger position:
3.3.1. Remove the headrest. 3.3.2. Route the top
tether (4) through the
loop on the
passenger side.
3.3.3. Then attach the top tether (4) to the top
tether
anchor (loop) (1) at
the center rear
seating position.
4. Tighten the top tether per the child restraint manufacturer's
instructions.
When the top tether is properly
tightened, the anchor (loop) may
bend. This is normal and will not
damage the vehicle.
If child restraints are installed in
both outboard positions, both top
tethers can be attached to the
center loop. Top tethers can be
attached for child restraints in all
three rear seating positions at
the same time, following the
routing instructions above. 5. Before placing a child in the
child restraint, make sure it is
securely held in place. To check,
grasp the child restraint at the
LATCH path and attempt to
move it side to side and back
and forth. There should be no
more than 2.5 cm (1 in) of
movement for proper installation.
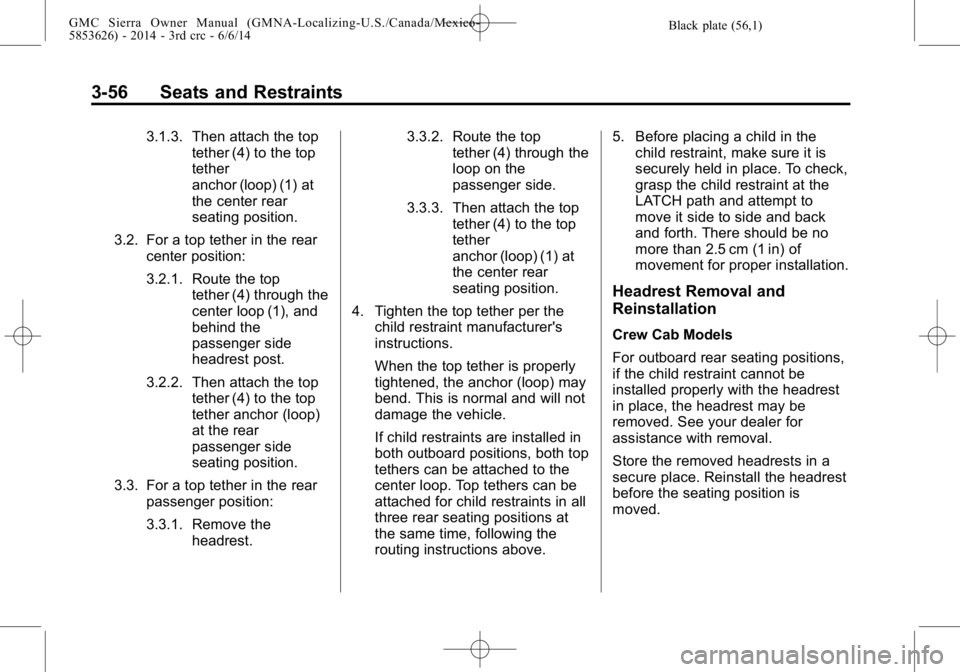
Headrest Removal and
Reinstallation
Crew Cab Models
For outboard rear seating positions,
if the child restraint cannot be
installed properly with the headrest
in place, the headrest may be
removed. See your dealer for
assistance with removal.
Store the removed headrests in a
secure place. Reinstall the headrest
before the seating position is
moved.
Page 117 of 544
Black plate (57,1)GMC Sierra Owner Manual (GMNA-Localizing-U.S./Canada/Mexico-
5853626) - 2014 - 3rd crc - 6/6/14
Seats and Restraints 3-57
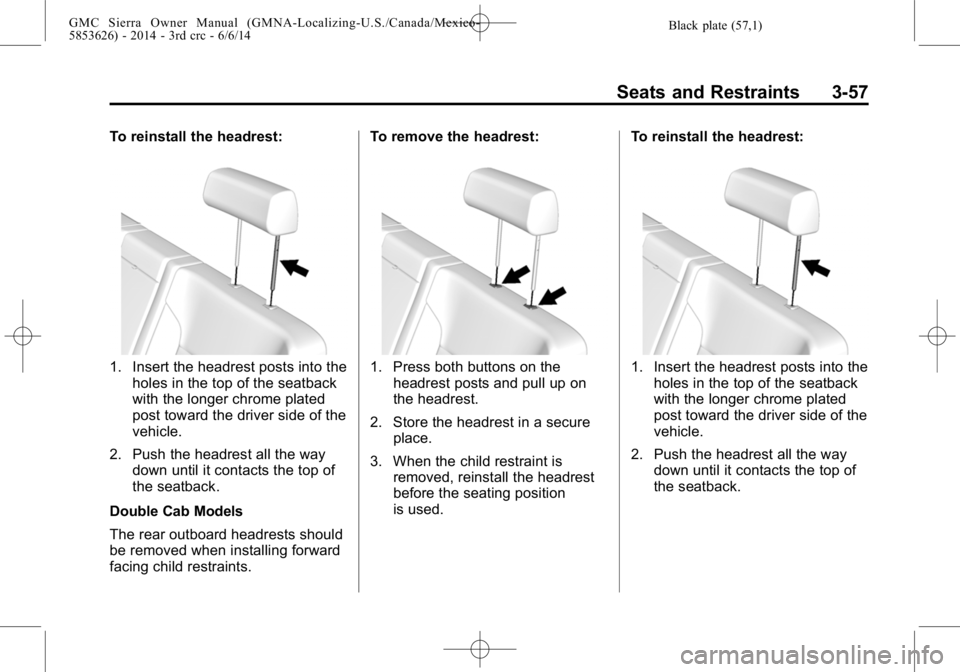
To reinstall the headrest:
1. Insert the headrest posts into theholes in the top of the seatback
with the longer chrome plated
post toward the driver side of the
vehicle.
2. Push the headrest all the way down until it contacts the top of
the seatback.
Double Cab Models
The rear outboard headrests should
be removed when installing forward
facing child restraints. To remove the headrest:1. Press both buttons on the
headrest posts and pull up on
the headrest.
2. Store the headrest in a secure place.
3. When the child restraint is removed, reinstall the headrest
before the seating position
is used. To reinstall the headrest:1. Insert the headrest posts into the
holes in the top of the seatback
with the longer chrome plated
post toward the driver side of the
vehicle.
2. Push the headrest all the way down until it contacts the top of
the seatback.