Manual mode GMC SIERRA 2014 Manual PDF
[x] Cancel search | Manufacturer: GMC, Model Year: 2014, Model line: SIERRA, Model: GMC SIERRA 2014Pages: 544, PDF Size: 13.79 MB
Page 319 of 544
Black plate (49,1)GMC Sierra Owner Manual (GMNA-Localizing-U.S./Canada/Mexico-
5853626) - 2014 - CRC - 6/6/14
Driving and Operating 9-49
Warning (Continued)
could be seriously injured. Be
sure to set the parking brake
before placing the transfer case in
N (Neutral). SeeParking Brake on
page 9-53.
N (Neutral): Shift the vehicle's
transfer case to N (Neutral) only
when towing the vehicle. See
Recreational Vehicle Towing on
page 10-94 orTowing the Vehicle
on page 10-93.
If the SERVICE 4WD message
stays on, take the vehicle to your
dealer for service. See “SERVICE
4WD” under Transmission
Messages on page 5-42.
Shifting Into Four-Wheel Drive
High or AUTO (Automatic
Four-Wheel Drive)
Turn the knob to the Four-Wheel
Drive High or AUTO position. This
can be done at any speed, except
when shifting from Four-Wheel Drive Low. The indicator light will
flash while shifting. It will remain on
when the shift is completed.
Shifting Into Two-Wheel
Drive High
Turn the knob to the Two-Wheel
Drive High position. This can be
done at any speed, except when
shifting from Four-Wheel Drive Low.
The indicator light will flash while
shifting. It will remain on when the
shift is completed.
Shifting Into Four-Wheel
Drive Low
When Four-Wheel Drive Low is
engaged, vehicle speed should be
kept below 72 km/h (45 mph).
Extended high-speed operation in
Four-Wheel Drive Low may damage
or shorten the life of the drivetrain.
To shift to the Four-Wheel Drive
Low position, the ignition must be in
ON/RUN and the vehicle must be
stopped or moving less than 5 km/h
(3 mph) with the transmission in
N (Neutral). The preferred method
for shifting into Four-Wheel Drive
Low is to have the vehicle moving
1.6 to 3.2 km/h (1 to 2 mph). Turn the
knob to the Four-Wheel Drive Low
position. You must wait for the
Four-Wheel Drive Low indicator light
to stop flashing before shifting the
transmission into gear.
{Caution
Shifting the transmission into
gear before the requested mode
indicator light has stopped
flashing could damage the
transfer case. To help avoid
damaging the vehicle, always wait
for the mode indicator lights to
stop flashing before shifting the
transmission into gear.
It is typical for the vehicle to exhibit
significant engagement noise and
bump when shifting between
Four-Wheel Drive Low and
Four-Wheel Drive High ranges or
from N (Neutral) with the engine
running.
Page 320 of 544
Black plate (50,1)GMC Sierra Owner Manual (GMNA-Localizing-U.S./Canada/Mexico-
5853626) - 2014 - CRC - 6/6/14
9-50 Driving and Operating
If the knob is turned to the
Four-Wheel Drive Low position
when the vehicle is in gear and/or
moving more than 5 km/h (3 mph),
the Four-Wheel Drive Low indicator
light will flash for 30 seconds and
not complete the shift. After
30 seconds the transfer case will
shift to Four-Wheel Drive
High mode. In this case, the knob
will need to be turned to the
Four-Wheel Drive High position in
order to see the indicator. With the
vehicle moving less than 5 km/h
(3 mph), and the transmission in
N (Neutral), attempt the shift again.
Shifting Out of Four-Wheel
Drive Low
To shift from Four-Wheel Drive Low
to Four-Wheel Drive High, AUTO,
or Two-Wheel Drive High, the
vehicle must be stopped or moving
less than 5 km/h (3 mph) with the
transmission in N (Neutral) and the
ignition in ON/RUN. The preferred
method for shifting out of
Four-Wheel Drive Low is to have
the vehicle moving1.6 to 3.2 km/h (1 to 2 mph). Turn the
knob to the Four-Wheel Drive High,
AUTO, or Two-Wheel Drive High
position. You must wait for the
Four-Wheel Drive High, AUTO,
or Two-Wheel Drive High indicator
light to stop flashing before shifting
the transmission into gear.
{Caution
Shifting the transmission into gear
before the requested mode
indicator light has stopped
flashing could damage the
transfer case. To help avoid
damaging the vehicle, always wait
for the mode indicator lights to
stop flashing before shifting the
transmission into gear.
It is typical for the vehicle to exhibit
significant engagement noise and
bump when shifting between
Four-Wheel Drive Low and
Four-Wheel Drive High ranges or
from N (Neutral) with the engine
running. If the knob is turned to the
Four-Wheel Drive High, AUTO,
or Two-Wheel Drive High switch
position when the vehicle is in gear
and/or moving more than
5 km/h (3 mph), the Four-Wheel
Drive High, AUTO, or Two-Wheel
Drive High indicator light will flash
for 30 seconds but will not complete
the shift. With the vehicle moving
less than 5 km/h (3 mph), and the
transmission in N (Neutral), attempt
the shift again.
Shifting into N (Neutral)
To shift the transfer case to
N (Neutral):
1. Make sure the vehicle is parked
so that it will not roll.
2. Set the parking brake and apply the regular brake pedal. See
Parking Brake on page 9-53.
3. Start the vehicle or turn the ignition to ON/RUN.
4. Put the transmission in N (Neutral).
Page 321 of 544
Black plate (51,1)GMC Sierra Owner Manual (GMNA-Localizing-U.S./Canada/Mexico-
5853626) - 2014 - CRC - 6/6/14
Driving and Operating 9-51
5. Shift the transfer case toTwo-Wheel Drive High.
6. Turn the transfer case dial clockwise to N (Neutral) until it
stops and hold it there until the
N (Neutral) light starts blinking.
This will take at least
10 seconds. Then slowly release
the dial to the Four-Wheel Drive
Low position. The N (Neutral)
light will come on when the
transfer case shift to N (Neutral)
is complete.
7. If the engine is running, make sure that the transfer case is in
N (Neutral) by shifting the
transmission to R (Reverse) for
one second, then shift the
transmission to D (Drive) for
one second.
8. Turn the ignition to ACC/ ACCESSORY, which will turn the
engine off.
9. Place the transmission shift lever in P (Park). 10. Release the parking brake prior
to moving the vehicle.
11. Turn the ignition to LOCK/OFF.
Shifting Out of N (Neutral)
To shift out of N (Neutral):
1. Set the parking brake and apply the regular brake pedal.
2. Turn the ignition to ON/RUN with the engine off, and shift the
transmission to N (Neutral).
3. Turn the transfer case dial to Two-Wheel Drive High,
Four-Wheel Drive High,
or AUTO.
After the transfer case has
shifted out of N (Neutral), the
N (Neutral) light will go out.
4. Release the parking brake prior to moving the vehicle.{Caution
Shifting the transmission into gear
before the requested mode
indicator light has stopped
flashing could damage the
transfer case. To help avoid
damaging the vehicle, always wait
for the mode indicator lights to
stop flashing before shifting the
transmission into gear.
5. Start the engine and shift the transmission to the desired
position.
Page 328 of 544
Black plate (58,1)GMC Sierra Owner Manual (GMNA-Localizing-U.S./Canada/Mexico-
5853626) - 2014 - CRC - 6/6/14
9-58 Driving and Operating
If equipped with an Allison or
Hydra-Matic 6-speed automatic
transmission, see“Tow/Haul Mode
Grade Braking” underTow/Haul
Mode on page 9-38 for an
explanation of how cruise control
interacts with the Range Selection
Mode, Tow/Haul Mode, and Grade
Braking systems.
If the cruise control is being used
and the Traction Control (TCS)
system or StabiliTrak begins to limit
wheel spin, the cruise control will
automatically disengage. See
Traction Control/Electronic Stability
Control on page 9-54. If a collision
alert occurs when cruise control is
activated, cruise control is
disengaged. See Forward Collision
Alert (FCA) System on page 9-64.
When road conditions allow the
cruise control to be safely used
again, it can be turned back on.
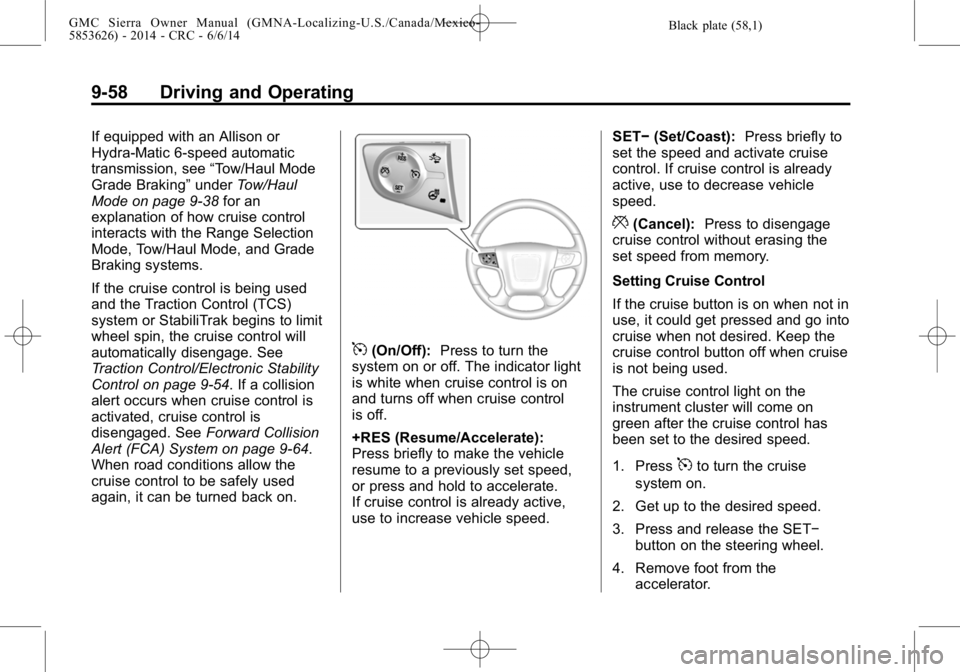
5(On/Off): Press to turn the
system on or off. The indicator light
is white when cruise control is on
and turns off when cruise control
is off.
+RES (Resume/Accelerate):
Press briefly to make the vehicle
resume to a previously set speed,
or press and hold to accelerate.
If cruise control is already active,
use to increase vehicle speed. SET−
(Set/Coast): Press briefly to
set the speed and activate cruise
control. If cruise control is already
active, use to decrease vehicle
speed.
*(Cancel): Press to disengage
cruise control without erasing the
set speed from memory.
Setting Cruise Control
If the cruise button is on when not in
use, it could get pressed and go into
cruise when not desired. Keep the
cruise control button off when cruise
is not being used.
The cruise control light on the
instrument cluster will come on
green after the cruise control has
been set to the desired speed.
1. Press
5to turn the cruise
system on.
2. Get up to the desired speed.
3. Press and release the SET− button on the steering wheel.
4. Remove foot from the accelerator.
Page 329 of 544
Black plate (59,1)GMC Sierra Owner Manual (GMNA-Localizing-U.S./Canada/Mexico-
5853626) - 2014 - CRC - 6/6/14
Driving and Operating 9-59
Resuming a Set Speed
If the cruise control is set at a
desired speed and then the brakes
are applied, the cruise control is
disengaged without erasing the set
speed from memory.
Once the vehicle speed reaches
about 40 km/h (25 mph) or more,
press the +RES button briefly on the
steering wheel. The vehicle returns
to the previous set speed.
Increasing Speed While Using
Cruise Control
If the cruise control system is
already activated:
.Press and hold the +RES button
on the steering wheel until the
desired speed is reached, then
release it.
.To increase vehicle speed in
small increments, briefly press
the +RES button. Each time this
is done, the vehicle goes about
1.6 km/h (1 mph) faster.Reducing Speed While Using
Cruise Control
If the cruise control system is
already activated:
.Press and hold the SET–
button
on the steering wheel until the
desired lower speed is reached,
then release it.
.To slow down in small
increments, briefly press the
SET– button. Each time this is
done, the vehicle goes about
1.6 km/h (1 mph) slower.
Passing Another Vehicle While
Using Cruise Control
Use the accelerator pedal to
increase the vehicle speed. When
you take your foot off the pedal, the
vehicle will slow down to the
previous set cruise speed. While
pressing the accelerator pedal or
shortly following the release to
override cruise control, briefly
pressing the SET– button will result
in cruise control set to the current
vehicle speed. Using Cruise Control on Hills
How well the cruise control works
on hills depends on the vehicle
speed, the load, and the steepness
of the hills. When going up steep
hills, pressing the accelerator pedal
may be necessary to maintain
vehicle speed.
While going downhill:.Vehicles with a 6-speed
automatic transmission and a
gasoline engine have Cruise
Grade Braking to help maintain
driver selected speed.
Cruise Grade Braking is enabled
when the vehicle is started and
cruise control is active. It is not
enabled in Range Selection
Mode. It assists in maintaining
driver selected speed when
driving on downhill grades by
using the engine and
transmission to slow the vehicle.
Page 330 of 544
Black plate (60,1)GMC Sierra Owner Manual (GMNA-Localizing-U.S./Canada/Mexico-
5853626) - 2014 - CRC - 6/6/14
9-60 Driving and Operating
To disable and enable Cruise
Grade Braking for the current
ignition key cycle, press and
hold the Tow/Haul button for
five seconds. A DIC message
displays. SeeTransmission
Messages on page 5-42.
.Vehicles with a diesel engine
have Cruise Grade Braking
enabled when Tow/Haul Mode is
on, the exhaust brake is on,
or both are on.
For other forms of Grade Braking,
see Automatic Transmission on
page 9-33 ,Tow/Haul Mode on
page 9-38, and Hill Descent Control
(HDC) on page 9-56. Ending Cruise Control
There are three ways to end cruise
control:
.To disengage cruise control,
step lightly on the brake pedal.
.To disengage cruise control,
Press
*on the steering wheel.
.To turn off the cruise control,
press
5on the steering wheel.
Erasing Speed Memory
The cruise control set speed is
erased from memory by pressing
5
or if the ignition is turned off.
Driver Assistance
Systems
This vehicle may have features that
work together to help avoid crashes
or reduce crash damage while
driving, backing, and parking. Read
this entire section before using
these systems.
{Warning
Do not rely on the Driver
Assistance Systems. These
systems do not replace the need
for paying attention and driving
safely. You may not hear or feel
alerts or warnings provided by
these systems. Failure to use
proper care when driving may
result in injury, death, or vehicle
damage. See Defensive Driving
on page 9-3.
(Continued)
Page 331 of 544
Black plate (61,1)GMC Sierra Owner Manual (GMNA-Localizing-U.S./Canada/Mexico-
5853626) - 2014 - CRC - 6/6/14
Driving and Operating 9-61
Warning (Continued)
Under many conditions, these
systems will not:
.Detect children, pedestrians,
bicyclists, or animals.
.Detect vehicles or objects
outside the area monitored by
the system.
.Work at all driving speeds.
.Warn you or provide you with
enough time to avoid a crash.
.Work under poor visibility or
bad weather conditions.
.Work if the detection sensor
is not cleaned or is covered
by ice, snow, mud, or dirt.
Complete attention is always
required while driving, and you
should be ready to take action
and apply the brakes and/or steer
the vehicle to avoid crashes. Audible or Safety Alert Seat
Some driver assistance features
alert the driver of obstacles by
beeping. To change the volume of
the warning chime, see
“Comfort
and Convenience” underVehicle
Personalization on page 5-45.
If equipped with the Safety Alert
Seat, the driver seat cushion may
provide a vibrating pulse alert
instead of beeping. To change this,
see “Collision/Detection Systems”
under Vehicle Personalization on
page 5-45.
Assistance Systems for
Parking or Backing
When the vehicle is in R (Reverse),
the Rear Vision Camera (RVC) and
Rear Parking Assist may help the
driver to avoid a crash or to reduce
crash damage. Some models may
also have Front Parking Assist. The RVC and Rear Parking Assist
will not work properly if the tailgate
is down. If the tailgate is down, do
not use these systems.
When the vehicle is shifted into
R (Reverse), the RVC displays an
image of the area behind the vehicle
in the center stack display. The
previous screen displays when the
vehicle is shifted out of R (Reverse)
after a short delay. To return to the
previous screen sooner, press a
button on the infotainment system,
shift into P (Park), or reach a vehicle
speed of 8 km/h (5 mph).
{Warning
The RVC system does not display
children, pedestrians, bicyclists,
animals, or any other object
located outside the camera's field
of view, below the bumper,
or under the vehicle. Perceived
distances may be different from
actual distances. Do not back the
(Continued)
Page 342 of 544
Black plate (72,1)GMC Sierra Owner Manual (GMNA-Localizing-U.S./Canada/Mexico-
5853626) - 2014 - CRC - 6/6/14
9-72 Driving and Operating
Warning (Continued)
.Turn off the engine when
refueling.
.Keep sparks, flames, and
smoking materials away
from fuel.
.Do not leave the fuel pump
unattended.
.Do not reenter the vehicle
while pumping fuel.
.Keep children away from the
fuel pump and never let
children pump fuel.
.Fuel can spray out if the fuel
cap is opened too quickly.
This spray can happen if the
tank is nearly full, and is
more likely in hot weather.
Open the fuel cap slowly and
wait for any hiss noise to stop
then unscrew the cap all
the way
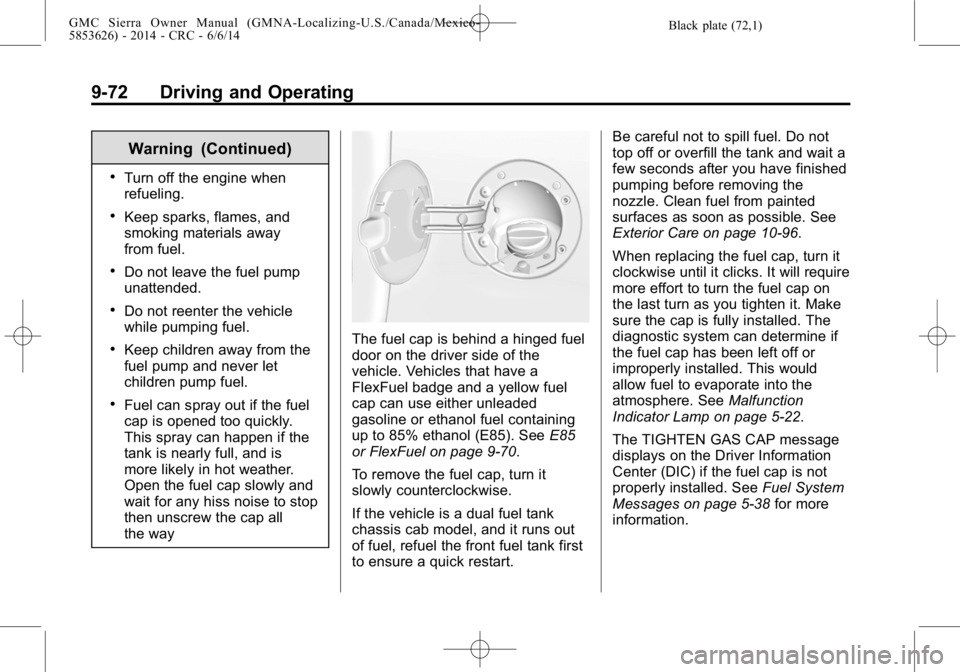
The fuel cap is behind a hinged fuel
door on the driver side of the
vehicle. Vehicles that have a
FlexFuel badge and a yellow fuel
cap can use either unleaded
gasoline or ethanol fuel containing
up to 85% ethanol (E85). SeeE85
or FlexFuel on page 9-70.
To remove the fuel cap, turn it
slowly counterclockwise.
If the vehicle is a dual fuel tank
chassis cab model, and it runs out
of fuel, refuel the front fuel tank first
to ensure a quick restart. Be careful not to spill fuel. Do not
top off or overfill the tank and wait a
few seconds after you have finished
pumping before removing the
nozzle. Clean fuel from painted
surfaces as soon as possible. See
Exterior Care on page 10-96.
When replacing the fuel cap, turn it
clockwise until it clicks. It will require
more effort to turn the fuel cap on
the last turn as you tighten it. Make
sure the cap is fully installed. The
diagnostic system can determine if
the fuel cap has been left off or
improperly installed. This would
allow fuel to evaporate into the
atmosphere. See
Malfunction
Indicator Lamp on page 5-22.
The TIGHTEN GAS CAP message
displays on the Driver Information
Center (DIC) if the fuel cap is not
properly installed. See Fuel System
Messages on page 5-38 for more
information.
Page 345 of 544
Black plate (75,1)GMC Sierra Owner Manual (GMNA-Localizing-U.S./Canada/Mexico-
5853626) - 2014 - CRC - 6/6/14
Driving and Operating 9-75
Before starting, check all trailer hitch
parts and attachments, safety
chains, electrical connectors, lamps,
tires, and mirrors. If the trailer has
electric brakes, start the
combination moving and then apply
the trailer brake controller by hand
to be sure the brakes work.
During the trip, check occasionally
to be sure that the load is secure
and the lamps and any trailer
brakes still work.
Following Distance
Stay at least twice as far behind the
vehicle ahead as you would when
driving the vehicle without a trailer.
This can help to avoid heavy
braking and sudden turns.
Passing
More passing distance is needed
when towing a trailer. The
combination will not accelerate as
quickly and is longer so it is
necessary to go much farther
beyond the passed vehicle before
returning to the lane.
Backing Up
Hold the bottom of the steering
wheel with one hand. To move the
trailer to the left, move that hand to
the left. To move the trailer to the
right, move your hand to the right.
Always back up slowly and,
if possible, have someone
guide you.
Making Turns
{Caution
Making very sharp turns while
trailering could cause the trailer to
come in contact with the vehicle.
The vehicle could be damaged.
Avoid making very sharp turns
while trailering.
When turning with a trailer, make
wider turns than normal. Do this so
the trailer will not strike soft
shoulders, curbs, road signs, trees,
or other objects. Avoid jerky or
sudden maneuvers. Signal well in
advance. If the trailer turn signal bulbs burn
out, the arrows on the instrument
cluster will still flash for turns. It is
important to check occasionally to
be sure the trailer bulbs are still
working.
Driving on Grades
Reduce speed and shift to a lower
gear
before starting down a long or
steep downgrade. If the
transmission is not shifted down, the
brakes might get hot and no longer
work well.
Vehicles can tow in D (Drive). Shift
the transmission to a lower gear if
the transmission shifts too often
under heavy loads and/or hilly
conditions.
The Tow/Haul Mode may be used if
the transmission shifts too often.
See Tow/Haul Mode on page 9-38.
When towing at high altitude on
steep uphill grades, consider the
following: Engine coolant will boil at
a lower temperature than at normal
altitudes. If the engine is turned off
Page 348 of 544
Black plate (78,1)GMC Sierra Owner Manual (GMNA-Localizing-U.S./Canada/Mexico-
5853626) - 2014 - CRC - 6/6/14
9-78 Driving and Operating
Weight of the Trailer
How heavy can a trailer safely be?
It depends on how the rig is used.
Speed, altitude, road grades,
outside temperature, and how much
the vehicle is used to pull a trailer
are all important. It can depend on
any special equipment on the
vehicle, and the amount of tongue
weight the vehicle can carry. See
“Weight of the Trailer Tongue”later
in this section for more information.
Trailer weight rating (TWR) is
calculated assuming the tow vehicle
has only the driver but all required
trailering equipment. Weight of
additional optional equipment,
passengers, and cargo in the tow
vehicle must be subtracted from the
trailer weight rating. For kingpin weight and trailer
tongue weight information, see
“Weight of the Trailer Tongue”
later
in this section.
Use the following chart to determine
how much the vehicle can weigh,
based upon the vehicle model and
options.
Weights listed apply for
conventional trailers and fifth-wheel
trailers unless otherwise noted.