GMC SIERRA 2024 User Guide
Manufacturer: GMC, Model Year: 2024, Model line: SIERRA, Model: GMC SIERRA 2024Pages: 440, PDF Size: 9.21 MB
Page 11 of 440

GMC Sierra/Sierra Denali 2500 HD/3500 HD Owner Manual (GMNA-
Localizing-U.S./Canada-16908340) - 2024 - CRC - 12/13/22
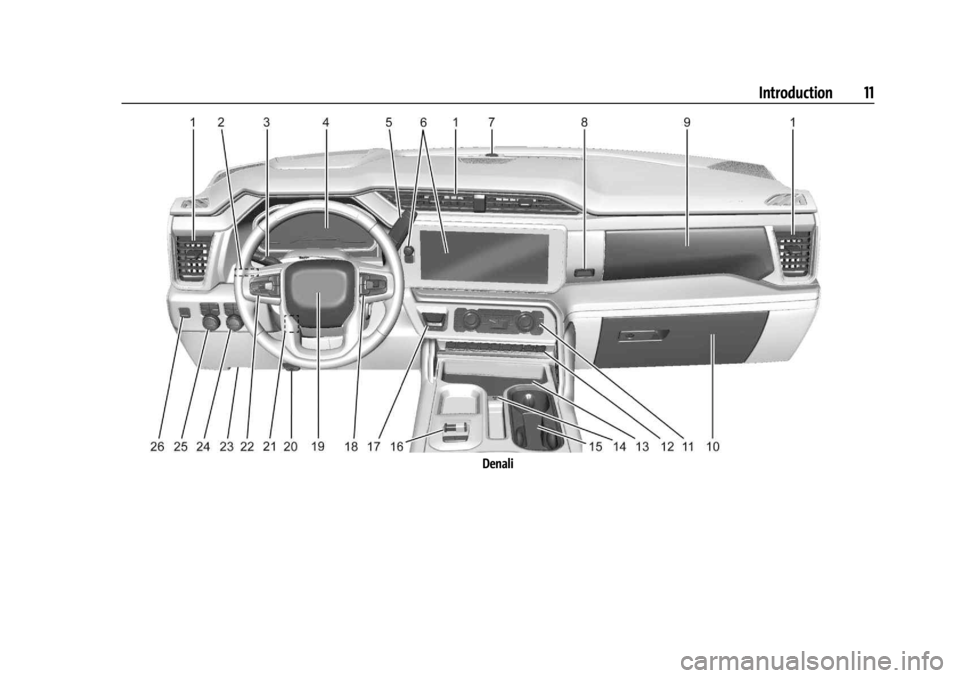
Introduction 9
1.Head-Up Display (HUD) 0135 (If
Equipped).
2. Air Vents 0196.
3. Turn Signal Lever. See Turn and
Lane-Change Signals 0147.
Windshield Wiper/Washer 0106.
4. Instrument Cluster (Base Level) 0112 or
Instrument Cluster (Uplevel) 0113.
5. Shift Lever. See Automatic Transmission
0 223.
Range Selection Mode. See Manual Mode
0 226.
6. Infotainment System. See Overview
(Uplevel Radio) 0155 or
Overview (Base Radio) 0154.
7. Light Sensor. See Automatic Headlamp
System 0145.
Vehicle Alarm System. See Vehicle
Security 032.
8. Upper Glove Box. See Glove Box099.
9. Lower Glove Box. See Glove Box099.
10. Upper Glove Box Button. See Glove Box
0 99. 11. Power Release Tailgate (If Equipped). See
Tailgate 024.
Hazard Warning Flashers 0146.
Traction Control/Electronic Stability
Control 0236.
Hill Descent Control Switch (If Equipped).
See Hill Descent Control (HDC) 0237.
Power Assist Steps 031 (If Equipped).
Express Window Down Button (If
Equipped). See Power Windows 042.
Tow/Haul Mode 0227 (On Some
Models).
Exhaust Brake (If Equipped). See Duramax
Diesel Supplement.
Power Take-Off (PTO) (If Equipped). See
Duramax Diesel Supplement.
12. USB Port 0163.
13. Climate Control Systems 0191 (If
Equipped).
Dual Automatic Climate Control System
0 193 (If Equipped).
Heated and Ventilated Front Seats 054
(If Equipped).
Heated Steering Wheel 0105 (If
Equipped). 14. Front Center Console Storage.
15.
Cupholders 0100.
16. Trailer Brake Control Panel (If Equipped). See“Integrated Trailer Brake Control
System” underTowing Equipment 0284.
17. ENGINE START/STOP. See Ignition
Positions 0216.
18. Steering Wheel Controls 0156.
Driver Information Center (DIC) Controls.
See Driver Information Center (DIC) (Base
Level) 0131 or
Driver Information Center (DIC) (Uplevel)
0 133.
19. Horn 0106.
20. Steering Wheel Adjustment 0105 (Out
of View).
21. Hood Release. See Hood0312.
22. Cruise Control 0239.
Adaptive Cruise Control (Camera) 0241
(If Equipped).
Forward Collision Alert (FCA) System
0 263 (If Equipped).
Page 12 of 440

GMC Sierra/Sierra Denali 2500 HD/3500 HD Owner Manual (GMNA-
Localizing-U.S./Canada-16908340) - 2024 - CRC - 12/13/22
10 Introduction
23.Instrument Panel Illumination Control
0150.
Exterior Cargo Lamps 0149.
Exterior Lamp Controls 0143.
Fog Lamps 0148 (If Equipped).
Task Lighting 0148 (If Equipped).
24. Data Link Connector (DLC). See Malfunction Indicator Lamp (Check
Engine Light) 0122 (Out of View).
25. Automatic Transfer Case Control. See Four-Wheel Drive 0228 (If Equipped).
Driver Mode Control 0238 (If Equipped).
Tow/Haul Mode. See Driver Mode Control
0 238 (If Equipped).
26. Electric Parking Brake 0234.
Page 13 of 440
GMC Sierra/Sierra Denali 2500 HD/3500 HD Owner Manual (GMNA-
Localizing-U.S./Canada-16908340) - 2024 - CRC - 12/13/22
Introduction 11
Denali
Page 14 of 440

GMC Sierra/Sierra Denali 2500 HD/3500 HD Owner Manual (GMNA-
Localizing-U.S./Canada-16908340) - 2024 - CRC - 12/13/22
12 Introduction
1.Air Vents 0196.
2. Head-Up Display (HUD) 0135 (If
Equipped).
3. Turn Signal Lever. See Turn and
Lane-Change Signals 0147.
Windshield Wiper/Washer 0106.
4. Instrument Cluster (Base Level) 0112 or
Instrument Cluster (Uplevel) 0113.
5. Shift Lever. See Automatic Transmission
0 223.
Range Selection Mode. See Manual Mode
0 226.
6. Infotainment System. See Overview
(Uplevel Radio) 0155 or
Overview (Base Radio) 0154.
7. Light Sensor. See Automatic Headlamp
System 0145.
Vehicle Alarm System. See Vehicle
Security 032.
8. Upper Glove Box Button. See Glove Box
0 99.
9. Upper Glove Box. See Glove Box099.
10. Lower Glove Box. See Glove Box099. 11.
Climate Control Systems 0191 (If
Equipped).
Dual Automatic Climate Control System
0 193 (If Equipped).
Heated and Ventilated Front Seats 054
(If Equipped).
Heated Steering Wheel 0105 (If
Equipped).
12. Power Release Tailgate (If Equipped). See Tailgate 024.
Hazard Warning Flashers 0146.
Traction Control/Electronic Stability
Control 0236.
Hill Descent Control Switch (If Equipped).
See Hill Descent Control (HDC) 0237.
Power Assist Steps 031 (If Equipped).
Express Window Down Button (If
Equipped). See Power Windows 042.
Tow/Haul Mode 0227 (On Some
Models).
Exhaust Brake (If Equipped). See Duramax
Diesel Supplement.
Power Take-Off (PTO) (If Equipped). See
Duramax Diesel Supplement. 13. Front Center Console Storage.
14.
USB Port 0163.
15. Cupholders 0100.
16. Trailer Brake Control Panel (If Equipped). See“Integrated Trailer Brake Control
System” underTowing Equipment 0284.
17. ENGINE START/STOP. See Ignition
Positions 0216.
18. Steering Wheel Controls 0156.
Driver Information Center (DIC) Controls.
See Driver Information Center (DIC) (Base
Level) 0131 or
Driver Information Center (DIC) (Uplevel)
0 133.
19. Horn 0106.
20. Hood Release. See Hood0312.
21. Steering Wheel Adjustment 0105 (Out
of View).
22. Cruise Control 0239.
Adaptive Cruise Control (Camera) 0241
(If Equipped).
Forward Collision Alert (FCA) System
0 263 (If Equipped).
Page 15 of 440

GMC Sierra/Sierra Denali 2500 HD/3500 HD Owner Manual (GMNA-
Localizing-U.S./Canada-16908340) - 2024 - CRC - 12/13/22
Introduction 13
23. Data Link Connector (DLC). SeeMalfunction Indicator Lamp (Check
Engine Light) 0122 (Out of View).
24. Instrument Panel Illumination Control
0150.
Exterior Cargo Lamps 0149.
Exterior Lamp Controls 0143.
Fog Lamps 0148 (If Equipped).
Task Lighting 0148 (If Equipped).
25. Automatic Transfer Case Control. See Four-Wheel Drive 0228 (If Equipped).
Driver Mode Control 0238 (If Equipped).
Tow/Haul Mode. See Driver Mode Control
0 238 (If Equipped).
26. Electric Parking Brake 0234.
Page 16 of 440
GMC Sierra/Sierra Denali 2500 HD/3500 HD Owner Manual (GMNA-
Localizing-U.S./Canada-16908340) - 2024 - CRC - 12/7/22
14 Keys, Doors, and Windows
Keys, Doors, and
Windows
Keys and Locks
Keys . . . . . . . . . . . . . . . . . . . . . . . . . . . . . . . . . . . . 14
Remote Key . . . . . . . . . . . . . . . . . . . . . . . . . . . . . 15
Remote Key Operation . . . . . . . . . . . . . . . . . . 15
Remote Vehicle Start . . . . . . . . . . . . . . . . . . . 21
Door Locks . . . . . . . . . . . . . . . . . . . . . . . . . . . . . . 22
Power Door Locks . . . . . . . . . . . . . . . . . . . . . . . 23
Delayed Locking . . . . . . . . . . . . . . . . . . . . . . . . 23
Automatic Door Locks . . . . . . . . . . . . . . . . . . 23
Lockout Protection . . . . . . . . . . . . . . . . . . . . . . 23
Safety Locks . . . . . . . . . . . . . . . . . . . . . . . . . . . . 24
Doors
Tailgate . . . . . . . . . . . . . . . . . . . . . . . . . . . . . . . . 24
Transporting Items That CanCatch Fire . . . . . . . . . . . . . . . . . . . . . . . . . . . . . 31
Power Assist Steps . . . . . . . . . . . . . . . . . . . . . . 31
Vehicle Security
Vehicle Security . . . . . . . . . . . . . . . . . . . . . . . . 32
Vehicle Alarm System . . . . . . . . . . . . . . . . . . 32
Steering Column Lock . . . . . . . . . . . . . . . . . . . 33
Immobilizer . . . . . . . . . . . . . . . . . . . . . . . . . . . . . 33
Immobilizer Operation . . . . . . . . . . . . . . . . . . 33
Exterior Mirrors
Convex Mirrors . . . . . . . . . . . . . . . . . . . . . . . . . 34
Manual Mirrors . . . . . . . . . . . . . . . . . . . . . . . . . 34
Trailer-Tow Mirrors . . . . . . . . . . . . . . . . . . . . . 35
Power Mirrors . . . . . . . . . . . . . . . . . . . . . . . . . . 35
Folding Mirrors . . . . . . . . . . . . . . . . . . . . . . . . . 36
Heated Mirrors . . . . . . . . . . . . . . . . . . . . . . . . . 37
Automatic Dimming Mirror . . . . . . . . . . . . . 37
Blind Spot Mirrors . . . . . . . . . . . . . . . . . . . . . . 37
Reverse Tilt Mirrors . . . . . . . . . . . . . . . . . . . . . 38
Interior Mirrors
Interior Rearview Mirrors . . . . . . . . . . . . . . . 38
Manual Rearview Mirror . . . . . . . . . . . . . . . . 38
Automatic Dimming Rearview Mirror . . . 38
Rear Camera Mirror . . . . . . . . . . . . . . . . . . . . 38
Truck Bed Camera Rearview Mirror . . . . . 41
Windows
Windows . . . . . . . . . . . . . . . . . . . . . . . . . . . . . . . 41
Power Windows . . . . . . . . . . . . . . . . . . . . . . . . 42
Rear Windows . . . . . . . . . . . . . . . . . . . . . . . . . . 44
Sun Visors . . . . . . . . . . . . . . . . . . . . . . . . . . . . . . 44
Roof
Sunroof . . . . . . . . . . . . . . . . . . . . . . . . . . . . . . . . 44
Keys and Locks
Keys
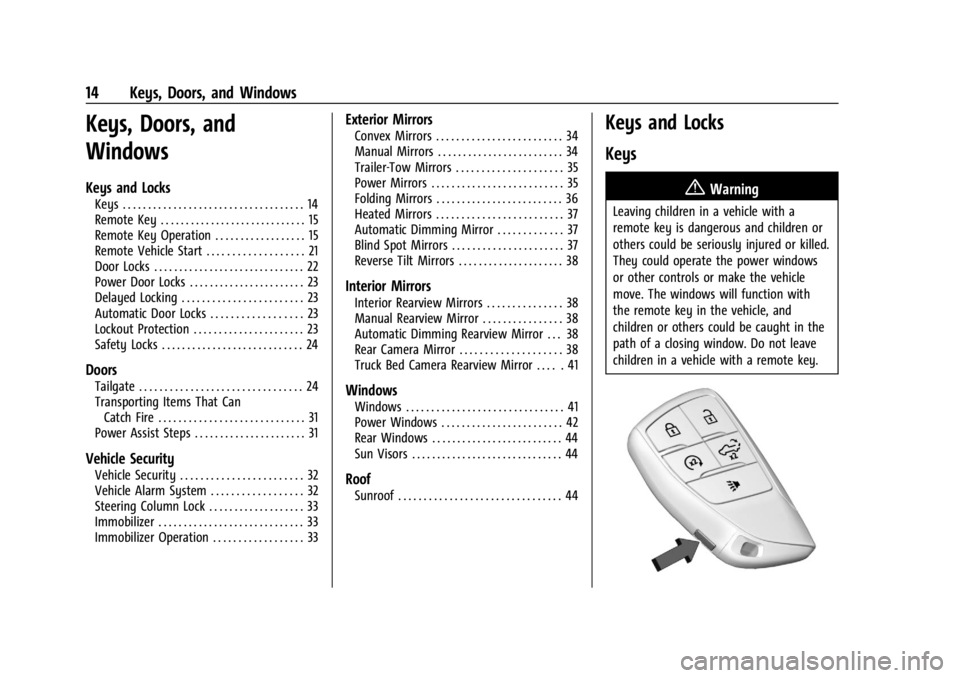
{Warning
Leaving children in a vehicle with a
remote key is dangerous and children or
others could be seriously injured or killed.
They could operate the power windows
or other controls or make the vehicle
move. The windows will function with
the remote key in the vehicle, and
children or others could be caught in the
path of a closing window. Do not leave
children in a vehicle with a remote key.
Page 17 of 440
GMC Sierra/Sierra Denali 2500 HD/3500 HD Owner Manual (GMNA-
Localizing-U.S./Canada-16908340) - 2024 - CRC - 12/7/22
Keys, Doors, and Windows 15
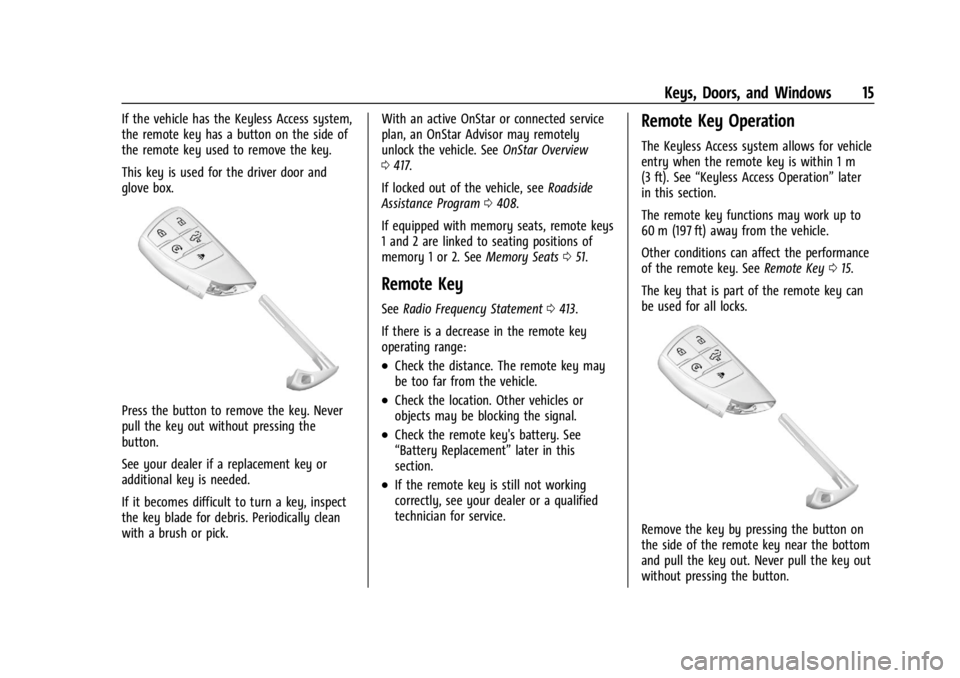
If the vehicle has the Keyless Access system,
the remote key has a button on the side of
the remote key used to remove the key.
This key is used for the driver door and
glove box.
Press the button to remove the key. Never
pull the key out without pressing the
button.
See your dealer if a replacement key or
additional key is needed.
If it becomes difficult to turn a key, inspect
the key blade for debris. Periodically clean
with a brush or pick.With an active OnStar or connected service
plan, an OnStar Advisor may remotely
unlock the vehicle. See
OnStar Overview
0 417.
If locked out of the vehicle, see Roadside
Assistance Program 0408.
If equipped with memory seats, remote keys
1 and 2 are linked to seating positions of
memory 1 or 2. See Memory Seats051.
Remote Key
See Radio Frequency Statement 0413.
If there is a decrease in the remote key
operating range:
.Check the distance. The remote key may
be too far from the vehicle.
.Check the location. Other vehicles or
objects may be blocking the signal.
.Check the remote key's battery. See
“Battery Replacement” later in this
section.
.If the remote key is still not working
correctly, see your dealer or a qualified
technician for service.
Remote Key Operation
The Keyless Access system allows for vehicle
entry when the remote key is within 1 m
(3 ft). See “Keyless Access Operation” later
in this section.
The remote key functions may work up to
60 m (197 ft) away from the vehicle.
Other conditions can affect the performance
of the remote key. See Remote Key015.
The key that is part of the remote key can
be used for all locks.
Remove the key by pressing the button on
the side of the remote key near the bottom
and pull the key out. Never pull the key out
without pressing the button.
Page 18 of 440
GMC Sierra/Sierra Denali 2500 HD/3500 HD Owner Manual (GMNA-
Localizing-U.S./Canada-16908340) - 2024 - CRC - 12/7/22
16 Keys, Doors, and Windows
See your dealer if a new remote key is
needed.
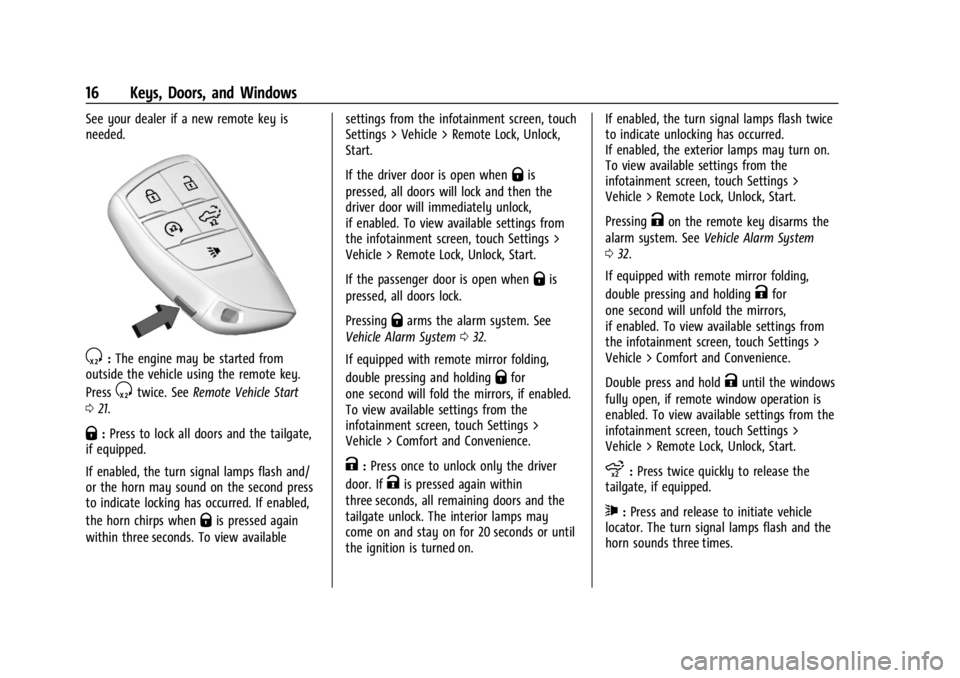
S:The engine may be started from
outside the vehicle using the remote key.
Press
Stwice. See Remote Vehicle Start
0 21.
Q:Press to lock all doors and the tailgate,
if equipped.
If enabled, the turn signal lamps flash and/
or the horn may sound on the second press
to indicate locking has occurred. If enabled,
the horn chirps when
Qis pressed again
within three seconds. To view available settings from the infotainment screen, touch
Settings > Vehicle > Remote Lock, Unlock,
Start.
If the driver door is open when
Qis
pressed, all doors will lock and then the
driver door will immediately unlock,
if enabled. To view available settings from
the infotainment screen, touch Settings >
Vehicle > Remote Lock, Unlock, Start.
If the passenger door is open when
Qis
pressed, all doors lock.
Pressing
Qarms the alarm system. See
Vehicle Alarm System 032.
If equipped with remote mirror folding,
double pressing and holding
Qfor
one second will fold the mirrors, if enabled.
To view available settings from the
infotainment screen, touch Settings >
Vehicle > Comfort and Convenience.
K: Press once to unlock only the driver
door. If
Kis pressed again within
three seconds, all remaining doors and the
tailgate unlock. The interior lamps may
come on and stay on for 20 seconds or until
the ignition is turned on. If enabled, the turn signal lamps flash twice
to indicate unlocking has occurred.
If enabled, the exterior lamps may turn on.
To view available settings from the
infotainment screen, touch Settings >
Vehicle > Remote Lock, Unlock, Start.
Pressing
Kon the remote key disarms the
alarm system. See Vehicle Alarm System
0 32.
If equipped with remote mirror folding,
double pressing and holding
Kfor
one second will unfold the mirrors,
if enabled. To view available settings from
the infotainment screen, touch Settings >
Vehicle > Comfort and Convenience.
Double press and hold
Kuntil the windows
fully open, if remote window operation is
enabled. To view available settings from the
infotainment screen, touch Settings >
Vehicle > Remote Lock, Unlock, Start.
x: Press twice quickly to release the
tailgate, if equipped.
7: Press and release to initiate vehicle
locator. The turn signal lamps flash and the
horn sounds three times.
Page 19 of 440
GMC Sierra/Sierra Denali 2500 HD/3500 HD Owner Manual (GMNA-
Localizing-U.S./Canada-16908340) - 2024 - CRC - 12/7/22
Keys, Doors, and Windows 17
Press and hold7for more than
three seconds to activate the panic alarm.
The turn signal lamps flash and the horn
sounds repeatedly for 30 seconds. The alarm
turns off when the ignition is turned on or
7is pressed again. The ignition must be off
for the panic alarm to work.
Keyless Access Operation
The Keyless Access system allows for doors
and the tailgate to be accessed without
pressing the remote key button. The remote
key must be within 1 m (3 ft) of the tailgate
or door being opened. If the vehicle has this
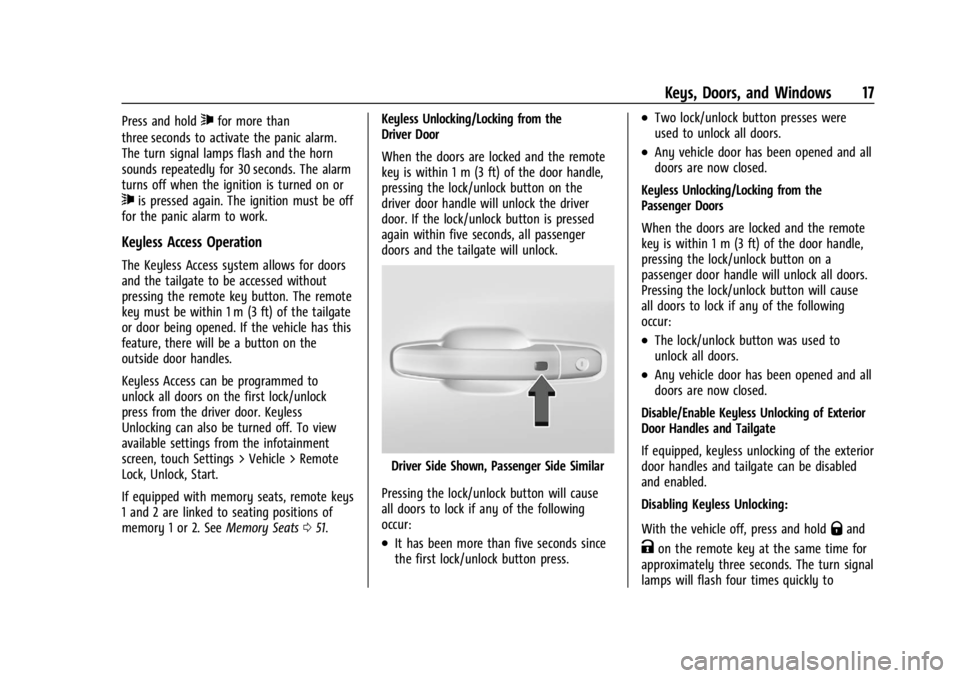
feature, there will be a button on the
outside door handles.
Keyless Access can be programmed to
unlock all doors on the first lock/unlock
press from the driver door. Keyless
Unlocking can also be turned off. To view
available settings from the infotainment
screen, touch Settings > Vehicle > Remote
Lock, Unlock, Start.
If equipped with memory seats, remote keys
1 and 2 are linked to seating positions of
memory 1 or 2. See Memory Seats051. Keyless Unlocking/Locking from the
Driver Door
When the doors are locked and the remote
key is within 1 m (3 ft) of the door handle,
pressing the lock/unlock button on the
driver door handle will unlock the driver
door. If the lock/unlock button is pressed
again within five seconds, all passenger
doors and the tailgate will unlock.
Driver Side Shown, Passenger Side Similar
Pressing the lock/unlock button will cause
all doors to lock if any of the following
occur:
.It has been more than five seconds since
the first lock/unlock button press.
.Two lock/unlock button presses were
used to unlock all doors.
.Any vehicle door has been opened and all
doors are now closed.
Keyless Unlocking/Locking from the
Passenger Doors
When the doors are locked and the remote
key is within 1 m (3 ft) of the door handle,
pressing the lock/unlock button on a
passenger door handle will unlock all doors.
Pressing the lock/unlock button will cause
all doors to lock if any of the following
occur:
.The lock/unlock button was used to
unlock all doors.
.Any vehicle door has been opened and all
doors are now closed.
Disable/Enable Keyless Unlocking of Exterior
Door Handles and Tailgate
If equipped, keyless unlocking of the exterior
door handles and tailgate can be disabled
and enabled.
Disabling Keyless Unlocking:
With the vehicle off, press and hold
Qand
Kon the remote key at the same time for
approximately three seconds. The turn signal
lamps will flash four times quickly to
Page 20 of 440
GMC Sierra/Sierra Denali 2500 HD/3500 HD Owner Manual (GMNA-
Localizing-U.S./Canada-16908340) - 2024 - CRC - 12/7/22
18 Keys, Doors, and Windows
indicate access is disabled. Using any
exterior handle to unlock the doors or open
the tailgate will cause the turn signal lamps
to flash four times quickly, indicating access
is disabled. If disabled, disarm the alarm
system before starting the vehicle.
Enabling Keyless Unlocking:
With the vehicle off, press and hold
Qand
Kon the remote key at the same time for
approximately three seconds. The turn signal
lamps will flash twice quickly to indicate
access is enabled.
Passive Locking
This feature will lock the vehicle several
seconds after all doors are closed, if the
vehicle is off and at least one remote key
has been removed from the interior, or none
remain in the interior.
If other electronic devices interfere with the
remote key signal, the vehicle may not
detect the remote key inside the vehicle.
If passive locking is enabled, the doors may
lock with the remote key inside the vehicle.
Do not leave the remote key in an
unattended vehicle. To view available settings from the
infotainment screen, touch Settings >
Vehicle > Remote Lock, Unlock, Start.
Temporary Disable of Passive Locking
Temporarily disable passive locking by
pressing and holding
Kon the interior door
switch with a door open for at least
four seconds, or until three chimes are
heard. Passive locking will then remain
disabled until
Qon the interior door is
pressed, or until the vehicle is turned on.
Remote Left in Vehicle Alert
When the vehicle is turned off and an
remote key is left in the vehicle, the horn
will chirp three times after all doors are
closed. To view available settings from the
infotainment screen, touch Settings >
Vehicle > Remote Lock, Unlock, Start.
Remote No Longer in Vehicle Alert
If the vehicle is on with a door open and
then all doors are closed, the vehicle will
check for remote keys inside. If an remote
key is not detected, the Driver Information
Center (DIC) will display NO REMOTE
DETECTED and the horn will chirp three times. This occurs only once each time the
vehicle is driven. To view available settings
from the infotainment screen, touch
Settings > Vehicle > Remote Lock, Unlock,
Start.
Key Access
To access a vehicle with a dead remote key
battery, see
Door Locks022.Programming Remote Keys to the
Vehicle
Only remote keys programmed to the
vehicle will work. If a remote key is lost or
stolen, a replacement can be purchased and
programmed through your dealer. The
vehicle can be reprogrammed so that lost or
stolen remote keys no longer work. Each
vehicle can have up to eight remote keys
matched to it.
Starting the Vehicle with a Low Remote
Key Battery
If the remote key battery is weak or if there
is interference with the signal, the DIC may
display NO KEY FOUND, REPLACE BATTERY IN
KEY or NO REMOTE KEY WAS DETECTED
PLACE KEY IN KEY POCKET THEN START YOUR
VEHICLE when starting the vehicle.