ignition GMC SIERRA 2024 User Guide
[x] Cancel search | Manufacturer: GMC, Model Year: 2024, Model line: SIERRA, Model: GMC SIERRA 2024Pages: 440, PDF Size: 9.21 MB
Page 36 of 440
GMC Sierra/Sierra Denali 2500 HD/3500 HD Owner Manual (GMNA-
Localizing-U.S./Canada-16908340) - 2024 - CRC - 12/7/22
34 Keys, Doors, and Windows
The security light, in the instrument cluster,
comes on if there is a problem with arming
or disarming the theft-deterrent system.
The system has one or more remote keys
matched to an immobilizer control unit in
your vehicle. Only a correctly matched
remote key will start the vehicle. If the
remote key is ever damaged, you may not
be able to start your vehicle.
When trying to start the vehicle, the
security light may come on briefly when the
ignition is turned on. If the engine does not
start and the security light stays on, there is
a problem with the system. Turn the
ignition off and try again.
If the vehicle will not change ignition modes
(accessory mode, on, off), and the remote
key appears to be undamaged, try another
remote key. Or, you may try placing the
remote key in the remote key pocket
located in the center console. SeeRemote
Key Operation 015.
If the ignition mode will not change with
the other remote key or with the remote
key in the remote key pocket, your vehicle
needs service. If the ignition does change
modes, the first remote key may be faulty. See your dealer who can service the
theft-deterrent system and have a new
remote key programmed to the vehicle.
It is possible for the immobilizer system to
learn new or replacement remote keys. Up
to eight remote keys can be programmed
for the vehicle. To program additional
remote keys, see "Programming Remote
Keys to the Vehicle" under
Remote Key
Operation 015.
Do not leave the remote key or device that
disarms or deactivates the vehicle theft
system in the vehicle.
Exterior Mirrors
Convex Mirrors
{Warning
A convex mirror can make things, like
other vehicles, look farther away than
they really are. If you cut too sharply
into the right lane, you could hit a
vehicle on the right. Check the inside
mirror or glance over your shoulder
before changing lanes. Standard Mirrors
If equipped, the passenger side mirror is
convex shaped. A convex mirror surface is
curved so more can be seen from the
driver seat.
Trailer-Tow Mirrors
The upper portion of both the driver and
passenger mirrors is flat.
The lower portion of both the driver and
passenger mirrors is convex. A convex mirror
surface is curved so more can be seen from
the driver seat. The lower portion is
adjusted manually.
Manual Mirrors
If equipped, adjust manual mirrors by
moving the mirror up and down or left to
right to see a little of the side of the vehicle
and to have a clear view behind the vehicle.
Using hood-mounted air deflectors and
add-on convex mirror attachments could
decrease mirror performance.
Page 44 of 440
GMC Sierra/Sierra Denali 2500 HD/3500 HD Owner Manual (GMNA-
Localizing-U.S./Canada-16908340) - 2024 - CRC - 12/7/22
42 Keys, Doors, and Windows
The vehicle aerodynamics are designed to
improve fuel economy performance. This
may result in a pulsing sound when either
rear window is down and the front windows
are up. To reduce the sound, open either a
front window or the sunroof, if equipped.
Power Windows
{Warning
Children could be seriously injured or
killed if caught in the path of a closing
window. Never leave the remote key in a
vehicle with children. When there are(Continued)
Warning (Continued)
children in the rear seat, use the window
lockout switch to prevent operation of
the windows. SeeKeys014.
The power windows work when the ignition
is on, in accessory mode, or when Retained
Accessory Power (RAP) is active. See
Retained Accessory Power (RAP) 0220.
Using the window switch, press to open or
pull to close the window.
The windows may be temporarily disabled if
they are used repeatedly within a
short time.
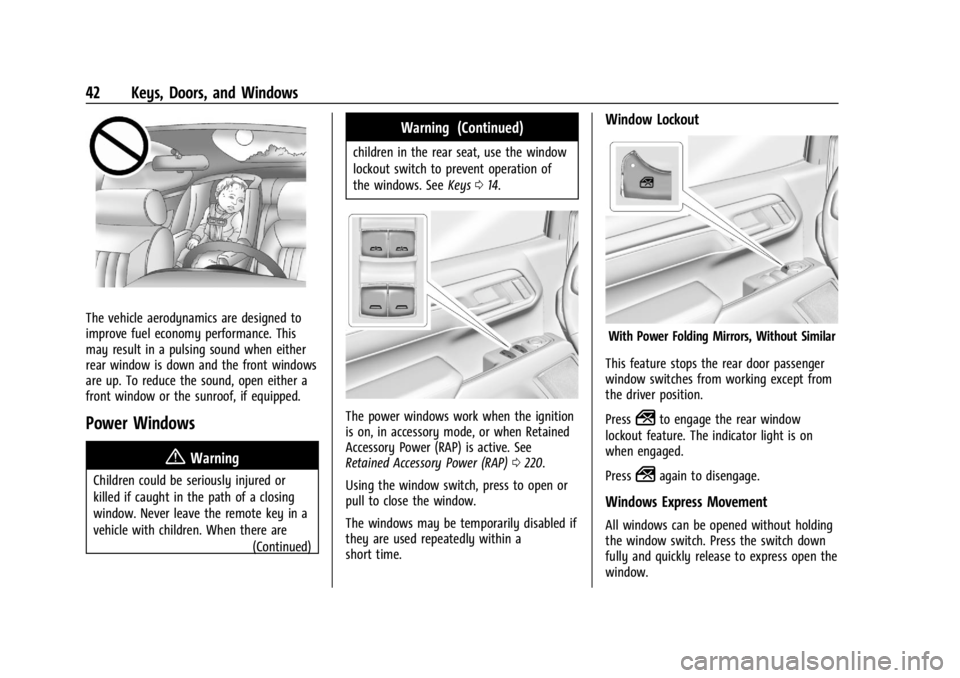
Window Lockout
With Power Folding Mirrors, Without Similar
This feature stops the rear door passenger
window switches from working except from
the driver position.
Press
2to engage the rear window
lockout feature. The indicator light is on
when engaged.
Press
2again to disengage.
Windows Express Movement
All windows can be opened without holding
the window switch. Press the switch down
fully and quickly release to express open the
window.
Page 45 of 440

GMC Sierra/Sierra Denali 2500 HD/3500 HD Owner Manual (GMNA-
Localizing-U.S./Canada-16908340) - 2024 - CRC - 12/7/22
Keys, Doors, and Windows 43
If equipped, pull the window switch up fully
and quickly release to express close the
window.
Briefly press or pull the window switch in
the same direction to stop that window’s
express movement.
Express Window Down
L: If equipped, this button will be on the
center stack.
Press and hold
Lto open all windows.
Release
Lto stop all movement.
Use the power window switches to close
each window.
Window Automatic Reversal System
The express-close feature will reverse
window movement if it comes in contact
with an object. Extreme cold or ice could
cause the window to auto-reverse. The
window will operate normally after the
object or condition is removed.
Automatic Reversal System Override
{Warning
If automatic reversal system override is
active, the window will not reverse
automatically. You or others could be
injured and the window could be
damaged. Before using automatic reversal
system override, make sure that all
people and obstructions are clear of the
window path.
When the engine is on, override the
automatic reversal system by pulling and
holding the window switch if conditions
prevent it from closing.
Programming the Power Windows
Programming may be necessary if the
vehicle battery has been disconnected or
discharged. If the window is unable to
express-up, program each express-close
window: 1. Close all doors.
2. Turn the ignition on or to accessory mode. 3. Partially open the window to be
programmed. Then close it and continue
to pull the switch briefly after the
window has fully closed.
4. Open the window and continue to press the switch briefly after the window has
fully opened.
Remote Window Operation
If equipped, this feature allows the windows
to be opened remotely. If enabled in vehicle
settings, double press and hold
Kon the
remote key. To view available settings from
the infotainment screen, touch Settings >
Vehicle > Remote Lock, Unlock, Start.
Page 46 of 440
GMC Sierra/Sierra Denali 2500 HD/3500 HD Owner Manual (GMNA-
Localizing-U.S./Canada-16908340) - 2024 - CRC - 12/7/22
44 Keys, Doors, and Windows
Rear Windows
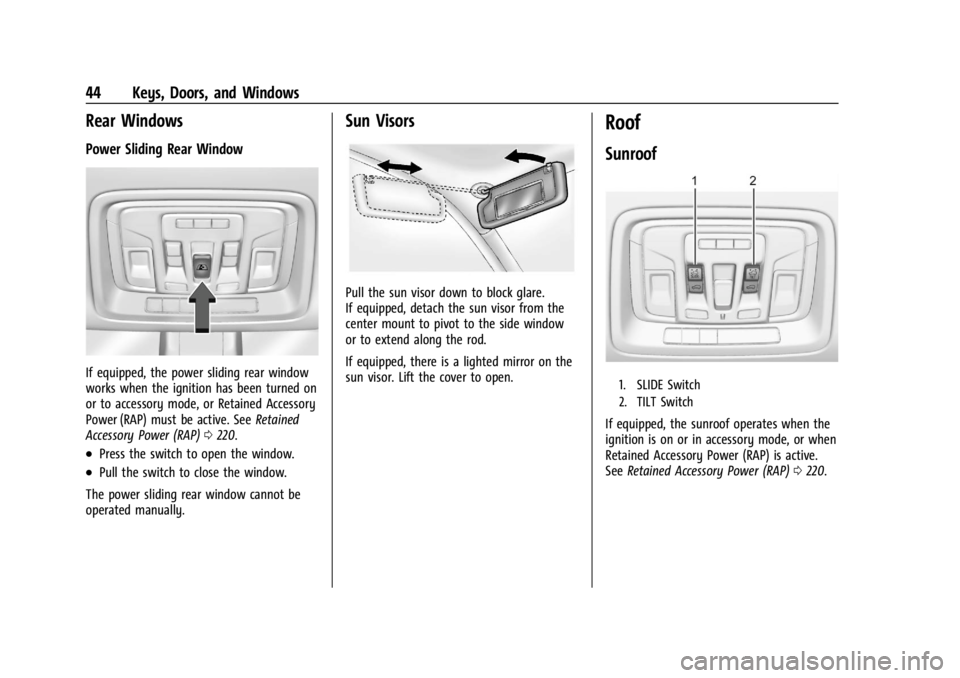
Power Sliding Rear Window
If equipped, the power sliding rear window
works when the ignition has been turned on
or to accessory mode, or Retained Accessory
Power (RAP) must be active. SeeRetained
Accessory Power (RAP) 0220.
.Press the switch to open the window.
.Pull the switch to close the window.
The power sliding rear window cannot be
operated manually.
Sun Visors
Pull the sun visor down to block glare.
If equipped, detach the sun visor from the
center mount to pivot to the side window
or to extend along the rod.
If equipped, there is a lighted mirror on the
sun visor. Lift the cover to open.
Roof
Sunroof
1. SLIDE Switch
2. TILT Switch
If equipped, the sunroof operates when the
ignition is on or in accessory mode, or when
Retained Accessory Power (RAP) is active.
See Retained Accessory Power (RAP) 0220.
Page 108 of 440
GMC Sierra/Sierra Denali 2500 HD/3500 HD Owner Manual (GMNA-
Localizing-U.S./Canada-16908340) - 2024 - CRC - 12/15/22
106 Instruments and Controls
Horn
To sound the horn, pressaon the
steering wheel.
Windshield Wiper/Washer
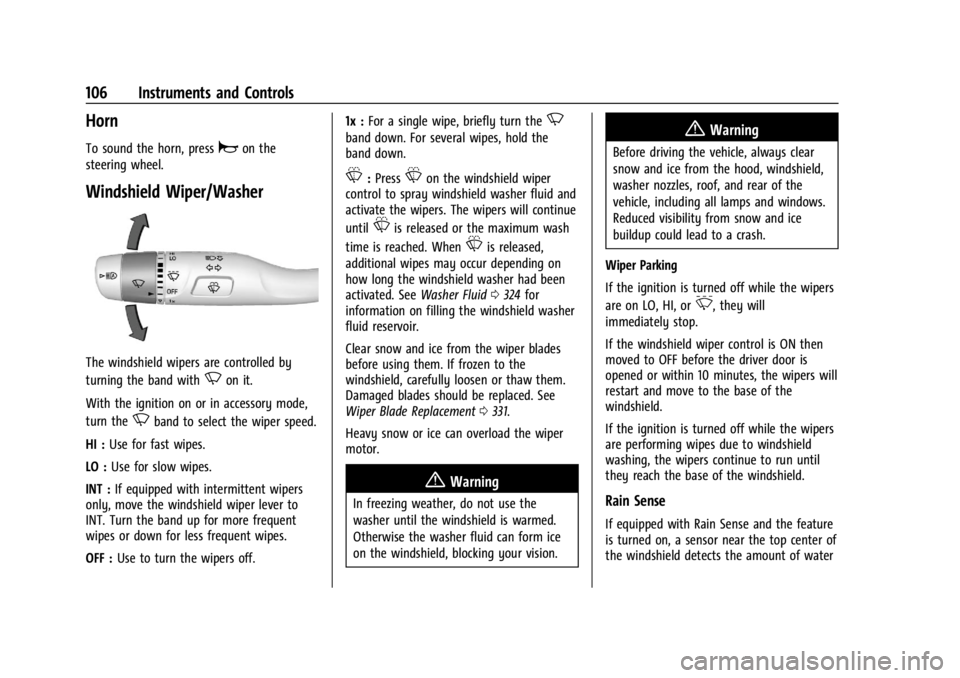
The windshield wipers are controlled by
turning the band with
Non it.
With the ignition on or in accessory mode,
turn the
Nband to select the wiper speed.
HI : Use for fast wipes.
LO : Use for slow wipes.
INT : If equipped with intermittent wipers
only, move the windshield wiper lever to
INT. Turn the band up for more frequent
wipes or down for less frequent wipes.
OFF : Use to turn the wipers off. 1x :
For a single wipe, briefly turn the
N
band down. For several wipes, hold the
band down.
L:PressLon the windshield wiper
control to spray windshield washer fluid and
activate the wipers. The wipers will continue
until
Lis released or the maximum wash
time is reached. When
Lis released,
additional wipes may occur depending on
how long the windshield washer had been
activated. See Washer Fluid0324 for
information on filling the windshield washer
fluid reservoir.
Clear snow and ice from the wiper blades
before using them. If frozen to the
windshield, carefully loosen or thaw them.
Damaged blades should be replaced. See
Wiper Blade Replacement 0331.
Heavy snow or ice can overload the wiper
motor.
{Warning
In freezing weather, do not use the
washer until the windshield is warmed.
Otherwise the washer fluid can form ice
on the windshield, blocking your vision.
{Warning
Before driving the vehicle, always clear
snow and ice from the hood, windshield,
washer nozzles, roof, and rear of the
vehicle, including all lamps and windows.
Reduced visibility from snow and ice
buildup could lead to a crash.
Wiper Parking
If the ignition is turned off while the wipers
are on LO, HI, or
3, they will
immediately stop.
If the windshield wiper control is ON then
moved to OFF before the driver door is
opened or within 10 minutes, the wipers will
restart and move to the base of the
windshield.
If the ignition is turned off while the wipers
are performing wipes due to windshield
washing, the wipers continue to run until
they reach the base of the windshield.
Rain Sense
If equipped with Rain Sense and the feature
is turned on, a sensor near the top center of
the windshield detects the amount of water
Page 110 of 440
GMC Sierra/Sierra Denali 2500 HD/3500 HD Owner Manual (GMNA-
Localizing-U.S./Canada-16908340) - 2024 - CRC - 12/15/22
108 Instruments and Controls
Caution
Leaving electrical equipment plugged in
for an extended period of time while the
vehicle is off will drain the battery.
Always unplug electrical equipment when
not in use and do not plug in equipment
that exceeds the maximum 15 amp
rating.
Certain power accessory plugs may not be
compatible with the accessory power outlet
and could overload vehicle or adapter fuses.
If a problem is experienced, see your dealer.
When adding electrical equipment, be sure
to follow the proper installation instructions
included with the equipment. See Add-On
Electrical Equipment 0306.
Caution
Hanging heavy equipment from the
power outlet can cause damage not
covered by the vehicle warranty. The
power outlets are designed for accessory
power plugs only, such as cell phone
charge cords.
Power Outlet 110/120-Volt Alternating
Current
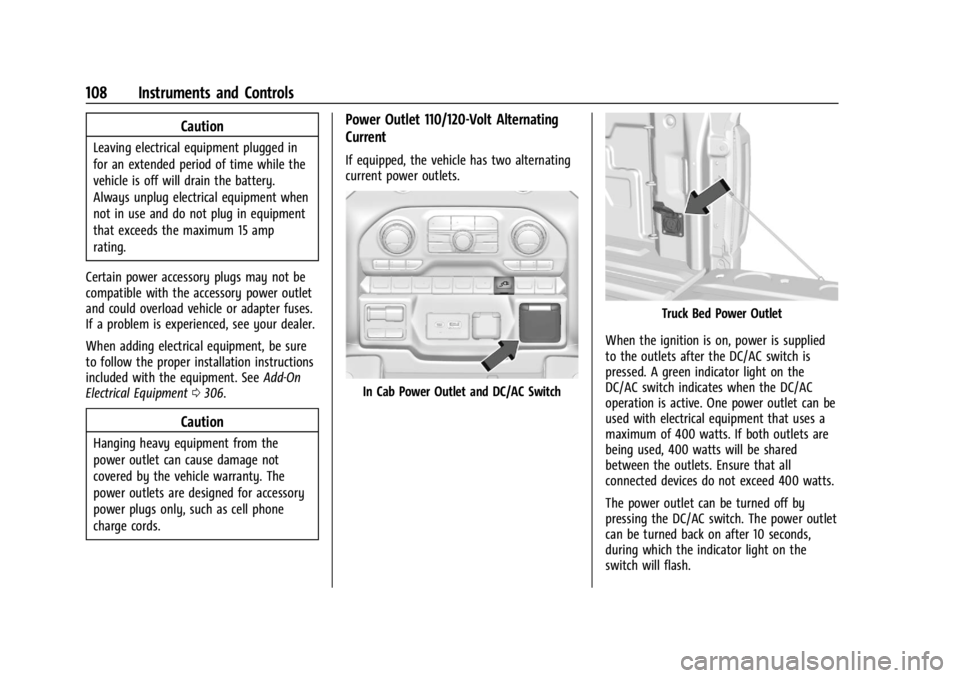
If equipped, the vehicle has two alternating
current power outlets.
In Cab Power Outlet and DC/AC Switch
Truck Bed Power Outlet
When the ignition is on, power is supplied
to the outlets after the DC/AC switch is
pressed. A green indicator light on the
DC/AC switch indicates when the DC/AC
operation is active. One power outlet can be
used with electrical equipment that uses a
maximum of 400 watts. If both outlets are
being used, 400 watts will be shared
between the outlets. Ensure that all
connected devices do not exceed 400 watts.
The power outlet can be turned off by
pressing the DC/AC switch. The power outlet
can be turned back on after 10 seconds,
during which the indicator light on the
switch will flash.
Page 111 of 440

GMC Sierra/Sierra Denali 2500 HD/3500 HD Owner Manual (GMNA-
Localizing-U.S./Canada-16908340) - 2024 - CRC - 12/15/22
Instruments and Controls 109
An indicator light on the outlet illuminates
when power is provided to the outlet and
no system fault is detected. The outlets will
not operate when the ignition is off, the
DC/AC switch is not pressed, or the plug is
not fully seated into the outlet.
If equipment is connected using more than
400 watts or a system fault is detected, a
protection circuit shuts off the power supply
and the indicator light turns off.
Do not use a power outlet with a missing or
damaged cover.
The power outlet is not designed for the
following, and may not work properly if
they are plugged in:
.Equipment with high initial peak wattage,
such as compressor-driven refrigerators
and electric power tools
.Other equipment requiring an extremely
stable power supply, such as
microcomputer-controlled electric blankets
and touch sensor lamps
.Medical equipment
Wireless Charging
If equipped and enabled, the vehicle has
wireless charging on the center console in
front of the cupholders. The system
operates at 145 kHz and wirelessly charges
one Qi compatible smartphone. The power
output of the system is capable of charging
at a rate up to 3 amp (15 W), as requested
by the compatible smartphone. SeeRadio
Frequency Statement 0413.
{Warning
Wireless charging may affect the
operation of an implanted pacemaker or
other medical devices. If you have one, it
is recommended to consult with your
doctor before using the wireless charging
system.
The vehicle must be on, in ACC/ACCESSORY,
or Retained Accessory Power (RAP) must be
active. The wireless charging feature may
not correctly indicate charging when the
vehicle is in RAP, during a Bluetooth phone
call, or when phone projection (e.g. Apple
CarPlay / Android Auto) is active. See
Retained Accessory Power (RAP) 0220. The operating temperature is
−40 °C (−40 °F)
to 85 °C (185 °F) for the charging system and
0 °C (32 °F) to 35 °C (95 °F) for the phone.
A charging stopped alert may be displayed
on the infotainment screen, if the wireless
charger or smartphone are outside of
normal operating temperature. Charging will
automatically resume when a normal
operating temperature is reached.
{Warning
Remove all objects from the charger
before charging your compatible
smartphone. Objects, such as coins, keys,
rings, paper clips, or cards, between the
smartphone and charger may become
very hot.
On the rare occasion that the charging
system does not detect an object, and
the object gets wedged between the
smartphone and charger, remove the
smartphone and allow the object to cool
before removing it from the charger, to
prevent burns.
Page 118 of 440
GMC Sierra/Sierra Denali 2500 HD/3500 HD Owner Manual (GMNA-
Localizing-U.S./Canada-16908340) - 2024 - CRC - 12/15/22
116 Instruments and Controls
Speedometer
The speedometer shows the vehicle speed in
either kilometers per hour (km/h) or miles
per hour (mph).
Odometer
The odometer shows how far the vehicle has
been driven, in either kilometers or miles.
Trip Odometer
The trip odometer shows how far the
vehicle has been driven since the trip
odometer was last reset.
The trip odometer is accessed and reset
through the Driver Information Center (DIC).
SeeDriver Information Center (DIC) (Base
Level) 0131 or
Driver Information Center (DIC) (Uplevel)
0 133.
Tachometer
The tachometer displays the engine speed in
revolutions per minute (rpm).
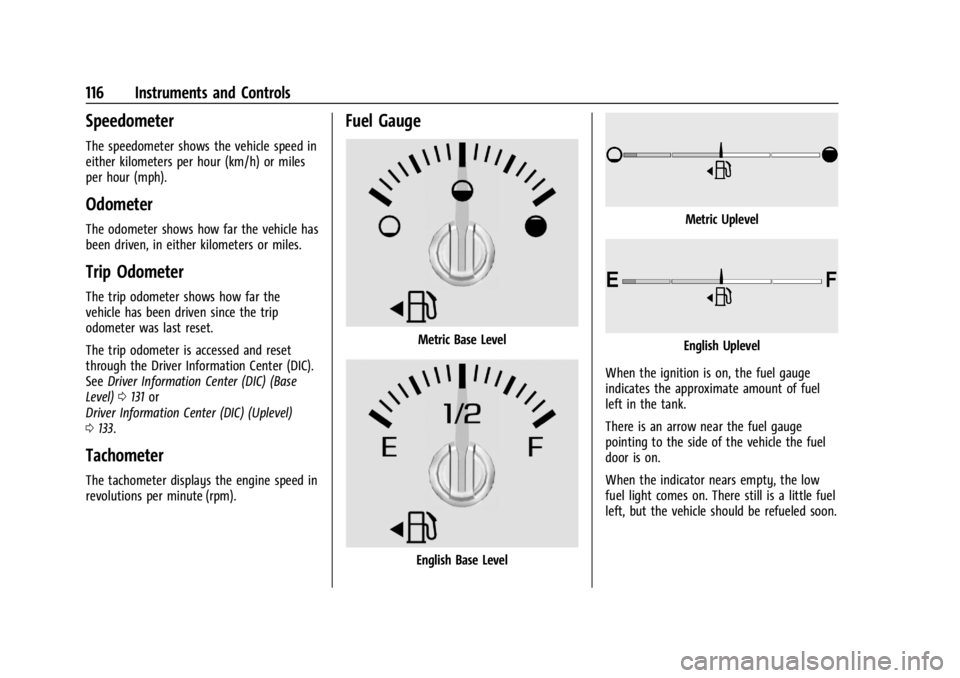
Fuel Gauge
Metric Base Level
English Base Level
Metric Uplevel
English Uplevel
When the ignition is on, the fuel gauge
indicates the approximate amount of fuel
left in the tank.
There is an arrow near the fuel gauge
pointing to the side of the vehicle the fuel
door is on.
When the indicator nears empty, the low
fuel light comes on. There still is a little fuel
left, but the vehicle should be refueled soon.
Page 119 of 440
GMC Sierra/Sierra Denali 2500 HD/3500 HD Owner Manual (GMNA-
Localizing-U.S./Canada-16908340) - 2024 - CRC - 12/15/22
Instruments and Controls 117
The fuel gauge may:
.Take a little more, or less fuel to fill up
than it indicates. For example, the gauge
may have indicated the tank is half full,
but it actually takes a little more, or less
than half the tank's capacity to fill
the tank.
.Moves a little while turning a corner,
speeding up, or braking.
.Takes a few seconds to stabilize after the
ignition is turned on and goes back to
empty when the ignition is turned off.
These are normal conditions, none of which
indicate a problem with the fuel gauge.
Fuel Range
The uplevel instrument cluster has a
estimated fuel range located in the bottom
center of the display. The fuel range is
displayed with the approximate distance the
vehicle can be driven without refueling. The
fuel range estimate is based on an average
of the vehicle’s fuel economy over recent
driving history and the amount of fuel
remaining in the fuel tank.
When the estimated fuel range is low, the
range shows LOW and a message may also
display in the Driver Information
Center (DIC).
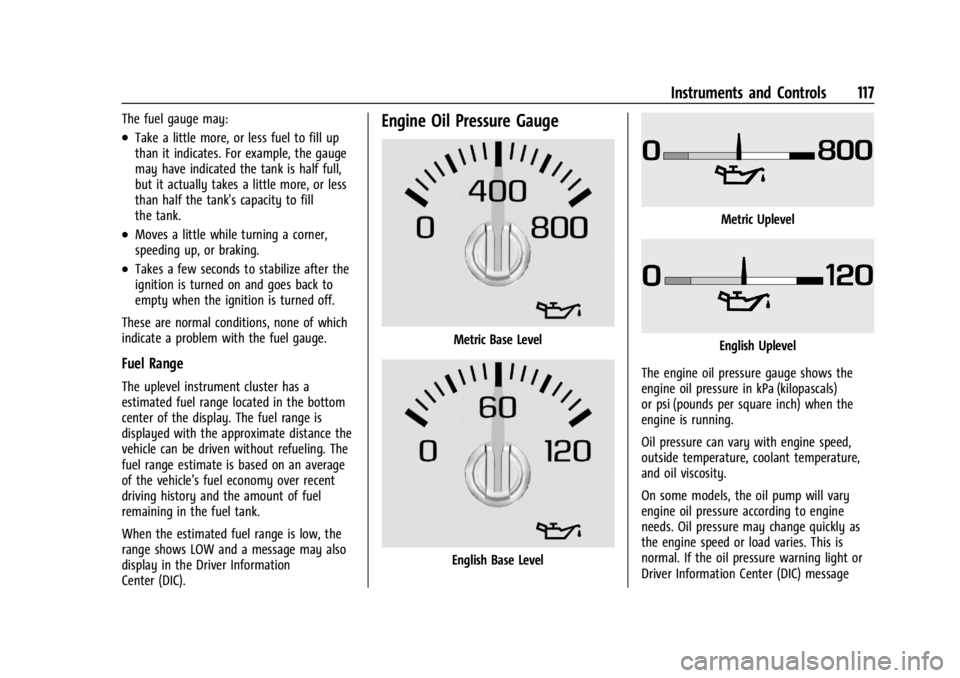
Engine Oil Pressure Gauge
Metric Base Level
English Base Level
Metric Uplevel
English Uplevel
The engine oil pressure gauge shows the
engine oil pressure in kPa (kilopascals)
or psi (pounds per square inch) when the
engine is running.
Oil pressure can vary with engine speed,
outside temperature, coolant temperature,
and oil viscosity.
On some models, the oil pump will vary
engine oil pressure according to engine
needs. Oil pressure may change quickly as
the engine speed or load varies. This is
normal. If the oil pressure warning light or
Driver Information Center (DIC) message
Page 121 of 440
GMC Sierra/Sierra Denali 2500 HD/3500 HD Owner Manual (GMNA-
Localizing-U.S./Canada-16908340) - 2024 - CRC - 12/15/22
Instruments and Controls 119
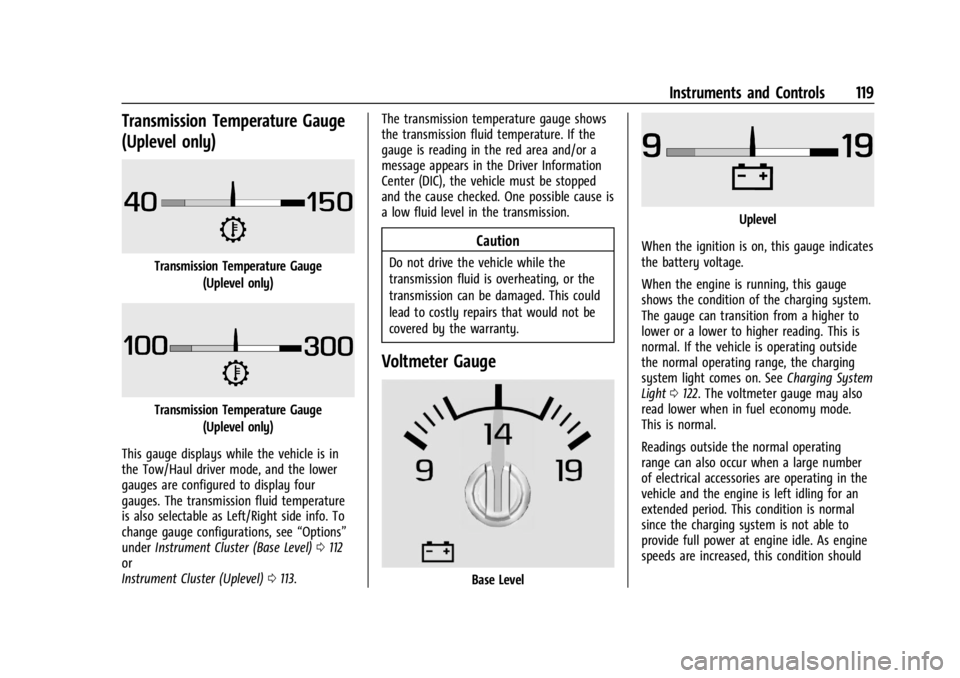
Transmission Temperature Gauge
(Uplevel only)
Transmission Temperature Gauge(Uplevel only)
Transmission Temperature Gauge(Uplevel only)
This gauge displays while the vehicle is in
the Tow/Haul driver mode, and the lower
gauges are configured to display four
gauges. The transmission fluid temperature
is also selectable as Left/Right side info. To
change gauge configurations, see “Options”
under Instrument Cluster (Base Level) 0112
or
Instrument Cluster (Uplevel) 0113. The transmission temperature gauge shows
the transmission fluid temperature. If the
gauge is reading in the red area and/or a
message appears in the Driver Information
Center (DIC), the vehicle must be stopped
and the cause checked. One possible cause is
a low fluid level in the transmission.
Caution
Do not drive the vehicle while the
transmission fluid is overheating, or the
transmission can be damaged. This could
lead to costly repairs that would not be
covered by the warranty.
Voltmeter Gauge
Base Level
Uplevel
When the ignition is on, this gauge indicates
the battery voltage.
When the engine is running, this gauge
shows the condition of the charging system.
The gauge can transition from a higher to
lower or a lower to higher reading. This is
normal. If the vehicle is operating outside
the normal operating range, the charging
system light comes on. See Charging System
Light 0122. The voltmeter gauge may also
read lower when in fuel economy mode.
This is normal.
Readings outside the normal operating
range can also occur when a large number
of electrical accessories are operating in the
vehicle and the engine is left idling for an
extended period. This condition is normal
since the charging system is not able to
provide full power at engine idle. As engine
speeds are increased, this condition should