turn signal GMC SIERRA 2024 Owner's Guide
[x] Cancel search | Manufacturer: GMC, Model Year: 2024, Model line: SIERRA, Model: GMC SIERRA 2024Pages: 440, PDF Size: 9.21 MB
Page 293 of 440
GMC Sierra/Sierra Denali 2500 HD/3500 HD Owner Manual (GMNA-
Localizing-U.S./Canada-16908340) - 2024 - CRC - 12/13/22
Driving and Operating 291
Turn Signals When Towing a Trailer
When properly connected, the trailer turn
signals will illuminate to indicate the vehicle
is turning, changing lanes, or stopping.
When towing a trailer, the arrows on the
instrument cluster will illuminate even if the
trailer is not properly connected or the bulbs
are burned out.
Tow/Haul Mode
For instructions on how to enter Tow/Haul
Mode, seeDriver Mode Control 0238.
Tow/Haul assists when pulling a heavy
trailer or a large or heavy load. See Tow/
Haul Mode 0227.
Tow/Haul Mode is designed to be most
effective when the vehicle and trailer
combined weight is at least 75% of the
vehicle's Gross Combined Weight Rating
(GCWR). See “Trailer Weight” underTrailer
Towing 0280.
Tow/Haul Mode is most useful when towing
a heavy trailer or carrying a large or
heavy load:
.Through rolling terrain.
.In stop-and-go traffic.
.In busy parking lots. Operating the vehicle in Tow/Haul Mode
when lightly loaded or not towing will not
cause damage; however, it is not
recommended and may result in unpleasant
engine and transmission driving
characteristics, heavy or light steering
efforts, and reduced fuel economy.
Integrated Trailer Brake Control System
The vehicle may have an Integrated Trailer
Brake Control (ITBC) system for use with
electric trailer brakes or most electric over
hydraulic trailer brake systems. These
instructions apply to both types of electric
trailer brakes.
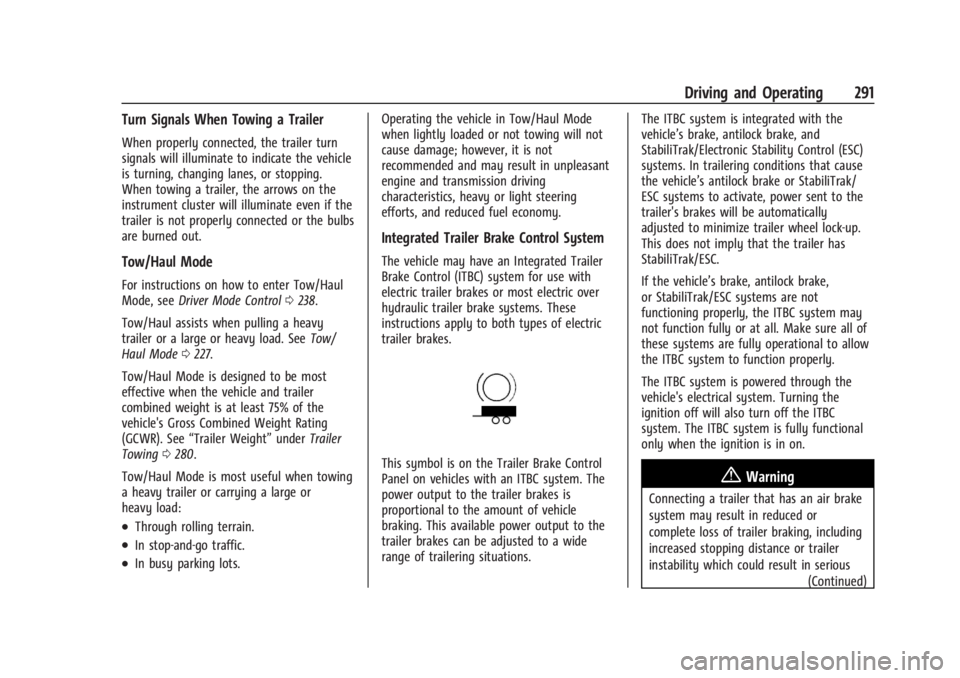
This symbol is on the Trailer Brake Control
Panel on vehicles with an ITBC system. The
power output to the trailer brakes is
proportional to the amount of vehicle
braking. This available power output to the
trailer brakes can be adjusted to a wide
range of trailering situations.
The ITBC system is integrated with the
vehicle’s brake, antilock brake, and
StabiliTrak/Electronic Stability Control (ESC)
systems. In trailering conditions that cause
the vehicle’s antilock brake or StabiliTrak/
ESC systems to activate, power sent to the
trailer's brakes will be automatically
adjusted to minimize trailer wheel lock-up.
This does not imply that the trailer has
StabiliTrak/ESC.
If the vehicle’s brake, antilock brake,
or StabiliTrak/ESC systems are not
functioning properly, the ITBC system may
not function fully or at all. Make sure all of
these systems are fully operational to allow
the ITBC system to function properly.
The ITBC system is powered through the
vehicle's electrical system. Turning the
ignition off will also turn off the ITBC
system. The ITBC system is fully functional
only when the ignition is in on.{Warning
Connecting a trailer that has an air brake
system may result in reduced or
complete loss of trailer braking, including
increased stopping distance or trailer
instability which could result in serious
(Continued)
Page 298 of 440

GMC Sierra/Sierra Denali 2500 HD/3500 HD Owner Manual (GMNA-
Localizing-U.S./Canada-16908340) - 2024 - CRC - 12/13/22
296 Driving and Operating
Warning (Continued)
.If the trailer brakes are not operating
properly at any time, or if a DIC
message indicates problems with the
trailer connections or trailer brakes,
carefully pull the vehicle over to the
side of the road when traffic
conditions allow.
Trailer Tires
Special Trailer (ST) tires differ from vehicle
tires. Trailer tires are designed with stiff
sidewalls to help prevent sway and to
support heavy loads. These features can
make it difficult to determine if the trailer
tire pressures are low only based on a visual
inspection.
Always check all trailer tire pressures before
each trip when the tires are cool. Low trailer
tire pressure is a leading cause of trailer tire
blow-outs.
If the vehicle is equipped with a trailer tire
pressure monitoring system, see the trailer
tire pressure monitoring system description
and the trailering app.Trailer tires deteriorate over time. The trailer
tire sidewall will show the week and year
the tire was manufactured. Many trailer tire
manufacturers recommend replacing tires
more than six years old.
Overloading is another leading cause of
trailer tire blow-outs. Never load your trailer
with more weight than the tires are
designed to support. The load rating is
located on the trailer tire sidewall.
Always know the maximum speed rating for
the trailer tires before driving. This may be
significantly lower than the vehicle tire
speed rating. The speed rating may be on
the trailer tire sidewall. If the speed rating is
not shown, the default trailer tire speed
rating is 105 km/h (65 mph).
Trailering App
Trailer Lights App
If equipped, the Trailer Lights App is on the
infotainment home screen.
Touch Start to cycle the trailer lamps on and
off to determine if they are working. The
test follows this sequence:
1. The running lights turn on first and remain on throughout the sequence. 2. The brake lights turn on for about
two seconds.
3. The left turn signal light flashes three times.
4. The right turn signal light flashes three times.
5. The reverse lights turn on for about two seconds.
6. Steps 2–5 repeat for approximately one minute and 45 seconds, or until the
test deactivates.
Touch Stop to stop the test. The test
automatically ends after one minute and
45 seconds.
The sequence also deactivates when any of
the following occur:
.The vehicle is turned off.
.The transmission is shifted out of P (Park).
.The brake pedal is pressed.
.The turn signal is activated.
.The hazard warning lights are activated.
Trailering App
If equipped, the Trailering App is on the
infotainment home screen.
Page 302 of 440
GMC Sierra/Sierra Denali 2500 HD/3500 HD Owner Manual (GMNA-
Localizing-U.S./Canada-16908340) - 2024 - CRC - 12/13/22
300 Driving and Operating
If trailer dimensions are out of range, this
feature will be unavailable.
Status View
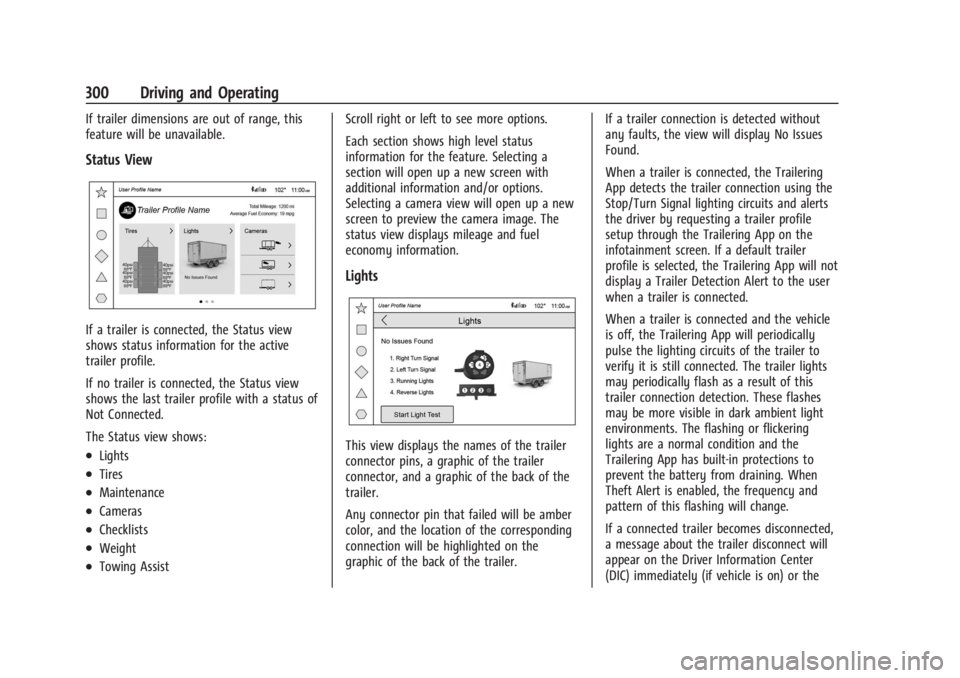
If a trailer is connected, the Status view
shows status information for the active
trailer profile.
If no trailer is connected, the Status view
shows the last trailer profile with a status of
Not Connected.
The Status view shows:
.Lights
.Tires
.Maintenance
.Cameras
.Checklists
.Weight
.Towing AssistScroll right or left to see more options.
Each section shows high level status
information for the feature. Selecting a
section will open up a new screen with
additional information and/or options.
Selecting a camera view will open up a new
screen to preview the camera image. The
status view displays mileage and fuel
economy information.
Lights
This view displays the names of the trailer
connector pins, a graphic of the trailer
connector, and a graphic of the back of the
trailer.
Any connector pin that failed will be amber
color, and the location of the corresponding
connection will be highlighted on the
graphic of the back of the trailer.
If a trailer connection is detected without
any faults, the view will display No Issues
Found.
When a trailer is connected, the Trailering
App detects the trailer connection using the
Stop/Turn Signal lighting circuits and alerts
the driver by requesting a trailer profile
setup through the Trailering App on the
infotainment screen. If a default trailer
profile is selected, the Trailering App will not
display a Trailer Detection Alert to the user
when a trailer is connected.
When a trailer is connected and the vehicle
is off, the Trailering App will periodically
pulse the lighting circuits of the trailer to
verify it is still connected. The trailer lights
may periodically flash as a result of this
trailer connection detection. These flashes
may be more visible in dark ambient light
environments. The flashing or flickering
lights are a normal condition and the
Trailering App has built-in protections to
prevent the battery from draining. When
Theft Alert is enabled, the frequency and
pattern of this flashing will change.
If a connected trailer becomes disconnected,
a message about the trailer disconnect will
appear on the Driver Information Center
(DIC) immediately (if vehicle is on) or the
Page 303 of 440

GMC Sierra/Sierra Denali 2500 HD/3500 HD Owner Manual (GMNA-
Localizing-U.S./Canada-16908340) - 2024 - CRC - 12/13/22
Driving and Operating 301
next time the vehicle is turned on (if trailer
was disconnected while vehicle is off). Check
your trailer connection if needed.
Connection Problem
If any of the trailer connections are lost, a
message about the connection issue appears
on the DIC. The infotainment screen will also
show the connection issue in the Lights
Status view.
Connection Trailer Lighting Faults Detected
The Trailering App monitors for electrical
faults on the trailer lights. A message about
the lighting issue appears on the DIC. The
infotainment screen will also show the
lighting issue in the Lights Status view.
Repair your trailer lights if needed. A trailer
lighting issue is not covered by your GM
warranty.
The Running Lights connection may not
detect partial outages. Activate the light test
to check all trailer lamps. See“Light Test”
following. Light Test
Touch Start Light Test to cycle the trailer
lights on and off to determine if they are
working. The test follows this sequence:
1. The running lights turn on first and remain on throughout the sequence.
2. The brake lights turn on for about two seconds.
3. The left turn signal light flashes three times.
4. The right turn signal light flashes three times.
5. The reverse lights turn on for about two seconds.
6. Steps 2-5 repeat for approximately one minute and 45 seconds, or until the
test deactivates.
Touch Stop to stop the test. The test will
automatically end after one minute and
45 seconds.
The sequence also deactivates when any of
the following occur:
.The vehicle is turned off.
.The transmission is shifted out of
P (Park).
.The brake pedal is pressed.
.The turn signal is activated.
.The hazard warning lights are activated.
Tires
Tire Pressure and Temperature
If the TTPMS sensor-to-vehicle learn process
was completed, the status view will display
the current tire pressure and temperature of
the trailer tires related to the active Trailer
Profile. If a tire’s pressure is low or high, the
color of the pressure value will be amber.
If a sensor malfunctions, the values are
dashed lines. If the screen displays “Service
Tire Pressure Monitoring System,” the
vehicle needs to be taken to a dealer for
service.
Touch to set up the TTPMS for the Trailer
Profile. See “Trailer Tire Pressure Setup”
previously in this section for details on the
setup. Also, touch Sensor Setup if the trailer
Page 311 of 440
GMC Sierra/Sierra Denali 2500 HD/3500 HD Owner Manual (GMNA-
Localizing-U.S./Canada-16908340) - 2024 - CRC - 12/7/22
Vehicle Care 309
Vehicle Care
General Information
General Information . . . . . . . . . . . . . . . . . . . 310
California Perchlorate MaterialsRequirements . . . . . . . . . . . . . . . . . . . . . . . . 310
Accessories and Modifications . . . . . . . . . 310
Vehicle Checks
Doing Your Own Service Work . . . . . . . . . 311
Hood . . . . . . . . . . . . . . . . . . . . . . . . . . . . . . . . . . 312
Engine Compartment Overview . . . . . . . . 313
Engine Oil . . . . . . . . . . . . . . . . . . . . . . . . . . . . . 314
Engine Oil Life System . . . . . . . . . . . . . . . . . 316
Automatic Transmission Fluid . . . . . . . . . . 317
Engine Air Filter Life System . . . . . . . . . . . 317
Engine Air Cleaner/Filter . . . . . . . . . . . . . . . 318
Cooling System . . . . . . . . . . . . . . . . . . . . . . . . 319
Engine Overheating . . . . . . . . . . . . . . . . . . . . 321
Overheated Engine Protection Operating Mode . . . . . . . . . . . . . . . . . . . . . 323
Engine Fan . . . . . . . . . . . . . . . . . . . . . . . . . . . . 323
Power Steering Fluid . . . . . . . . . . . . . . . . . . 323
Washer Fluid . . . . . . . . . . . . . . . . . . . . . . . . . . 324
Brakes . . . . . . . . . . . . . . . . . . . . . . . . . . . . . . . . . 325
Brake Pad Life System . . . . . . . . . . . . . . . . . 325
Brake Fluid . . . . . . . . . . . . . . . . . . . . . . . . . . . . 326
Battery - North America . . . . . . . . . . . . . . . 327
Four-Wheel Drive . . . . . . . . . . . . . . . . . . . . . . 329
Front Axle . . . . . . . . . . . . . . . . . . . . . . . . . . . . . 329 Rear Axle . . . . . . . . . . . . . . . . . . . . . . . . . . . . . . 329
Noise Control System . . . . . . . . . . . . . . . . . 329
Automatic Transmission Shift Lock
Control Function Check (Mechanical
Shifter) . . . . . . . . . . . . . . . . . . . . . . . . . . . . . . 330
Park Brake and P (Park) Mechanism Check . . . . . . . . . . . . . . . . . . . . . . . . . . . . . . . . 331
Wiper Blade Replacement . . . . . . . . . . . . . . 331
Glass Replacement . . . . . . . . . . . . . . . . . . . . . 331
Windshield Replacement . . . . . . . . . . . . . . . 332
Gas Strut(s) . . . . . . . . . . . . . . . . . . . . . . . . . . . . 332
Headlamp Aiming
Front Headlamp Aiming . . . . . . . . . . . . . . . 333
Bulb Replacement
Bulb Replacement . . . . . . . . . . . . . . . . . . . . . 333
Halogen Bulbs . . . . . . . . . . . . . . . . . . . . . . . . . 333
LED Lighting . . . . . . . . . . . . . . . . . . . . . . . . . . . 333
Headlamps, Front Turn Signal, Sidemarker, and Parking Lamps . . . . . . 333
Taillamps, Turn Signal, Stoplamps, and Back-Up Lamps . . . . . . . . . . . . . . . . . . . . . . 334
Center High-Mounted Stoplamp (CHMSL) and Cargo Lamp . . . . . . . . . . . . 335
License Plate Lamp . . . . . . . . . . . . . . . . . . . . 335
Electrical System
Electrical System Overload . . . . . . . . . . . . . 335
Fuses and Circuit Breakers . . . . . . . . . . . . . 337
Engine Compartment Fuse Block . . . . . . . 337 Instrument Panel Fuse Block (Left) . . . . . 341
Instrument Panel Fuse Block (Right) . . . 342
Wheels and Tires
Tires . . . . . . . . . . . . . . . . . . . . . . . . . . . . . . . . . . . 345
All-Season Tires . . . . . . . . . . . . . . . . . . . . . . . . 345
Winter Tires . . . . . . . . . . . . . . . . . . . . . . . . . . . 346
All-Terrain Tires . . . . . . . . . . . . . . . . . . . . . . . 346
Tire Sidewall Labeling . . . . . . . . . . . . . . . . . 346
Tire Designations . . . . . . . . . . . . . . . . . . . . . . 347
Tire Terminology and Definitions . . . . . . 348
Tire Pressure . . . . . . . . . . . . . . . . . . . . . . . . . . 350
Tire Pressure Monitor System . . . . . . . . . . 351
Tire Pressure Monitor Operation . . . . . . . 351
Tire Inspection . . . . . . . . . . . . . . . . . . . . . . . . 356
Tire Rotation . . . . . . . . . . . . . . . . . . . . . . . . . . 357
When It Is Time for New Tires . . . . . . . . 359
Buying New Tires . . . . . . . . . . . . . . . . . . . . . 360
Different Size Tires and Wheels . . . . . . . . 361
Uniform Tire Quality Grading . . . . . . . . . . 361
Wheel Alignment and Tire Balance . . . . 362
Wheel Replacement . . . . . . . . . . . . . . . . . . . 362
Tire Chains . . . . . . . . . . . . . . . . . . . . . . . . . . . . 363
If a Tire Goes Flat . . . . . . . . . . . . . . . . . . . . . 364
Tire Changing . . . . . . . . . . . . . . . . . . . . . . . . . 365
Full-Size Spare Tire . . . . . . . . . . . . . . . . . . . . . 375
Jump Starting
Jump Starting - North America . . . . . . . . 376
Page 335 of 440
GMC Sierra/Sierra Denali 2500 HD/3500 HD Owner Manual (GMNA-
Localizing-U.S./Canada-16908340) - 2024 - CRC - 12/7/22
Vehicle Care 333
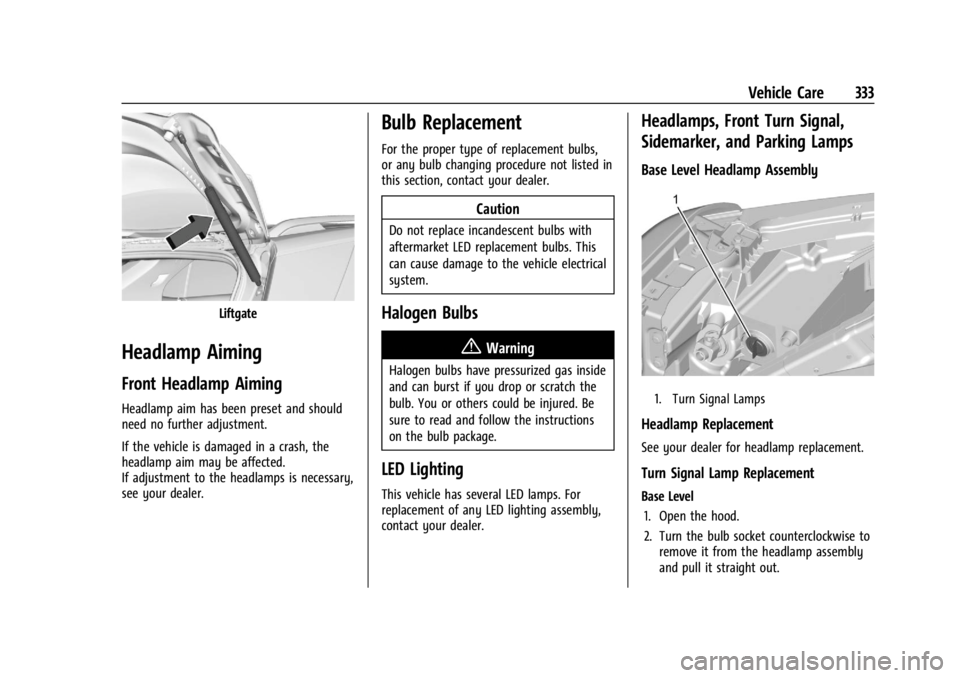
Liftgate
Headlamp Aiming
Front Headlamp Aiming
Headlamp aim has been preset and should
need no further adjustment.
If the vehicle is damaged in a crash, the
headlamp aim may be affected.
If adjustment to the headlamps is necessary,
see your dealer.
Bulb Replacement
For the proper type of replacement bulbs,
or any bulb changing procedure not listed in
this section, contact your dealer.
Caution
Do not replace incandescent bulbs with
aftermarket LED replacement bulbs. This
can cause damage to the vehicle electrical
system.
Halogen Bulbs
{Warning
Halogen bulbs have pressurized gas inside
and can burst if you drop or scratch the
bulb. You or others could be injured. Be
sure to read and follow the instructions
on the bulb package.
LED Lighting
This vehicle has several LED lamps. For
replacement of any LED lighting assembly,
contact your dealer.
Headlamps, Front Turn Signal,
Sidemarker, and Parking Lamps
Base Level Headlamp Assembly
1. Turn Signal Lamps
Headlamp Replacement
See your dealer for headlamp replacement.
Turn Signal Lamp Replacement
Base Level1. Open the hood.
2. Turn the bulb socket counterclockwise to remove it from the headlamp assembly
and pull it straight out.
Page 336 of 440
GMC Sierra/Sierra Denali 2500 HD/3500 HD Owner Manual (GMNA-
Localizing-U.S./Canada-16908340) - 2024 - CRC - 12/7/22
334 Vehicle Care
3. Remove the bulb by pulling it straightout of the bulb socket.
4. Replace the bulb and reverse Steps 1–3 to reinstall.
Uplevel
See your dealer for headlamp replacement.
Taillamps, Turn Signal, Stoplamps,
and Back-Up Lamps
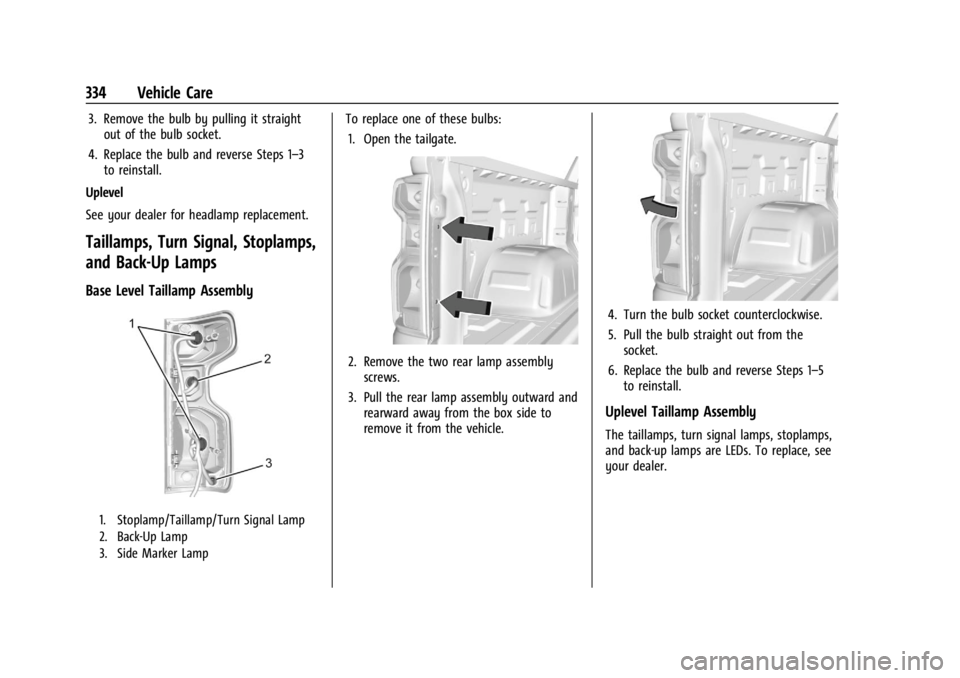
Base Level Taillamp Assembly
1. Stoplamp/Taillamp/Turn Signal Lamp
2. Back-Up Lamp
3. Side Marker Lamp
To replace one of these bulbs: 1. Open the tailgate.
2. Remove the two rear lamp assembly screws.
3. Pull the rear lamp assembly outward and rearward away from the box side to
remove it from the vehicle.
4. Turn the bulb socket counterclockwise.
5. Pull the bulb straight out from thesocket.
6. Replace the bulb and reverse Steps 1–5 to reinstall.
Uplevel Taillamp Assembly
The taillamps, turn signal lamps, stoplamps,
and back-up lamps are LEDs. To replace, see
your dealer.
Page 355 of 440

GMC Sierra/Sierra Denali 2500 HD/3500 HD Owner Manual (GMNA-
Localizing-U.S./Canada-16908340) - 2024 - CRC - 12/7/22
Vehicle Care 353
.The TPMS sensor matching process was
not done or not completed successfully
after rotating the tires. The malfunction
light and the DIC message should go off
after successfully completing the sensor
matching process. See "TPMS Sensor
Matching Process" later in this section.
.One or more TPMS sensors are missing or
damaged. The malfunction light and the
DIC message should go off when the
TPMS sensors are installed and the sensor
matching process is performed
successfully. See your dealer for service.
.Replacement tires or wheels do not match
the original equipment tires or wheels.
Tires and wheels other than those
recommended could prevent the TPMS
from functioning properly. SeeBuying
New Tires 0360.
.Operating electronic devices or being near
facilities using radio wave frequencies
similar to the TPMS could cause the TPMS
sensors to malfunction.
If the TPMS is not functioning properly, it
cannot detect or signal a low tire pressure
condition. See your dealer for service if the
TPMS malfunction light and DIC message
come on and stay on.
Tire Fill Alert (If Equipped)
This feature provides visual and audible
alerts outside the vehicle to help when
inflating an underinflated tire to the
recommended cold tire pressure.
When the low tire pressure warning light
comes on: 1. Park the vehicle in a safe, level place.
2. Set the parking brake firmly.
3. Place the vehicle in P (Park).
4. Add air to the tire that is underinflated. The turn signal lamp will flash.
When the recommended pressure is
reached, the horn sounds once and the
turn signal lamp will stop flashing and
briefly turn solid.
Repeat these steps for all underinflated tires
that have illuminated the low tire pressure
warning light.
{Warning
Overinflating a tire could cause the tire
to rupture and you or others could be
injured. Do not exceed the maximum (Continued)
Warning (Continued)
pressure listed on the tire sidewall. See
Tire Sidewall Labeling0346 and
Vehicle Load Limits 0210.
If the tire is overinflated by more than
35 kPa (5 psi), the horn will sound multiple
times and the turn signal lamp will continue
to flash for several seconds after filling
stops. To release and correct the pressure,
while the turn signal lamp is still flashing,
briefly press the center of the valve stem.
When the recommended pressure is reached,
the horn sounds once.
If the turn signal lamp does not flash within
15 seconds after starting to inflate the tire,
the tire fill alert has not been activated or is
not working.
If the hazard warning flashers are on, the
tire fill alert visual feedback will not work
properly.
The TPMS will not activate the tire fill alert
properly under the following conditions:
.There is interference from an external
device or transmitter.
.The air pressure from the inflation device
is not sufficient to inflate the tire.
Page 356 of 440
GMC Sierra/Sierra Denali 2500 HD/3500 HD Owner Manual (GMNA-
Localizing-U.S./Canada-16908340) - 2024 - CRC - 12/7/22
354 Vehicle Care
.There is a malfunction in the TPMS.
.There is a malfunction in the horn or turn
signal lamps.
.The TPMS sensor identification code is not
registered to the system.
.The TPMS sensor battery is low.
If the tire fill alert does not operate due to
TPMS interference, move the vehicle about
1 m (3 ft) back or forward and try again.
If the tire fill alert feature is not working,
use a tire pressure gauge.
TPMS Sensor Matching Process
Use this TPMS Sensor Matching Process if
your vehicle is equipped with dual rear
wheels:
Each TPMS sensor has a unique
identification code. The identification code
needs to be matched to a new tire/wheel
position after rotating the vehicle’s tires or
replacing one or more of the TPMS sensors.
Also, the TPMS sensor matching process
should be performed after replacing a spare
tire with a road tire containing the TPMS
sensor. The malfunction light and the DIC
message should go off at the next ignition
cycle. The sensors are matched to the tire/
wheel positions, using a TPMS relearn tool,
in the following order: driver side front tire, passenger side front tire, passenger side
outer rear tire, passenger side inner rear
tire, driver side outer rear tire, and driver
side inner rear tire. See your dealer for
service or to purchase a relearn tool.
A TPMS relearn tool can also be purchased.
See Tire Pressure Monitor Sensor Activation
Tool at www.gmtoolsandequipment.com or
call 1-800-GM TOOLS (1-800-468-6657).
There are two minutes to match the first
tire/wheel position, and five minutes overall
to match all six tire/wheel positions. If it
takes longer, the matching process stops
and must be restarted.
The TPMS sensor matching process is:
1. Set the parking brake.
2. Turn the ignition on without starting the vehicle.
3. Uplevel DIC Only: Make sure the Tire Pressure info page option is turned on.
The info pages on the DIC can be turned
on and off through the Options menu.
See Driver Information Center (DIC) (Base
Level) 0131 or
Driver Information Center (DIC) (Uplevel)
0 133. 4. If the vehicle has an uplevel DIC, use the
DIC controls on the right side of the
steering wheel to scroll to the Tire
Pressure screen under the DIC info page.
If the vehicle has a base level DIC, use
the trip odometer reset stem to scroll to
the Tire Pressure screen.
5. If the vehicle has an uplevel DIC, press and hold the thumbwheel located in the
center of the DIC controls on the right
side of the steering wheel.
If the vehicle has a base level DIC, press
and hold the trip odometer reset stem
for about five seconds. A message asking
if the process should begin should
appear. Select yes and press the trip
odometer reset stem to confirm the
selection.
The horn sounds twice to signal the
receiver is in relearn mode and the TIRE
LEARNING ACTIVE message displays on
the DIC screen.
6. Start with the driver side front tire.
7. Place the relearn tool against the tire sidewall, near the valve stem. Then press
the button to activate the TPMS sensor.
A horn chirp confirms that the sensor
identification code has been matched to
this tire and wheel position.
Page 358 of 440

GMC Sierra/Sierra Denali 2500 HD/3500 HD Owner Manual (GMNA-
Localizing-U.S./Canada-16908340) - 2024 - CRC - 12/7/22
356 Vehicle Care
the trailer tire placard on the trailer or the
trailer tire sidewall for the recommended
tire pressure.
The system is compatible with trailer tires
that have placard pressure values from
103 - 689 kpa (15 - 100 psi). The hole in the
wheel for the tire stem must be 11.43 mm
(0.453 in) or 15.88 mm (0.625 in) in
diameter. Use of the pressure sensors on a
wheel with a different stem hole size could
result in loss of air from the tire.
If a low trailer tire pressure condition is
detected, the TTPMS displays a warning
message on the DIC. If the warning message
is displayed, stop as soon as possible and
inflate the tires to the recommended
pressure shown on the tire placard on the
trailer.
In addition, the TTPMS monitors the
temperature of the trailer tires. If the
system detects a high temperature on one
or more of the trailer tires, a warning
message will be displayed on the DIC. If this
warning message is displayed, stop as soon
as possible, and inspect the overheated
trailer tire. Common causes for high trailer
tire temperature are underinflation,
overloading, or tire damage.TTPMS Malfunction Message
The TTPMS will not function properly if one
or more of the trailer tire sensors are
missing or inoperable. If the system detects
a malfunction, a DIC message indicates that
the system requires service. Some of the
conditions that can cause the service
message to occur are:
.One of the trailer tires has been replaced
with the spare tire which does not have a
learned TTPMS sensor. The DIC message
should turn off after the pressure sensor
is installed in the tire, and the learning
process is performed successfully. See
"TTPMS Sensor Learning Process" under
Trailering App0296.
.The TTPMS sensor learning process was
not done or not completed successfully.
The DIC message should go off after
successfully completing the sensor
learning process. See "TTPMS Sensor
Learning Process" under Trailering App
0 296.
.One or more TTPMS sensors are missing
or damaged. The DIC message should go
off when the TTPMS sensors are installed
and the sensor learning process is performed successfully. See "TTPMS
Sensor Learning Process" under
Trailering
App 0296.
.Operating electronic devices or being near
facilities using radio wave frequencies
similar to the TTPMS could cause
interference to the TTPMS which could
cause loss of signal reception from the
sensor.
.If the system does not receive the signal
from an individual sensor, an error
message may not occur until the vehicle
has been driver for a period of time.
If the TTPMS is not functioning properly, it
cannot detect or signal a low tire condition.
See your dealer for service if the DIC
message comes on and stays on when the
trailer tire pressures have been checked and
determined to be correct.
Tire Inspection
We recommend that the tires, including
the spare tire, if the vehicle has one, be
inspected for signs of wear or damage
at least once a month.