change wheel GMC SIERRA 2024 Owners Manual
[x] Cancel search | Manufacturer: GMC, Model Year: 2024, Model line: SIERRA, Model: GMC SIERRA 2024Pages: 440, PDF Size: 9.21 MB
Page 8 of 440

GMC Sierra/Sierra Denali 2500 HD/3500 HD Owner Manual (GMNA-
Localizing-U.S./Canada-16908340) - 2024 - CRC - 12/13/22
6 Introduction
1. Tow/Haul Mode (On Some Models). SeeDriver Mode Control 0238.
Automatic Transfer Case Control (If
Equipped). See Four-Wheel Drive 0228.
Driver Mode Control 0238 (If Equipped).
2. Air Vents 0196.
3. Turn Signal Lever. See Turn and
Lane-Change Signals 0147.
Windshield Wiper/Washer 0106.
4. Head-Up Display (HUD) 0135 (If
Equipped).
5. Instrument Cluster (Base Level) 0112 or
Instrument Cluster (Uplevel) 0113.
6. Shift Lever. See Automatic Transmission
0 223.
Range Selection Mode. See Manual Mode
0 226.
7. Light Sensor. See Automatic Headlamp
System 0145.
8. Infotainment Controls. See Overview
(Uplevel Radio) 0155 or
Overview (Base Radio) 0154.
9. Upper Glove Box. See Glove Box099. 10. Lower Glove Box. See
Glove Box099.
11. Climate Control Systems 0191 (If
Equipped).
Dual Automatic Climate Control System
0 193 (If Equipped).
12.
XPark Assist Switch (If Equipped). See
Assistance Systems for Parking or Backing
0 253.
5Power Release Tailgate (If
Equipped). See Tailgate024.
|Hazard Warning Flashers 0146.
gTraction Control/Electronic Stability
Control 0236.
-DC/AC Switch. See Power Outlets
0 107.
@Lane Departure Warning (LDW) 0270
(If Equipped).
5Hill Descent Control Switch (If
Equipped). See Hill Descent Control (HDC)
0 237.
jPower Assist Steps 031 (If
Equipped).
LExpress Window Down Button (If
Equipped). See Power Windows 042.
Tow/Haul Mode 0227 (On Some
Models).
Exhaust Brake (If Equipped). See Duramax
Diesel Supplement.
Power Take-Off (PTO) (If Equipped). See
Duramax Diesel Supplement.
13. Power Outlet (Alternating Current) (If Equipped). See Power Outlets0107.
14. Power Outlets 0107.
15. USB Port 0163.
16. Trailer Brake Control Panel (If Equipped). See“Integrated Trailer Brake Control
System” underTowing Equipment 0284.
17. ENGINE START/STOP. See Ignition
Positions 0216.
18. Steering Wheel Controls 0156 (If
Equipped).
Driver Information Center (DIC) Controls.
See Driver Information Center (DIC) (Base
Level) 0131 or
Driver Information Center (DIC) (Uplevel)
0 133.
Page 11 of 440

GMC Sierra/Sierra Denali 2500 HD/3500 HD Owner Manual (GMNA-
Localizing-U.S./Canada-16908340) - 2024 - CRC - 12/13/22
Introduction 9
1.Head-Up Display (HUD) 0135 (If
Equipped).
2. Air Vents 0196.
3. Turn Signal Lever. See Turn and
Lane-Change Signals 0147.
Windshield Wiper/Washer 0106.
4. Instrument Cluster (Base Level) 0112 or
Instrument Cluster (Uplevel) 0113.
5. Shift Lever. See Automatic Transmission
0 223.
Range Selection Mode. See Manual Mode
0 226.
6. Infotainment System. See Overview
(Uplevel Radio) 0155 or
Overview (Base Radio) 0154.
7. Light Sensor. See Automatic Headlamp
System 0145.
Vehicle Alarm System. See Vehicle
Security 032.
8. Upper Glove Box. See Glove Box099.
9. Lower Glove Box. See Glove Box099.
10. Upper Glove Box Button. See Glove Box
0 99. 11. Power Release Tailgate (If Equipped). See
Tailgate 024.
Hazard Warning Flashers 0146.
Traction Control/Electronic Stability
Control 0236.
Hill Descent Control Switch (If Equipped).
See Hill Descent Control (HDC) 0237.
Power Assist Steps 031 (If Equipped).
Express Window Down Button (If
Equipped). See Power Windows 042.
Tow/Haul Mode 0227 (On Some
Models).
Exhaust Brake (If Equipped). See Duramax
Diesel Supplement.
Power Take-Off (PTO) (If Equipped). See
Duramax Diesel Supplement.
12. USB Port 0163.
13. Climate Control Systems 0191 (If
Equipped).
Dual Automatic Climate Control System
0 193 (If Equipped).
Heated and Ventilated Front Seats 054
(If Equipped).
Heated Steering Wheel 0105 (If
Equipped). 14. Front Center Console Storage.
15.
Cupholders 0100.
16. Trailer Brake Control Panel (If Equipped). See“Integrated Trailer Brake Control
System” underTowing Equipment 0284.
17. ENGINE START/STOP. See Ignition
Positions 0216.
18. Steering Wheel Controls 0156.
Driver Information Center (DIC) Controls.
See Driver Information Center (DIC) (Base
Level) 0131 or
Driver Information Center (DIC) (Uplevel)
0 133.
19. Horn 0106.
20. Steering Wheel Adjustment 0105 (Out
of View).
21. Hood Release. See Hood0312.
22. Cruise Control 0239.
Adaptive Cruise Control (Camera) 0241
(If Equipped).
Forward Collision Alert (FCA) System
0 263 (If Equipped).
Page 14 of 440

GMC Sierra/Sierra Denali 2500 HD/3500 HD Owner Manual (GMNA-
Localizing-U.S./Canada-16908340) - 2024 - CRC - 12/13/22
12 Introduction
1.Air Vents 0196.
2. Head-Up Display (HUD) 0135 (If
Equipped).
3. Turn Signal Lever. See Turn and
Lane-Change Signals 0147.
Windshield Wiper/Washer 0106.
4. Instrument Cluster (Base Level) 0112 or
Instrument Cluster (Uplevel) 0113.
5. Shift Lever. See Automatic Transmission
0 223.
Range Selection Mode. See Manual Mode
0 226.
6. Infotainment System. See Overview
(Uplevel Radio) 0155 or
Overview (Base Radio) 0154.
7. Light Sensor. See Automatic Headlamp
System 0145.
Vehicle Alarm System. See Vehicle
Security 032.
8. Upper Glove Box Button. See Glove Box
0 99.
9. Upper Glove Box. See Glove Box099.
10. Lower Glove Box. See Glove Box099. 11.
Climate Control Systems 0191 (If
Equipped).
Dual Automatic Climate Control System
0 193 (If Equipped).
Heated and Ventilated Front Seats 054
(If Equipped).
Heated Steering Wheel 0105 (If
Equipped).
12. Power Release Tailgate (If Equipped). See Tailgate 024.
Hazard Warning Flashers 0146.
Traction Control/Electronic Stability
Control 0236.
Hill Descent Control Switch (If Equipped).
See Hill Descent Control (HDC) 0237.
Power Assist Steps 031 (If Equipped).
Express Window Down Button (If
Equipped). See Power Windows 042.
Tow/Haul Mode 0227 (On Some
Models).
Exhaust Brake (If Equipped). See Duramax
Diesel Supplement.
Power Take-Off (PTO) (If Equipped). See
Duramax Diesel Supplement. 13. Front Center Console Storage.
14.
USB Port 0163.
15. Cupholders 0100.
16. Trailer Brake Control Panel (If Equipped). See“Integrated Trailer Brake Control
System” underTowing Equipment 0284.
17. ENGINE START/STOP. See Ignition
Positions 0216.
18. Steering Wheel Controls 0156.
Driver Information Center (DIC) Controls.
See Driver Information Center (DIC) (Base
Level) 0131 or
Driver Information Center (DIC) (Uplevel)
0 133.
19. Horn 0106.
20. Hood Release. See Hood0312.
21. Steering Wheel Adjustment 0105 (Out
of View).
22. Cruise Control 0239.
Adaptive Cruise Control (Camera) 0241
(If Equipped).
Forward Collision Alert (FCA) System
0 263 (If Equipped).
Page 57 of 440
GMC Sierra/Sierra Denali 2500 HD/3500 HD Owner Manual (GMNA-
Localizing-U.S./Canada-16908340) - 2024 - CRC - 12/7/22
Seats and Restraints 55
Press the button once for the highest
setting. With each press of the button, the
seat will change to the next lower setting,
and then to the off setting. The indicator
lights next to the buttons indicate three for
the highest setting and one for the lowest.
If the heated seats are on high for
30 minutes, their level will automatically be
lowered.
Auto Heated and Ventilated Seats
When the vehicle is on, this feature,
if enabled, will automatically activate the
heated or ventilated seats at the level
required by the vehicle’s interior
temperature.
The active high, medium, low, or off heated
or ventilated seat level will be indicated by
the manual heated or ventilated seat
buttons on the center stack. Use the manual
heated or ventilated seat buttons on the
center stack to turn auto heated or
ventilated seats off. If the passenger seat is
unoccupied, the auto heated or ventilated
seats feature will not activate that seat.
If equipped with a heated steering wheel,
the auto heated steering wheel activation
will follow the heated seat auto activation
and the heated wheel indicator will follow
the state of the steering wheel heat.To enable or disable auto heated or
ventilated seats, select Settings > Vehicle >
Climate and Air Quality > Auto Cooled or
Auto Heated Seats > ON or OFF.
Remote Start Heated and Ventilated Seats
If equipped, the heated seats will turn on
automatically during a remote start if it is
cold outside and the ventilated seats will
turn on automatically if it is hot outside.
If equipped, the heated steering wheel will
turn on automatically during a remote start
if it is cold outside. The heated and
ventilated seat indicators and heated
steering wheel indicator may come on
during this operation.
The heated and ventilated seats and heated
steering wheel may cancel when the vehicle
is started. These features can be manually
selected after the vehicle is turned on.
The temperature performance of an
unoccupied seat may be reduced. This is
normal.
To enable or disable remote start heated or
ventilated seats, select Settings > Vehicle >
Remote Lock, Unlock, and Start > Remote
Start Auto Heat Seats or Remote Start Auto
Cool Seats > ON or OFF. See
Remote Vehicle
Start 021.Rear Seats
Rear Seat Reminder
If equipped, the message REAR SEAT
REMINDER LOOK IN REAR SEAT displays
under certain conditions indicating there
may be an item or passenger in the rear
seat. Check before exiting the vehicle.
This feature will activate when a second row
door is opened while the vehicle is on or up
to 10 minutes before the vehicle is turned
on. There will be an alert when the vehicle
is turned off. The alert does not directly
detect objects in the rear seat; instead,
under certain conditions, it detects when a
rear door is opened and closed, indicating
that there may be something in the
rear seat.
The feature is active only once each time
the vehicle is turned on and off, and will
require reactivation by opening and closing
the second row doors. There may be an
alert even when there is nothing in the rear
seat; for example, if a child entered the
vehicle through the rear door and left the
vehicle without the vehicle being shut off.
Page 75 of 440

GMC Sierra/Sierra Denali 2500 HD/3500 HD Owner Manual (GMNA-
Localizing-U.S./Canada-16908340) - 2024 - CRC - 12/7/22
Seats and Restraints 73
approved by GM for your specific vehicle.
SeeAdding Equipment to the
Airbag-Equipped Vehicle 073 for more
information about modifications that can
affect how the system operates.
The ON indicator may be lit if an object,
such as a briefcase, handbag, grocery bag,
laptop, or other electronic device, is put on
an unoccupied seat. If this is not desired,
remove the object from the seat.
{Warning
Stowing articles under the passenger seat
or between the passenger seat cushion
and seatback may interfere with the
proper operation of the passenger
sensing system.
Servicing the Airbag-Equipped
Vehicle
Airbags affect how the vehicle should be
serviced. There are parts of the airbag
system in several places around the vehicle.
Your dealer and the service manual have
information about servicing the vehicle and
the airbag system. To purchase a service
manual, see Publication Ordering
Information 0413.
{Warning
For up to 10 seconds after the vehicle is
turned off and the battery is
disconnected, an airbag can still inflate
during improper service. You can be
injured if you are close to an airbag
when it inflates. Avoid yellow connectors.
They are probably part of the airbag
system. Be sure to follow proper service
procedures, and make sure the person
performing work for you is qualified to
do so.
Adding Equipment to the
Airbag-Equipped Vehicle
Adding accessories that change the vehicle's
frame, bumper system, height, front end,
or side sheet metal, may keep the airbag
system from working properly.
The operation of the airbag system can also
be affected by changing, including
improperly repairing or replacing, any parts
of the following:
.Airbag system, including airbag modules,
front or side impact sensors, sensing and
diagnostic module, or airbag wiring
.Front seats, including stitching, seams,
or zippers
.Seat belts
.Steering wheel, instrument panel,
overhead console, ceiling trim, or pillar
garnish trim
.Inner door seals, including speakers
Your dealer and the service manual have
information about the location of the airbag
modules and sensors, sensing and diagnostic
module, and airbag wiring along with the
proper replacement procedures.
In addition, the vehicle has a passenger
sensing system for the front outboard
passenger position, which includes sensors
that are part of the passenger seat. The
passenger sensing system may not operate
properly if the original seat trim is replaced
with non-GM covers, upholstery, or trim; or
with GM covers, upholstery, or trim
designed for a different vehicle. Any object,
such as an aftermarket seat heater or a
comfort-enhancing pad or device, installed
under or on top of the seat fabric, could
also interfere with the operation of the
passenger sensing system. This could either
prevent proper deployment of the passenger
airbag(s) or prevent the passenger sensing
Page 76 of 440
GMC Sierra/Sierra Denali 2500 HD/3500 HD Owner Manual (GMNA-
Localizing-U.S./Canada-16908340) - 2024 - CRC - 12/7/22
74 Seats and Restraints
system from properly turning off the
passenger airbag(s). SeePassenger Sensing
System 069.
If the vehicle has rollover roof-rail airbags,
see Different Size Tires and Wheels 0361 for
additional important information.
If a snow plow is added to the vehicle, the
airbags should still work properly. The
airbag systems were designed to work
properly under a wide range of conditions,
including snow plowing with vehicles that
have the optional snow plow prep package
(RPO VYU). Do not change or defeat the
snow plow's “tripping mechanism.” If you
do, it can damage the snow plow and the
vehicle, and may cause an airbag
deployment.
If the vehicle must be modified because you
have a disability and have questions about
whether the modifications will affect the
vehicle's airbag system, or if you have
questions about whether the airbag system
will be affected if the vehicle is modified for
any other reason, call Customer Assistance.
See Customer Assistance Offices 0407.Airbag System Check
The airbag system does not need regularly
scheduled maintenance or replacement.
Make sure the airbag readiness light is
working. See Airbag Readiness Light 0121.
Caution
If an airbag covering is damaged, opened,
or broken, the airbag may not work
properly. Do not open or break the airbag
coverings. If there are any opened or
broken airbag coverings, have the airbag
covering and/or airbag module replaced.
For the location of the airbags, see Where
Are the Airbags? 066. See your dealer
for service.
Replacing Airbag System Parts
after a Crash
{Warning
A crash can damage the airbag systems
in the vehicle. A damaged airbag system
may not properly protect you and your
passenger(s) in a crash, resulting in
serious injury or even death. To help
make sure the airbag systems are
working properly after a crash, have
them inspected and any necessary
replacements made as soon as possible.
If an airbag inflates, you will need to
replace airbag system parts. See your dealer
for service.
If the airbag readiness light stays on after
the vehicle is started or comes on when you
are driving, the airbag system may not work
properly. Have the vehicle serviced right
away. See Airbag Readiness Light 0121.
Page 115 of 440
GMC Sierra/Sierra Denali 2500 HD/3500 HD Owner Manual (GMNA-
Localizing-U.S./Canada-16908340) - 2024 - CRC - 12/15/22
Instruments and Controls 113
Instrument Cluster (Uplevel)
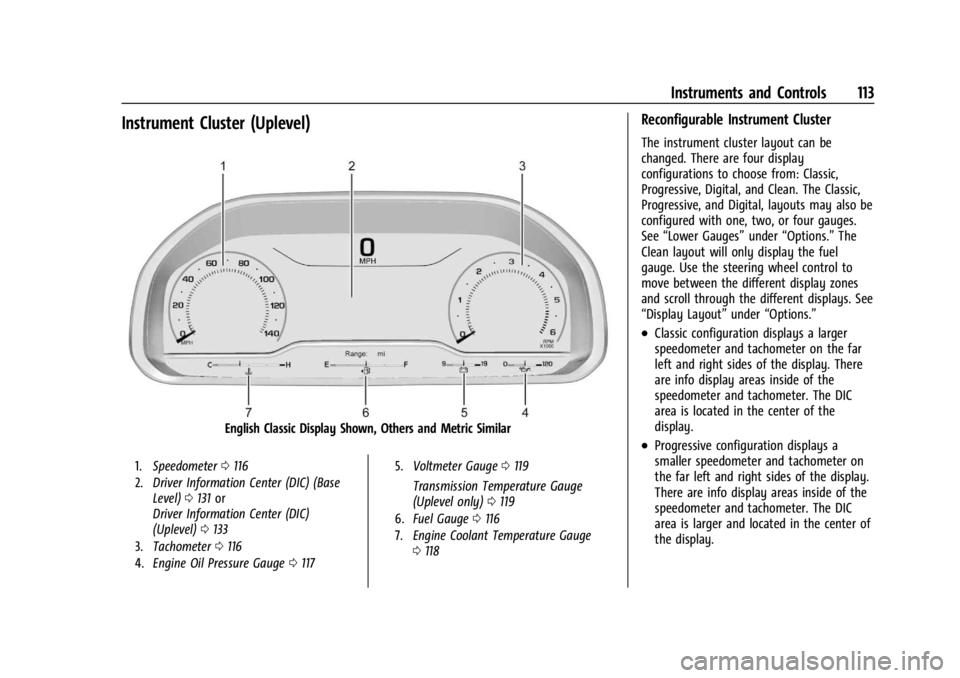
English Classic Display Shown, Others and Metric Similar
1.Speedometer 0116
2. Driver Information Center (DIC) (Base
Level) 0131 or
Driver Information Center (DIC)
(Uplevel) 0133
3. Tachometer 0116
4. Engine Oil Pressure Gauge 0117 5.
Voltmeter Gauge 0119
Transmission Temperature Gauge
(Uplevel only) 0119
6. Fuel Gauge 0116
7. Engine Coolant Temperature Gauge
0118
Reconfigurable Instrument Cluster
The instrument cluster layout can be
changed. There are four display
configurations to choose from: Classic,
Progressive, Digital, and Clean. The Classic,
Progressive, and Digital, layouts may also be
configured with one, two, or four gauges.
See “Lower Gauges” under“Options.” The
Clean layout will only display the fuel
gauge. Use the steering wheel control to
move between the different display zones
and scroll through the different displays. See
“Display Layout” under“Options.”
.Classic configuration displays a larger
speedometer and tachometer on the far
left and right sides of the display. There
are info display areas inside of the
speedometer and tachometer. The DIC
area is located in the center of the
display.
.Progressive configuration displays a
smaller speedometer and tachometer on
the far left and right sides of the display.
There are info display areas inside of the
speedometer and tachometer. The DIC
area is larger and located in the center of
the display.
Page 116 of 440
GMC Sierra/Sierra Denali 2500 HD/3500 HD Owner Manual (GMNA-
Localizing-U.S./Canada-16908340) - 2024 - CRC - 12/15/22
114 Instruments and Controls
.Digital configuration displays the info
display areas on the far left and right
sides of the display. The DIC area is larger
and located in the center of the display.
.Clean configuration is a simplified display
that has a digital speed in the center. The
DIC area is located on the far right of the
display.
Cluster Menu
There are interactive display areas in the
instrument cluster. Locations vary by the
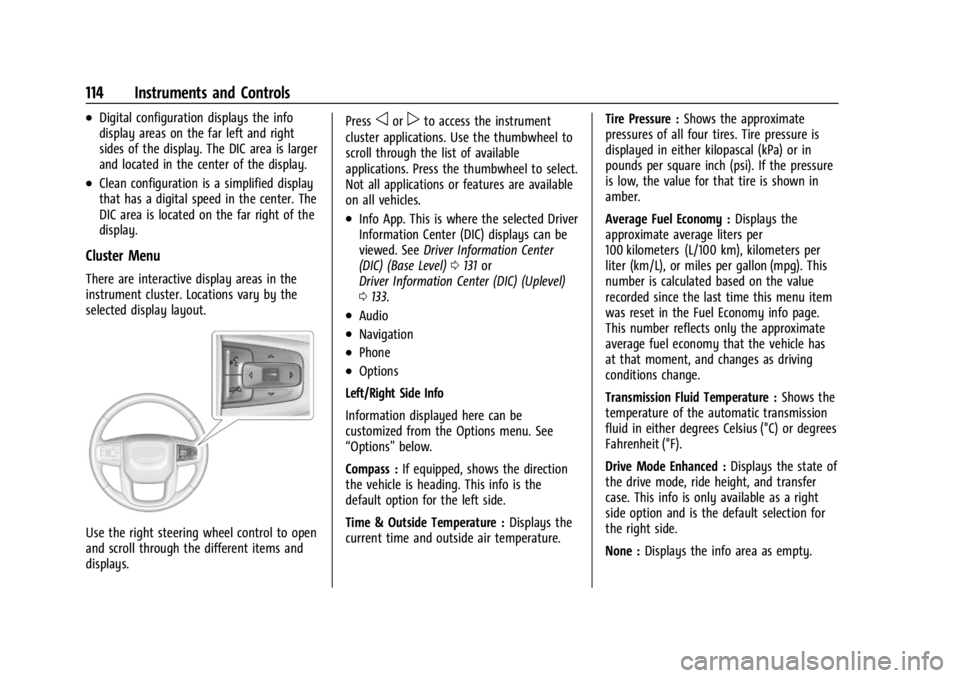
selected display layout.
Use the right steering wheel control to open
and scroll through the different items and
displays.Press
oorpto access the instrument
cluster applications. Use the thumbwheel to
scroll through the list of available
applications. Press the thumbwheel to select.
Not all applications or features are available
on all vehicles.
.Info App. This is where the selected Driver
Information Center (DIC) displays can be
viewed. See Driver Information Center
(DIC) (Base Level) 0131 or
Driver Information Center (DIC) (Uplevel)
0 133.
.Audio
.Navigation
.Phone
.Options
Left/Right Side Info
Information displayed here can be
customized from the Options menu. See
“Options” below.
Compass : If equipped, shows the direction
the vehicle is heading. This info is the
default option for the left side.
Time & Outside Temperature : Displays the
current time and outside air temperature. Tire Pressure :
Shows the approximate
pressures of all four tires. Tire pressure is
displayed in either kilopascal (kPa) or in
pounds per square inch (psi). If the pressure
is low, the value for that tire is shown in
amber.
Average Fuel Economy : Displays the
approximate average liters per
100 kilometers (L/100 km), kilometers per
liter (km/L), or miles per gallon (mpg). This
number is calculated based on the value
recorded since the last time this menu item
was reset in the Fuel Economy info page.
This number reflects only the approximate
average fuel economy that the vehicle has
at that moment, and changes as driving
conditions change.
Transmission Fluid Temperature : Shows the
temperature of the automatic transmission
fluid in either degrees Celsius (°C) or degrees
Fahrenheit (°F).
Drive Mode Enhanced : Displays the state of
the drive mode, ride height, and transfer
case. This info is only available as a right
side option and is the default selection for
the right side.
None : Displays the info area as empty.
Page 117 of 440
GMC Sierra/Sierra Denali 2500 HD/3500 HD Owner Manual (GMNA-
Localizing-U.S./Canada-16908340) - 2024 - CRC - 12/15/22
Instruments and Controls 115
Audio
Browse music, select from the favorites,
or change the audio source. Use the
thumbwheel to change the station or go to
the next or previous track.
Navigation
If there is an active route, the Turn-by-Turn
directions will appear on the Navigation
Page, if there is no active route a compass
will be displayed.
Phone
If there is no active phone call, view recent
calls, or scroll through contacts.
Options
Use the thumbwheel to scroll through items
in the Options menu.
Display Layout :Choose Classic, Progressive,
Digital, and Clean layout by pressing the
thumbwheel while the desired item is
highlighted. Exit the Layout menu by
pressing
o.
Left/Right Side Info : Press the thumbwheel
to select the items to be displayed in the
display areas. See "Left/Right Side Info"
previously in this section. Lower Gauges :
Choose one of three gauge
configurations by pressing the thumbwheel
while the desired item is highlighted. The
selected configuration will be displayed at
the bottom of the display.
Maximum displays fuel level, coolant
temperature, engine oil pressure, and
battery voltage. Transmission fluid
temperature displays instead of battery
voltage while in Tow Haul mode.
Medium displays fuel level, and coolant
temperature.
Minimum displays only the fuel level.
Info Page Options : Press the thumbwheel
to select the items to be displayed in the
Info app. See Driver Information Center (DIC)
(Base Level) 0131 or
Driver Information Center (DIC) (Uplevel)
0 133.
Units : Choose US or metric units by
pressing the thumbwheel while the desired
item is highlighted.
Speed Warning : Allows the driver to set a
speed that they do not want to exceed. To
set the Speed Warning press the
thumbwheel when Speed Warning is
displayed. Use the thumbwheel to adjust
the value and press to set the speed. Once the speed is set, this feature can be
turned off by pressing the thumbwheel
while viewing this page. If the selected
speed limit is exceeded, a pop-up warning is
displayed with a chime.
Speed Sign Display :
Shows sign
information, which comes from a roadway
database in the onboard navigation system,
if equipped. The sign will show “− −”when
offline maps are unavailable. See Maps
0 165.
Head-up Display (HUD) : If equipped, this
feature allows for adjusting the angle of the
HUD image and changing or turning off the
Speed Limit Sign.
HUD Rotation: Press the thumbwheel while
Adjust Rotation is highlighted to enter
Adjust Mode. Scroll to adjust the angle of
the HUD display. Press the thumbwheel to
confirm and save the setting. This feature
may only be available in P (Park).
Speed Limit Style: Press the thumbwheel
while Speed Limit Style is highlighted to
change the speed sign style or to turn it off.
Software Information : Displays open source
software information.
Reset To Defaults : Allows the driver to
reset to default settings.
Page 125 of 440
GMC Sierra/Sierra Denali 2500 HD/3500 HD Owner Manual (GMNA-
Localizing-U.S./Canada-16908340) - 2024 - CRC - 12/15/22
Instruments and Controls 123
Caution
If the vehicle is driven continually with
this light on, the emission control system
may not work as well, the fuel economy
may be lower, and the vehicle may not
run smoothly. This could lead to costly
repairs that might not be covered by the
vehicle warranty.
Caution
Modifications to the engine, transmission,
exhaust, intake, or fuel system, or the
use of replacement tires that do not
meet the original tire specifications, can
cause this light to come on. This could
lead to costly repairs not covered by the
vehicle warranty. This could also affect
the vehicle’s ability to pass an Emissions
Inspection/Maintenance test. See
Accessories and Modifications0310.
If the light is flashing : A malfunction has
been detected that could damage the
emission control system and increase vehicle
emissions. Diagnosis and service may be
required. To help prevent damage, reduce vehicle
speed and avoid hard accelerations and
uphill grades. If towing a trailer, reduce the
amount of cargo being hauled as soon as
possible.
If the light continues to flash, find a safe
place to park. Turn the vehicle off and wait
at least 10 seconds before restarting the
engine. If the light is still flashing, follow
the previous guidelines and see your dealer
for service as soon as possible.
If the light is on steady :
A malfunction has
been detected. Diagnosis and service may be
required.
Check the following:
.If fuel has been added to the vehicle
using the capless funnel adapter, make
sure that it has been removed. See
“Filling the Tank with a Portable Gas Can”
under Filling the Tank (Chassis Cab and
Box Delete Models) 0275 or
Filling the Tank (Pickup Models) 0273.
The diagnostic system can detect if the
adapter has been left installed in the
vehicle, allowing fuel to evaporate into
the atmosphere. A few driving trips with
the adapter removed may turn off the
light.
.Poor fuel quality can cause inefficient
engine operation and poor driveability,
which may go away once the engine is
warmed up. If this occurs, change the fuel
brand. It may require at least one full
tank of the proper fuel to turn the light
off. See Recommended Fuel 0272.
If the light remains on, see your dealer.
Emissions Inspection and Maintenance
Programs
If the vehicle requires an Emissions
Inspection/Maintenance test, the test
equipment will likely connect to the
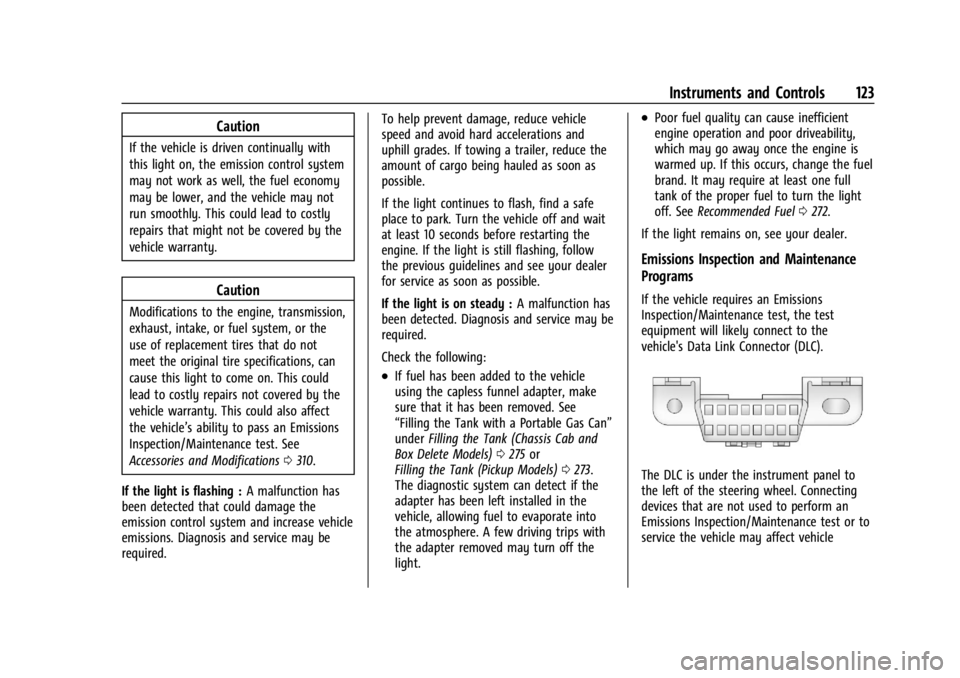
vehicle's Data Link Connector (DLC).
The DLC is under the instrument panel to
the left of the steering wheel. Connecting
devices that are not used to perform an
Emissions Inspection/Maintenance test or to
service the vehicle may affect vehicle