change wheel GMC SIERRA DENALI 2003 Owners Manual
[x] Cancel search | Manufacturer: GMC, Model Year: 2003, Model line: SIERRA DENALI, Model: GMC SIERRA DENALI 2003Pages: 428, PDF Size: 20.35 MB
Page 126 of 428
Section 3 Instrument Panel
I~s~Pu~~~IP Panel OWWV~~W ............................... 3.2
Hazard Warning Flashers
................................ 3.3
Other Warning Devices ................................... 3.4
Horn
............................................................. 3.4
Tilt Wheel
..................................................... 3.4
Turn SignaVMultifunction Lever
......................... 3.5
Exterior Lamps
............................................. 3.11
Interior Lamps
.............................................. 3.15
Accessory Power Outlets
............................... 3.16
Ashtrays and Cigarette Lighter
........................ 3.17
Climate Controls
............................................ 3.18
Dual Automatic Climate Control System
........... 3.18
Warning Lights, Gages and Indicators
............. 3.24
Instrument Panel Cluster
................................ 3.25
Speedometer and Odometer
........................... 3.26
Tachometer
................................................ -3-26
Safety Belt Reminder Light
............................. 3.26
Air Bag Readiness Light
................................ 3-27
Passenger Air Bag Status Indicator
................. 3.30
Battery Warning Light
.................................... 3.33
Brake System Warning Light
.......................... 3.34
Anti-Lock Brake System Warning Light
............. 3.35
Air
Bag
Off Light .......................................... 3-28
Voltmeter Gage
............................................ 3-33
Engine Coolant Temperature Gage
..... ..... 3.36 Transmission Temperature
Gage
..................... 3.36
Malfunction Indicator Lamp
............................. 3.38
Oil Pressure Gage
........................................ 3-40
Cruise Control Light
...................................... 3.41
Tow/Haul Mode Light
.................................... 3-41
Fuel Gage
................................................... 3.42
Driver Information Center (DIC)
....................... 3.43
DIC Operation and Displays
........................... 3.43
DIC Warnings and Messages
......................... 3.53
Audio System(s)
............................................. 3.61
Setting the Time
...................... .......... 3.6 1
Radio with Cassette and CD ..... .............. 3.62
Rear Seat Audio (RSA)
............................. 3.76
CD Changer
................................................ 3-78
Theft-Deterrent Feature
................................. -3-81
Audio Steering Wheel Controls
....................... 3.81
Understanding Radio Reception
...................... 3-82
Care of Your Cassette Tape Player
................ -3-83
Care of Your CDs
......................................... 3.84
Care of Your CD Player
................................ 3.84
Fixed Mast Antenna
...................................... 3.84
XMTM Satellite Radio Antenna System
............. 3.84
DAB Radio Antenna System
........................... 3.84
Low Fuel Warning Light
................................. 3-42
Page 128 of 428
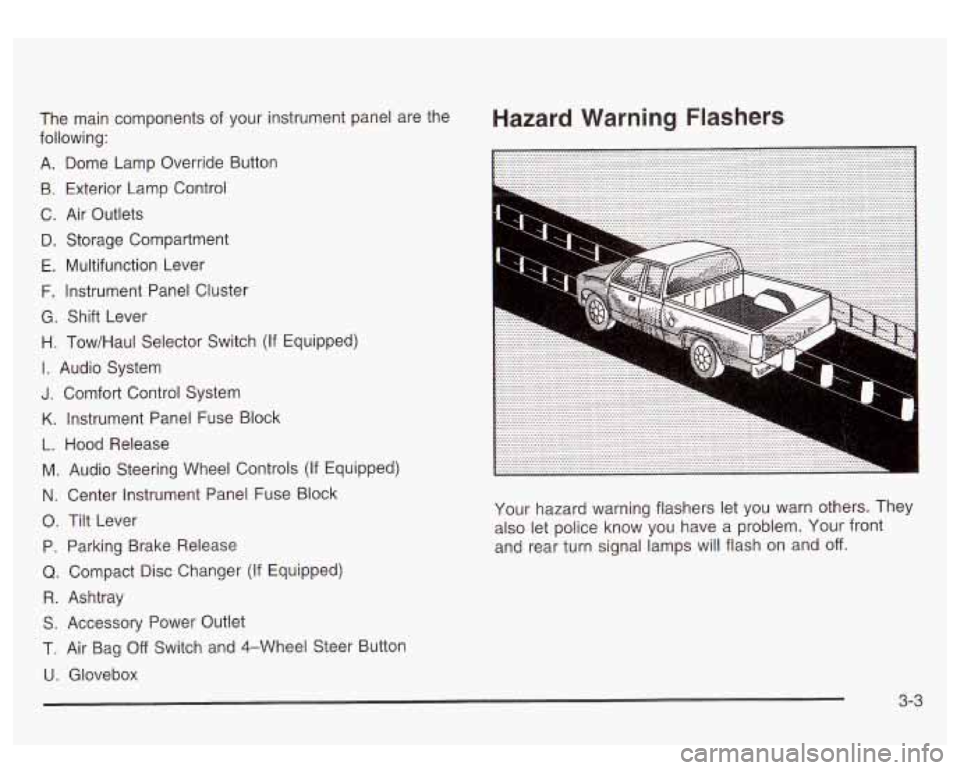
Hazard Warning Flashers The main components of your instrument panel are the
following:
A. Dome Lamp Override Button
9. Exterior Lamp Control
C. Air Outlets
D. Storage Compartment
E. Multifunction Lever
F. Instrument Panel Cluster
G. Shift Lever
H. Tow/Haul Selector Switch (If Equipped)
I. Audio System
J. Comfort Control System
K. Instrument Panel Fuse Block
L. Hood Release
M. Audio Steering Wheel Controls
(If Equipped)
N. Center Instrument Panel Fuse Block
0. Tilt Lever
P. Parking Brake Release
Q. Compact Disc Changer (If Equipped)
R. Ashtray
S. Accessory Power Outlet
1. Air Bag Off Switch and 4-Wheel Steer Button
U. Glovebox Your hazard
warning flashers let you warn others. They
also let police know you have a problem. Your front
and rear turn signal lamps will flash on and
off.
3-3
Page 133 of 428
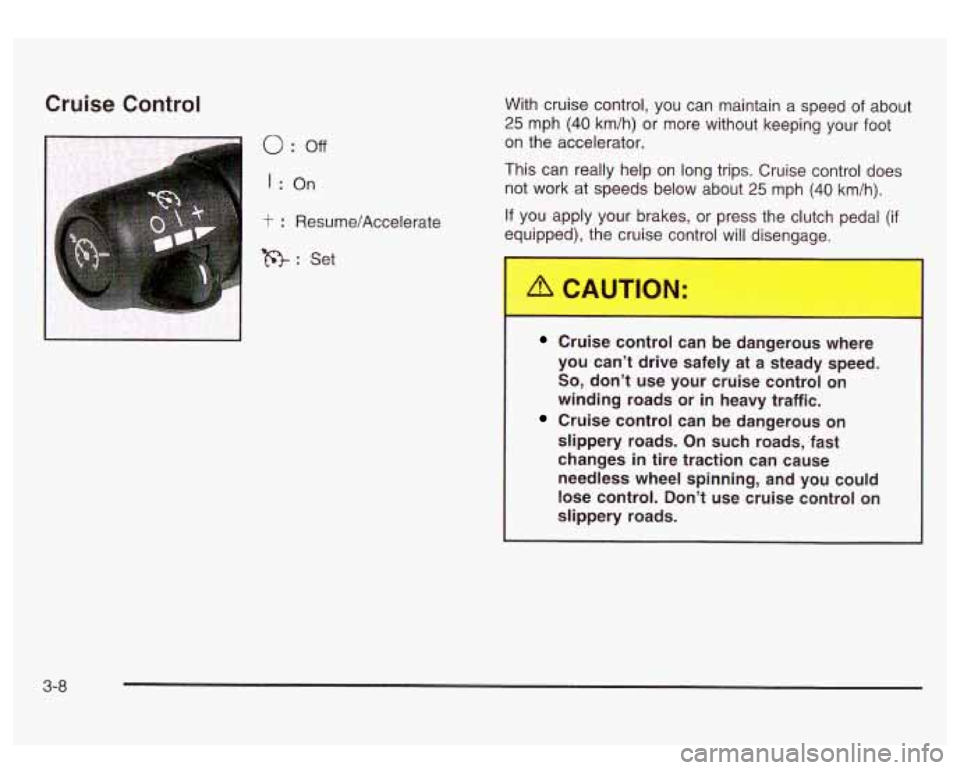
Cruise Control
0 : off
I : On
t : Resume/Accelerate
R: Set With cruise control,
you can maintain
a speed of about
25 mph (40 km/h) or more without keeping your foot
on the accelerator.
This can really help on long trips. Cruise control does
not work at speeds below about
25 mph (40 km/h).
If you apply your brakes, or press the clutch pedal (if
equipped), the cruise control will disengage.
Cruise control can be dangerous where
you can’t drive safely at a steady speed.
So, don’t use your cruise control on
winding roads or in heavy traffic.
Cruise control can be dangerous on
slippery roads. On such roads, fast
changes
in tire traction can cause
needless wheel spinning, and you could
lose control. Don’t use cruise control on
slippery roads.
3-8
Page 168 of 428
Driver Information Center (DIC)
The DIC display is located on the instrument panel
cluster above the steering wheel. The DIC can display
information such as the trip odometer, fuel economy and
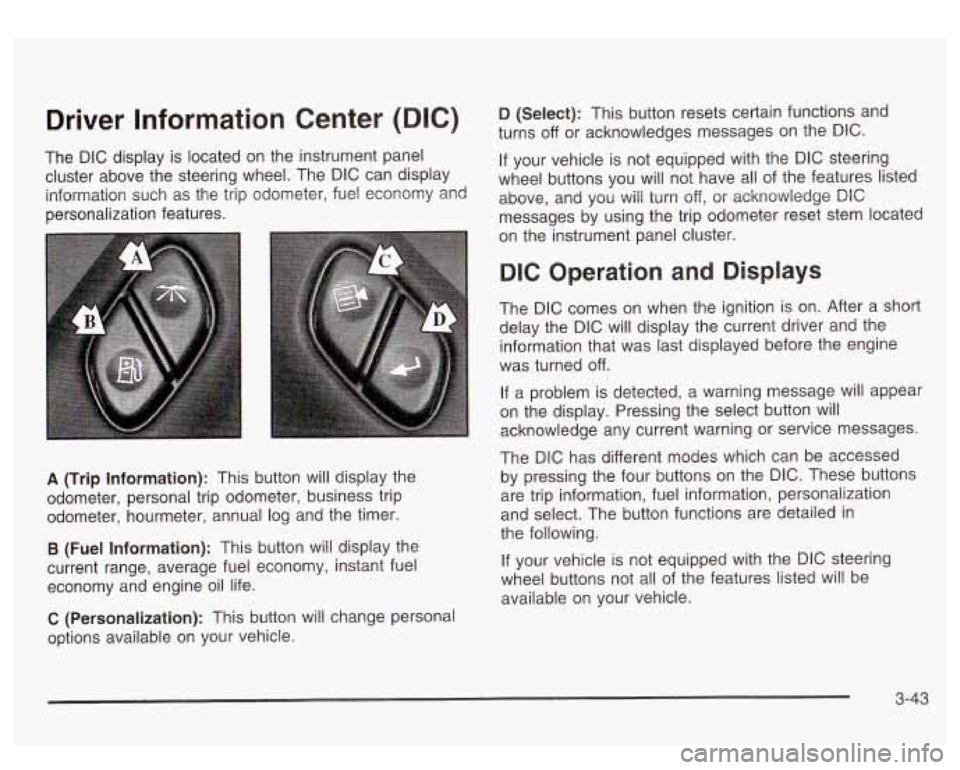
personalization features.
A (Trip Information): This button will display the
odometer, personal trip odometer, business trip
odometer, hourmeter, annual log and the timer.
B (Fuel Information): This button will display the
current range, average fuel economy, instant fuel
economy and engine oil life.
C (Personalization): This button will change personal
options available on your vehicle.
D (Select): This button resets certain functions and
turns
off or acknowledges messages on the DIC.
If your vehicle is not equipped with the DIC steering
wheel buttons you will not have all of the features listed
above, and you will turn off,
or acknowledge DIC
messages by using the trip odometer reset stem located
on the instrument panel cluster.
DIC Operation and Displays
The DIC comes on when the ignition is on. After a short
delay the DIC will display the current driver and the
information that was last displayed before the engine
was turned
off.
If a problem is detected, a warning message will appear
on the display. Pressing the select button will
acknowledge any current warning or service messages.
The DIC has different modes which can be accessed
by pressing the four buttons on the DIC. These buttons
are trip information, fuel information, personalization
and select. The button functions are detailed in
the following.
If your vehicle is not equipped with the DIC steering
wheel buttons not all of the features listed will be
available on your vehicle.
3-43
Page 171 of 428
Fuel Information Button
Use the fuel information button to scroll through the
range, average fuel economy, instant fuel economy and
the GM
Oil Life SystemTM.
If your vehicle is not equipped with the DIC steering
wheel control buttons you will not be able to display the
fuel information.
Fuel Range
Press the fuel information button until RANGE appears
to display the remaining distance you can drive
without refueling. It’s based on fuel economy and the
fuel remaining in the tank. The display will show
LOW if
the fuel level is low.
The fuel economy data used to determine fuel range is
an average of recent driving conditions. As your
driving conditions change, this data is gradually updated.
Fuel range cannot be reset.
Average Fuel Economy
Press the fuel information button until AVG appears in
the display. Average fuel economy is how many
miles per gallon your vehicle is getting based on current
and past driving conditions.
Press and hold the select button while AVG.ECON is
displayed to reset the average fuel economy. Average
fuel economy will then
be calculated starting from
that point.
If the average fuel economy is not reset, it
will be continually updated each time you drive.
Instant Fuel Economy
Press the fuel information button until INST appears in
the display. Instant fuel economy is how many miles
per gallon your vehicle is at the particular moment
in time. The instant fuel economy cannot be reset.
GM Oil Life SystemTM
Press the fuel information button until ENGINE OIL LIFE
appears in the display. The GM
Oil Life SystemTM
shows an estimate of the oil’s remaining useful life. It
will show
100% when the system is reset after an
oil change. It will alert you
to change your oil on a
schedule consistent with your driving conditions.
Always reset the engine oil life after and oil change.
To
reset the Oil Life System press and hold the select
button while ENGINE
OIL LIFE is displayed.
The DIC does not replace the need to maintain your
vehicle as recommended in the Maintenance Schedule
in this manual. Also, the oil change reminder will not
detect dusty conditions or engine malfunctions that may
affect the oil. Also, the oil change reminder does not
measure how much
oil you have in your engine. So, be
sure to check your oil level often. See
Engine Oil on
page 5- 13.
3-46
Page 217 of 428
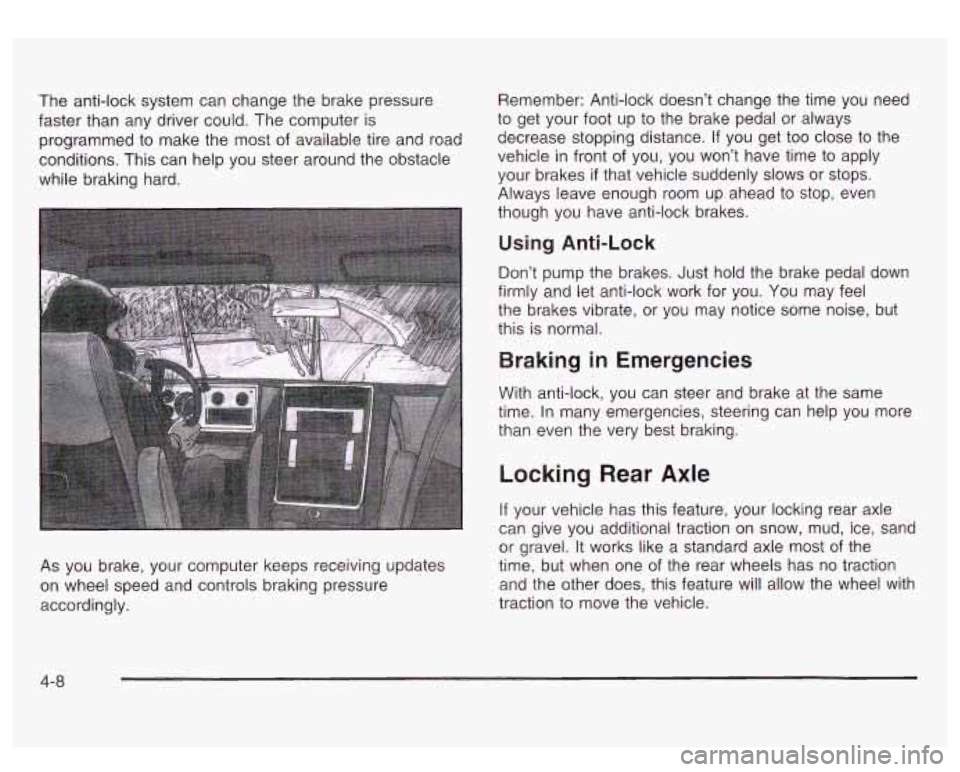
The anti-lock system can change the brake pressure
faster than any driver could. The computer is
programmed to make the most
of available tire and road
conditions. This can help you steer around the obstacle
while braking hard.
As you brake, your computer keeps receiving updates
on wheel speed and controls braking pressure
accordingly. Remember:
Anti-lock doesn’t change the time you need
to get your foot up
to the brake pedal or always
decrease stopping distance.
If you get too close to the
vehicle in front of you, you won’t have time to apply
your brakes
if that vehicle suddenly slows or stops.
Always leave enough room up ahead
to stop, even
though you have anti-lock brakes.
Using Anti-Lock
Don’t pump the brakes. Just hold the brake pedal down
firmly and let anti-lock work for you. You may feel
the brakes vibrate, or you may notice some noise, but
this is normal.
Braking in Emergencies
With anti-lock, you can steer and brake at the same
time. In many emergencies, steering can help you more
than even the very best braking.
Locking Rear Axle
If your vehicle has this feature, your locking rear axle
can give you additional traction on snow, mud, ice, sand
or gravel. It works like a standard axle most of the
time, but when one of the rear wheels has no traction
and the other does, this feature will allow the wheel with
traction to move the vehicle.
4-8
Page 218 of 428
Steering
Power Steering
If you lose power steering assist because the engine
stops or the system is not functioning, you can steer but
it will take much more effort.
Steering Tips
Driving on Curves
It’s important to take curves at a reasonable speed.
A lot of the “driver lost control” accidents mentioned on
the news happen on curves. Here’s why:
Experienced driver or beginner, each of us is subject to
the same laws of physics when driving on curves.
The traction of the tires against the road surface makes
it possible for the vehicle to change its path when
you turn the front wheels.
If there’s no traction, inertia
will keep the vehicle going in the same direction.
If
you’ve ever tried to steer a vehicle on wet ice, you’ll
understand this.
The traction you can get in a curve depends on the
condition of your tires and the road surface, the angle at
which the curve is banked, and your speed. While you’re
in a curve, speed
is the one factor you can control. Suppose
you’re steering through a sharp curve. Then you
suddenly accelerate. Both control systems
- steering
and acceleration
- have to do their work where the tires
meet the road. Adding the sudden acceleration can
demand too much of those places. You can
lose control.
What should you do
if this ever happens? Ease up on
the accelerator pedal, steer the vehicle the way
you want
it to go, and slow down.
Speed limit signs near curves warn that you should
adjust your speed. Of course, the posted speeds
are based on good weather and road conditions. Under
less favorable conditions you’ll want to go slower.
If you need to reduce your speed as you approach a
curve, do it before you enter the curve, while your front
wheels are straight ahead.
Try to adjust your speed
so you can “drive” through the
curve. Maintain a reasonable, steady speed. Wait to
accelerate until you are out of the curve, and then
accelerate gently into the straightaway.
Steering in Emergencies
There are times when steering can be more effective than
braking. For example, you come over a hill and find a
truck stopped in your lane, or a car suddenly pulls out
from nowhere, or a child darts out from between parked
cars and stops right in front of you. You can avoid these
problems by braking
- if you can stop in time. But
sometimes you can’t; there isn’t room. That’s the time for
evasive action
- steering around the problem.
4-9
Page 221 of 428
I
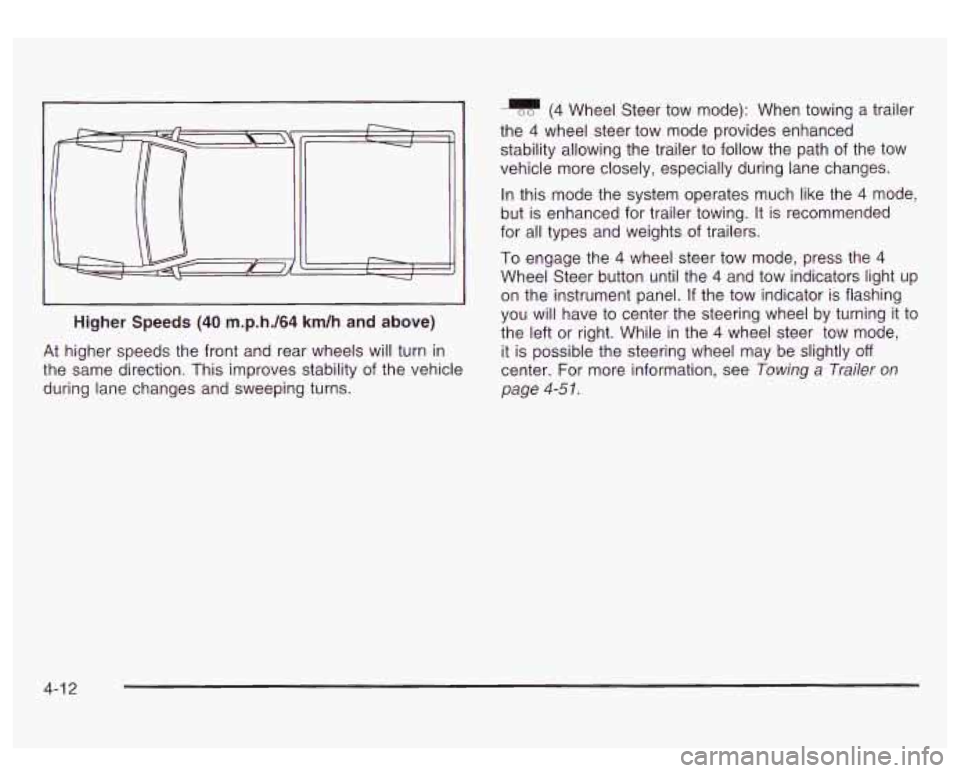
Higher Speeds (40 m.p.h./64 km/h and above)
J
At higher speeds the front and rear wheels will turn in
the same direction. This improves stability of the vehicle
during lane changes and sweeping turns.
(4 Wheel Steer tow mode): When towing a trailer
the
4 wheel steer tow mode provides enhanced
stability allowing the trailer to follow the path of the tow
vehicle more closely, especially during lane changes.
In this mode the system operates much like the
4 mode,
but is enhanced for trailer towing. It is recommended
for all types and weights
of trailers.
To engage the
4 wheel steer tow mode, press the 4
Wheel Steer button until the 4 and tow indicators light up
on the instrument panel.
If the tow indicator is flashing
you will have to center the steering wheel by turning it to
the left or right. While in the
4 wheel steer tow mode,
it is possible the steering wheel may be slightly
off
center. For more information, see Towing a Trailer on
page
4-5 I.
4-1 2
Page 224 of 428
a
Check your mirrors, glance over your shoulder and
start your left lane change signal before moving out
of the right lane
to pass. When you are far enough
ahead of the passed vehicle to see its front in your
inside mirror, activate your right lane change signal
and move back into the right lane. (Remember that
if
your right outside mirror is convex, the vehicle you
just passed may seem
to be farther away from you
than it really is.)
Try not to pass more than one vehicle at a time on
two-lane roads. Reconsider before passing the next
vehicle.
Don’t overtake a slowly moving vehicle too rapidly.
Even though the brake lamps are not flashing, it may
be slowing down or starting to turn.
If you’re being passed, make
it easy for the following
driver to get ahead
of you. Perhaps you can ease a
little
to the right.
Loss of Control
Let’s review what driving experts say about what
happens when the three control systems (brakes,
steering and acceleration) don’t have enough friction
where the tires meet the road to do what the driver
has asked.
In any emergency, don’t give up. Keep trying
to steer
and constantly seek an escape route or area of
less danger.
Skidding
In a skid, a driver can lose control of the vehicle.
Defensive drivers avoid most skids by taking reasonable
care suited
to existing conditions, and by not
“overdriving” those conditions. But skids are always
possible.
The three types of skids correspond to your vehicle’s
three control systems. In the braking skid, your wheels
aren’t rolling. In the steering or cornering skid, too
much speed or steering
in a curve causes tires to slip
and lose cornering force. And in the acceleration
skid, too much throttle causes the driving wheels
to spin.
A cornering skid is best handled by easing your foot
off
the accelerator pedal.
If your vehicle starts to slide, ease your foot off the
accelerator pedal and quickly steer the way you want
the vehicle
to go. If you start steering quickly enough,
your vehicle may straighten out. Always be ready
for a second skid
if it occurs.
Of course, traction is reduced when water, snow, ice,
gravel or other material
is on the road. For safety, you’ll
want to slow down and adjust your driving
to these
conditions.
It is important to slow down on slippery
surfaces because stopping distance will be longer and
vehicle control more limited.
4-1 5
Page 225 of 428
While driving on a surface with reduced traction, try
your best to avoid sudden steering, acceleration
or braking (including engine braking by shifting to a
lower gear). Any sudden changes could cause the tires
to slide. You may not realize the surface is slippery
until your vehicle
is skidding. Learn to recognize warning
clues
- such as enough water, ice or packed snow
on the road to make a “mirrored surface”
- and slow
down when you have any doubt.
Remember: Any anti-lock brake system (ABS) helps
avoid only the braking skid.
Operating Your All-Wheel-Drive
Vehicle
Off Paved Roads
Many of the same design features that help make your
vehicle responsive on paved roads during poor
weather conditions
- features like the locking rear axle
and all-wheel drive
- help make it much better
suited for off-road use than a conventional passenger
car. Its higher ground clearance also helps your vehicle
step over some off-road obstacles. But your vehicle
doesn’t have features like special underbody shielding
and a transfer case low gear range, things that are
usually thought necessary for extended or sever off-road
service. This guide
is for operating your vehicle off
paved roads.
Also, see Braking on page 4-6.
Off-road driving can be great fun. But it does have
some definite hazards. The greatest of these is
the terrain itself.
“Off-roading” means you’ve left the great North American\
road system behind. Traffic lanes aren’t marked.
Curves aren’t banked. There are no road signs.
Surfaces can be slippery, rough, uphill or downhill. In
short, you’ve gone right back to nature.
Off-road driving involves some new skills. And that’s
why it’s very important that
you read this guide.
You’ll find many driving tips and suggestions. These will
help make your off-road driving safer and more
enjoyable.
Before You Go Off-Roading
There are some things to do before you go out. For
example, be sure to have all necessary maintenance
and service work done. Check to make sure all
underbody shields (if
so equipped) are properly
attached.
Is there enough fuel? Is the spare tire fully
inflated? Are the fluid levels up where they should be?
What are the local laws that apply to off-roading
where you’ll be driving?
If you don’t know, you should
check with law enforcement people in the area. Will you
be on someone’s private land? If
so, be sure to get
the necessary permission.
4-1 6