coolant level GMC SIERRA DENALI 2003 Owners Manual
[x] Cancel search | Manufacturer: GMC, Model Year: 2003, Model line: SIERRA DENALI, Model: GMC SIERRA DENALI 2003Pages: 428, PDF Size: 20.35 MB
Page 145 of 428
2. Set the driver’s and passenger’s temperature.
To find your comfort setting, start with a
74°F
(23°C) temperature setting and allow about
20 minutes for the system to regulate. Turn the
driver’s or passenger’s side temperature knob
to adjust the temperature setting as necessary. If
you choose the temperature setting of
60°F
(15°C) the system will remain at the maximum
cooling setting. If you choose the temperature
setting of
90°F (32°C) the system will remain at the
maximum heat setting. Choosing either maximum
setting will not cause the vehicle to heat or cool any
faster.
Be careful not
to cover the sensor located on the
top of the instrument panel near the windshield.
This sensor regulates air temperature based on sun
load, and also turns on your headlamps.
To avoid blowing cold air in cold weather, the
system will delay turning on the fan until warm air
is available. The length of delay depends on
the engine coolant temperature. Pressing the fan switch will override this delay and change the fan
to
a selected speed.
Manual Operation
To change the current setting, select one of the
following:
A 8f? v (Fan): This button allows you to manually
adjust the fan speed. Press the up arrow
to increase fan
speed and the down arrow
to decrease fan speed.
4d (Mode): Press this button to manually change the
direction of the airflow in your vehicle; keep pressing the
button until the desired mode appears on the display.
If you press the mode button
to select an air delivery
mode, the display will change
to show you the selected
air mode delivery. The display will then show the
current status of the system. When the system is turned
off, the display will go blank after displaying the
current status
of the system.
f;’ (Vent): This mode directs air to the instrument
panel vents.
+2 (Bi-Level): This mode directs half of the air to the
instrument panel vents, then directs the remaining air
to
the floor vents. A little air is directed toward the
windshield and the side window vents. Cooler air is
directed
to the upper vents and warmer air to the floor
vents.
3-20
Page 179 of 428
CHANGE ENGINE OIL
This message is displayed when the engine oil needs to
be changed.
When you change the engine oil, be sure to reset the
CHANGE ENGINE
OIL message. See Engine Oil, When
to Change
under Engine Oil on page 5-13.
OIL LIFE RESET
This message will appear on the display for about 10
seconds after resetting the change engine oil message.
LOW COOLANT LEVEL
If the engine coolant level is low, this message will
appear on the DIC. Adding coolant will clear the
message.
ENGINE COOLANT HOT
If the cooling system temperature gets hot, this message
will appear in the DIC. Stop the vehicle and let the
engine idle in PARK (P) to allow the coolant to reach a
safe temperature. This message will clear when the
coolant temperature drops to safe operating
temperature.
ENGINE OVERHEATED
If the engine cooling system reaches unsafe
temperatures for operation, this message will appear in
the DIC and you will hear a chime. Stop and turn
off
3-54
the vehicle as soon as it is safe to do so to avoid
severe damage. This message will clear when the
engine has cooled to a safe operating temperature.
OIL PRESSURE LOW
If low oil pressure levels occur, this message will be
displayed on the DIC and a chime will sound. Stop the
vehicle as soon as safely possible and do not operate
it until the cause of the low oil pressure has been
corrected. Check your oil as soon as possible and have
your vehicle serviced.
REDUCED ENGINE POWER
This message is displayed when the cooling system
temperature gets too hot and the engine further enters
the engine coolant protection mode.
See
Engine Overheating on page 5-27 for further
information.
BATTERY NOT CHARGING
if the battery is not charging during operation, this
message will appear on the DIC. Driving with this
problem could drain your battery. Have the electrical
system checked as soon as possible. Pressing the
select button will acknowledge this message and clear it
from the DIC display.
Page 267 of 428
Driving On Grades
Reduce speed and shift to a lower gear before you start
down a long or steep downgrade.
If you don’t shift
down, you might have to use your brakes
so much that
they would get hot and no longer work well.
You can tow in DRIVE
(5). You may want to shift the
transmission to THIRD
(3) or, if necessary, a lower gear
selection
if the transmission shifts too often (e.g.,
under heavy loads and/or hilly conditions).
You may also want to activate the tow/haul mode
if the
transmission shifts too often. See “Tow/Haul Mode”
earlier in this section.
When towing at high altitude on steep uphill grades,
consider the following: Engine coolant will boil at a lower
temperature than at normal altitudes.
If you turn your
engine
off immediately after towing at high altitude
on steep uphill grades, your vehicle may show signs
similar
to engine overheating. To avoid this, let the
engine run while parked (preferably on level ground)
with the automatic transmission in PARK (P) for a
few minutes before turning the engine
off. If you do get
the overheat warning, see
Engine Overheating on
page
5-27.
Parking on Hills
m
You really should not park your vehicle, with a
trailer attached, on a hill.
If something goes
wrong, your rig could start to move. People
can be injured, and both your vehicle and the
trailer can be damaged.
But
if you ever have to park your rig on a hill, here’s
how to do it:
1. Apply your regular brakes, but don’t shift into
PARK
(P) yet.
2. Have someone place chocks under the trailer
wheels.
3. When the wheel chocks are in place, release the
regular brakes until the chocks absorb the load.
4. Reapply the regular brakes. Then apply your
parking brake and shift into PARK (P).
5. Release the regular brakes.
4-58
Page 282 of 428
A. Engine Air CleanedFilter
B. Coolant Surge Tank
C. Air CleanerlFilter Restriction Indicator
B. Engine Oil Dipstick
E. Engine Oil Fill Cap
F. Automatic Transmission Dipstick
G. Fan
H. Remote Negative
(-) Terminal (GND)
I. Remote Positive (+) Terminal
J. Power Steering Fluid Reservoir
K. Brake Fluid Reservoir
L. Underhood Fuse Block
M. Battery
N. Windshield Washer Fluid Reservoir
Engine Oil
If the CHECK ENG OIL LEVEL message appears on
the instrument cluster, it means you need to check your
engine
oil level right away.
For more information, see “CHECK ENG
OIL LEVEL”
under
DIC Warnings and Messages on page 3-53.
You should check your engine oil level regularly; this is
an added reminder.
5-1 3
Page 295 of 428
Checking Coolant
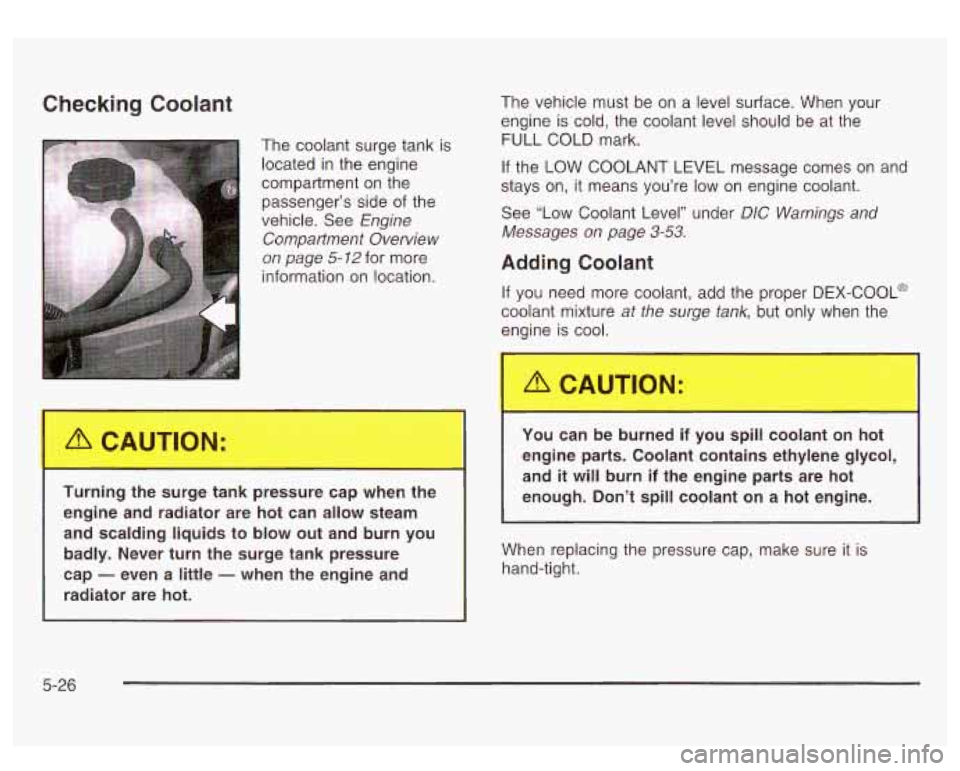
The coolant surge tank is
located in the engine
compartment on the
passenger’s side
of the
vehicle. See
Engine
Compartment Overview
on page
5-12 for more ’
Turning the surge tank pressure cap when the
engine and radiator are hot can allow steam
and scalding liquids to blow out and burn you
badly. Never turn the surge tank pressure
cap
- even a little - when the engine and
radiator are hot. The
vehicle must be on a level surface. When your
engine is cold, the coolant level should be at the
FULL COLD mark.
If the LOW COOLANT LEVEL message comes on and
stays on, it means you’re low on engine coolant.
See “Low Coolant Level” under
DIC Warnings and
Messages
on page 3-53.
Adding Coolant
If you need more coolant, add the proper DEX-COOL@
coolant mixture
at the surge tank, but only when the
engine is cool.
I
You can I: burned if you spill coolant on hot
engine parts. Coolant contains ethylene glycol,
and
it will burn if the engine parts are hot
enough. Don’t spill coolant
on a hot engine.
I I
When replacing the pressure cap, make sure it is
hand-tight.
5-26
Page 299 of 428
Cooling System
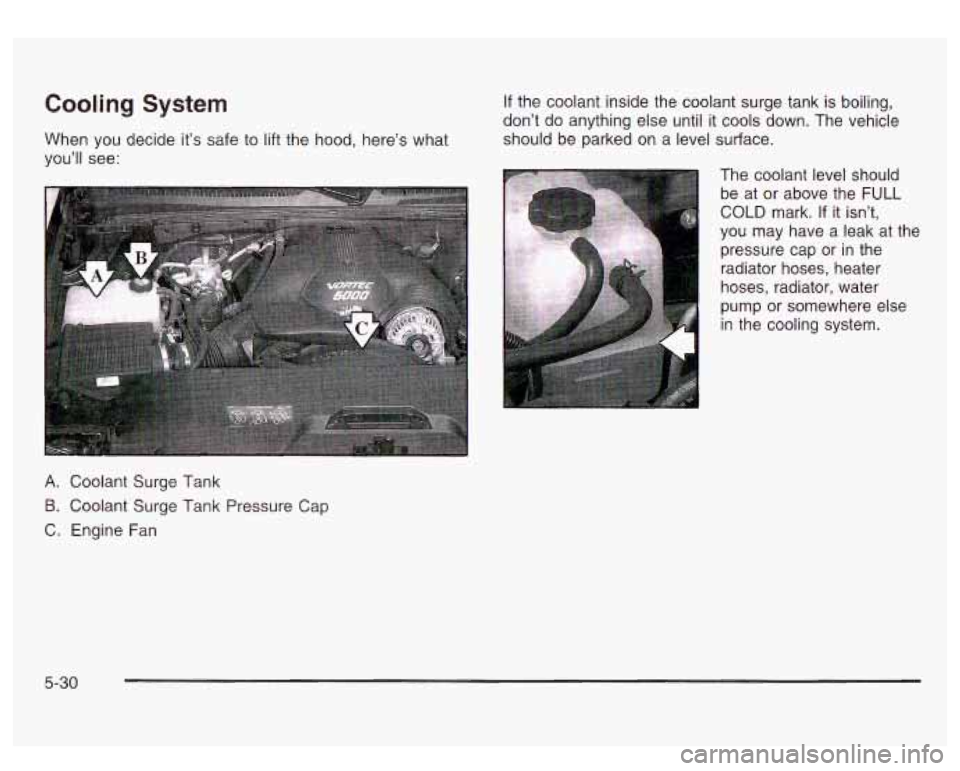
When you decide it's safe to lift the hood, here's what
you'll see:
If the coolant inside the coolant surge tank is boiling,
don't do anything else until it cools down. The vehicle
should be parked on a level surface.
A. Coolant Surge Tank
B. Coolant Surge Tank Pressure Cap
C. Engine Fan The coolant level should
be at
or above the FULL
COLD mark. If it isn't,
you may have a leak at the
rn*:A.~~ z,=7j_ . %%A" %!!:..- pressure cap or in the
*^" radiator hoses, heater
hoses, radiator, water
pump or somewhere else
in the cooling system.
I
5-30
Page 301 of 428
How to Add Coolant to the Coolant
Surge Tank
If you haven’t found a problem yet, check to see if coolant
is visible in the surge tank.
If coolant is visible but the
coolant level isn’t at or above the
FULL COLD mark, add
a
50/50 mixture of clean, drinkable waterand
DEX-COOL@ coolant at the coolant surge tank, but be
sure the cooling system, including the coolant surge tank
pressure cap, is cool before you do it. See Engine
Coolant on
page 5-24 for more information.
/;1 CAUTIC I:
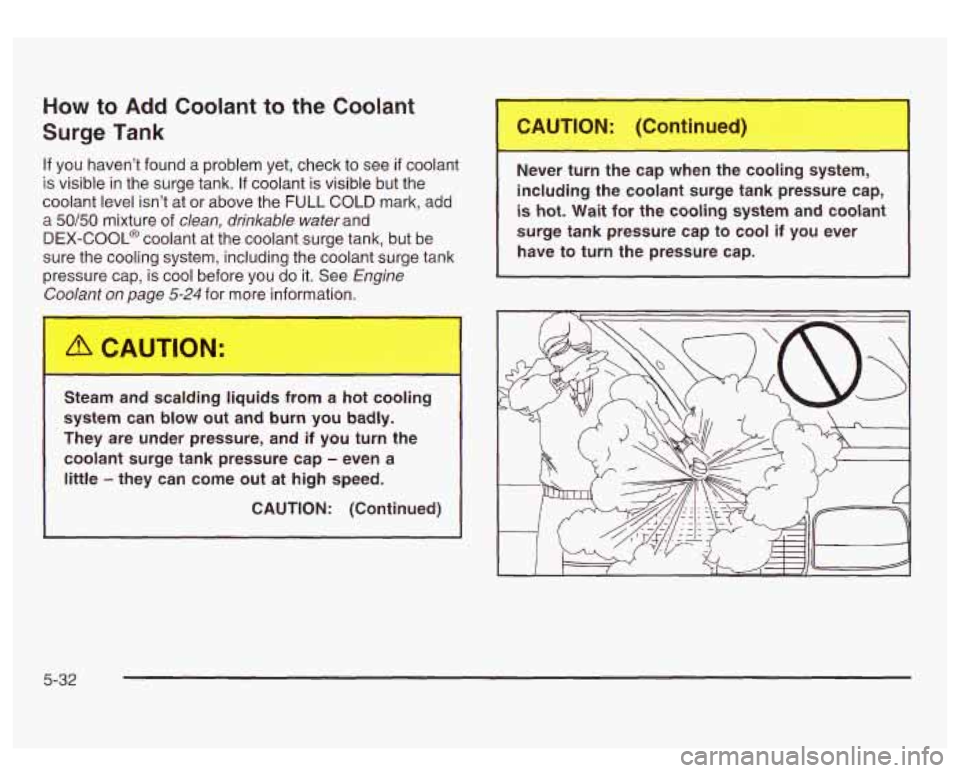
Steam and scaldin, ,iquids from a hot coa ....g
system can blow out and burn you badly.
They are under pressure, and if you turn the
coolant surge tank pressure cap
- even a
little
- they can come out at high speed.
CAUTION: (Continued) Never
turn the cap when the cooling
system,
including the coolant surge tank pressure cap,
is hot. Wait for the cooling system and coolant
surge tank pressure cap to cool if you ever have to turn the pressure cap.
5-32
Page 303 of 428
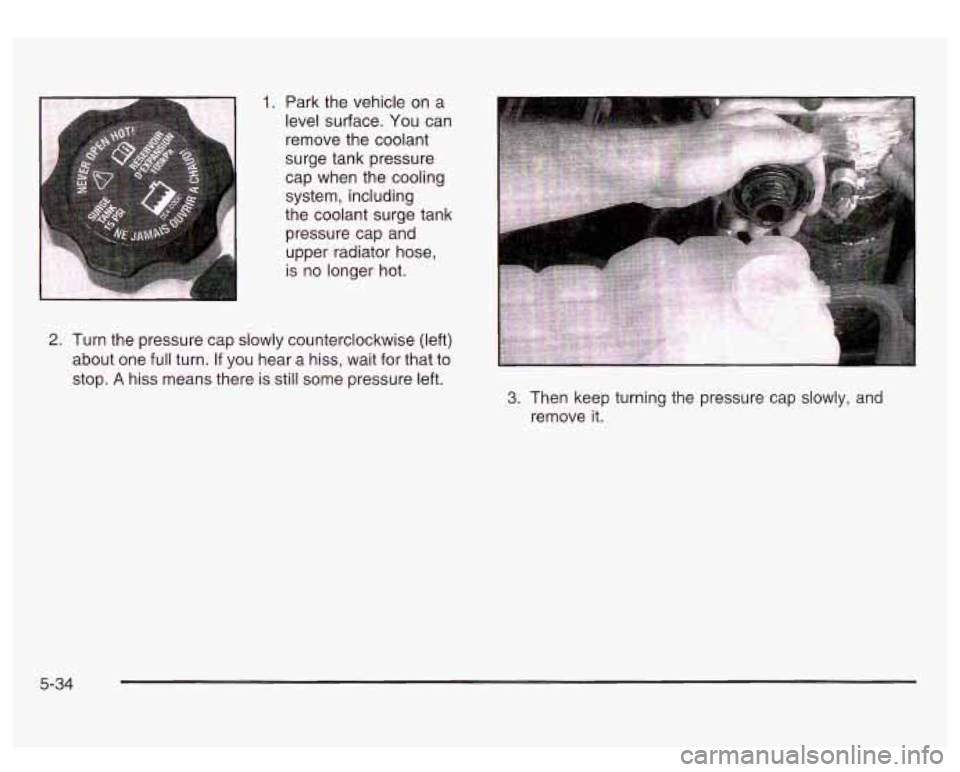
1. Park the vehicle on a
level surface. You can
remove the coolant
surge tank pressure
cap when the cooling
system, including
the coolant surge tank pressure cap and
upper radiator hose,
is no longer hot.
2. Turn the pressure cap slowly counterclockwise (left)
about one full turn.
If you hear a hiss, wait for that to
stop.
A hiss means there is still some pressure left.
3. Then keep turning the pressure cap slowly, and
remove
it.
5-34
Page 304 of 428
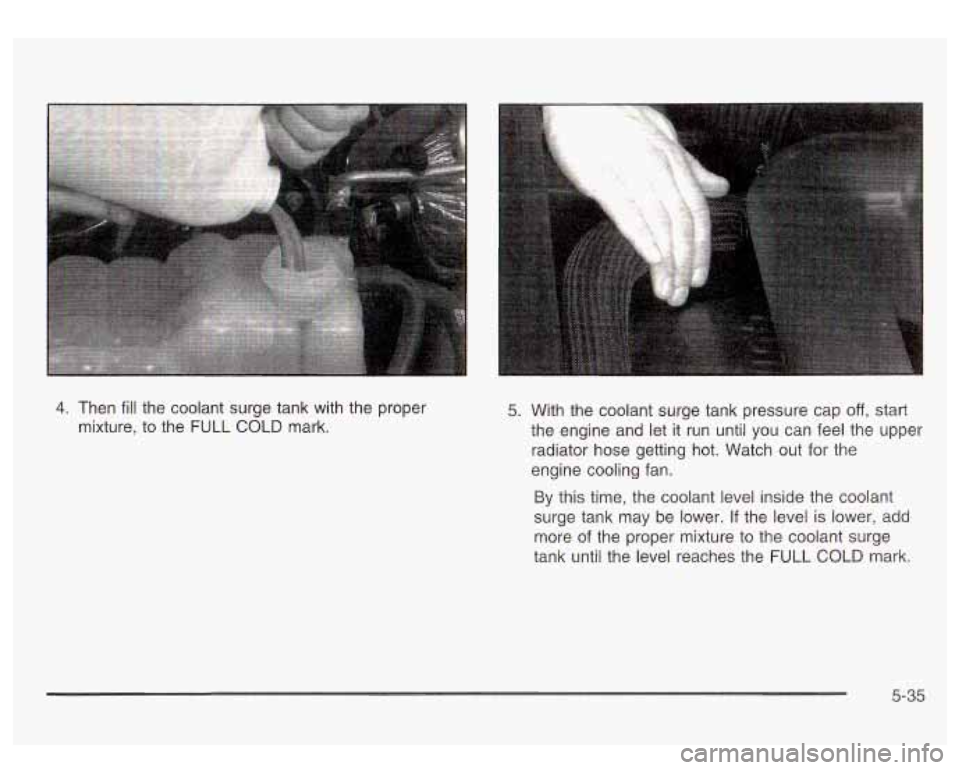
4. Then fill the coolant surge tank with the proper
mixture, to the FULL COLD mark. 5. With the coolant surge tank pressure cap off, start
the engine and let
it run until you can feel the upper
radiator hose getting hot. Watch out for the
engine cooling fan.
By this time, the coolant level inside the coolant
surge tank may be lower. If the level is lower, add
more
of the proper mixture to the coolant surge
tank until the level reaches the FULL COLD mark.
5-35
Page 384 of 428
90,000 Miles (150 000 km)
0 Check readfront axle fluid level and add fluid as
needed. Check constant velocity joints and axle seals
for leaking.
0 Replace fuel filter. An Emission Control Service. (See
Footnote
t.)
0 Replace engine air cleaner filter. An Emission
Control Service.
0 Rotate tires. See Tire Inspection and Rotation on
page 5-62
for proper rotation pattern and additional
information.
(See footnote +.)
97,500 Miles (162 500 km)
c[I Check readfront axle fluid level and add fluid as
needed. Check constant velocity joints and axle seals
for leaking.
page 5-62 for proper rotation pattern and additional
information.
(See footnote +.)
0 Rotate tires. See Tire Inspection and Rotation on
100,000 Miles (166 000 km)
0 Inspect spark plug wires. An Emission Control
0 Replace spark plugs. An Emission Control Service.
Service.
0 Change automatic
transmission fluid and filter if the
vehicle
is mainly driven under one or more of these
conditions:
- In heavy city traffic where the outside
temperature regularly reaches
90°F (32°C) or
higher.
- In hilly or mountainous terrain.
- When doing frequent trailer towing.
- Uses such as found in taxi, police or delivery
service.
0 If you haven’t used your vehicle under severe service
conditions listed previously and, therefore, haven’t
changed your automatic transmission fluid, change
both the fluid and filter.
0 Inspect Positive Crankcase Ventilation (PCV) valve.
An Emission Control Service.
150,000 Miles (240 000 km)
0 Drain, flush and refill cooling system (or every
60 months since last service, whichever occurs first).
See
Engine Coolant on page 5-24 for what to use.
Inspect hoses. Clean radiator, condenser, pressure
cap and neck. Pressure test the cooling system
and pressure cap.
An Emission Control Service.
0 Inspect engine accessory drive belt. An Emission
Control Service.
6-9