gas type GMC SIERRA DENALI 2003 Owners Manual
[x] Cancel search | Manufacturer: GMC, Model Year: 2003, Model line: SIERRA DENALI, Model: GMC SIERRA DENALI 2003Pages: 428, PDF Size: 20.35 MB
Page 275 of 428

California Fuel
If your vehicle is certified to meet California Emission
Standards (see the underhood emission control label),
it is designed to operate on fuels that meet California
specifications. If this fuel is not available
in states
adopting California emissions standards, your vehicle
will operate satisfactorily on fuels meeting federal
specifications, but emission control system performance
may be affected. The malfunction indicator lamp may
turn on (see
Malfunction lndicator Lamp on page 3-38 )
and your vehicle may fail a smog-check test. If this
occurs, return
to your authorized GM dealer for
diagnosis. If it is determined that the condition is caused
by the type of fuel used, repairs may not be covered
by your warranty.
Additives
To provide cleaner air, all gasolines in the United States
are now required to contain additives that will help
prevent engine and fuel system deposits from forming,
allowing your emission control system to work properly.
You should not have
to add anything to your fuel. Gasolines containing
oxygenates, such as ethers and
ethanol, and reformulated gasolines may be available in
your area to contribute
to clean air. General Motors
recommends that you use these gasolines, particularly
if
they comply with the specifications described earlier.
Notice: Your vehicle was not designed for fuel
that contains methanol. Don’t use fuel containing
methanol.
It can corrode metal parts in your
fuel system and also damage the plastic and rubber
parts. That damage wouldn’t be covered under
your warranty.
Some gasolines that are not reformulated for low
emissions may contain an octane-enhancing additive
called methylcyclopentadienyl manganese tricarbonyl
(MMT); ask the attendant where you buy gasoline
whether the fuel contains MMT. General Motors does
not recommend the use of such gasolines. Fuels
containing MMT can reduce the life of spark plugs and
the performance of the emission control system may
be affected. The malfunction indicator lamp may turn on.
If this occurs, return to your authorized GM dealer
for service.
5-6
Page 278 of 428

When you put the fuel cap back on, turn it to the right
(clockwise) until you hear a clicking sound. Make
sure you fully install the cap. The diagnostic system can
determine
if the fuel cap has been left off or improperly
installed. this would allow fuel
to evaporate into the
atmosphere. See
Malfunction Indicator lamp on
page 3-38.
Notice: If you need a new fuel cap, be sure to get
the right type. Your dealer can get one for you. If you get the wrong type,
it may not fit properly.
This may cause your malfunction indicator lamp to
light and may damage your fuel tank and emissions
system. See “Malfunction Indicator Lamp” in the
Index.
Filling a Portable Fue ‘~er
Never fill -)ortable fuel container while it is in
your vehicle. Static electricity discharge from
the container can ignite the gasoline vapor.
You can be badly burned and your vehicle
damaged if
this occurs. To help avoid injury to
you and others:
0 Dispense gasoline only into approved
containers.
Do not fill a container while it is inside a
vehicle,
in a vehicle’s trunk, pickup bed or
on any surface other than the ground.
0 Bring the fill nozzle in contact with the
inside of the fill opening before operating
the nozzle. Contact should be maintained until the filling
is complete.
Don’t smoke while pumping gasoline.
5-9
Page 321 of 428

Bulb Replacement
For any bulb changing procedure not listed in this
section, contact your dealer.
See
Replacement Bulbs on page 5-59 for the proper
types
of bulbs to use.
Halogen Bulbs
Headlamps
Halogen bulbs have pressurized gas inside
and can burst
if you drop or scratch the bulb.
You or others could be injured. Be sure to read
and follow the instructions on the bulb
package.
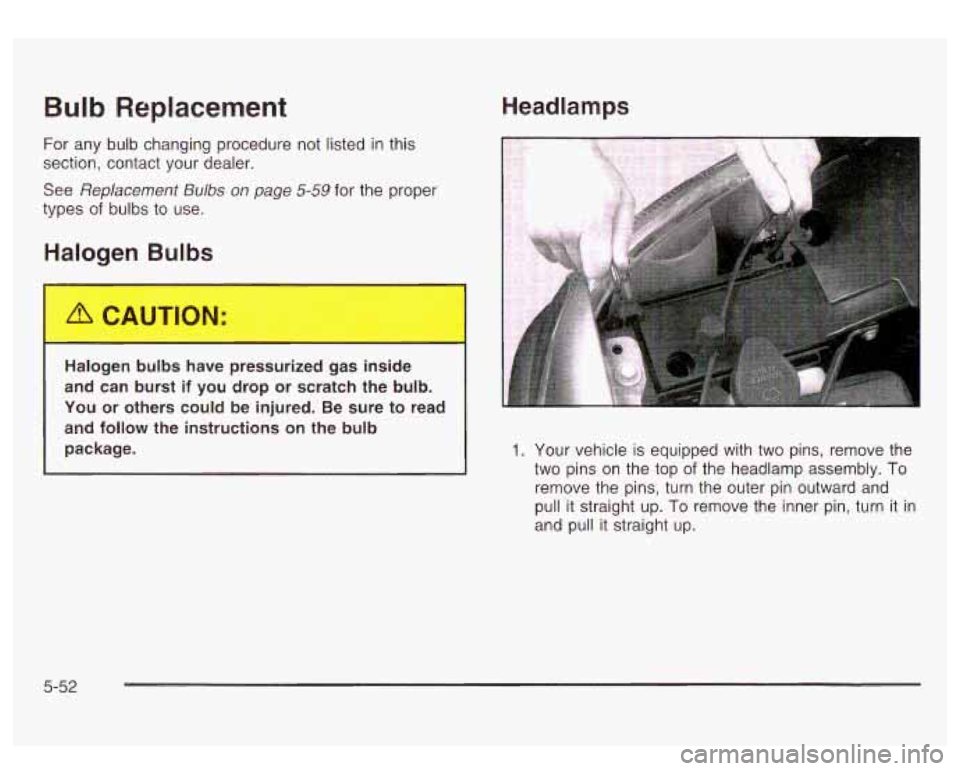
1. Your vehicle is equipped with two pins, remove the
two pins on the top of the headlamp assembly.
To
remove the pins, turn the outer pin outward and
pull it straight up.
To remove the inner pin, turn it in
and pull it straight up.
5-52