wheel torque GMC SIERRA DENALI 2003 Owners Manual
[x] Cancel search | Manufacturer: GMC, Model Year: 2003, Model line: SIERRA DENALI, Model: GMC SIERRA DENALI 2003Pages: 428, PDF Size: 20.35 MB
Page 310 of 428
Notice:
Using the wrong fluid can badly damage brake
system parts. For example, just a few drops of
mineral-based
oil, such as engine oil, in your
brake system can damage brake system
parts
so badly that they’ll have to be replaced.
Don’t let someone
put in the wrong kind of fluid.
If you spill brake fluid on your vehicle’s painted
surfaces, the paint finish can be damaged.
Be careful not to spill brake fluid on your
vehicle.
If you do, wash it off immediately.
See “Appearance Care” in the Index.
Brake Wear
Your vehicle has four-wheel disc brakes.
Disc brake pads have built-in wear indicators that make
a high-pitched warning sound when the brake pads
are worn and new pads are needed. The sound
may come and go or be heard all the time your vehicle
is moving (except when you are pushing on the
brake pedal firmly). The
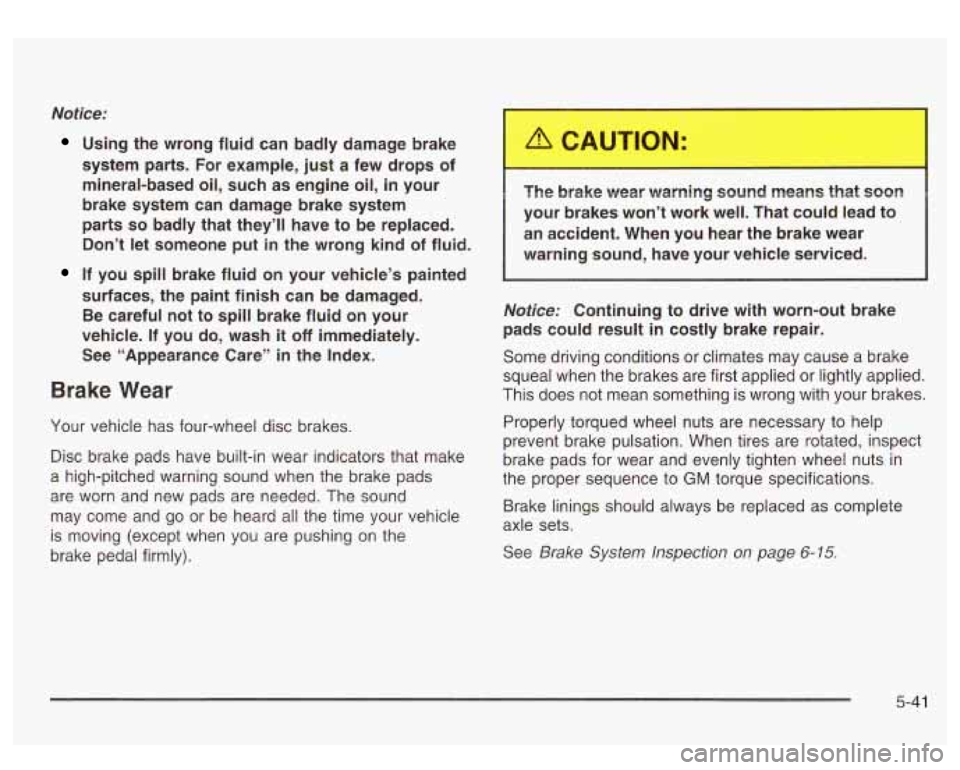
brake wear warning sound means that soon
your brakes won’t work well. That could lead to
an accident. When you hear the brake wear
Notice: Continuing to drive with worn-out brake
pads could result
in costly brake repair.
Some driving conditions or climates may cause a brake
squeal when the brakes are first applied or lightly applied.
This does not mean something is wrong with your brakes.
Properly torqued wheel nuts are necessary to help
prevent brake pulsation. When tires are rotated, inspect
brake pads for wear and evenly tighten wheel nuts in
the proper sequence
to GM torque specifications.
Brake linings should always be replaced as complete
axle sets.
See
Brake System Inspection on page 6- 15
5-41
Page 332 of 428
The purpose of regular rotation is to achieve more
uniform wear for all tires on the vehicle. The first rotation
is the most important. See “Part A: Scheduled
Maintenance Services,” in Section
6, for scheduled
rotation
intervals;
After the tires have been rotated, adjust the front and
rear inflation pressures as shown on the
CertificationEire label. Make certain that all wheel nuts
are properly tightened. See “Wheel Nut Torque”
under
Capacities and Specificatiol on ge 5-104.
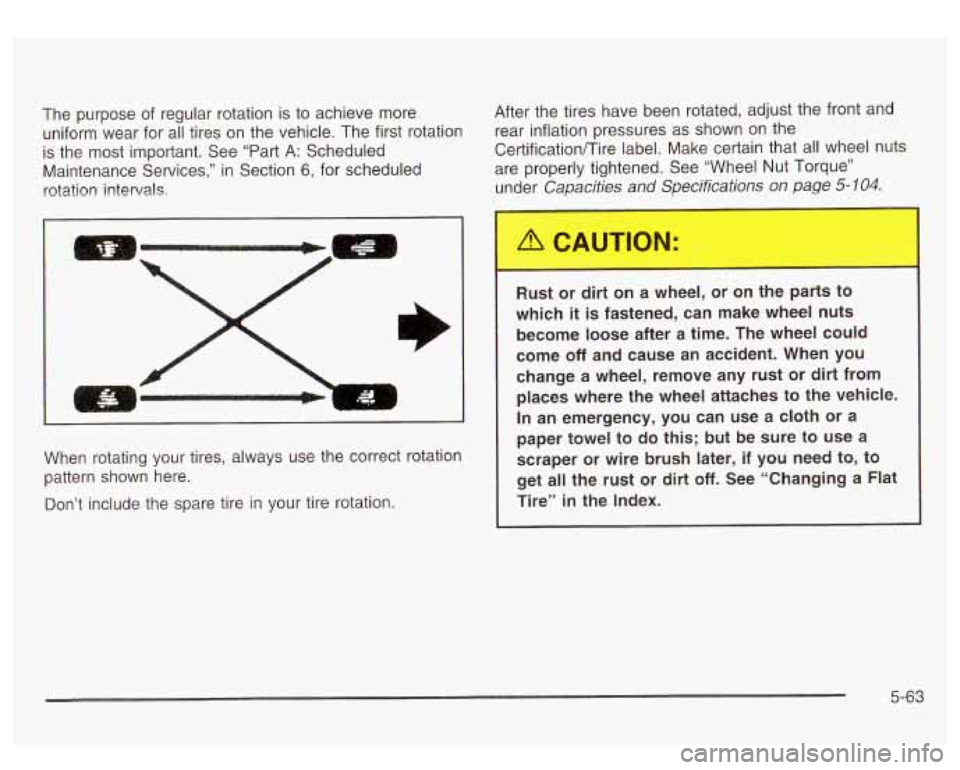
When rotating your tires, always use the correct rotation
pattern shown here.
Don’t include the spare tire in your tire rotation. Rust or dirt on a
wheel, or on the parts to
which
it is fastened, can make wheel nuts
become loose after a time. The wheel could
come
off and cause an accident. When you
change a wheel, remove any rust or dirt from
places where the wheel attaches to the vehicle,
In an emergency, you can use a cloth or a
paper towel to do
this; but be sure to use a
scraper or wire brush later,
if you need to, to
get all the rust or dirt
off. See “Changing a Flal
Tire”
in the Index.
5-63
Page 351 of 428
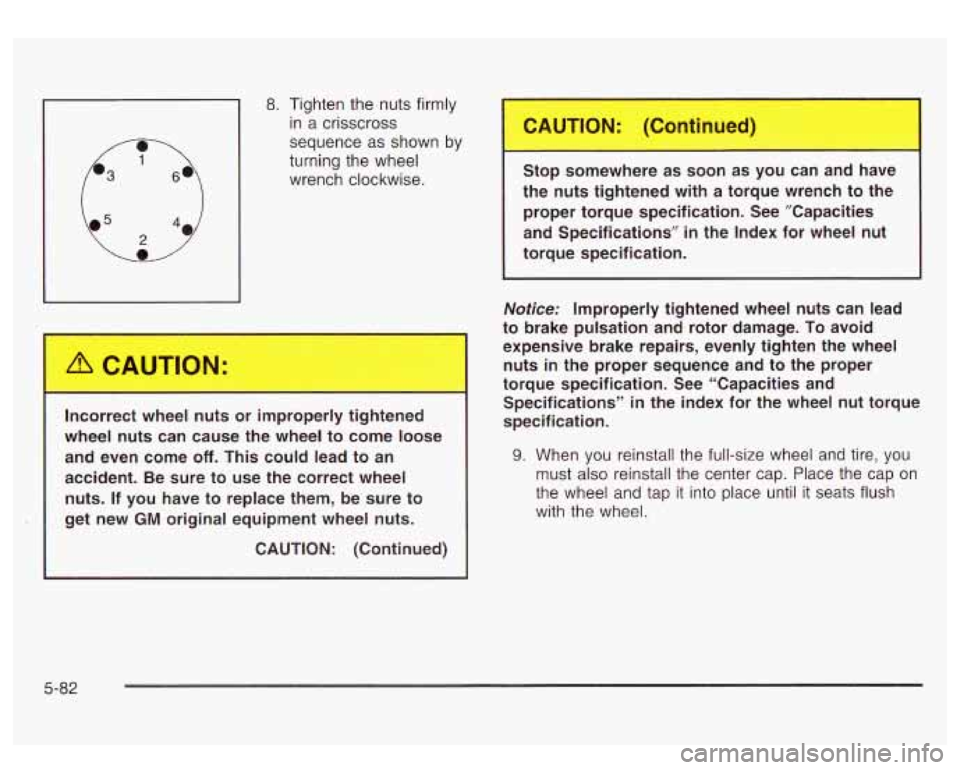
1 in a crisscross
8.
Tighten the nuts firmly
sequence as shown by
turning the wheel
wrench clockwise.
Incorrect wheel
nuts or improperly tightened
wheel nuts can cause the wheel to come loose and even come
off. This could lead to an
accident. Be sure to use the correct wheel
nuts. If you have to replace them, be sure to
get new
GM original equipment wheel nuts.
CAUTION: (Continued) Stop somewhere
as soon as you can and have
the nuts tightened with a torque wrench to the
proper torque specification. See ”Capacities
and Specifications” in the Index for wheel nut
torque specification.
Notice: Improperly tightened wheel nuts can lead
to brake pulsation and rotor damage. To avoid
expensive brake repairs, evenly tighten the wheel
nuts in the proper sequence and to the proper
torque specification. See “Capacities and
Specifications”
in the index for the wheel nut torque
specification.
9. When you reinstall the full-size wheel and tire, you
must
also reinstall the center cap. Place the cap on
the wheel and tap it into place until it seats flush
with the wheel.
5-82
Page 373 of 428
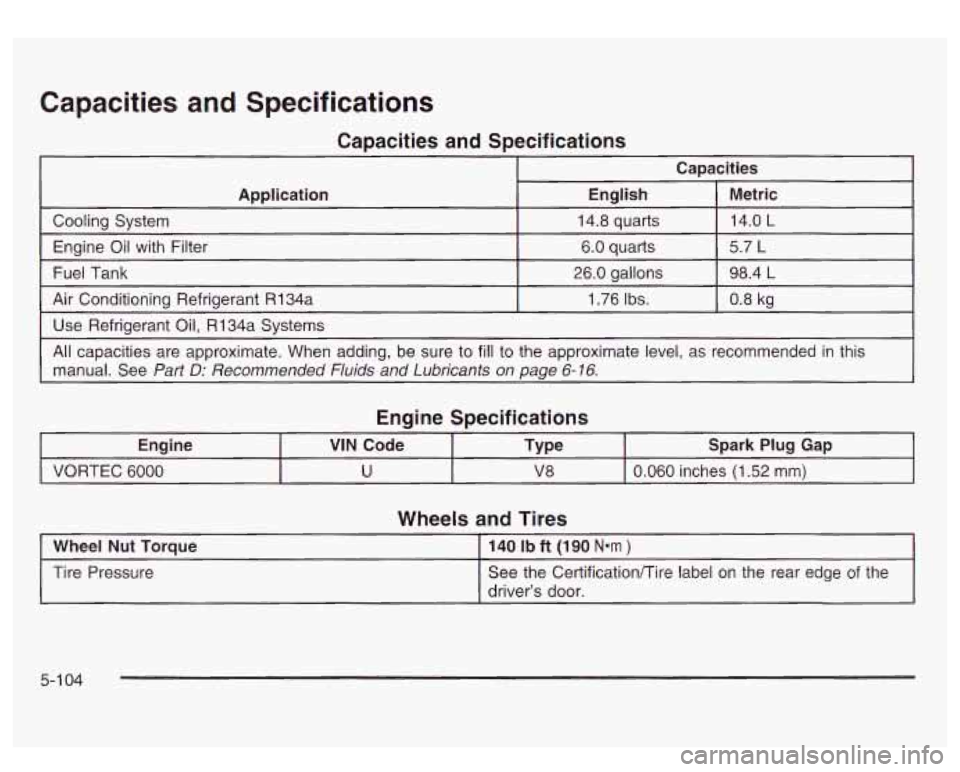
Capacities and Specifications
Capacities and Specifications
Capacities
Application
All capacities are approximate. When adding, be sure to
fill to the approximate level, as recommended in this
Use
Refrigerant Oil, R134a Systems 0.8
kg
1.76 Ibs.
Air Conditioning Refrigerant R134a 98.4
L 26.0 gallons
Fuel
Tank 5.7
L 6.0 quarts
Engine Oil
with Filter 14.0
L 14.8 quarts
Cooling
System Metric
English
manual. See
Part D: Recommended Fluids and Lubricants on page 6-16.
Engine Specifications
Engine Spark Plug Gap
Type
VIN Code
VORTEC 6000
0.060 inches (1.52 mm) V8
U
Wheels and Tires
Wheel Nut Torque
See the CertificationKire label on the rear edge of the
Tire
Pressure 140 Ib ft (190 N*m )
driver’s door.
5-1 04
Page 423 of 428
Taillamps ....................................................... 5-58
Temperature and Compass Display
.................... 2-28
Testing the Alarm
............................................ 2-14
Theft.Deterrent. Radio
..................................... 3-81
Theft-Deterrent Systems
................................... 2-1 3
Content Theft-Deterrent
................................ 2-1 3
Passlock@
................................................... 2-1 4
Tilt Wheel
........................................................ 3-4
Tire Inflation Check
......................................... 6-10
Tires
..................................................... 5.61. 5-90
Buying New Tires
........................................ 5-64
Chains
....................................................... 5-68
Changing a Flat Tire
.................................... 5-69
If a Tire Goes Flat ....................................... 5-68
Inflation
- Tire Pressure ............................... 5-62
Inspection and Rotation
................................ 5-62
Spare Tire
.................................................. 5-85
Uniform Tire Quality Grading
......................... 5-65
Wheel Alignment and Tire Balance
................. 5-67
Wheel Replacement
..................................... 5-67
When It
Is Time for New Tires ...................... 5-64
To Use the Engine Coolant Heater .................... 2-18
Tonneau Cover
............................................ 2-39
Top of the Instrument Panel
.......... ........ 5-87
Top Strap
...................................................... 1-40
Top Strap Anchor Location
............................... 1-41
Torque Lock
................................................... 2-25
Total Weight on Your Vehicle’s Tires
.................. 4-55 Tow/Haul
Mode
............................................... 2-21
Tow/Haul Mode Light
....................................... 3-41
Towing Recreational Vehicle
..................................... 4-45
Towing a Trailer
.......................................... 4-51
Your Vehicle
............................................... 4-45
TRACTION ACTIVE
.................................... 3-58
Trailer Recommendations
....................................... 4-50
Trailer Brakes
................................................. 4-56
Trailer Wiring Harness
..................................... 4-60
Transfer Case
................................................ 5-49
Transmission Fluid, Automatic
.......................... ......... 5-21
Temperature Gage
....................................... 3-36
TRANSMISSION HOT
..................................... 3-59
Transmission Operation, Automatic
.................... 2-18
Transmission, Transaxle, Transfer Case Unit Repair Manual
............................................ 7-10
Transportation Options
...................................... 7-7
Trip Information Button
....................... ..... 3-44
Trip Odometer
................................................ 3-26
Truck-Camper Loading Information
.................... 4-48
Turn and Lane Change Signals
.......................... 3-5
Turn SignaVMultifunction Lever ........................... 3-5
Turn Signals When Towing a Trailer
.................. 4-57
Two-Tiered Loading
......................................... 4-47
TURN
SIGNAL ON
......................................... 3-56
14