lights GMC SIERRA DENALI 2004 Owners Manual
[x] Cancel search | Manufacturer: GMC, Model Year: 2004, Model line: SIERRA DENALI, Model: GMC SIERRA DENALI 2004Pages: 452, PDF Size: 3.02 MB
Page 1 of 452
Seats and Restraint Systems........................... 1-1
Front Seats
............................................... 1-3
Rear Seats
............................................... 1-8
Safety Belts
.............................................. 1-8
Child Restraints
.......................................1-29
Air Bag Systems
......................................1-62
Restraint System Check
............................1-79
Features and Controls..................................... 2-1
Keys
........................................................ 2-2
Doors and Locks
....................................... 2-6
Windows
.................................................2-13
Theft-Deterrent Systems
............................2-15
Starting and Operating Your Vehicle
...........2-18
Mirrors
....................................................2-31
OnStar
žSystem
......................................2-36
HomeLinkžTransmitter
.............................2-38
Storage Areas
.........................................2-42
Vehicle Personalization
.............................2-45
Instrument Panel............................................. 3-1
Instrument Panel Overview
.......................... 3-2
Climate Controls
......................................3-19
Warning Lights, Gages and Indicators
.........3-27
Driver Information Center (DIC)
..................3-46
Audio System(s)
.......................................3-64Driving Your Vehicle....................................... 4-1
Your Driving, the Road, and Your Vehicle
..... 4-2
Towing
...................................................4-48
Service and Appearance Care.......................... 5-1
Service
..................................................... 5-3
Fuel
......................................................... 5-4
Checking Things Under the Hood
................. 5-8
All-Wheel Drive
........................................5-46
Rear Axle
...............................................5-47
Front Axle
...............................................5-48
Bulb Replacement
....................................5-49
Windshield Wiper Blade Replacement
.........5-58
Tires
......................................................5-59
Appearance Care
.....................................5-96
Vehicle Identi®cation
...............................5-104
Electrical System
....................................5-105
Capacities and Speci®cations
...................5-114
Maintenance Schedule..................................... 6-1
Maintenance Schedule
................................ 6-2
Customer Assistance and Information.............. 7-1
Customer Assistance and Information
........... 7-2
Reporting Safety Defects
...........................7-10
Index................................................................ 1
2004 GMC Sierra Denali Owner ManualM
Page 4 of 452
Vehicle Damage Warnings
Also, in this book you will ®nd these notices:
Notice:These mean there is something that could
damage your vehicle.
A notice will tell you about something that can damage
your vehicle. Many times, this damage would not be
covered by your warranty, and it could be costly. But the
notice will tell you what to do to help avoid the
damage.
When you read other manuals, you might see CAUTION
and NOTICE warnings in different colors or in different
words.
You'll also see warning labels on your vehicle. They use
the same words, CAUTION or NOTICE.
Vehicle Symbols
Your vehicle has components and labels that use
symbols instead of text. Symbols, used on your vehicle,
are shown along with the text describing the operation
or information relating to a speci®c component, control,
message, gage or indicator.
If you need help ®guring out a speci®c name of a
component, gage or indicator, reference the following
topics:
·Seats and Restraint Systems in Section 1
·Features and Controls in Section 2
·Instrument Panel Overview in Section 3
·Climate Controls in Section 3
·Warning Lights, Gages and Indicators in Section 3
·Audio System(s) in Section 3
·Engine Compartment Overview in Section 5
iv
Page 10 of 452
Power Lumbar
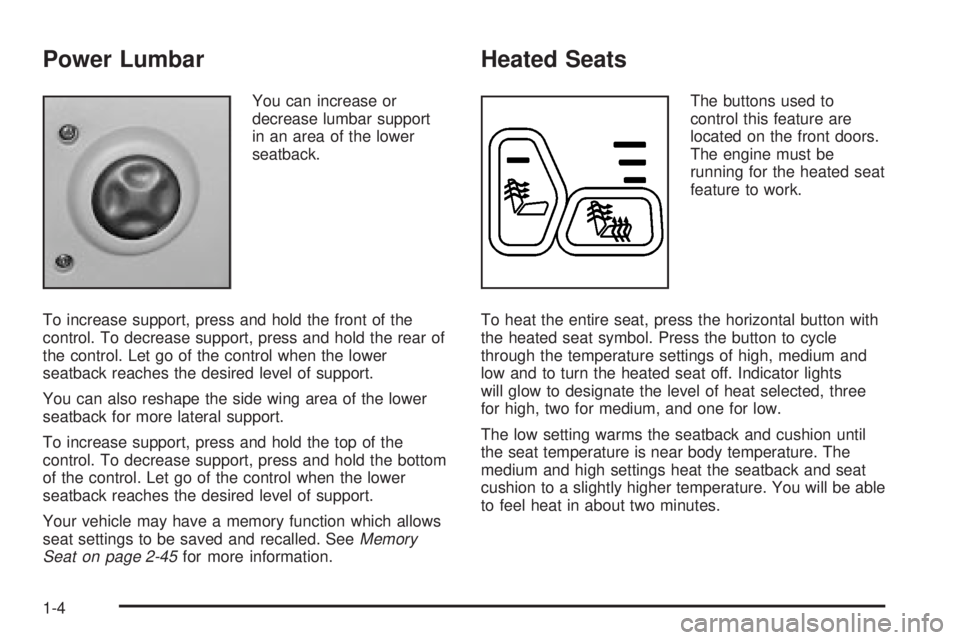
You can increase or
decrease lumbar support
in an area of the lower
seatback.
To increase support, press and hold the front of the
control. To decrease support, press and hold the rear of
the control. Let go of the control when the lower
seatback reaches the desired level of support.
You can also reshape the side wing area of the lower
seatback for more lateral support.
To increase support, press and hold the top of the
control. To decrease support, press and hold the bottom
of the control. Let go of the control when the lower
seatback reaches the desired level of support.
Your vehicle may have a memory function which allows
seat settings to be saved and recalled. See
Memory
Seat on page 2-45for more information.
Heated Seats
The buttons used to
control this feature are
located on the front doors.
The engine must be
running for the heated seat
feature to work.
To heat the entire seat, press the horizontal button with
the heated seat symbol. Press the button to cycle
through the temperature settings of high, medium and
low and to turn the heated seat off. Indicator lights
will glow to designate the level of heat selected, three
for high, two for medium, and one for low.
The low setting warms the seatback and cushion until
the seat temperature is near body temperature. The
medium and high settings heat the seatback and seat
cushion to a slightly higher temperature. You will be able
to feel heat in about two minutes.
1-4
Page 117 of 452
Mirrors
Automatic Dimming Rearview Mirror
with OnStar
ž, Compass and
Temperature Display
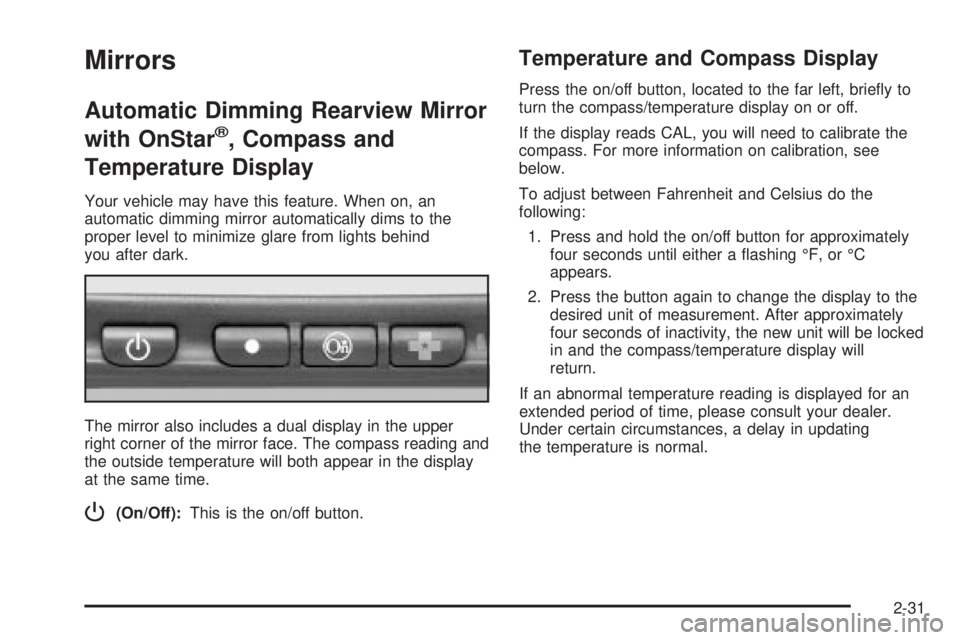
Your vehicle may have this feature. When on, an
automatic dimming mirror automatically dims to the
proper level to minimize glare from lights behind
you after dark.
The mirror also includes a dual display in the upper
right corner of the mirror face. The compass reading and
the outside temperature will both appear in the display
at the same time.
P(On/Off):This is the on/off button.
Temperature and Compass Display
Press the on/off button, located to the far left, brie¯y to
turn the compass/temperature display on or off.
If the display reads CAL, you will need to calibrate the
compass. For more information on calibration, see
below.
To adjust between Fahrenheit and Celsius do the
following:
1. Press and hold the on/off button for approximately
four seconds until either a ¯ashing ÉF, or ÉC
appears.
2. Press the button again to change the display to the
desired unit of measurement. After approximately
four seconds of inactivity, the new unit will be locked
in and the compass/temperature display will
return.
If an abnormal temperature reading is displayed for an
extended period of time, please consult your dealer.
Under certain circumstances, a delay in updating
the temperature is normal.
2-31
Page 133 of 452
Instrument Panel Overview...............................3-2
Hazard Warning Flashers................................3-4
Other Warning Devices...................................3-4
Horn.............................................................3-5
Tilt Wheel.....................................................3-5
Turn Signal/Multifunction Lever.........................3-5
Exterior Lamps.............................................3-12
Interior Lamps..............................................3-16
Accessory Power Outlets...............................3-18
Ashtrays and Cigarette Lighter........................3-19
Climate Controls............................................3-19
Dual Automatic Climate Control System...........3-19
Warning Lights, Gages and Indicators.............3-27
Warning Lights, Gages, and Indicators.............3-27
Instrument Panel Cluster................................3-28
Speedometer and Odometer...........................3-29
Tachometer.................................................3-29
Safety Belt Reminder Light.............................3-29
Air Bag Readiness Light................................3-30
Air Bag Off Light..........................................3-30
Passenger Air Bag Status Indicator.................3-33
Battery Warning Light....................................3-35
Voltmeter Gage............................................3-36
Brake System Warning Light..........................3-37
Anti-Lock Brake System Warning Light.............3-38
Engine Coolant Temperature Gage..................3-38Transmission Temperature Gage.....................3-39
Malfunction Indicator Lamp.............................3-40
Oil Pressure Gage........................................3-43
Cruise Control Light......................................3-44
Tow/Haul Mode Light....................................3-44
Fuel Gage...................................................3-45
Low Fuel Warning Light.................................3-45
Driver Information Center (DIC).......................3-46
DIC Operation and Displays...........................3-46
DIC Warnings and Messages.........................3-57
Audio System(s).............................................3-64
Setting the Time...........................................3-64
Radio with Cassette and CD..........................3-65
Navigation/Radio System...............................3-79
Rear Seat Audio (RSA).................................3-80
CD Changer................................................3-82
Theft-Deterrent Feature..................................3-85
Audio Steering Wheel Controls.......................3-85
Radio Reception...........................................3-86
Care of Your Cassette Tape Player.................3-87
Care of Your CDs.........................................3-88
Care of Your CD Player................................3-88
Fixed Mast Antenna......................................3-88
XMŸ Satellite Radio Antenna System
(48 Contiguous US States).........................3-88
Chime Level Adjustment................................3-88
Section 3 Instrument Panel
3-1
Page 144 of 452
Exterior Lamps
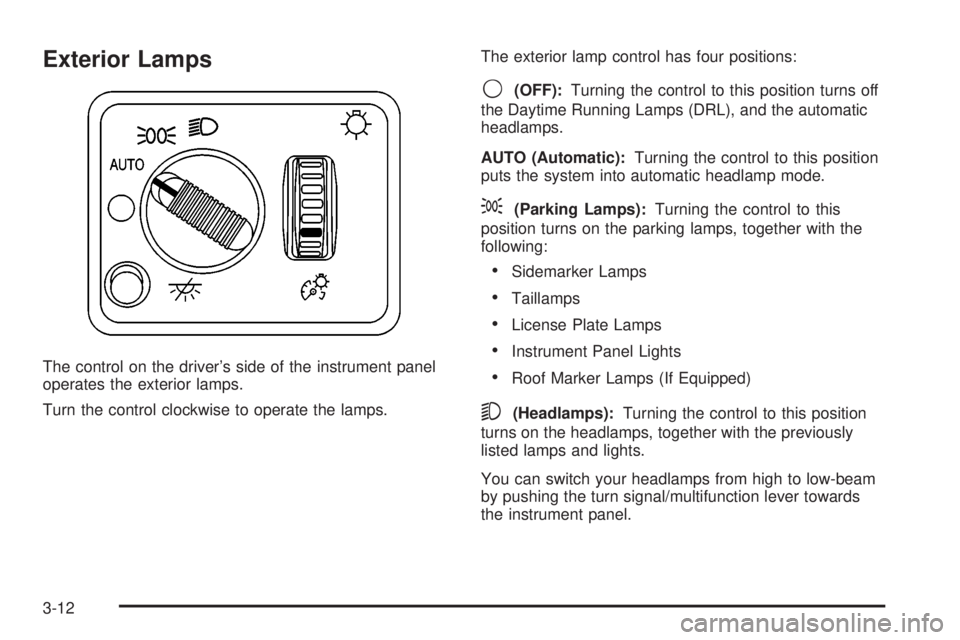
The control on the driver's side of the instrument panel
operates the exterior lamps.
Turn the control clockwise to operate the lamps.The exterior lamp control has four positions:
9(OFF):Turning the control to this position turns off
the Daytime Running Lamps (DRL), and the automatic
headlamps.
AUTO (Automatic):Turning the control to this position
puts the system into automatic headlamp mode.
;(Parking Lamps):Turning the control to this
position turns on the parking lamps, together with the
following:
·Sidemarker Lamps
·Taillamps
·License Plate Lamps
·Instrument Panel Lights
·Roof Marker Lamps (If Equipped)
5(Headlamps):Turning the control to this position
turns on the headlamps, together with the previously
listed lamps and lights.
You can switch your headlamps from high to low-beam
by pushing the turn signal/multifunction lever towards
the instrument panel.
3-12
Page 145 of 452
Automatic Headlamp System
When it is dark enough outside, your automatic
headlamp system will turn on your headlamps at the
normal brightness along with other lamps such as
the taillamps, sidemarker, parking lamps and the
instrument panel lights. The radio lights will also be dim.
Your vehicle is equipped with a headlamp off delay,
which will keep the headlamps on for a short time after
the ignition is turned off. For more information see
DIC Operation and Displays on page 3-46.
Your vehicle has a light sensor located on the top of the
instrument panel in the defroster grille. Be sure it is
not covered, or the system will be on whenever
the ignition is on.
The system may also turn on your headlamps when
driving through a parking garage, heavy overcast
weather or a tunnel. This is normal.
There is a delay in the transition between the daytime
and nighttime operation of the Daytime Running
Lamps (DRL) and the automatic headlamp systems so
that driving under bridges or bright overhead street
lights does not affect the system. The DRL and
automatic headlamp system will only be affected when
the light sensor sees a change in lighting lasting
longer than the delay.If you start your vehicle in a dark garage, the automatic
headlamp system will come on immediately. Once
you leave the garage, it will take approximately
one minute for the automatic headlamp system to
change to DRL if it is bright enough outside. During that
delay, your instrument panel cluster may not be as
bright as usual. Make sure your instrument panel
brightness control is in the full bright position. See
ªInstrument Panel Brightness Controlº under
Interior
Lamps on page 3-16.
To idle your vehicle with the automatic headlamp
system off, turn the control to the off position.
You may be able to turn off your automatic headlamp
system. See Daytime Running Lamps (DRL) later in this
section for more information.
Your headlamps will also stay on after you exit the
vehicle. You can program this feature using the Driver
Information Center. See
Driver Information Center (DIC)
on page 3-46
As with any vehicle, you should turn on the regular
headlamps if you need them.
3-13
Page 148 of 452
Interior Lamps
Instrument Panel Brightness Control
P
:This feature controls the brightness of the
instrument panel lights.
The thumbwheel for this feature is located next to the
exterior lamp control.
Turn the thumbwheel up to adjust the instrument panel
lights and return the radio display to full brightness
when the headlamps or parking lamps are on. To turn
on the dome lamps, with the vehicle doors closed,
turn the thumbwheel all the way up.
Exit Lighting
With exit lighting, the interior lamps will come on when
you remove the key from the ignition. The lamps will not
come on if the dome override button is pressed in.
Entry Lighting
Your vehicle is equipped with an illuminated entry
feature.
When a door is opened, the dome lamps and puddle
lamps will come on if the dome override button is in the
out position. If the dome override button is pressed
in, the lamps will not come on.
3-16
Page 159 of 452
Warning Lights, Gages and
Indicators
Warning Lights, Gages, and
Indicators
This part describes the warning lights and gages that
may be on your vehicle. The pictures will help you
locate them.
Warning lights and gages can signal that something is
wrong before it becomes serious enough to cause
an expensive repair or replacement. Paying attention to
your warning lights and gages could also save you
or others from injury.
Warning lights come on when there may be or is a
problem with one of your vehicle's functions. As you will
see in the details on the next few pages, some
warning lights come on brie¯y when you start the
engine just to let you know they're working. If you are
familiar with this section, you should not be alarmed
when this happens.Gages can indicate when there may be or is a problem
with one of your vehicle's functions. Often gages
and warning lights work together to let you know when
there's a problem with your vehicle.
When one of the warning lights comes on and stays on
when you are driving, or when one of the gages
shows there may be a problem, check the section that
tells you what to do about it. Please follow this
manual's advice. Waiting to do repairs can be
costly ± and even dangerous. So please get to know
your warning lights and gages. They're a big help.
Your vehicle also has a driver information system that
works along with the warning lights and gages. See
Driver Information Center (DIC) on page 3-46.
3-27
Page 167 of 452
If, after several seconds, all status indicator lights
remain on, or if there are no lights at all, there may be a
problem with the lights or the passenger sensing
system. See your dealer for service.
{CAUTION:
If the air bag off indicator and the air bag
readiness light ever come on together, it
means that something may be wrong with the
air bag system. If this ever happens, have the
vehicle serviced promptly, because an
adult-size person sitting in the right front
passenger seat may not have the protection of
the air bag. See²Air Bag Readiness Light²in
the Index.
Battery Warning Light
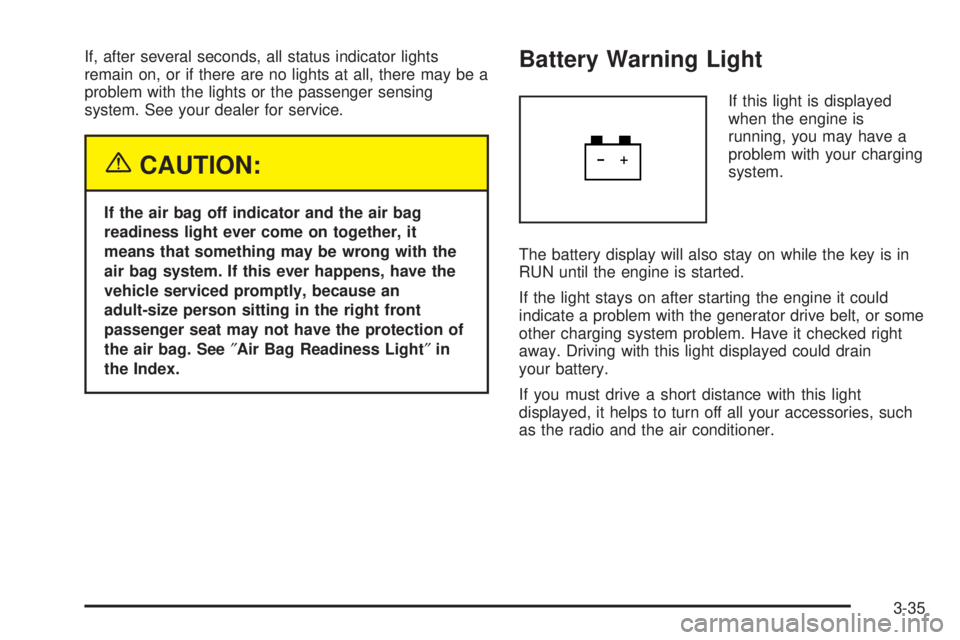
If this light is displayed
when the engine is
running, you may have a
problem with your charging
system.
The battery display will also stay on while the key is in
RUN until the engine is started.
If the light stays on after starting the engine it could
indicate a problem with the generator drive belt, or some
other charging system problem. Have it checked right
away. Driving with this light displayed could drain
your battery.
If you must drive a short distance with this light
displayed, it helps to turn off all your accessories, such
as the radio and the air conditioner.
3-35