stop start GMC SIERRA DENALI 2010 User Guide
[x] Cancel search | Manufacturer: GMC, Model Year: 2010, Model line: SIERRA DENALI, Model: GMC SIERRA DENALI 2010Pages: 550, PDF Size: 4.17 MB
Page 169 of 550
Roof Rack System
{WARNING:
If something is carried on top of the vehicle that is
longer or wider than the roof rack—like paneling,
plywood, or a mattress— the wind can catch it
while the vehicle is being driven. The item being
carried could be violently torn off, and this could
cause a collision, and damage the vehicle. Never
carry something longer or wider than the roof rack
on top of the vehicle unless using a GM Certified
accessory carrier.
For vehicles with a roof rack, the rack can be used to
load items. For roof racks that do not have crossrails
included, GM Certified crossrails can be purchased as
an accessory. See your dealer/retailer for additional
information.
Notice: Loading cargo on the roof rack that weighs
more than 91 kg (200 lbs) or hangs over the rear or
sides of the vehicle may damage the vehicle. Load
cargo so that it rests evenly between the crossrails,
making sure to fasten cargo securely. To prevent damage or loss of cargo when driving, check
to make sure crossrails and cargo are securely
fastened. Loading cargo on the roof rack will make the
vehicle’s center of gravity higher. Avoid high speeds,
sudden starts, sharp turns, sudden braking or abrupt
maneuvers, otherwise it may result in loss of control.
If driving for a long distance, on rough roads, or at high
speeds, occasionally stop the vehicle to make sure the
cargo remains in its place.
Do not exceed the maximum vehicle capacity when
loading the vehicle. For more information on vehicle
capacity and loading, see
Loading the Vehicle
on
page 5‑31.
.If small heavy objects are placed on the roof, cut a
piece of 3/8 inch plywood to fit inside the crossrails
and siderails to spread the load. Tie the plywood to
the siderail supports.
.Tie the load and secure it to the crossrails or the
siderail supports. Use the crossrails only to keep
the load from sliding. To move a crossrail, lift the
release lever up, on both sides of the rail. Then
slide the crossrail to the desired position balancing
the force side to side. Press the release lever
down on both sides of the rail, down to tighten it.
Try to slide the crossrail back and forth slightly to
make sure it is tight.
3-59
Page 208 of 550
Antilock Brake System (ABS)
Warning Light
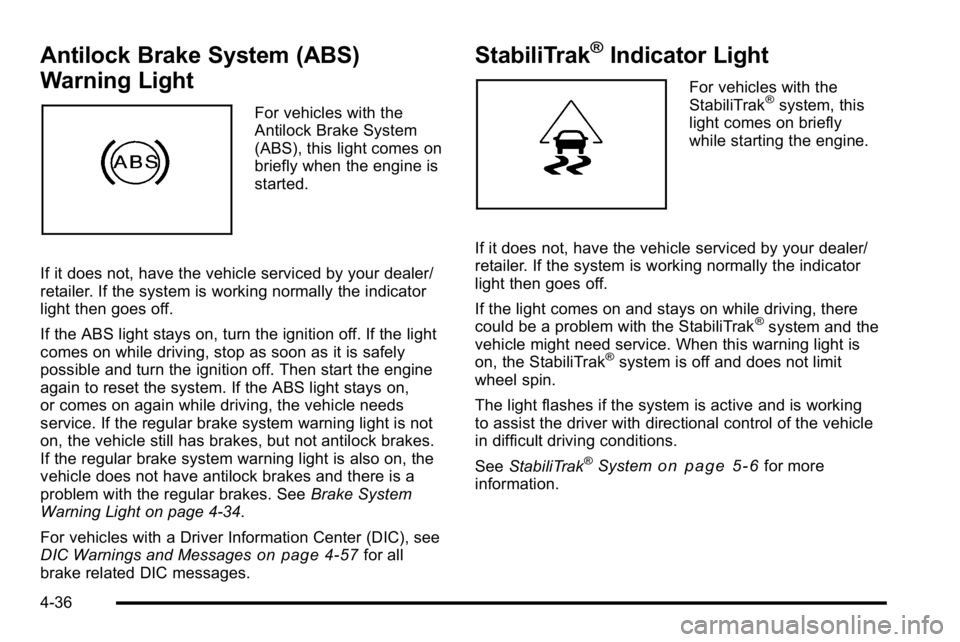
For vehicles with the
Antilock Brake System
(ABS), this light comes on
briefly when the engine is
started.
If it does not, have the vehicle serviced by your dealer/
retailer. If the system is working normally the indicator
light then goes off.
If the ABS light stays on, turn the ignition off. If the light
comes on while driving, stop as soon as it is safely
possible and turn the ignition off. Then start the engine
again to reset the system. If the ABS light stays on,
or comes on again while driving, the vehicle needs
service. If the regular brake system warning light is not
on, the vehicle still has brakes, but not antilock brakes.
If the regular brake system warning light is also on, the
vehicle does not have antilock brakes and there is a
problem with the regular brakes. See Brake System
Warning Light on page 4‑34.
For vehicles with a Driver Information Center (DIC), see
DIC Warnings and Messages
on page 4‑57for all
brake related DIC messages.
StabiliTrak®Indicator Light
For vehicles with the
StabiliTrak®system, this
light comes on briefly
while starting the engine.
If it does not, have the vehicle serviced by your dealer/
retailer. If the system is working normally the indicator
light then goes off.
If the light comes on and stays on while driving, there
could be a problem with the StabiliTrak
®system and the
vehicle might need service. When this warning light is
on, the StabiliTrak
®system is off and does not limit
wheel spin.
The light flashes if the system is active and is working
to assist the driver with directional control of the vehicle
in difficult driving conditions.
See StabiliTrak
®Systemon page 5‑6for more
information.
4-36
Page 209 of 550
Engine Coolant Temperature Gage
United StatesCanada
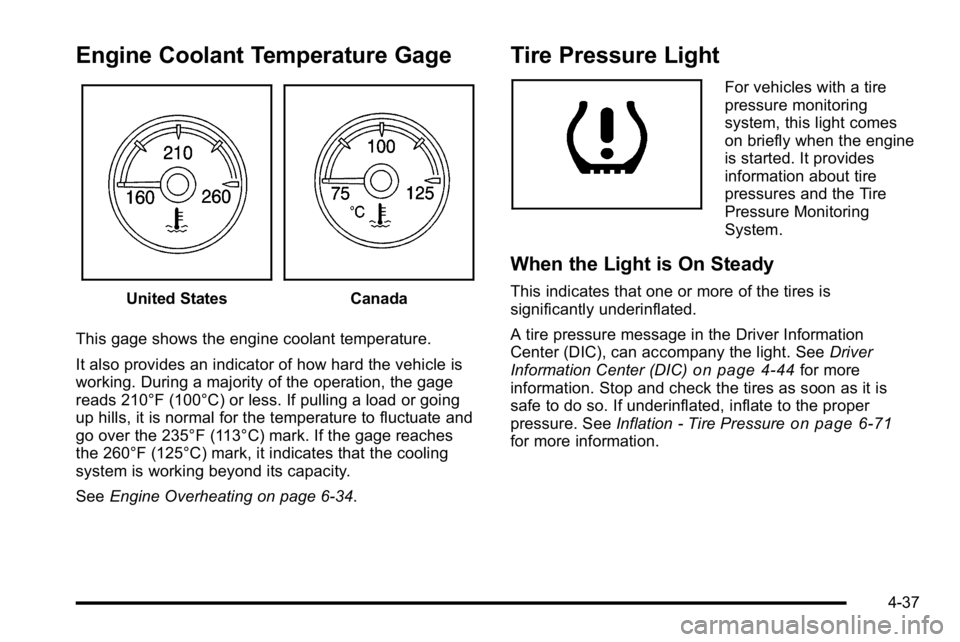
This gage shows the engine coolant temperature.
It also provides an indicator of how hard the vehicle is
working. During a majority of the operation, the gage
reads 210°F (100°C) or less. If pulling a load or going
up hills, it is normal for the temperature to fluctuate and
go over the 235°F (113°C) mark. If the gage reaches
the 260°F (125°C) mark, it indicates that the cooling
system is working beyond its capacity.
See Engine Overheating on page 6‑34.
Tire Pressure Light
For vehicles with a tire
pressure monitoring
system, this light comes
on briefly when the engine
is started. It provides
information about tire
pressures and the Tire
Pressure Monitoring
System.
When the Light is On Steady
This indicates that one or more of the tires is
significantly underinflated.
A tire pressure message in the Driver Information
Center (DIC), can accompany the light. See Driver
Information Center (DIC)
on page 4‑44for more
information. Stop and check the tires as soon as it is
safe to do so. If underinflated, inflate to the proper
pressure. See Inflation - Tire Pressure
on page 6‑71for more information.
4-37
Page 211 of 550
This light comes on during a malfunction in one of
two ways:
Light Flashing :A misfire condition has been detected.
A misfire increases vehicle emissions and could
damage the emission control system on the vehicle.
Diagnosis and service might be required.
To prevent more serious damage to the vehicle:
.Reduce vehicle speed.
.Avoid hard accelerations.
.Avoid steep uphill grades.
.If towing a trailer, reduce the amount of cargo
being hauled as soon as it is possible.
If the light continues to flash, when it is safe to do so,
stop the vehicle. Find a safe place to park the vehicle.
Turn the key off, wait at least 10 seconds, and restart
the engine. If the light is still flashing, follow the
previous steps and see your dealer/retailer for service
as soon as possible.
Light On Steady : An emission control system
malfunction has been detected on the vehicle.
Diagnosis and service might be required.
An emission system malfunction might be corrected by
doing the following:
.Make sure the fuel cap is fully installed. See Filling
the Tankon page 6‑10. The diagnostic system
can determine if the fuel cap has been left off or improperly installed. A loose or missing fuel cap
allows fuel to evaporate into the atmosphere. A few
driving trips with the cap properly installed should
turn the light off.
.If the vehicle has been driven through a deep
puddle of water, the vehicle's electrical system
might be wet. The condition is usually corrected
when the electrical system dries out. A few driving
trips should turn the light off.
.Make sure to fuel the vehicle with quality fuel. Poor
fuel quality causes the engine not to run as
efficiently as designed and can cause: stalling after
start-up, stalling when the vehicle is changed into
gear, misfiring, hesitation on acceleration,
or stumbling on acceleration. These conditions
might go away once the engine is warmed up.
If one or more of these conditions occurs, change
the fuel brand used. It will require at least one full
tank of the proper fuel to turn the light off.
See Gasoline Octane on page 6‑7.
If none of the above have made the light turn off, your
dealer/retailer can check the vehicle. The dealer/retailer
has the proper test equipment and diagnostic tools to fix
any mechanical or electrical problems that might have
developed.
4-39
Page 222 of 550
Fuel Range
Press the trip/fuel button until FUEL RANGE displays.
This display shows the approximate number of
remaining miles (mi) or kilometers (km) the vehicle can
be driven without refueling. The display will show LOW
if the fuel level is low.
The fuel range estimate is based on an average of the
vehicle's fuel economy over recent driving history and
the amount of fuel remaining in the fuel tank. This
estimate will change if driving conditions change. For
example, if driving in traffic and making frequent stops,
this display may read one number, but if the vehicle is
driven on a freeway, the number may change even
though the same amount of fuel is in the fuel tank. This
is because different driving conditions produce different
fuel economies. Generally, freeway driving produces
better fuel economy than city driving. Fuel range cannot
be reset.
Average Economy
Press the trip/fuel button until AVG ECONOMY
displays. This display shows the approximate average
miles per gallon (mpg) or liters per 100 kilometers
(L/100 km). This number is calculated based on the
number of mpg (L/100 km) recorded since the last time
this menu item was reset. To reset AVG ECONOMY,
press and hold the set/reset button.
Fuel Used
Press the trip/fuel button until FUEL USED displays.
This display shows the number of gallons (gal) or
liters (L) of fuel used since the last reset of this menu
item. To reset the fuel used information, press and hold
the set/reset button while FUEL USED is displayed.
Timer
Press the trip/fuel button until TIMER displays. This
display can be used as a timer.
To start the timer, press the set/reset button while
TIMER is displayed. The display will show the amount
of time that has passed since the timer was last reset,
not including time the ignition is off. Time will continue
to be counted as long as the ignition is on, even if
another display is being shown on the DIC. The
timer will record up to 99 hours, 59 minutes and
59 seconds (99:59:59) after which the display will
return to zero.
To stop the timer, press the set/reset button briefly while
TIMER is displayed.
To reset the timer to zero, press and hold the set/reset
button while TIMER is displayed.
4-50
Page 230 of 550
BATTERY LOW START VEHICLE
When the vehicle’s battery is severely discharged, this
message will display and four chimes will sound. Start
the vehicle immediately. If the vehicle is not started and
the battery continues to discharge, the climate controls,
heated seats, and audio systems will shut off and the
vehicle may require a jump start. These systems will
function again after the vehicle is started.
CHANGE ENGINE OIL SOON
This message displays when the engine oil needs to be
changed. When you change the engine oil, be sure to
reset the CHANGE ENGINE OIL SOON message. See
Engine Oil Life System
on page 6‑20for information on
how to reset the message. See Engine Oilon
page 6‑18and Scheduled Maintenanceon page 7‑3for more information.
CHECK TRAILER WIRING
On vehicles with the Integrated Trailer Brake Control
(ITBC) system, this message may display and a chime
may sound when one of the following conditions exists:
.A trailer with electric brakes becomes
disconnected from the vehicle.
‐If the disconnect occurs while the vehicle is
stopped, this message clears itself after a
short time.
‐ If the disconnect occurs while the vehicle is
moving, this message stays on until the ignition
is turned off.
.There is a short in the wiring to the electric trailer
brakes.
When this message displays, power is no longer
available to the trailer brakes.
As soon as it is safe to do so, carefully pull your vehicle
over to the side of the road and turn the ignition off.
Check the wiring connection to the trailer and turn the
ignition back on. This message clears if the trailer is
reconnected. This message also clears if you
acknowledge it. If this message still displays, either
your vehicle or the trailer needs service. See your
dealer/retailer.
See “Integrated Trailer Brake Control System” under
Towing a Trailer
on page 5‑42for more information.
4-58
Page 233 of 550
PARK ASST BLOCKED SEE OWNERS
MANUAL
If your vehicle has the Ultrasonic Rear Parking Assist
(URPA) system, this message displays if there is
something interfering with the park assist system. See
Ultrasonic Rear Parking Assist (URPA)
on page 3‑43for more information.
PARK ASSIST OFF
On vehicles with the Ultrasonic Rear Parking Assist
(URPA) system, after the vehicle has been started, this
message displays to remind the driver that the URPA
system has been turned off. Press the set/reset button
or the trip odometer reset stem to acknowledge this
message and clear it from the DIC display. To turn the
URPA system back on, seeUltrasonic Rear Parking
Assist (URPA) on page 3‑43.
PASSENGER DOOR OPEN
This message displays and a chime sounds if the front
passenger door is not fully closed and the vehicle is
shifted out of P (Park). Stop and turn off the vehicle,
check the door for obstructions, and close the door
again. Check to see if the message still appears on
the DIC.
REMOTE KEY LEARNING ACTIVE
This message displays while you are matching a
Remote Keyless Entry (RKE) transmitter to your
vehicle. See “Matching Transmitter(s) to Your Vehicle”
under Remote Keyless Entry (RKE) System Operation
on page 3‑4and“DIC Operation and Displays (Using
DIC Buttons)” earlier in this section for more
information.
REPLACE BATTERY IN REMOTE KEY
This message displays if a Remote Keyless Entry
(RKE) transmitter battery is low. The battery needs to
be replaced in the transmitter. See “Battery
Replacement” underRemote Keyless Entry (RKE)
System Operation on page 3‑4.
RIGHT REAR DOOR OPEN
This message displays and a chime sounds if the
passenger side rear door is not fully closed and the
vehicle is shifted out of P (Park). Stop and turn off the
vehicle, check the door for obstructions, and close the
door again. Check to see if the message still appears
on the DIC.
4-61
Page 234 of 550
SERVICE 4 WHEEL DRIVE
If your vehicle has the all-wheel-drive (AWD) system,
this message displays if a problem occurs with this
system. If this message appears, stop as soon as
possible and turn off the vehicle. Restart the vehicle
and check for the message on the DIC display. If the
message is still displayed or appears again when you
begin driving, the AWD system needs service. See your
dealer/retailer.
SERVICE AIR BAG
This message displays if there is a problem with the
airbag system. Have your dealer/retailer inspect the
system for problems. SeeAirbag Readiness Light
on
page 4‑31and Airbag Systemon page 2‑56for more
information.
SERVICE BATTERY CHARGING
SYSTEM
On some vehicles, this message displays if there is a
problem with the battery charging system. Under certain
conditions, the charging system light may also turn on
in the instrument panel cluster. See Charging System
Light
on page 4‑33. Driving with this problem could
drain the battery. Turn off all unnecessary accessories.
Have the electrical system checked as soon as
possible. See your dealer/retailer.
SERVICE BRAKE SYSTEM
This message displays along with the brake system
warning light if there is a problem with the brake
system. See Brake System Warning Light
on
page 4‑34. If this message appears, stop as soon as
possible and turn off the vehicle. Restart the vehicle
and check for the message on the DIC display. If the
message is still displayed or appears again when you
begin driving, the brake system needs service as soon
as possible. See your dealer/retailer.
SERVICE BRAKES SOON
This message displays if there is a problem with the
brake system. If this message appears, stop as soon as
possible and turn off the vehicle. Restart the vehicle
and check for the message on the DIC display. If the
message is still displayed or appears again when you
begin driving, the brake system needs service. See
your dealer/retailer.
4-62
Page 235 of 550
SERVICE PARK ASSIST
On vehicles with the Ultrasonic Rear Parking Assist
(URPA) system, this message displays if there is a
problem with the URPA system. Do not use this system
to help you park. SeeUltrasonic Rear Parking Assist
(URPA)
on page 3‑43for more information. See your
dealer/retailer for service.
SERVICE STABILITRAK
If your vehicle has StabiliTrak®and this message
displays, it means there may be a problem with the
StabiliTrak system. If you see this message, try to reset
the system. Stop; turn off the engine for at least
15 seconds; then start the engine again. If this message
still comes on, it means there is a problem. You should
see your dealer/retailer for service. The vehicle is safe
to drive, however, you do not have the benefit of
StabiliTrak, so reduce your speed and drive accordingly.
SERVICE THEFT DETERRENT SYSTEM
This message displays when there is a problem with the
theft-deterrent system. The vehicle may or may not
restart so you may want to take the vehicle to your
dealer/retailer before turning off the engine. See
PASS-Key
®III+ Electronic Immobilizer Operationon
page 3‑20for more information.
SERVICE TIRE MONITOR SYSTEM
If your vehicle has the Tire Pressure Monitor System
(TPMS), this message displays if a part on the system
is not working properly. The tire pressure light also
flashes and then remains on during the same ignition
cycle. See Tire Pressure Light
on page 4‑37. Several
conditions may cause this message to appear. See Tire
Pressure Monitor Operation
on page 6‑74for more
information. If the warning comes on and stays on,
there may be a problem with the TPMS. See your
dealer/retailer.
SERVICE TRACTION CONTROL
If your vehicle has StabiliTrak, this message displays
when there is a problem with the Traction Control
System (TCS). When this message displays, the
system will not limit wheel spin. Adjust your driving
accordingly. See your dealer/retailer for service. See
StabiliTrak
®Systemon page 5‑6for more
information.
4-63
Page 260 of 550
If the ignition or radio is turned off with a CD in the
player it stays in the player. When the ignition or radio is
turned on, the CD starts to play where it stopped, if it
was the last selected audio source.
When the CD is inserted, the CD symbol displays. As
each new track starts to play, the track number displays.
The CD player can play the smaller 3 inch (8 cm) single
CDs with an adapter ring. Full-size CDs and the smaller
CDs are loaded in the same manner.
Ejecting a Disc
Z
EJECT or CD (Eject):Press and release to eject
the disc that is currently playing. A CD ejecting from a
radio with CD/MP3/DVD and USB, ejects from the
bottom slot. A beep sounds and Ejecting Disc displays.
Once the disc is ejected, Remove Disc displays. The
disc can be removed. If the disc is not removed, after
several seconds, the disc automatically pulls back into
the player.
ZDVD (Eject): Press and release to eject the disc
that is currently playing in the top slot. A beep sounds
and Ejecting Disc displays.
If loading and reading of a disc cannot be completed,
such as unknown format, etc., and the disc fails to eject,
press and hold for more than five seconds to force the
disc to eject.
Playing a CD (In Either the DVD or
CD Slot)
Insert a CD partway into the slot, label side up. The
player pulls it in and the CD should begin playing
(loading a disc into the system, depending on media
type and format ranges from 5 to 20 seconds for a CD,
and up to 30 seconds for a DVD to begin playing).
If the ignition or radio is turned off, with a CD in the
player, it stays in the player. When the ignition or radio
is turned on, the CD starts playing where it stopped, if it
was the last selected audio source. The CD is
controlled by the buttons on the radio faceplate or by
the RSA unit. See Rear Seat Audio (RSA)
on
page 4‑135for more information. The DVD/CD decks,
(upper slot is the DVD deck and the lower slot is the CD
deck) of the radio are compatible with most audio CDs,
CD-R, CD-RW, and MP3s.
When a CD is inserted, the text tab DVD or CD symbol
displays on the left side of the radio display. As each
new track starts to play, the track number displays.
The CD player can play the smaller 3 inch (8 cm) single
CDs with an adapter ring. Full-size CDs and the smaller
CDs are loaded in the same manner.
4-88