brake GMC SIERRA DENALI 2010 Owners Manual
[x] Cancel search | Manufacturer: GMC, Model Year: 2010, Model line: SIERRA DENALI, Model: GMC SIERRA DENALI 2010Pages: 550, PDF Size: 4.17 MB
Page 5 of 550
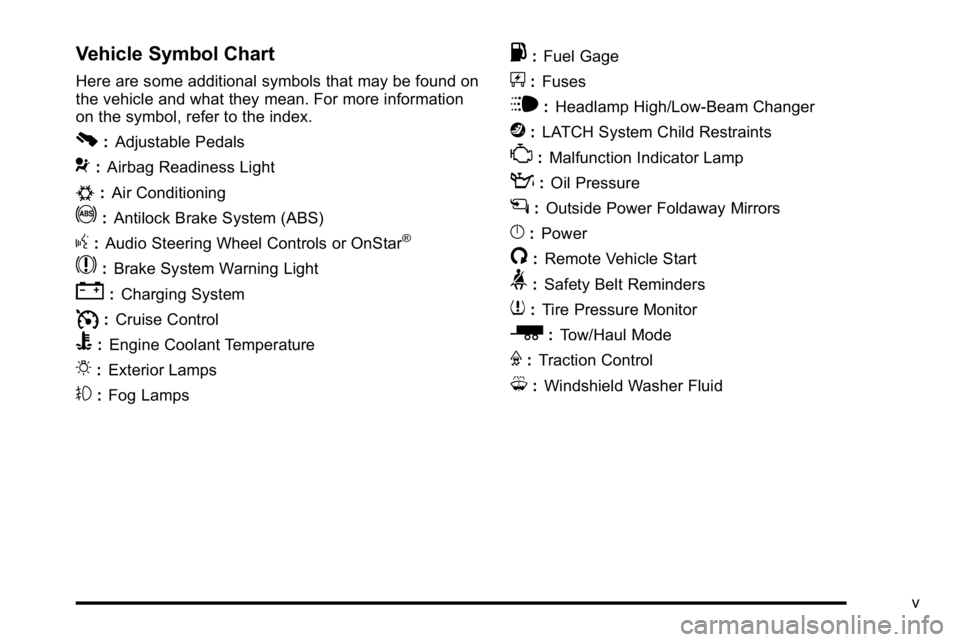
Vehicle Symbol Chart
Here are some additional symbols that may be found on
the vehicle and what they mean. For more information
on the symbol, refer to the index.
0:Adjustable Pedals
9:Airbag Readiness Light
#:Air Conditioning
!:Antilock Brake System (ABS)
g:Audio Steering Wheel Controls or OnStar®
$: Brake System Warning Light
":Charging System
I:Cruise Control
B: Engine Coolant Temperature
O:Exterior Lamps
#:Fog Lamps
.: Fuel Gage
+:Fuses
i: Headlamp High/Low-Beam Changer
j:LATCH System Child Restraints
*: Malfunction Indicator Lamp
::Oil Pressure
g:Outside Power Foldaway Mirrors
}:Power
/:Remote Vehicle Start
>:Safety Belt Reminders
7:Tire Pressure Monitor
_: Tow/Haul Mode
F:Traction Control
M:Windshield Washer Fluid
v
Page 7 of 550
Section 1 In Brief
Instrument Panel. . . . . . . . . . . . . . . . . . . . . . . . . . . . . . . . . . . 1-2
Initial Drive Information . . . . . . . . . . . . . . . . . . . . . . . . . . . 1-4
Remote Keyless Entry (RKE) System . . . . . . . . . . . 1-4
Remote Vehicle Start . . . . . . . . . . . . . . . . . . . . . . . . . . . 1-5
Door Locks . . . . . . . . . . . . . . . . . . . . . . . . . . . . . . . . . . . . . 1-5
Windows . . . . . . . . . . . . . . . . . . . . . . . . . . . . . . . . . . . . . . . . 1-6
Seat Adjustment . . . . . . . . . . . . . . . . . . . . . . . . . . . . . . . . 1-7
Heated Seats . . . . . . . . . . . . . . . . . . . . . . . . . . . . . . . . . . . 1-9
Heated and Ventilated Seats . . . . . . . . . . . . . . . . . . . . 1-9
Head Restraint Adjustment . . . . . . . . . . . . . . . . . . . . 1-10
Safety Belt . . . . . . . . . . . . . . . . . . . . . . . . . . . . . . . . . . . . . 1-10
Sensing System for Passenger Airbag . . . . . . . . . 1-11
Mirror Adjustment . . . . . . . . . . . . . . . . . . . . . . . . . . . . . . 1-11
Steering Wheel Adjustment . . . . . . . . . . . . . . . . . . . . 1-12
Throttle and Brake Pedal Adjustment . . . . . . . . . . 1-13
Interior Lighting . . . . . . . . . . . . . . . . . . . . . . . . . . . . . . . . 1-13
Exterior Lighting . . . . . . . . . . . . . . . . . . . . . . . . . . . . . . . 1-14
Windshield Wiper/Washer . . . . . . . . . . . . . . . . . . . . . . 1-15
Climate Controls . . . . . . . . . . . . . . . . . . . . . . . . . . . . . . . 1-15
Transmission . . . . . . . . . . . . . . . . . . . . . . . . . . . . . . . . . . 1-17 Vehicle Features
. . . . . . . . . . . . . . . . . . . . . . . . . . . . . . . . . . 1-18
Radio(s) . . . . . . . . . . . . . . . . . . . . . . . . . . . . . . . . . . . . . . . 1-18
Satellite Radio . . . . . . . . . . . . . . . . . . . . . . . . . . . . . . . . . 1-19
Portable Audio Devices . . . . . . . . . . . . . . . . . . . . . . . . 1-19
Steering Wheel Controls . . . . . . . . . . . . . . . . . . . . . . . 1-20
Bluetooth
®. . . . . . . . . . . . . . . . . . . . . . . . . . . . . . . . . . . . . 1-20
Navigation System . . . . . . . . . . . . . . . . . . . . . . . . . . . . . 1-20
Driver Information Center (DIC) . . . . . . . . . . . . . . . . 1-21
Cruise Control . . . . . . . . . . . . . . . . . . . . . . . . . . . . . . . . . 1-22
Rear Vision Camera (RVC) . . . . . . . . . . . . . . . . . . . . 1-23
Ultrasonic Parking Assist . . . . . . . . . . . . . . . . . . . . . . 1-23
Power Outlets . . . . . . . . . . . . . . . . . . . . . . . . . . . . . . . . . 1-23
Universal Remote System . . . . . . . . . . . . . . . . . . . . . 1-23
Sunroof . . . . . . . . . . . . . . . . . . . . . . . . . . . . . . . . . . . . . . . . 1-24
Performance and Maintenance . . . . . . . . . . . . . . . . . .1-24
StabiliTrak
®. . . . . . . . . . . . . . . . . . . . . . . . . . . . . . . . . . . . 1-24
Tire Pressure Monitor . . . . . . . . . . . . . . . . . . . . . . . . . . 1-25
Engine Oil Life System . . . . . . . . . . . . . . . . . . . . . . . . 1-25
Fuel E85 (85% Ethanol) . . . . . . . . . . . . . . . . . . . . . . . 1-26
Driving for Better Fuel Economy . . . . . . . . . . . . . . . 1-26
Roadside Assistance Program . . . . . . . . . . . . . . . . . 1-27
OnStar
®. . . . . . . . . . . . . . . . . . . . . . . . . . . . . . . . . . . . . . . 1-27
1-1
Page 9 of 550

A.Outlet Adjustment on page 4‑27.
B. Turn Signal/Multifunction Lever on page 4‑4.
C. Instrument Panel Cluster on page 4‑28.
D. Hazard Warning Flashers
on page 4‑3.
E. Shift Lever. See Automatic Transmission Operation
on page 3‑28.
F. Tow/Haul Mode
on page 3‑32(If Equipped).
G. Driver Information Center (DIC) Buttons. See Driver Information Center (DIC) on page 4‑44.
H. Audio System(s) on page 4‑76.
I. Exterior Lamps on page 4‑10.
J. Integrated Trailer Brake Controller (If Equipped). See Towing a Trailer on page 5‑42.
K. Dome Lamp Override
on page 4‑14.Dome Lampson page 4‑13.
L. Cruise Control on page 4‑7.
M. Hood Release on page 6‑14.
N. Parking Brake on page 3‑34. O.
Tilt Wheel on page 4‑3.
P. Horn on page 4‑3.
Q. Audio Steering Wheel Controls on page 4‑137.
R. Climate Control System (With Air Conditioning)
on
page 4‑17or Climate Control System (With Heater
Only)on page 4‑20or Dual Automatic Climate
Control Systemon page 4‑21(If Equipped).
S. Accessory Power Outlet(s)
on page 4‑16.
Cigarette Lighter (If Equipped). See Ashtray(s) and
Cigarette Lighter
on page 4‑17.
T. StabiliTrak®Systemon page 5‑6(If Equipped).
Pedal Adjust Button (If Equipped). See Adjustable
Throttle and Brake Pedal
on page 3‑26. Ultrasonic
Rear Parking Assist (URPA)on page 3‑43(If Equipped). Heated Windshield Washer Fluid
Button (If Equipped). See Windshield Washeron
page 4‑6.
U. Passenger Airbag Off Control (If Equipped). See Passenger Sensing System on page 2‑66.
V. Glove Box on page 3‑57.
1-3
Page 14 of 550
Power Reclining Seatbacks
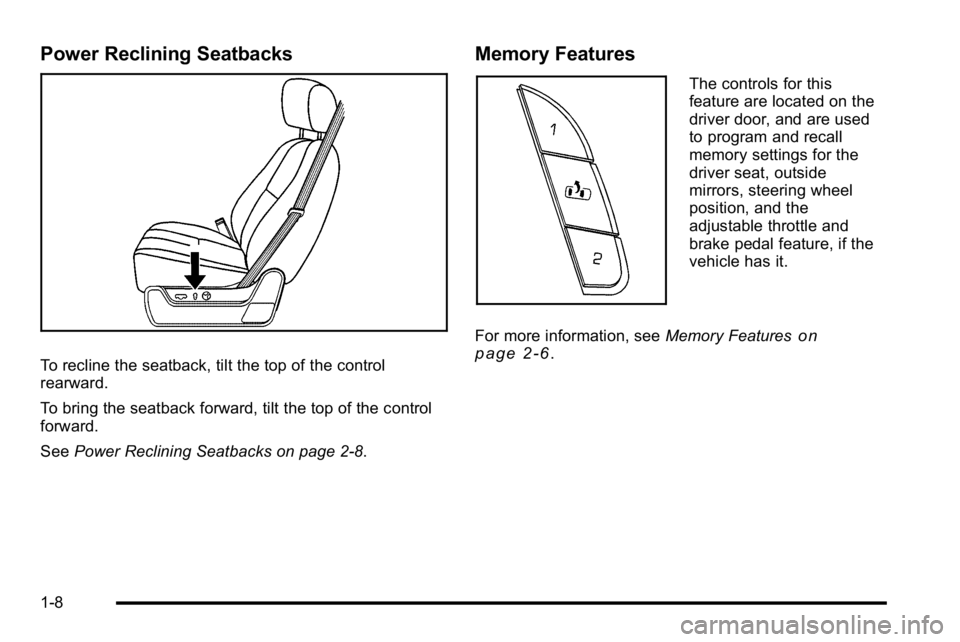
To recline the seatback, tilt the top of the control
rearward.
To bring the seatback forward, tilt the top of the control
forward.
SeePower Reclining Seatbacks on page 2‑8.
Memory Features
The controls for this
feature are located on the
driver door, and are used
to program and recall
memory settings for the
driver seat, outside
mirrors, steering wheel
position, and the
adjustable throttle and
brake pedal feature, if the
vehicle has it.
For more information, see Memory Features
on
page 2‑6.
1-8
Page 19 of 550
Throttle and Brake Pedal Adjustment
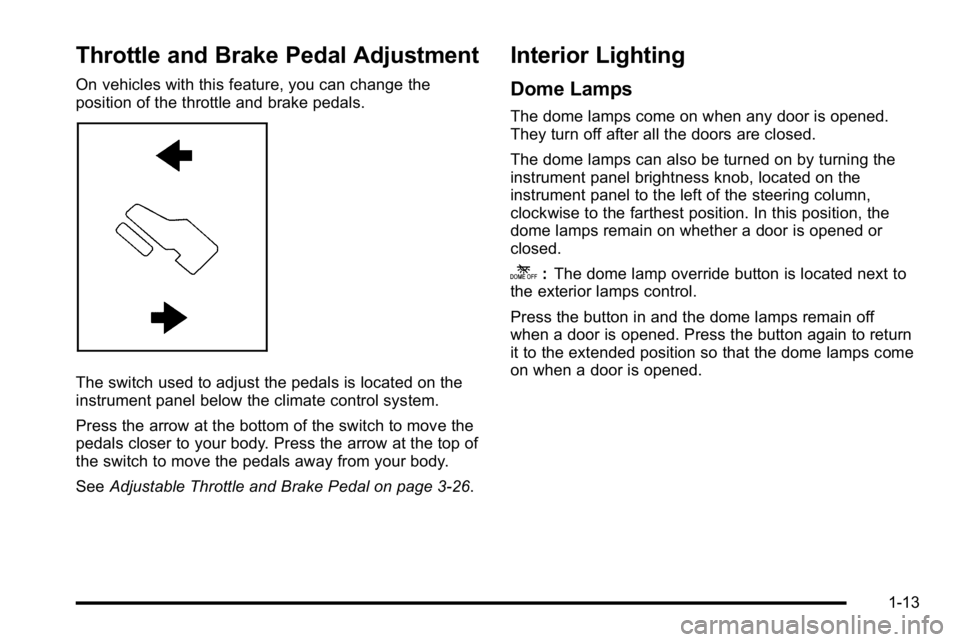
On vehicles with this feature, you can change the
position of the throttle and brake pedals.
The switch used to adjust the pedals is located on the
instrument panel below the climate control system.
Press the arrow at the bottom of the switch to move the
pedals closer to your body. Press the arrow at the top of
the switch to move the pedals away from your body.
SeeAdjustable Throttle and Brake Pedal on page 3‑26.
Interior Lighting
Dome Lamps
The dome lamps come on when any door is opened.
They turn off after all the doors are closed.
The dome lamps can also be turned on by turning the
instrument panel brightness knob, located on the
instrument panel to the left of the steering column,
clockwise to the farthest position. In this position, the
dome lamps remain on whether a door is opened or
closed.
k:The dome lamp override button is located next to
the exterior lamps control.
Press the button in and the dome lamps remain off
when a door is opened. Press the button again to return
it to the extended position so that the dome lamps come
on when a door is opened.
1-13
Page 27 of 550
Driver Information Center (DIC)
The DIC display is located at the bottom of the
instrument panel cluster. It shows the status of many
vehicle systems and enables access to the
personalization menu.
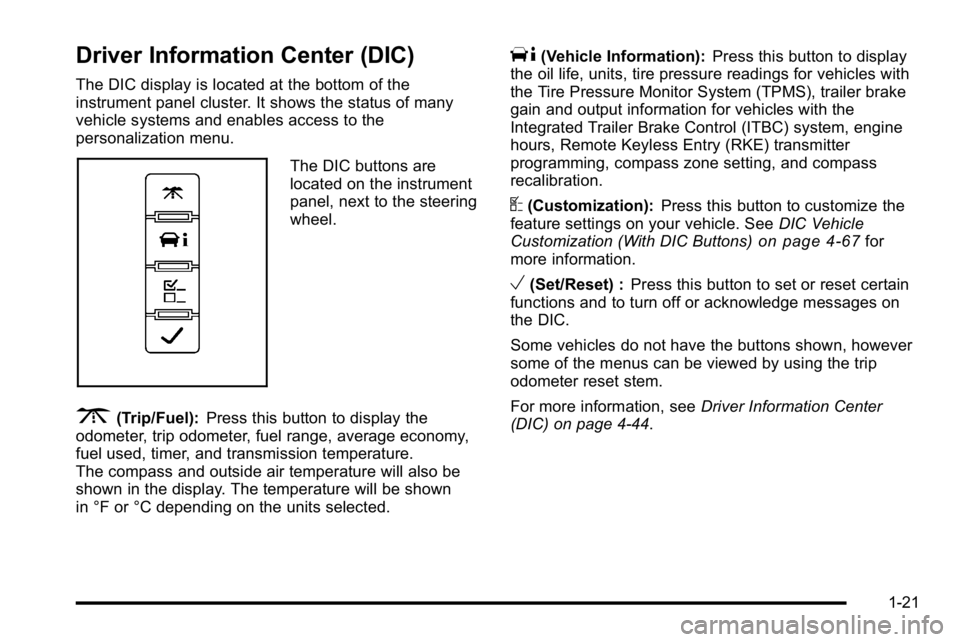
The DIC buttons are
located on the instrument
panel, next to the steering
wheel.
3(Trip/Fuel):Press this button to display the
odometer, trip odometer, fuel range, average economy,
fuel used, timer, and transmission temperature.
The compass and outside air temperature will also be
shown in the display. The temperature will be shown
in °F or °C depending on the units selected.
T(Vehicle Information): Press this button to display
the oil life, units, tire pressure readings for vehicles with
the Tire Pressure Monitor System (TPMS), trailer brake
gain and output information for vehicles with the
Integrated Trailer Brake Control (ITBC) system, engine
hours, Remote Keyless Entry (RKE) transmitter
programming, compass zone setting, and compass
recalibration.
U(Customization): Press this button to customize the
feature settings on your vehicle. See DIC Vehicle
Customization (With DIC Buttons)
on page 4‑67for
more information.
V(Set/Reset) : Press this button to set or reset certain
functions and to turn off or acknowledge messages on
the DIC.
Some vehicles do not have the buttons shown, however
some of the menus can be viewed by using the trip
odometer reset stem.
For more information, see Driver Information Center
(DIC) on page 4‑44.
1-21
Page 32 of 550
Resetting the Oil Life System
To reset the Engine Oil Life System on most vehicles:1. Display the OIL LIFE REMAINING on the DIC. If the vehicle does not have DIC buttons, the
vehicle must be in P (Park) to access this display.
2. Press and hold the SET/RESET button on the DIC, or the trip odometer reset stem if the vehicle does
not have DIC buttons, for more than five seconds.
The oil life will change to 100%.
On all vehicles, the Engine Oil Life System can be reset
as follows: 1. Turn the ignition to ON/RUN with the engine off
2. Fully press the accelerator pedal slowly three times within five seconds.
3. Display the OIL LIFE REMAINING on the DIC. If the display shows 100%, the system is reset.
See Engine Oil Life System on page 6‑20.
Fuel E85 (85% Ethanol)
This vehicle has a yellow fuel cap and can use either
unleaded gasoline or ethanol fuel containing up to 85%
ethanol (E85). See Gasoline Octane
on page 6‑7and
Fuel E85 (85% Ethanol) on page 6‑9.
Driving for Better Fuel Economy
Driving habits can affect fuel mileage. Here are some
driving tips to get the best fuel economy possible.
.Avoid fast starts and accelerate smoothly.
.Brake gradually and avoid abrupt stops.
.Avoid idling the engine for long periods of time.
.When road and weather conditions are
appropriate, use cruise control, if equipped.
.Always follow posted speed limits or drive more
slowly when conditions require.
.Keep vehicle tires properly inflated.
.Combine several trips into a single trip.
.Replace the vehicle's tires with the same TPC
Spec number molded into the tire's sidewall near
the size.
.Follow recommended scheduled maintenance.
1-26
Page 42 of 550
+(Heated Seatback):To heat only the seatback,
press the button with the heated seatback symbol.
This symbol will appear on the climate control display to
indicate that the feature is on. Press the button to cycle
through the temperature settings of high, medium, and
low and to turn the heated seatback off. Indicator bars
next to the symbol designate the level of heat selected:
three for high, two for medium, and one for low.
z(Heated Seat and Seatback): To heat the entire
seat, press the button with the heated seat and
seatback symbol.
This symbol will appear on the climate control display to
indicate that the feature is on. Press the button to cycle
through the temperature settings of high, medium, and
low and to turn the heated seat off. Indicator bars next
to the symbol designate the level of heat selected: three
for high, two for medium, and one for low.
The heated and cooled seats will be canceled after the
ignition is turned off. If you want to use the heated and
cooled seat feature after you restart your vehicle, you
will need to press the appropriate seat button again.
Memory Features
On vehicles with the memory package, the controls for
this feature are located on the driver's door panel.
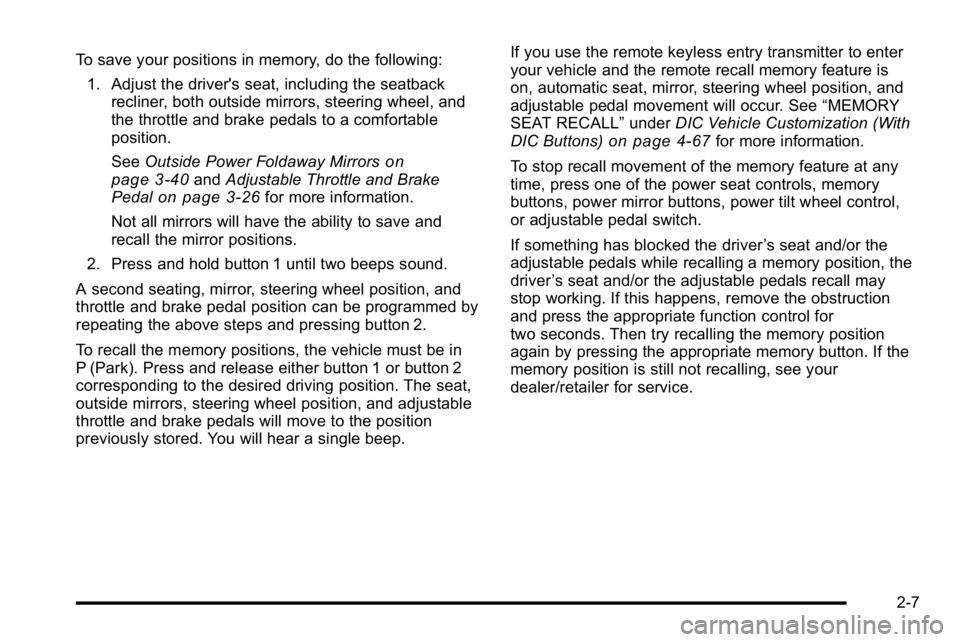
The controls for this
feature are located on the
driver's door, and are
used to program and
recall memory settings for
the driver's seat, outside
mirrors, steering wheel
position, and the
adjustable throttle and
brake pedal feature,
if your vehicle has it.
2-6
Page 43 of 550
To save your positions in memory, do the following:1. Adjust the driver's seat, including the seatback recliner, both outside mirrors, steering wheel, and
the throttle and brake pedals to a comfortable
position.
See Outside Power Foldaway Mirrors
on
page 3‑40and Adjustable Throttle and Brake
Pedalon page 3‑26for more information.
Not all mirrors will have the ability to save and
recall the mirror positions.
2. Press and hold button 1 until two beeps sound.
A second seating, mirror, steering wheel position, and
throttle and brake pedal position can be programmed by
repeating the above steps and pressing button 2.
To recall the memory positions, the vehicle must be in
P (Park). Press and release either button 1 or button 2
corresponding to the desired driving position. The seat,
outside mirrors, steering wheel position, and adjustable
throttle and brake pedals will move to the position
previously stored. You will hear a single beep. If you use the remote keyless entry transmitter to enter
your vehicle and the remote recall memory feature is
on, automatic seat, mirror, steering wheel position, and
adjustable pedal movement will occur. See
“MEMORY
SEAT RECALL” underDIC Vehicle Customization (With
DIC Buttons)
on page 4‑67for more information.
To stop recall movement of the memory feature at any
time, press one of the power seat controls, memory
buttons, power mirror buttons, power tilt wheel control,
or adjustable pedal switch.
If something has blocked the driver ’s seat and/or the
adjustable pedals while recalling a memory position, the
driver ’s seat and/or the adjustable pedals recall may
stop working. If this happens, remove the obstruction
and press the appropriate function control for
two seconds. Then try recalling the memory position
again by pressing the appropriate memory button. If the
memory position is still not recalling, see your
dealer/retailer for service.
2-7
Page 101 of 550
{WARNING:
A crash severe enough to inflate the airbags may
have also damaged important functions in the
vehicle, such as the fuel system, brake and
steering systems, etc. Even if the vehicle appears
to be drivable after a moderate crash, there may
be concealed damage that could make it difficult
to safely operate the vehicle.
Use caution if you should attempt to restart the
engine after a crash has occurred.In many crashes severe enough to inflate the airbag,
windshields are broken by vehicle deformation.
Additional windshield breakage may also occur from the
right front passenger airbag..Airbags are designed to inflate only once. After an
airbag inflates, you will need some new parts for
the airbag system. If you do not get them, the
airbag system will not be there to help protect you
in another crash. A new system will include airbag
modules and possibly other parts. The service
manual for your vehicle covers the need to replace
other parts.
.The vehicle has a crash sensing and diagnostic
module which records information after a crash.
See
Vehicle Data Recording and Privacy
on
page 8‑18and Event Data Recorderson
page 8‑19.
.Let only qualified technicians work on the airbag
systems. Improper service can mean that an
airbag system will not work properly. See your
dealer/retailer for service.
2-65