oil GMC SIERRA DENALI 2010 Owners Manual
[x] Cancel search | Manufacturer: GMC, Model Year: 2010, Model line: SIERRA DENALI, Model: GMC SIERRA DENALI 2010Pages: 550, PDF Size: 4.17 MB
Page 5 of 550
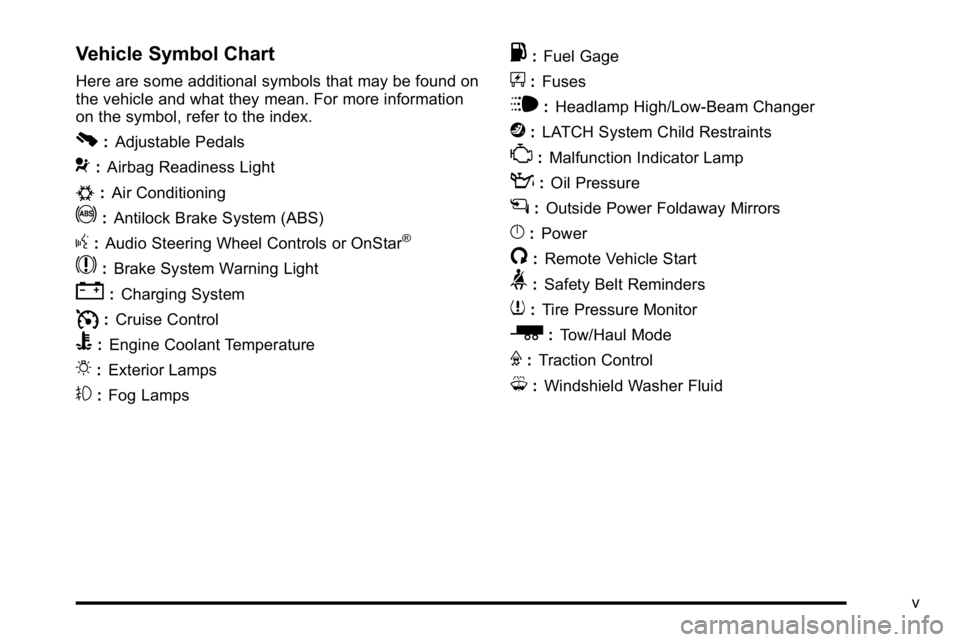
Vehicle Symbol Chart
Here are some additional symbols that may be found on
the vehicle and what they mean. For more information
on the symbol, refer to the index.
0:Adjustable Pedals
9:Airbag Readiness Light
#:Air Conditioning
!:Antilock Brake System (ABS)
g:Audio Steering Wheel Controls or OnStar®
$: Brake System Warning Light
":Charging System
I:Cruise Control
B: Engine Coolant Temperature
O:Exterior Lamps
#:Fog Lamps
.: Fuel Gage
+:Fuses
i: Headlamp High/Low-Beam Changer
j:LATCH System Child Restraints
*: Malfunction Indicator Lamp
::Oil Pressure
g:Outside Power Foldaway Mirrors
}:Power
/:Remote Vehicle Start
>:Safety Belt Reminders
7:Tire Pressure Monitor
_: Tow/Haul Mode
F:Traction Control
M:Windshield Washer Fluid
v
Page 7 of 550
Section 1 In Brief
Instrument Panel. . . . . . . . . . . . . . . . . . . . . . . . . . . . . . . . . . . 1-2
Initial Drive Information . . . . . . . . . . . . . . . . . . . . . . . . . . . 1-4
Remote Keyless Entry (RKE) System . . . . . . . . . . . 1-4
Remote Vehicle Start . . . . . . . . . . . . . . . . . . . . . . . . . . . 1-5
Door Locks . . . . . . . . . . . . . . . . . . . . . . . . . . . . . . . . . . . . . 1-5
Windows . . . . . . . . . . . . . . . . . . . . . . . . . . . . . . . . . . . . . . . . 1-6
Seat Adjustment . . . . . . . . . . . . . . . . . . . . . . . . . . . . . . . . 1-7
Heated Seats . . . . . . . . . . . . . . . . . . . . . . . . . . . . . . . . . . . 1-9
Heated and Ventilated Seats . . . . . . . . . . . . . . . . . . . . 1-9
Head Restraint Adjustment . . . . . . . . . . . . . . . . . . . . 1-10
Safety Belt . . . . . . . . . . . . . . . . . . . . . . . . . . . . . . . . . . . . . 1-10
Sensing System for Passenger Airbag . . . . . . . . . 1-11
Mirror Adjustment . . . . . . . . . . . . . . . . . . . . . . . . . . . . . . 1-11
Steering Wheel Adjustment . . . . . . . . . . . . . . . . . . . . 1-12
Throttle and Brake Pedal Adjustment . . . . . . . . . . 1-13
Interior Lighting . . . . . . . . . . . . . . . . . . . . . . . . . . . . . . . . 1-13
Exterior Lighting . . . . . . . . . . . . . . . . . . . . . . . . . . . . . . . 1-14
Windshield Wiper/Washer . . . . . . . . . . . . . . . . . . . . . . 1-15
Climate Controls . . . . . . . . . . . . . . . . . . . . . . . . . . . . . . . 1-15
Transmission . . . . . . . . . . . . . . . . . . . . . . . . . . . . . . . . . . 1-17 Vehicle Features
. . . . . . . . . . . . . . . . . . . . . . . . . . . . . . . . . . 1-18
Radio(s) . . . . . . . . . . . . . . . . . . . . . . . . . . . . . . . . . . . . . . . 1-18
Satellite Radio . . . . . . . . . . . . . . . . . . . . . . . . . . . . . . . . . 1-19
Portable Audio Devices . . . . . . . . . . . . . . . . . . . . . . . . 1-19
Steering Wheel Controls . . . . . . . . . . . . . . . . . . . . . . . 1-20
Bluetooth
®. . . . . . . . . . . . . . . . . . . . . . . . . . . . . . . . . . . . . 1-20
Navigation System . . . . . . . . . . . . . . . . . . . . . . . . . . . . . 1-20
Driver Information Center (DIC) . . . . . . . . . . . . . . . . 1-21
Cruise Control . . . . . . . . . . . . . . . . . . . . . . . . . . . . . . . . . 1-22
Rear Vision Camera (RVC) . . . . . . . . . . . . . . . . . . . . 1-23
Ultrasonic Parking Assist . . . . . . . . . . . . . . . . . . . . . . 1-23
Power Outlets . . . . . . . . . . . . . . . . . . . . . . . . . . . . . . . . . 1-23
Universal Remote System . . . . . . . . . . . . . . . . . . . . . 1-23
Sunroof . . . . . . . . . . . . . . . . . . . . . . . . . . . . . . . . . . . . . . . . 1-24
Performance and Maintenance . . . . . . . . . . . . . . . . . .1-24
StabiliTrak
®. . . . . . . . . . . . . . . . . . . . . . . . . . . . . . . . . . . . 1-24
Tire Pressure Monitor . . . . . . . . . . . . . . . . . . . . . . . . . . 1-25
Engine Oil Life System . . . . . . . . . . . . . . . . . . . . . . . . 1-25
Fuel E85 (85% Ethanol) . . . . . . . . . . . . . . . . . . . . . . . 1-26
Driving for Better Fuel Economy . . . . . . . . . . . . . . . 1-26
Roadside Assistance Program . . . . . . . . . . . . . . . . . 1-27
OnStar
®. . . . . . . . . . . . . . . . . . . . . . . . . . . . . . . . . . . . . . . 1-27
1-1
Page 27 of 550
Driver Information Center (DIC)
The DIC display is located at the bottom of the
instrument panel cluster. It shows the status of many
vehicle systems and enables access to the
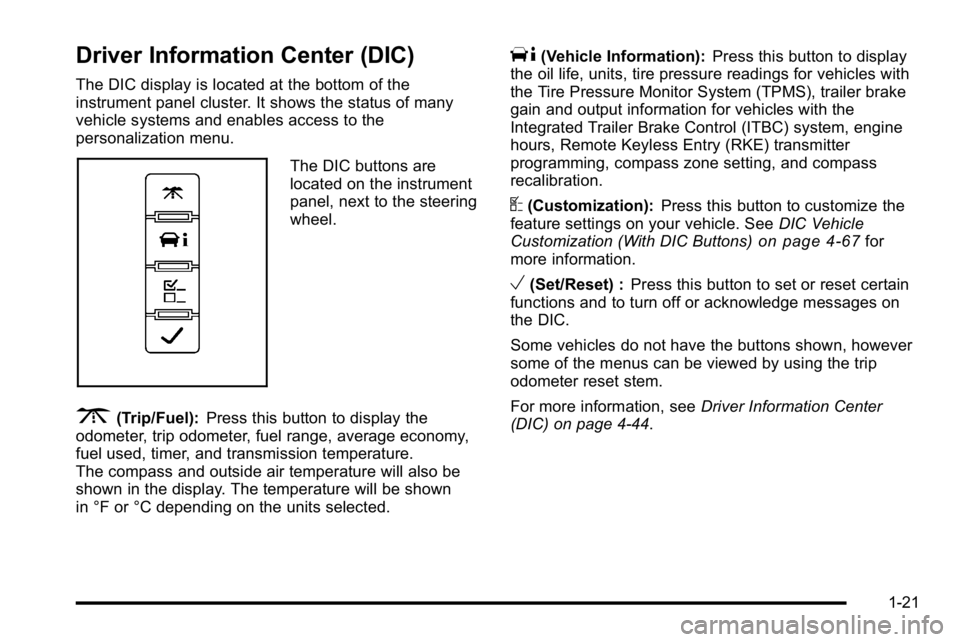
personalization menu.
The DIC buttons are
located on the instrument
panel, next to the steering
wheel.
3(Trip/Fuel):Press this button to display the
odometer, trip odometer, fuel range, average economy,
fuel used, timer, and transmission temperature.
The compass and outside air temperature will also be
shown in the display. The temperature will be shown
in °F or °C depending on the units selected.
T(Vehicle Information): Press this button to display
the oil life, units, tire pressure readings for vehicles with
the Tire Pressure Monitor System (TPMS), trailer brake
gain and output information for vehicles with the
Integrated Trailer Brake Control (ITBC) system, engine
hours, Remote Keyless Entry (RKE) transmitter
programming, compass zone setting, and compass
recalibration.
U(Customization): Press this button to customize the
feature settings on your vehicle. See DIC Vehicle
Customization (With DIC Buttons)
on page 4‑67for
more information.
V(Set/Reset) : Press this button to set or reset certain
functions and to turn off or acknowledge messages on
the DIC.
Some vehicles do not have the buttons shown, however
some of the menus can be viewed by using the trip
odometer reset stem.
For more information, see Driver Information Center
(DIC) on page 4‑44.
1-21
Page 31 of 550
Tire Pressure Monitor
This vehicle may have a Tire Pressure Monitor
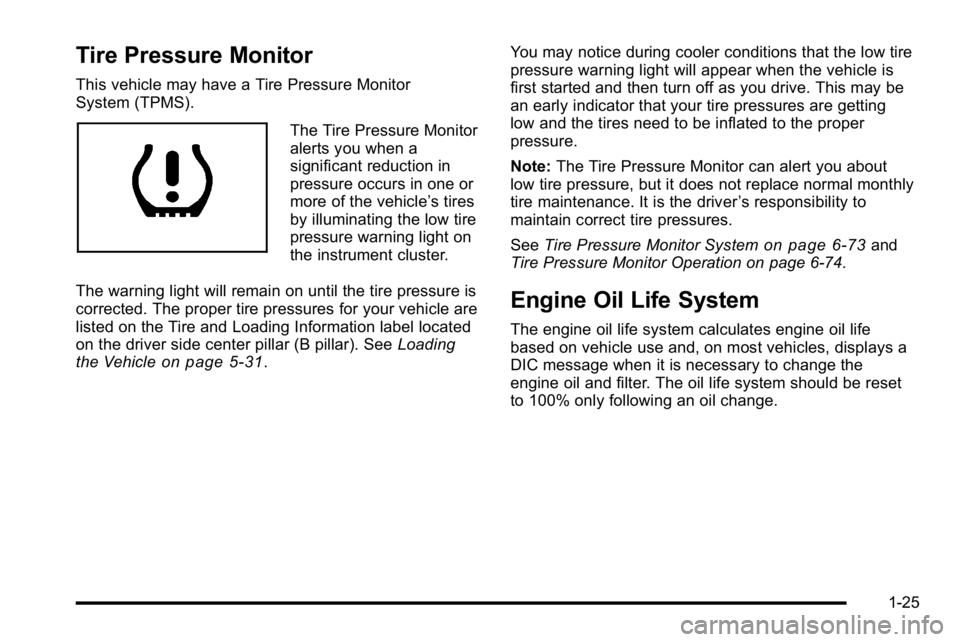
System (TPMS).
The Tire Pressure Monitor
alerts you when a
significant reduction in
pressure occurs in one or
more of the vehicle’s tires
by illuminating the low tire
pressure warning light on
the instrument cluster.
The warning light will remain on until the tire pressure is
corrected. The proper tire pressures for your vehicle are
listed on the Tire and Loading Information label located
on the driver side center pillar (B pillar). See Loading
the Vehicle
on page 5‑31. You may notice during cooler conditions that the low tire
pressure warning light will appear when the vehicle is
first started and then turn off as you drive. This may be
an early indicator that your tire pressures are getting
low and the tires need to be inflated to the proper
pressure.
Note:
The Tire Pressure Monitor can alert you about
low tire pressure, but it does not replace normal monthly
tire maintenance. It is the driver ’s responsibility to
maintain correct tire pressures.
See Tire Pressure Monitor System
on page 6‑73and
Tire Pressure Monitor Operation on page 6‑74.
Engine Oil Life System
The engine oil life system calculates engine oil life
based on vehicle use and, on most vehicles, displays a
DIC message when it is necessary to change the
engine oil and filter. The oil life system should be reset
to 100% only following an oil change.
1-25
Page 32 of 550
Resetting the Oil Life System
To reset the Engine Oil Life System on most vehicles:1. Display the OIL LIFE REMAINING on the DIC. If the vehicle does not have DIC buttons, the
vehicle must be in P (Park) to access this display.
2. Press and hold the SET/RESET button on the DIC, or the trip odometer reset stem if the vehicle does
not have DIC buttons, for more than five seconds.
The oil life will change to 100%.
On all vehicles, the Engine Oil Life System can be reset
as follows: 1. Turn the ignition to ON/RUN with the engine off
2. Fully press the accelerator pedal slowly three times within five seconds.
3. Display the OIL LIFE REMAINING on the DIC. If the display shows 100%, the system is reset.
See Engine Oil Life System on page 6‑20.
Fuel E85 (85% Ethanol)
This vehicle has a yellow fuel cap and can use either
unleaded gasoline or ethanol fuel containing up to 85%
ethanol (E85). See Gasoline Octane
on page 6‑7and
Fuel E85 (85% Ethanol) on page 6‑9.
Driving for Better Fuel Economy
Driving habits can affect fuel mileage. Here are some
driving tips to get the best fuel economy possible.
.Avoid fast starts and accelerate smoothly.
.Brake gradually and avoid abrupt stops.
.Avoid idling the engine for long periods of time.
.When road and weather conditions are
appropriate, use cruise control, if equipped.
.Always follow posted speed limits or drive more
slowly when conditions require.
.Keep vehicle tires properly inflated.
.Combine several trips into a single trip.
.Replace the vehicle's tires with the same TPC
Spec number molded into the tire's sidewall near
the size.
.Follow recommended scheduled maintenance.
1-26
Page 119 of 550
The additional ten minutes are considered a second
remote vehicle start.
Once two remote starts, or a single remote start with
one time extension has been done, the vehicle must be
started with the key. After the key is removed from the
ignition, the vehicle can be remote started again.
The vehicle cannot be remote started if the key is in the
ignition, the hood is not closed, or if there is an
emission control system malfunction and the check
engine light comes on.
Also, the engine will turn off during a remote vehicle
start if the coolant temperature gets too high or if the oil
pressure gets low.Vehicles that have the remote vehicle start feature are
shipped from the factory with the remote vehicle start
system enabled. The system may be enabled or
disabled through the DIC. See
“REMOTE START”
under DIC Vehicle Customization (With DIC Buttons)
on
page 4‑67for additional information. If your vehicle
does not have DIC buttons, see your dealer/retailer to
enable or disable the remote vehicle start system.
Remote Start Ready
If your vehicle does not have the remote vehicle start
feature, it may have the remote start ready feature. This
feature allows your dealer/retailer to add the
manufacturer's remote vehicle start feature.
See your dealer/retailer if you would like to add the
manufacturer's remote vehicle start feature to your
vehicle.
3-9
Page 135 of 550
Starting Procedure
1. With your foot off the accelerator pedal, turn theignition to START. When the engine starts, let go of
the key. The idle speed will slow down as the
engine warms. Do not race the engine immediately
after starting it. Operate the engine and
transmission gently to allow the oil to warm up and
lubricate all moving parts.
The vehicle has a Computer-Controlled Cranking
System. This feature assists in starting the engine
and protects components. If the ignition key is
turned to the START position, and then released
when the engine begins cranking, the engine will
continue cranking for a few seconds or until the
vehicle starts. If the engine does not start and the
key is held in START, cranking will be stopped
after 15 seconds to prevent cranking motor
damage. To prevent gear damage, this system also
prevents cranking if the engine is already running.
Engine cranking can be stopped by turning the
ignition switch to the ACC/ACCESSORY or LOCK/
OFF position.
Notice: Cranking the engine for long periods of
time, by returning the key to the START position
immediately after cranking has ended, can overheat
and damage the cranking motor, and drain the
battery. Wait at least 15 seconds between each try,
to let the cranking motor cool down. 2. If the engine does not start after 5‐10 seconds,
especially in very cold weather (below 0°F or
−18°C), it could be flooded with too much gasoline.
Try pushing the accelerator pedal all the way to the
floor and holding it there as you hold the key in
START for up to a maximum of 15 seconds. Wait at
least 15 seconds between each try, to allow the
cranking motor to cool down. When the engine
starts, let go of the key and accelerator. If the
vehicle starts briefly but then stops again, repeat
these steps. This clears the extra gasoline from the
engine. Do not race the engine immediately after
starting it. Operate the engine and transmission
gently until the oil warms up and lubricates all
moving parts.
Notice: The engine is designed to work with the
electronics in the vehicle. If you add electrical
parts or accessories, you could change the way
the engine operates. Before adding electrical
equipment, check with your dealer/retailer. If you
do not, the engine might not perform properly. Any
resulting damage would not be covered by the
vehicle warranty.
3-25
Page 174 of 550
Section 4 Instrument Panel
Malfunction Indicator Lamp . . . . . . . . . . . . . . . . . . . . 4-38
Oil Pressure Gage . . . . . . . . . . . . . . . . . . . . . . . . . . . . . 4-40
Oil Pressure Light . . . . . . . . . . . . . . . . . . . . . . . . . . . . . 4-41
Security Light . . . . . . . . . . . . . . . . . . . . . . . . . . . . . . . . . . 4-42
Fog Lamp Light . . . . . . . . . . . . . . . . . . . . . . . . . . . . . . . . 4-42
Cruise Control Light . . . . . . . . . . . . . . . . . . . . . . . . . . . 4-42
Highbeam On Light . . . . . . . . . . . . . . . . . . . . . . . . . . . . 4-42
Tow/Haul Mode Light . . . . . . . . . . . . . . . . . . . . . . . . . . 4-43
Fuel Gage . . . . . . . . . . . . . . . . . . . . . . . . . . . . . . . . . . . . . 4-43
Driver Information Center (DIC) . . . . . . . . . . . . . . . . . .4-44
DIC Operation and Displays (Using Trip Odometer Reset Stem) . . . . . . . . . . . . . . . . . . . . . . 4-44
DIC Operation and Displays (Using DIC Buttons) . . . . . . . . . . . . . . . . . . . . . . . . . . . . . . . . . . . . . 4-48
DIC Compass . . . . . . . . . . . . . . . . . . . . . . . . . . . . . . . . . . 4-55
DIC Warnings and Messages . . . . . . . . . . . . . . . . . . 4-57
DIC Vehicle Customization (With DIC Buttons) . . . . . . . . . . . . . . . . . . . . . . . . . . . . . . . . . . . . . 4-67 Audio System(s)
. . . . . . . . . . . . . . . . . . . . . . . . . . . . . . . . . . 4-76
Setting the Clock . . . . . . . . . . . . . . . . . . . . . . . . . . . . . . 4-77
Radio(s) . . . . . . . . . . . . . . . . . . . . . . . . . . . . . . . . . . . . . . . 4-79
Using an MP3 (Radios with CD) . . . . . . . . . . . . . . . 4-99
Using an MP3 (Radios with CD and DVD) . . . . 4-106
XM Radio Messages . . . . . . . . . . . . . . . . . . . . . . . . . 4-114
Navigation/Radio System . . . . . . . . . . . . . . . . . . . . . 4-115
Bluetooth
®. . . . . . . . . . . . . . . . . . . . . . . . . . . . . . . . . . . . 4-115
Rear Seat Entertainment (RSE) System . . . . . . 4-126
Rear Seat Audio (RSA) . . . . . . . . . . . . . . . . . . . . . . . 4-135
Theft-Deterrent Feature . . . . . . . . . . . . . . . . . . . . . . 4-136
Audio Steering Wheel Controls . . . . . . . . . . . . . . . 4-137
Radio Reception . . . . . . . . . . . . . . . . . . . . . . . . . . . . . . 4-139
Fixed Mast Antenna . . . . . . . . . . . . . . . . . . . . . . . . . . 4-140
XM™ Satellite Radio Antenna System . . . . . . . . 4-140
4-2
Page 212 of 550
Emissions Inspection and Maintenance
Programs
Some state/provincial and local governments have or
might begin programs to inspect the emission control
equipment on the vehicle. Failure to pass this
inspection could prevent getting a vehicle registration.
Here are some things to know to help the vehicle pass
an inspection:
.The vehicle will not pass this inspection if the
check engine light is on with the engine running,
or if the key is in ON/RUN and the light is not on.
.The vehicle will not pass this inspection if the
OBD II (on-board diagnostic) system determines
that critical emission control systems have not
been completely diagnosed by the system. The
vehicle would be considered not ready for
inspection. This can happen if the battery has
recently been replaced or if the battery has run
down. The diagnostic system is designed to
evaluate critical emission control systems during
normal driving. This can take several days of
routine driving. If this has been done and the
vehicle still does not pass the inspection for lack of
OBD II system readiness, your dealer/retailer can
prepare the vehicle for inspection.
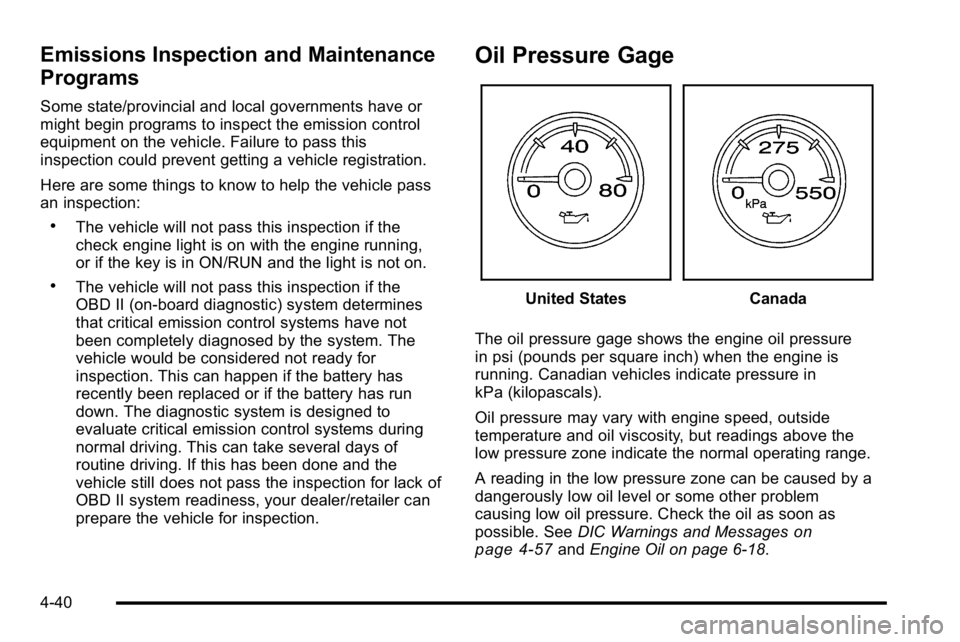
Oil Pressure Gage
United StatesCanada
The oil pressure gage shows the engine oil pressure
in psi (pounds per square inch) when the engine is
running. Canadian vehicles indicate pressure in
kPa (kilopascals).
Oil pressure may vary with engine speed, outside
temperature and oil viscosity, but readings above the
low pressure zone indicate the normal operating range.
A reading in the low pressure zone can be caused by a
dangerously low oil level or some other problem
causing low oil pressure. Check the oil as soon as
possible. See DIC Warnings and Messages
on
page 4‑57and Engine Oil on page 6‑18.
4-40
Page 213 of 550
{WARNING:
Do not keep driving if the oil pressure is low. The
engine can become so hot that it catches fire.
Someone could be burned. Check the oil as soon
as possible and have the vehicle serviced.
Notice: Lack of proper engine oil maintenance can
damage the engine. The repairs would not be
covered by the vehicle warranty. Always follow the
maintenance schedule in this manual for changing
engine oil.
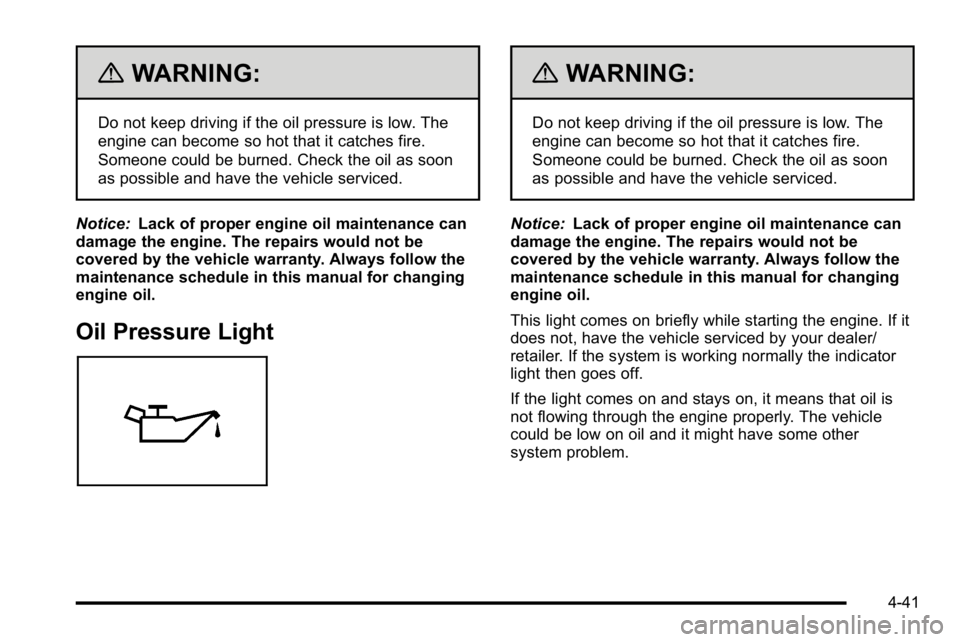
Oil Pressure Light
{WARNING:
Do not keep driving if the oil pressure is low. The
engine can become so hot that it catches fire.
Someone could be burned. Check the oil as soon
as possible and have the vehicle serviced.
Notice: Lack of proper engine oil maintenance can
damage the engine. The repairs would not be
covered by the vehicle warranty. Always follow the
maintenance schedule in this manual for changing
engine oil.
This light comes on briefly while starting the engine. If it
does not, have the vehicle serviced by your dealer/
retailer. If the system is working normally the indicator
light then goes off.
If the light comes on and stays on, it means that oil is
not flowing through the engine properly. The vehicle
could be low on oil and it might have some other
system problem.
4-41