parking brake GMC SIERRA DENALI 2010 Owners Manual
[x] Cancel search | Manufacturer: GMC, Model Year: 2010, Model line: SIERRA DENALI, Model: GMC SIERRA DENALI 2010Pages: 550, PDF Size: 4.17 MB
Page 7 of 550
Section 1 In Brief
Instrument Panel. . . . . . . . . . . . . . . . . . . . . . . . . . . . . . . . . . . 1-2
Initial Drive Information . . . . . . . . . . . . . . . . . . . . . . . . . . . 1-4
Remote Keyless Entry (RKE) System . . . . . . . . . . . 1-4
Remote Vehicle Start . . . . . . . . . . . . . . . . . . . . . . . . . . . 1-5
Door Locks . . . . . . . . . . . . . . . . . . . . . . . . . . . . . . . . . . . . . 1-5
Windows . . . . . . . . . . . . . . . . . . . . . . . . . . . . . . . . . . . . . . . . 1-6
Seat Adjustment . . . . . . . . . . . . . . . . . . . . . . . . . . . . . . . . 1-7
Heated Seats . . . . . . . . . . . . . . . . . . . . . . . . . . . . . . . . . . . 1-9
Heated and Ventilated Seats . . . . . . . . . . . . . . . . . . . . 1-9
Head Restraint Adjustment . . . . . . . . . . . . . . . . . . . . 1-10
Safety Belt . . . . . . . . . . . . . . . . . . . . . . . . . . . . . . . . . . . . . 1-10
Sensing System for Passenger Airbag . . . . . . . . . 1-11
Mirror Adjustment . . . . . . . . . . . . . . . . . . . . . . . . . . . . . . 1-11
Steering Wheel Adjustment . . . . . . . . . . . . . . . . . . . . 1-12
Throttle and Brake Pedal Adjustment . . . . . . . . . . 1-13
Interior Lighting . . . . . . . . . . . . . . . . . . . . . . . . . . . . . . . . 1-13
Exterior Lighting . . . . . . . . . . . . . . . . . . . . . . . . . . . . . . . 1-14
Windshield Wiper/Washer . . . . . . . . . . . . . . . . . . . . . . 1-15
Climate Controls . . . . . . . . . . . . . . . . . . . . . . . . . . . . . . . 1-15
Transmission . . . . . . . . . . . . . . . . . . . . . . . . . . . . . . . . . . 1-17 Vehicle Features
. . . . . . . . . . . . . . . . . . . . . . . . . . . . . . . . . . 1-18
Radio(s) . . . . . . . . . . . . . . . . . . . . . . . . . . . . . . . . . . . . . . . 1-18
Satellite Radio . . . . . . . . . . . . . . . . . . . . . . . . . . . . . . . . . 1-19
Portable Audio Devices . . . . . . . . . . . . . . . . . . . . . . . . 1-19
Steering Wheel Controls . . . . . . . . . . . . . . . . . . . . . . . 1-20
Bluetooth
®. . . . . . . . . . . . . . . . . . . . . . . . . . . . . . . . . . . . . 1-20
Navigation System . . . . . . . . . . . . . . . . . . . . . . . . . . . . . 1-20
Driver Information Center (DIC) . . . . . . . . . . . . . . . . 1-21
Cruise Control . . . . . . . . . . . . . . . . . . . . . . . . . . . . . . . . . 1-22
Rear Vision Camera (RVC) . . . . . . . . . . . . . . . . . . . . 1-23
Ultrasonic Parking Assist . . . . . . . . . . . . . . . . . . . . . . 1-23
Power Outlets . . . . . . . . . . . . . . . . . . . . . . . . . . . . . . . . . 1-23
Universal Remote System . . . . . . . . . . . . . . . . . . . . . 1-23
Sunroof . . . . . . . . . . . . . . . . . . . . . . . . . . . . . . . . . . . . . . . . 1-24
Performance and Maintenance . . . . . . . . . . . . . . . . . .1-24
StabiliTrak
®. . . . . . . . . . . . . . . . . . . . . . . . . . . . . . . . . . . . 1-24
Tire Pressure Monitor . . . . . . . . . . . . . . . . . . . . . . . . . . 1-25
Engine Oil Life System . . . . . . . . . . . . . . . . . . . . . . . . 1-25
Fuel E85 (85% Ethanol) . . . . . . . . . . . . . . . . . . . . . . . 1-26
Driving for Better Fuel Economy . . . . . . . . . . . . . . . 1-26
Roadside Assistance Program . . . . . . . . . . . . . . . . . 1-27
OnStar
®. . . . . . . . . . . . . . . . . . . . . . . . . . . . . . . . . . . . . . . 1-27
1-1
Page 9 of 550

A.Outlet Adjustment on page 4‑27.
B. Turn Signal/Multifunction Lever on page 4‑4.
C. Instrument Panel Cluster on page 4‑28.
D. Hazard Warning Flashers
on page 4‑3.
E. Shift Lever. See Automatic Transmission Operation
on page 3‑28.
F. Tow/Haul Mode
on page 3‑32(If Equipped).
G. Driver Information Center (DIC) Buttons. See Driver Information Center (DIC) on page 4‑44.
H. Audio System(s) on page 4‑76.
I. Exterior Lamps on page 4‑10.
J. Integrated Trailer Brake Controller (If Equipped). See Towing a Trailer on page 5‑42.
K. Dome Lamp Override
on page 4‑14.Dome Lampson page 4‑13.
L. Cruise Control on page 4‑7.
M. Hood Release on page 6‑14.
N. Parking Brake on page 3‑34. O.
Tilt Wheel on page 4‑3.
P. Horn on page 4‑3.
Q. Audio Steering Wheel Controls on page 4‑137.
R. Climate Control System (With Air Conditioning)
on
page 4‑17or Climate Control System (With Heater
Only)on page 4‑20or Dual Automatic Climate
Control Systemon page 4‑21(If Equipped).
S. Accessory Power Outlet(s)
on page 4‑16.
Cigarette Lighter (If Equipped). See Ashtray(s) and
Cigarette Lighter
on page 4‑17.
T. StabiliTrak®Systemon page 5‑6(If Equipped).
Pedal Adjust Button (If Equipped). See Adjustable
Throttle and Brake Pedal
on page 3‑26. Ultrasonic
Rear Parking Assist (URPA)on page 3‑43(If Equipped). Heated Windshield Washer Fluid
Button (If Equipped). See Windshield Washeron
page 4‑6.
U. Passenger Airbag Off Control (If Equipped). See Passenger Sensing System on page 2‑66.
V. Glove Box on page 3‑57.
1-3
Page 111 of 550
Section 3 Features and Controls
Keys. . . . . . . . . . . . . . . . . . . . . . . . . . . . . . . . . . . . . . . . . . . . . . . . 3-3
Remote Keyless Entry (RKE) System . . . . . . . . . . . 3-4
Remote Keyless Entry (RKE) System Operation . . . . . . . . . . . . . . . . . . . . . . . . . . . . . . . . . . . . . 3-4
Remote Vehicle Start . . . . . . . . . . . . . . . . . . . . . . . . . . . 3-7
Doors and Locks . . . . . . . . . . . . . . . . . . . . . . . . . . . . . . . . . 3-10
Door Locks . . . . . . . . . . . . . . . . . . . . . . . . . . . . . . . . . . . . 3-10
Power Door Locks . . . . . . . . . . . . . . . . . . . . . . . . . . . . . 3-11
Delayed Locking . . . . . . . . . . . . . . . . . . . . . . . . . . . . . . . 3-11
Programmable Automatic Door Locks . . . . . . . . . . 3-11
Rear Door Security Locks . . . . . . . . . . . . . . . . . . . . . 3-12
Lockout Protection . . . . . . . . . . . . . . . . . . . . . . . . . . . . . 3-13
Rear Doors . . . . . . . . . . . . . . . . . . . . . . . . . . . . . . . . . . . . 3-13
Tailgate . . . . . . . . . . . . . . . . . . . . . . . . . . . . . . . . . . . . . . . . 3-13
Windows . . . . . . . . . . . . . . . . . . . . . . . . . . . . . . . . . . . . . . . . . . 3-15
Manual Windows . . . . . . . . . . . . . . . . . . . . . . . . . . . . . . 3-16
Power Windows . . . . . . . . . . . . . . . . . . . . . . . . . . . . . . . 3-16
Sliding Rear Window . . . . . . . . . . . . . . . . . . . . . . . . . . . 3-17
Power Sliding Rear Window . . . . . . . . . . . . . . . . . . . 3-17
Sun Visors . . . . . . . . . . . . . . . . . . . . . . . . . . . . . . . . . . . . . 3-17
Theft-Deterrent Systems . . . . . . . . . . . . . . . . . . . . . . . . .3-18
Content Theft-Deterrent . . . . . . . . . . . . . . . . . . . . . . . . 3-18
PASS-Key
®III+ Electronic Immobilizer . . . . . . . . . 3-20
PASS-Key®III+ Electronic Immobilizer
Operation . . . . . . . . . . . . . . . . . . . . . . . . . . . . . . . . . . . . 3-20 Starting and Operating Your Vehicle
. . . . . . . . . . . .3-22
New Vehicle Break-In . . . . . . . . . . . . . . . . . . . . . . . . . . 3-22
Ignition Positions . . . . . . . . . . . . . . . . . . . . . . . . . . . . . . 3-23
Retained Accessory Power (RAP) . . . . . . . . . . . . . 3-24
Starting the Engine . . . . . . . . . . . . . . . . . . . . . . . . . . . . 3-24
Adjustable Throttle and Brake Pedal . . . . . . . . . . . 3-26
Engine Coolant Heater . . . . . . . . . . . . . . . . . . . . . . . . . 3-26
Active Fuel Management™ . . . . . . . . . . . . . . . . . . . . 3-27
Automatic Transmission Operation . . . . . . . . . . . . . 3-28
Tow/Haul Mode . . . . . . . . . . . . . . . . . . . . . . . . . . . . . . . . 3-32
Parking Brake . . . . . . . . . . . . . . . . . . . . . . . . . . . . . . . . . 3-34
Shifting Into Park . . . . . . . . . . . . . . . . . . . . . . . . . . . . . . 3-35
Shifting Out of Park . . . . . . . . . . . . . . . . . . . . . . . . . . . . 3-36
Parking Over Things That Burn . . . . . . . . . . . . . . . . 3-37
Engine Exhaust . . . . . . . . . . . . . . . . . . . . . . . . . . . . . . . . 3-37
Running the Vehicle While Parked . . . . . . . . . . . . . 3-38
Mirrors . . . . . . . . . . . . . . . . . . . . . . . . . . . . . . . . . . . . . . . . . . . . 3-39
Manual Rearview Mirror . . . . . . . . . . . . . . . . . . . . . . . . 3-39
Automatic Dimming Rearview Mirror . . . . . . . . . . . 3-39
Outside Power Mirrors . . . . . . . . . . . . . . . . . . . . . . . . . 3-40
Outside Power Foldaway Mirrors . . . . . . . . . . . . . . 3-40
Park Tilt Mirrors . . . . . . . . . . . . . . . . . . . . . . . . . . . . . . . . 3-41
Outside Convex Mirror . . . . . . . . . . . . . . . . . . . . . . . . . 3-42
Outside Heated Mirrors . . . . . . . . . . . . . . . . . . . . . . . . 3-42
3-1
Page 138 of 550
Automatic Transmission Operation
The vehicle has a Hydra-Matic®6L80 automatic
transmission, and has an electronic shift position
indicator within the instrument panel cluster. The
electronic shift position indicator displays when the shift
lever is moved out of P (Park).
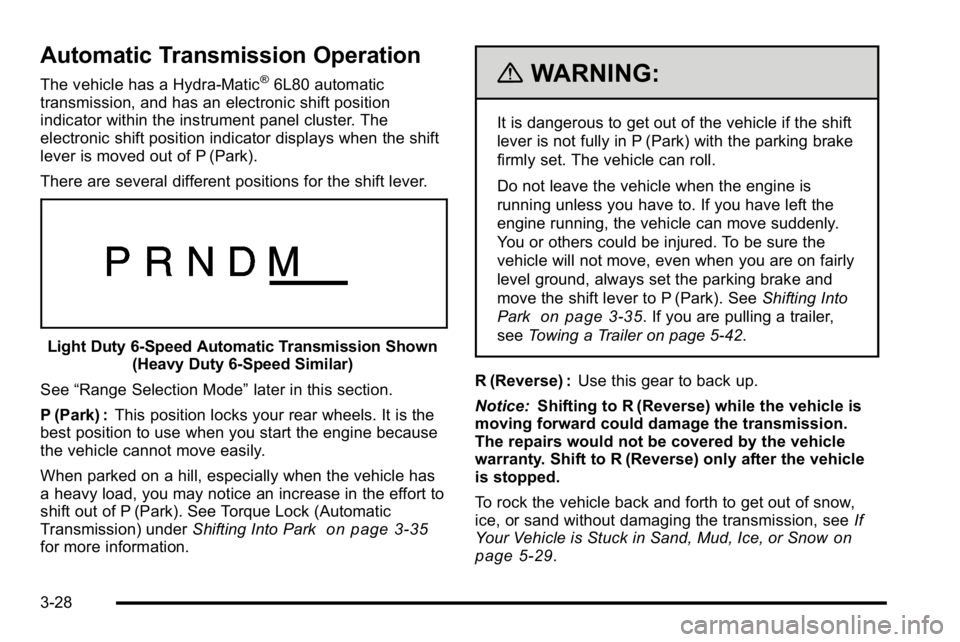
There are several different positions for the shift lever.
Light Duty 6‐Speed Automatic Transmission Shown (Heavy Duty 6‐Speed Similar)
See “Range Selection Mode” later in this section.
P (Park) : This position locks your rear wheels. It is the
best position to use when you start the engine because
the vehicle cannot move easily.
When parked on a hill, especially when the vehicle has
a heavy load, you may notice an increase in the effort to
shift out of P (Park). See Torque Lock (Automatic
Transmission) under Shifting Into Park
on page 3‑35for more information.
{WARNING:
It is dangerous to get out of the vehicle if the shift
lever is not fully in P (Park) with the parking brake
firmly set. The vehicle can roll.
Do not leave the vehicle when the engine is
running unless you have to. If you have left the
engine running, the vehicle can move suddenly.
You or others could be injured. To be sure the
vehicle will not move, even when you are on fairly
level ground, always set the parking brake and
move the shift lever to P (Park). See Shifting Into
Park
on page 3‑35. If you are pulling a trailer,
see Towing a Trailer on page 5‑42.
R (Reverse) : Use this gear to back up.
Notice: Shifting to R (Reverse) while the vehicle is
moving forward could damage the transmission.
The repairs would not be covered by the vehicle
warranty. Shift to R (Reverse) only after the vehicle
is stopped.
To rock the vehicle back and forth to get out of snow,
ice, or sand without damaging the transmission, see If
Your Vehicle is Stuck in Sand, Mud, Ice, or Snow
on
page 5‑29.
3-28
Page 144 of 550
Parking Brake
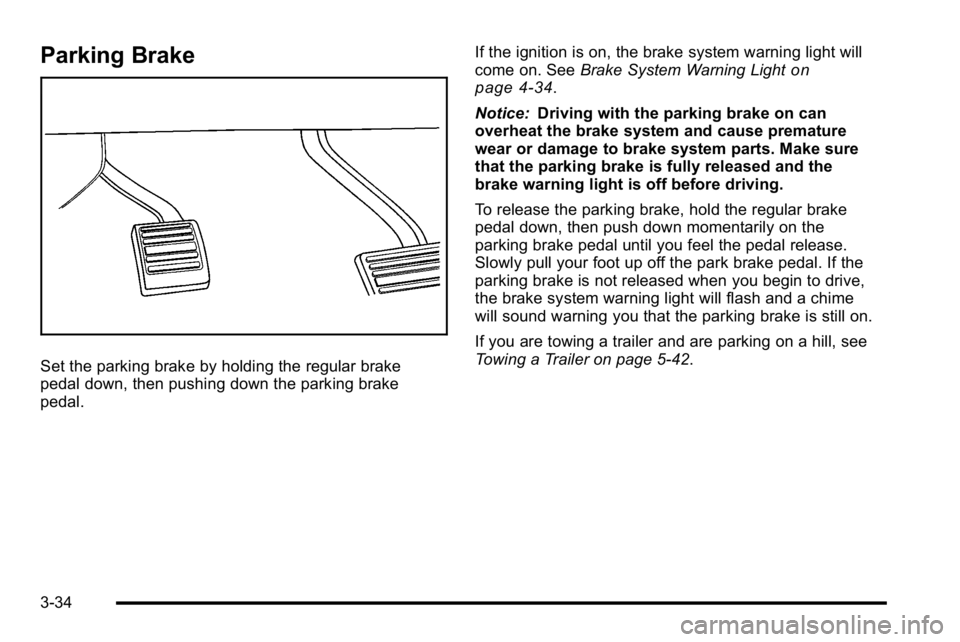
Set the parking brake by holding the regular brake
pedal down, then pushing down the parking brake
pedal.If the ignition is on, the brake system warning light will
come on. See
Brake System Warning Light
on
page 4‑34.
Notice: Driving with the parking brake on can
overheat the brake system and cause premature
wear or damage to brake system parts. Make sure
that the parking brake is fully released and the
brake warning light is off before driving.
To release the parking brake, hold the regular brake
pedal down, then push down momentarily on the
parking brake pedal until you feel the pedal release.
Slowly pull your foot up off the park brake pedal. If the
parking brake is not released when you begin to drive,
the brake system warning light will flash and a chime
will sound warning you that the parking brake is still on.
If you are towing a trailer and are parking on a hill, see
Towing a Trailer on page 5‑42.
3-34
Page 145 of 550
Shifting Into Park
{WARNING:
It can be dangerous to get out of the vehicle if the
shift lever is not fully in P (Park) with the parking
brake firmly set. The vehicle can roll. If you have
left the engine running, the vehicle can move
suddenly. You or others could be injured. To be
sure the vehicle will not move, even when you are
on fairly level ground, use the steps that follow.
If you are pulling a trailer, seeTowing a Trailer
on
page 5‑42
.
1. Hold the brake pedal down, then set the parking brake.
2. Move the shift lever into the P (Park) position by pulling the shift lever toward you and moving it up
as far as it will go.
3. Turn the ignition key to LOCK/OFF.
4. Remove the key and take it with you. If you can leave the vehicle with the ignition key in your hand,
the vehicle is in P (Park).
Leaving the Vehicle With the Engine
Running
{WARNING:
It can be dangerous to leave the vehicle with the
engine running. The vehicle could move suddenly
if the shift lever is not fully in P (Park) with the
parking brake firmly set. And, if you leave the
vehicle with the engine running, it could overheat
and even catch fire. You or others could be
injured. Do not leave the vehicle with the engine
running.
If you have to leave the vehicle with the engine running,
be sure the vehicle is in P (Park) and the parking brake
is firmly set. After the shift lever is moved into P (Park),
hold the regular brake pedal down. Then, see if you can
move the shift lever away from P (Park) without first
pulling it toward you. If you can, it means that the shift
lever was not fully locked into P (Park).
3-35
Page 146 of 550
Torque Lock
If you are parking on a hill and you do not shift the
transmission into P (Park) properly, the weight of the
vehicle can put too much force on the parking pawl in
the transmission. It might be difficult to pull the shift
lever out of P (Park). This is called torque lock. To
prevent torque lock, set the parking brake and then shift
into P (Park) properly before you leave the driver seat.
To find out how, seeShifting Into Park on page 3‑35.
When you are ready to drive, move the shift lever out of
P (Park) before releasing the parking brake.
If torque lock does occur, you might need to have
another vehicle push yours a little uphill to take some of
the pressure from the parking pawl in the transmission.
Then you should be able to pull the shift lever out of
P (Park).
Shifting Out of Park
This vehicle is equipped with an electronic shift lock
release system. The shift lock release is designed to:
.Prevent ignition key removal unless the shift lever
is in P (Park) with the shift lever button fully
released, and
.Prevent movement of the shift lever out of P (Park),
unless the ignition is in ON/RUN or ACC/
ACCESSORY and the regular brake pedal is
applied. The shift lock release is always functional except in the
case of an uncharged or low voltage (less than 9 volt)
battery.
If the vehicle has an uncharged battery or a battery
with low voltage, try charging or jump starting the
battery. See
Jump Starting
on page 6‑44for more
information.
To shift out of P (Park) use the following:
1. Apply the brake pedal.
2. Move the shift lever to the desired position.
If you still are unable to shift out of P (Park): 1. Ease the pressure on the shift lever.
2. While holding down the brake pedal, press the shift lever all the way into P (Park).
3. Move the shift lever to the desired position.
If you are still having a problem shifting, then have the
vehicle serviced soon.
3-36
Page 148 of 550
Running the Vehicle While Parked
It is better not to park with the engine running. But if you
ever have to, here are some things to know.
{WARNING:
Idling a vehicle in an enclosed area with poor
ventilation is dangerous. Engine exhaust may
enter the vehicle. Engine exhaust contains
Carbon Monoxide (CO) which cannot be seen or
smelled. It can cause unconsciousness and even
death. Never run the engine in an enclosed area
that has no fresh air ventilation. For more
information, seeEngine Exhaust on page 3‑37.
{WARNING:
It can be dangerous to get out of the vehicle if the
automatic transmission shift lever is not fully in
P (Park) with the parking brake firmly set. The
vehicle can roll. Do not leave the vehicle when the
engine is running unless you have to. If you have
left the engine running, the vehicle can move
suddenly. You or others could be injured. To be
sure the vehicle will not move, even when you are
on fairly level ground, always set the parking
brake and move the shift lever to P (Park).
Follow the proper steps to be sure the vehicle will not
move. See Shifting Into Park on page 3‑35.
If parking on a hill and pulling a trailer, see Towing a
Trailer on page 5‑42.
3-38
Page 180 of 550
Setting Cruise Control
Cruise control will not work if the parking brake is set,
or if the master cylinder brake fluid level is low.
The cruise control light on the instrument panel cluster
comes on after the cruise control has been set to the
desired speed.
{WARNING:
If you leave your cruise control on when you are
not using cruise, you might hit a button and go
into cruise when you do not want to. You could be
startled and even lose control. Keep the cruise
control switch off until you want to use cruise
control.
1. Press
T.
2. Get up to the desired speed.
3. Press the SET− button located on the steering
wheel and release it.
4. Take your foot off the accelerator.
Resuming a Set Speed
If the brakes are applied while the cruise control is set,
the cruise control is disengaged. But it does not need to
be reset.
Once the vehicle speed reaches about 40 km/h
(25 mph) or more, press the +RES button on the
steering wheel. The vehicle will go back to the previous
set speed and stay there.
Increasing Speed While Using Cruise
Control
To increase the cruise speed while using cruise control:
.Press and hold the +RES button on the steering
wheel until the new desired speed is reached, then
release it.
.To increase vehicle speed in small increments,
press the +RES button. Each time this is done, the
vehicle goes about 1.6 km/h (1 mph) faster.
4-8
Page 206 of 550
The voltmeter gage may also read lower when in fuel
economy mode. This is normal.
Readings in the low warning zone can occur when a
large number of electrical accessories are operating in
the vehicle and the engine is left at an idle for an
extended period. This condition is normal since the
charging system is not able to provide full power at
engine idle. As engine speeds are increased, this
condition should correct itself as higher engine speeds
allow the charging system to create maximum power.
The vehicle can only be driven for a short time with the
reading in either warning zone. If the vehicle must be
driven, turn off all unnecessary accessories.
Readings in either warning zone indicate a possible
problem in the electrical system. Have the vehicle
serviced as soon as possible.Brake System Warning Light
With the ignition on, the brake system warning light
comes on when the parking brake is set. If the vehicle
is driven with the parking brake engaged, a chime
sounds when the vehicle speed is greater than
8 km/h (5 mph).
The vehicle's hydraulic brake system is divided into two
parts. If one part is not working, the other part can still
work and stop the vehicle. For good braking, both parts
need to be working well.
If the warning light comes on and a chime sounds there
could be a brake problem. Have the brake system
inspected right away.
This light can also come on due to low brake fluid. See
Brakes
on page 6‑40for more information.
4-34