GMC SIERRA DENALI 2019 Owners Manual
Manufacturer: GMC, Model Year: 2019, Model line: SIERRA DENALI, Model: GMC SIERRA DENALI 2019Pages: 472, PDF Size: 8.98 MB
Page 181 of 472
GMC Sierra/Sierra Denali Owner Manual (GMNA-Localizing-U.S./Canada/
Mexico-1500-11698638) - 2019 - crc - 5/15/18
180 Lighting
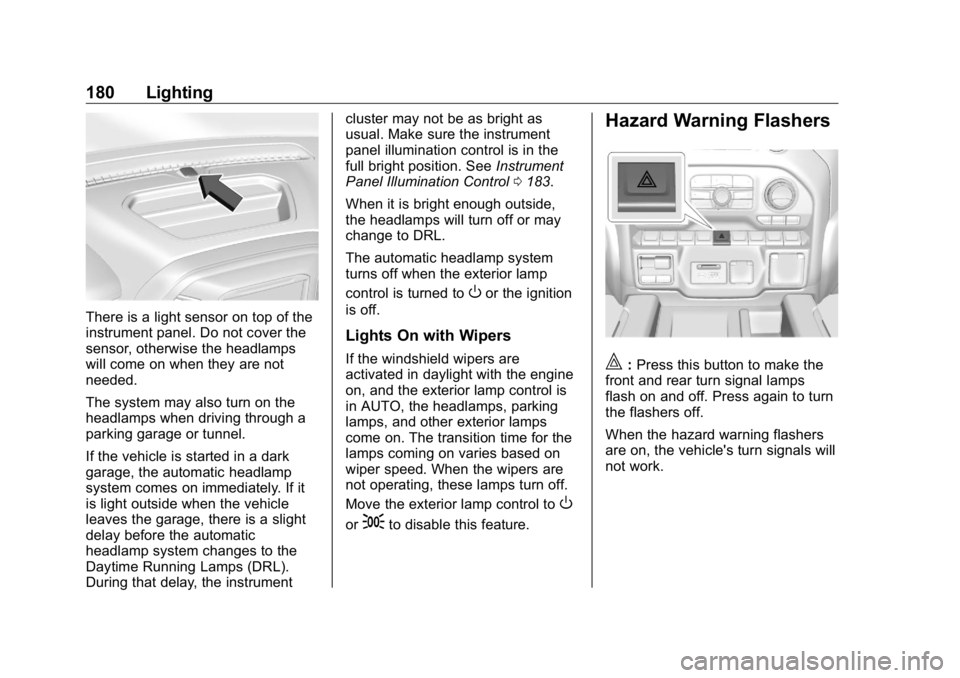
There is a light sensor on top of the
instrument panel. Do not cover the
sensor, otherwise the headlamps
will come on when they are not
needed.
The system may also turn on the
headlamps when driving through a
parking garage or tunnel.
If the vehicle is started in a dark
garage, the automatic headlamp
system comes on immediately. If it
is light outside when the vehicle
leaves the garage, there is a slight
delay before the automatic
headlamp system changes to the
Daytime Running Lamps (DRL).
During that delay, the instrument cluster may not be as bright as
usual. Make sure the instrument
panel illumination control is in the
full bright position. See Instrument
Panel Illumination Control 0 183 .
When it is bright enough outside,
the headlamps will turn off or may
change to DRL.
The automatic headlamp system
turns off when the exterior lamp
control is turned to
O or the ignition
is off.
Lights On with Wipers If the windshield wipers are
activated in daylight with the engine
on, and the exterior lamp control is
in AUTO, the headlamps, parking
lamps, and other exterior lamps
come on. The transition time for the
lamps coming on varies based on
wiper speed. When the wipers are
not operating, these lamps turn off.
Move the exterior lamp control to
Oor
; to disable this feature. Hazard Warning Flashers
| : Press this button to make the
front and rear turn signal lamps
flash on and off. Press again to turn
the flashers off.
When the hazard warning flashers
are on, the vehicle's turn signals will
not work.
Page 182 of 472
GMC Sierra/Sierra Denali Owner Manual (GMNA-Localizing-U.S./Canada/
Mexico-1500-11698638) - 2019 - crc - 5/15/18
Lighting 181
Turn and Lane-Change
Signals
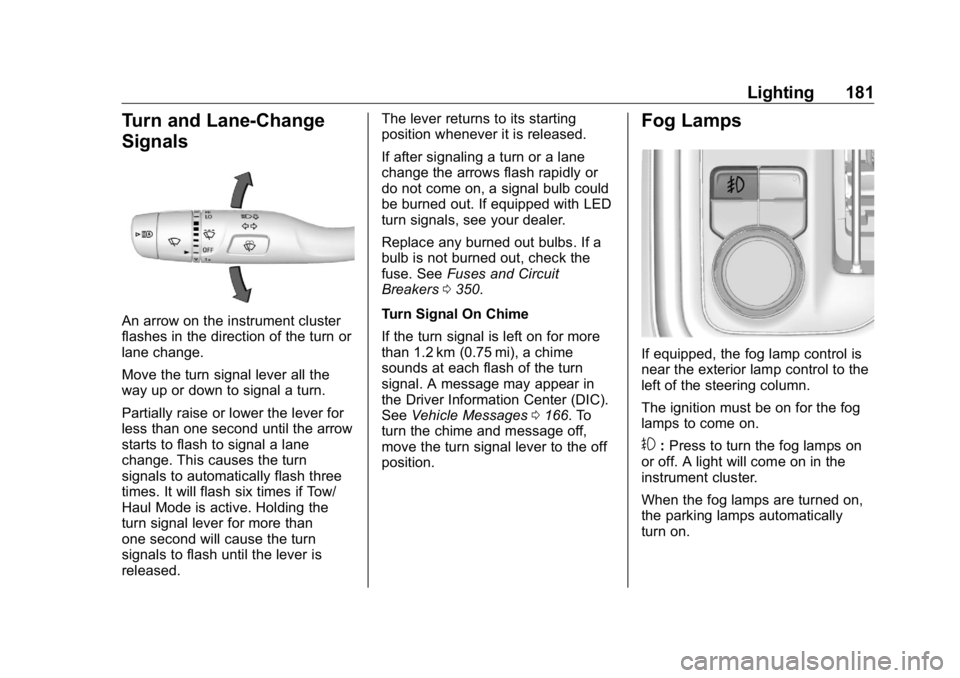
An arrow on the instrument cluster
flashes in the direction of the turn or
lane change.
Move the turn signal lever all the
way up or down to signal a turn.
Partially raise or lower the lever for
less than one second until the arrow
starts to flash to signal a lane
change. This causes the turn
signals to automatically flash three
times. It will flash six times if Tow/
Haul Mode is active. Holding the
turn signal lever for more than
one second will cause the turn
signals to flash until the lever is
released. The lever returns to its starting
position whenever it is released.
If after signaling a turn or a lane
change the arrows flash rapidly or
do not come on, a signal bulb could
be burned out. If equipped with LED
turn signals, see your dealer.
Replace any burned out bulbs. If a
bulb is not burned out, check the
fuse. See Fuses and Circuit
Breakers 0 350 .
Turn Signal On Chime
If the turn signal is left on for more
than 1.2 km (0.75 mi), a chime
sounds at each flash of the turn
signal. A message may appear in
the Driver Information Center (DIC).
See Vehicle Messages 0 166 . To
turn the chime and message off,
move the turn signal lever to the off
position. Fog Lamps
If equipped, the fog lamp control is
near the exterior lamp control to the
left of the steering column.
The ignition must be on for the fog
lamps to come on.
# : Press to turn the fog lamps on
or off. A light will come on in the
instrument cluster.
When the fog lamps are turned on,
the parking lamps automatically
turn on.
Page 183 of 472
GMC Sierra/Sierra Denali Owner Manual (GMNA-Localizing-U.S./Canada/
Mexico-1500-11698638) - 2019 - crc - 5/15/18
182 Lighting When the headlamps are changed
to high beam, the fog lamps also go
off. When the high-beam headlamps
are turned off, the fog lamps will
come on again.
Some localities have laws that
require the headlamps to be on with
the fog lamps.
Task Lighting
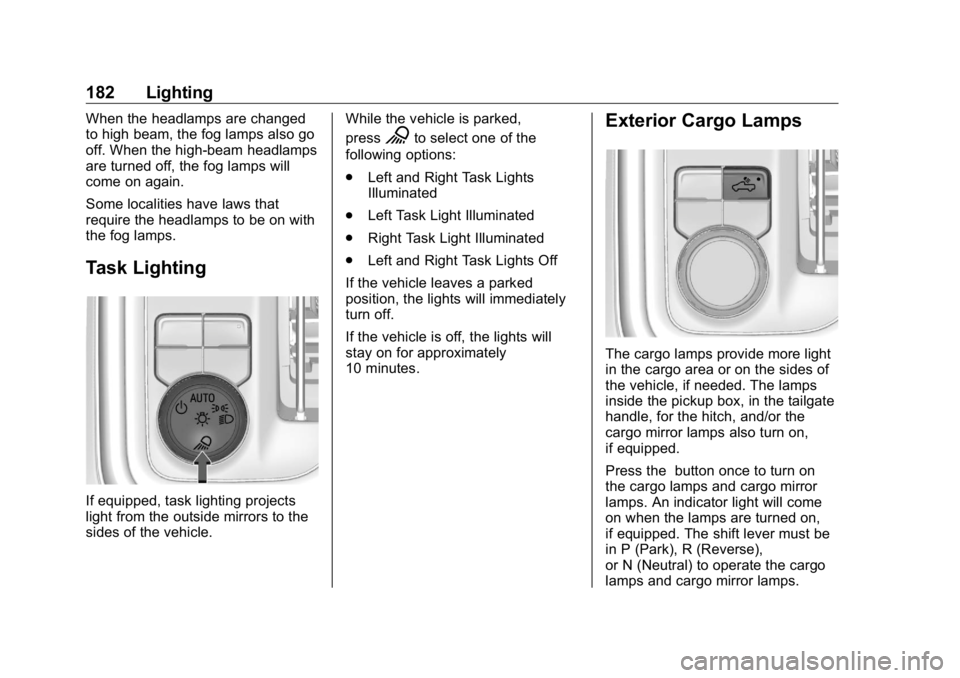
If equipped, task lighting projects
light from the outside mirrors to the
sides of the vehicle. While the vehicle is parked,
press
K to select one of the
following options:
.
Left and Right Task Lights
Illuminated
.
Left Task Light Illuminated
.
Right Task Light Illuminated
.
Left and Right Task Lights Off
If the vehicle leaves a parked
position, the lights will immediately
turn off.
If the vehicle is off, the lights will
stay on for approximately
10 minutes. Exterior Cargo Lamps
The cargo lamps provide more light
in the cargo area or on the sides of
the vehicle, if needed. The lamps
inside the pickup box, in the tailgate
handle, for the hitch, and/or the
cargo mirror lamps also turn on,
if equipped.
Press the button once to turn on
the cargo lamps and cargo mirror
lamps. An indicator light will come
on when the lamps are turned on,
if equipped. The shift lever must be
in P (Park), R (Reverse),
or N (Neutral) to operate the cargo
lamps and cargo mirror lamps.
Page 184 of 472
GMC Sierra/Sierra Denali Owner Manual (GMNA-Localizing-U.S./Canada/
Mexico-1500-11698638) - 2019 - crc - 5/15/18
Lighting 183Press the button again within
five seconds to turn the cargo mirror
lamps off. The cargo lamps will
remain on.
Press the button again to turn off all
the cargo lamps.
Become familiar with and follow all
state and local laws that apply to
cargo lamp operation.
Interior Lighting Instrument Panel
Illumination Control
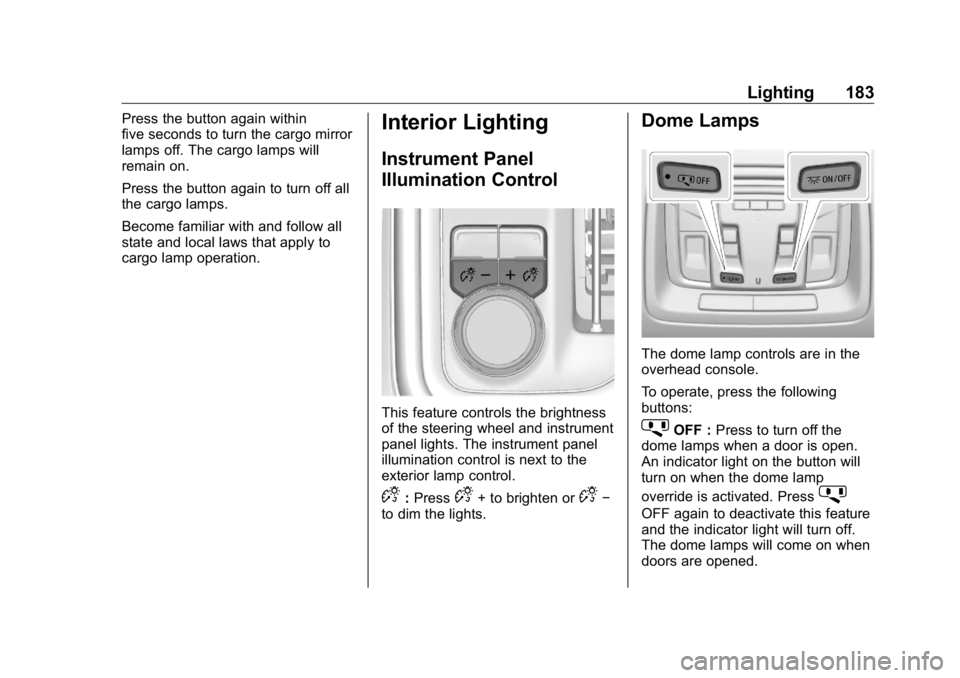
This feature controls the brightness
of the steering wheel and instrument
panel lights. The instrument panel
illumination control is next to the
exterior lamp control.
D : Press
D + to brighten or
D −
to dim the lights. Dome Lamps
The dome lamp controls are in the
overhead console.
To operate, press the following
buttons:
j OFF : Press to turn off the
dome lamps when a door is open.
An indicator light on the button will
turn on when the dome lamp
override is activated. Press
j OFF again to deactivate this feature
and the indicator light will turn off.
The dome lamps will come on when
doors are opened.
Page 185 of 472
GMC Sierra/Sierra Denali Owner Manual (GMNA-Localizing-U.S./Canada/
Mexico-1500-11698638) - 2019 - crc - 5/15/18
184 Lighting + ON/OFF : Press to turn the dome
lamps on manually. Press again to
turn the dome lamps off.
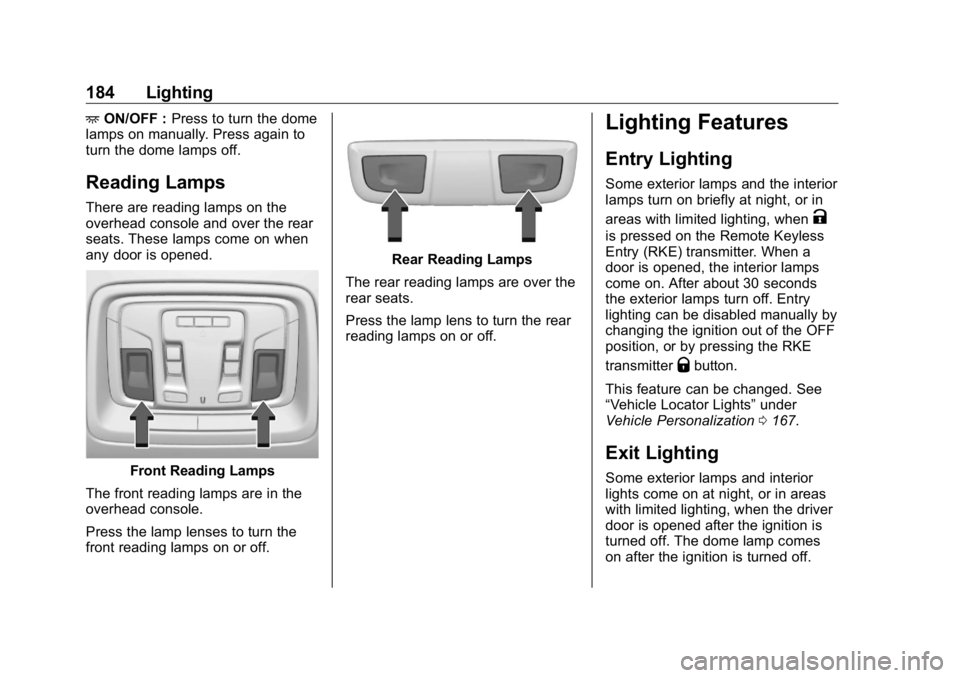
Reading Lamps There are reading lamps on the
overhead console and over the rear
seats. These lamps come on when
any door is opened.
Front Reading Lamps
The front reading lamps are in the
overhead console.
Press the lamp lenses to turn the
front reading lamps on or off. Rear Reading Lamps
The rear reading lamps are over the
rear seats.
Press the lamp lens to turn the rear
reading lamps on or off. Lighting Features Entry Lighting Some exterior lamps and the interior
lamps turn on briefly at night, or in
areas with limited lighting, when
Kis pressed on the Remote Keyless
Entry (RKE) transmitter. When a
door is opened, the interior lamps
come on. After about 30 seconds
the exterior lamps turn off. Entry
lighting can be disabled manually by
changing the ignition out of the OFF
position, or by pressing the RKE
transmitter
Q button.
This feature can be changed. See
“ Vehicle Locator Lights ” under
Vehicle Personalization 0 167 .
Exit Lighting Some exterior lamps and interior
lights come on at night, or in areas
with limited lighting, when the driver
door is opened after the ignition is
turned off. The dome lamp comes
on after the ignition is turned off.
Page 186 of 472
GMC Sierra/Sierra Denali Owner Manual (GMNA-Localizing-U.S./Canada/
Mexico-1500-11698638) - 2019 - crc - 5/15/18
Lighting 185The exterior lamps and dome lamp
remain on for a set amount of time,
then automatically turn off.
The exterior lamps turn off
immediately by turning the exterior
lamp control off.
This feature can be changed. See
Vehicle Personalization 0 167 .
Battery Load
Management The vehicle has Electric Power
Management (EPM), which
estimates the battery's temperature
and state of charge. It then adjusts
the voltage for best performance
and extended life of the battery.
When the battery's state of charge
is low, the voltage is raised slightly
to quickly bring the charge back up.
When the state of charge is high,
the voltage is lowered slightly to
prevent overcharging. The voltmeter
gauge or the voltage display on the
Driver Information Center (DIC),
if equipped, may show the voltage moving up or down. This is normal.
If there is a problem, an alert will be
displayed.
The battery can be discharged at
idle if the electrical loads are very
high. This is true for all vehicles.
This is because the generator
(alternator) may not be spinning fast
enough at idle to produce all the
power that is needed for very high
electrical loads.
A high electrical load occurs when
several of the following are on, such
as: headlamps, high beams, fog
lamps, rear window defogger,
climate control fan at high speed,
heated seats, engine cooling fans,
trailer loads, and loads plugged into
accessory power outlets.
EPM works to prevent excessive
discharge of the battery. It does this
by balancing the generator's output
and the vehicle's electrical needs.
It can increase engine idle speed to
generate more power, whenever
needed. It can temporarily reduce
the power demands of some
accessories. Normally, these actions occur in
steps or levels, without being
noticeable. In rare cases at the
highest levels of corrective action,
this action may be noticeable to the
driver. If so, a DIC message might
be displayed and it is recommended
that the driver reduce the electrical
loads as much as possible.
Battery Power Protection This feature shuts off the dome and
reading lamps, if they are left on for
more than 10 minutes after the
ignition is turned off. The cargo
lamp shuts off after 20 minutes. This
prevents the battery from
running down.
Exterior Lighting Battery
Saver The exterior lamps turn off about
10 minutes after the ignition is
turned off, if the parking lamps or
headlamps have been manually left
on. This protects against draining
the battery. To restart the 10-minute
Page 187 of 472
GMC Sierra/Sierra Denali Owner Manual (GMNA-Localizing-U.S./Canada/
Mexico-1500-11698638) - 2019 - crc - 5/15/18
186 Lighting timer, turn the exterior lamp control
to the
O position and then back to
the
; or
2 position.
To keep the lamps on for more than
10 minutes, the ignition must be on
or in ACC/ACCESSORY.
Page 188 of 472
GMC Sierra/Sierra Denali Owner Manual (GMNA-Localizing-U.S./Canada/
Mexico-1500-11698638) - 2019 - crc - 5/15/18
Infotainment System 187
Infotainment
System Introduction Infotainment . . . . . . . . . . . . . . . . . . 187
Introduction Infotainment See the infotainment manual for
information on the radio, audio
players, phone, navigation system,
and voice or speech recognition.
It also includes information on
settings.
Active Noise Cancellation (ANC)
If equipped, ANC reduces engine
noise in the vehicle ’ s interior. ANC
requires the factory-installed audio
system, radio, speakers, amplifier (if
equipped), induction system, and
exhaust system to work properly.
Deactivation is required by your
dealer if related aftermarket
equipment is installed.
Page 189 of 472
GMC Sierra/Sierra Denali Owner Manual (GMNA-Localizing-U.S./Canada/
Mexico-1500-11698638) - 2019 - crc - 5/15/18
188 Climate Controls
Climate Controls Climate Control Systems Climate Control Systems . . . . . 188
Dual Automatic Climate
Control System . . . . . . . . . . . . . 190
Air Vents Air Vents . . . . . . . . . . . . . . . . . . . . . 194
Maintenance Passenger Compartment Air
Filter . . . . . . . . . . . . . . . . . . . . . . . . 194
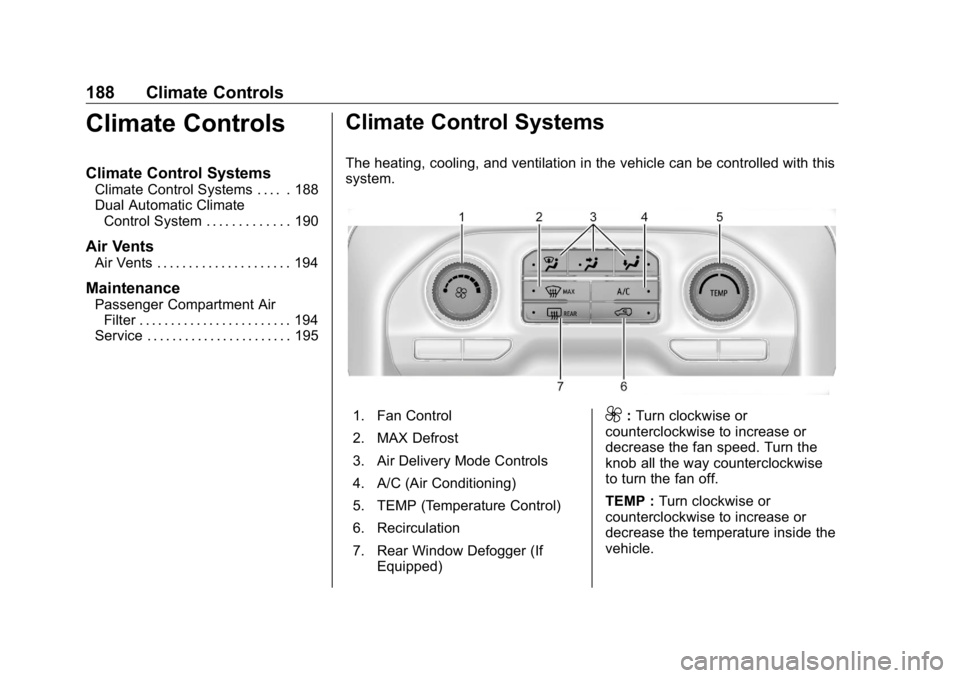
Service . . . . . . . . . . . . . . . . . . . . . . . 195 Climate Control Systems The heating, cooling, and ventilation in the vehicle can be controlled with this
system.
1. Fan Control
2. MAX Defrost
3. Air Delivery Mode Controls
4. A/C (Air Conditioning)
5. TEMP (Temperature Control)
6. Recirculation
7. Rear Window Defogger (If
Equipped) 9 : Turn clockwise or
counterclockwise to increase or
decrease the fan speed. Turn the
knob all the way counterclockwise
to turn the fan off.
TEMP : Turn clockwise or
counterclockwise to increase or
decrease the temperature inside the
vehicle.
Page 190 of 472
GMC Sierra/Sierra Denali Owner Manual (GMNA-Localizing-U.S./Canada/
Mexico-1500-11698638) - 2019 - crc - 5/18/18
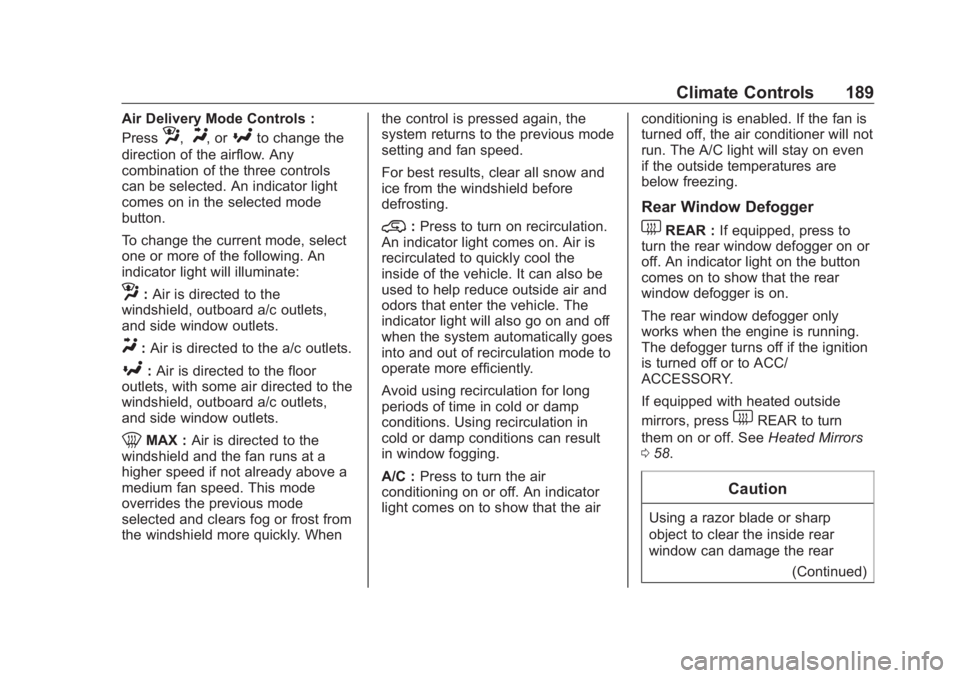
Climate Controls 189Air Delivery Mode Controls :
Press
z ,
Y , or
[ to change the
direction of the airflow. Any
combination of the three controls
can be selected. An indicator light
comes on in the selected mode
button.
To change the current mode, select
one or more of the following. An
indicator light will illuminate:
z : Air is directed to the
windshield, outboard a/c outlets,
and side window outlets.
Y : Air is directed to the a/c outlets.
[ : Air is directed to the floor
outlets, with some air directed to the
windshield, outboard a/c outlets,
and side window outlets.
0 MAX : Air is directed to the
windshield and the fan runs at a
higher speed if not already above a
medium fan speed. This mode
overrides the previous mode
selected and clears fog or frost from
the windshield more quickly. When the control is pressed again, the
system returns to the previous mode
setting and fan speed.
For best results, clear all snow and
ice from the windshield before
defrosting.
@ : Press to turn on recirculation.
An indicator light comes on. Air is
recirculated to quickly cool the
inside of the vehicle. It can also be
used to help reduce outside air and
odors that enter the vehicle. The
indicator light will also go on and off
when the system automatically goes
into and out of recirculation mode to
operate more efficiently.
Avoid using recirculation for long
periods of time in cold or damp
conditions. Using recirculation in
cold or damp conditions can result
in window fogging.
A/C : Press to turn the air
conditioning on or off. An indicator
light comes on to show that the air conditioning is enabled. If the fan is
turned off, the air conditioner will not
run. The A/C light will stay on even
if the outside temperatures are
below freezing.
Rear Window Defogger
1 REAR : If equipped, press to
turn the rear window defogger on or
off. An indicator light on the button
comes on to show that the rear
window defogger is on.
The rear window defogger only
works when the engine is running.
The defogger turns off if the ignition
is turned off or to ACC/
ACCESSORY.
If equipped with heated outside
mirrors, press
1 REAR to turn
them on or off. See Heated Mirrors
0 58 .
Caution
Using a razor blade or sharp
object to clear the inside rear
window can damage the rear
(Continued)