key GMC TERRAIN 2010 Owner's Manual
[x] Cancel search | Manufacturer: GMC, Model Year: 2010, Model line: TERRAIN, Model: GMC TERRAIN 2010Pages: 16, PDF Size: 0.29 MB
Page 1 of 16

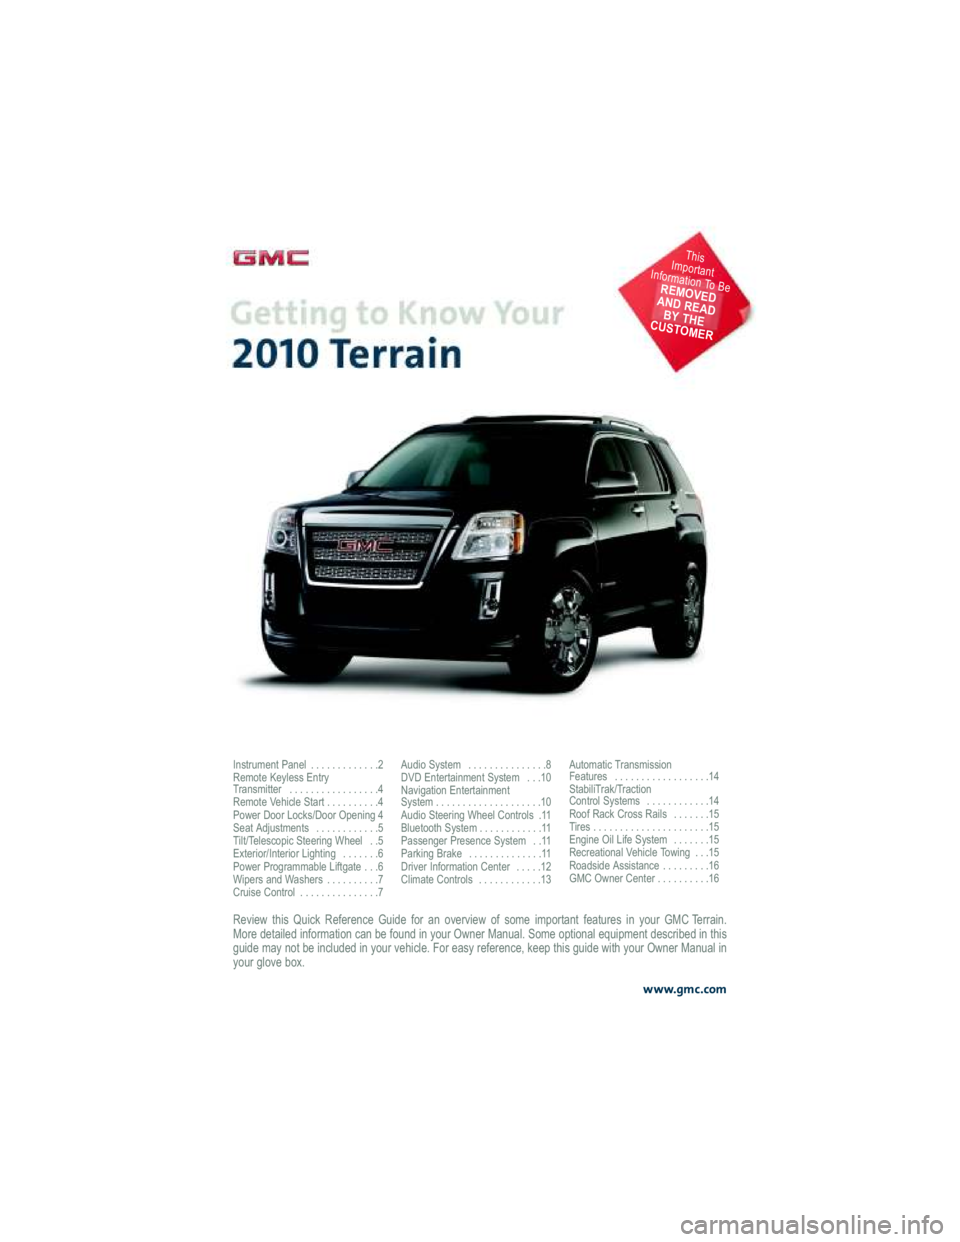
Review this Quick Reference Guide for an overview of some important features in your GMC Terrain.
More detailed information can be found in your Owner Manual . Some optional equipment described in this
guide may not be included in your vehicle. For easy referen ce, keep this guide with your Owner Manual in
your glove box.
www.gmc.com
Instrument Panel . . . . . . . . . . . . .2
Remote Keyless Entry
Transmitter . . . . . . . . . . . . . . . . .4
Remote Vehicle Start . . . . . . . . . .4
Power Door Locks/Door Opening 4
Seat Adjustments . . . . . . . . . . . .5
Tilt/Telescopic Steering Wheel . .5
Exterior/Interior Lighting . . . . . . .6
Power Programmable Liftgate . . .6
Wipers and Washers . . . . . . . . . .7
Cruise Control . . . . . . . . . . . . . . .7 Audio System . . . . . . . . . . . . . . .8
DVD Entertainment System . . .10
Navigation Entertainment
System . . . . . . . . . . . . . . . . . . . .10
Audio Steering Wheel Controls .11
Bluetooth System . . . . . . . . . . . .11
Passenger Presence System . .11
Parking Brake . . . . . . . . . . . . . .11
Driver Information Center . . . . .12
Climate Controls . . . . . . . . . . . .13
Automatic Transmission
Features . . . . . . . . . . . . . . . . . .14
StabiliTrak/Traction
Control Systems . . . . . . . . . . . .14
Roof Rack Cross Rails . . . . . . .15
Tires . . . . . . . . . . . . . . . . . . . . . .15
Engine Oil Life System . . . . . . .15
Recreational Vehicle Towing . . .15
Roadside Assistance . . . . . . . . .16
GMC Owner Center . . . . . . . . . .16
This
Important
Information To Be
REMOVED
AND READ BY THE
CUSTOMER
Page 4 of 16

4
Remote Keyless Entry Transmitter
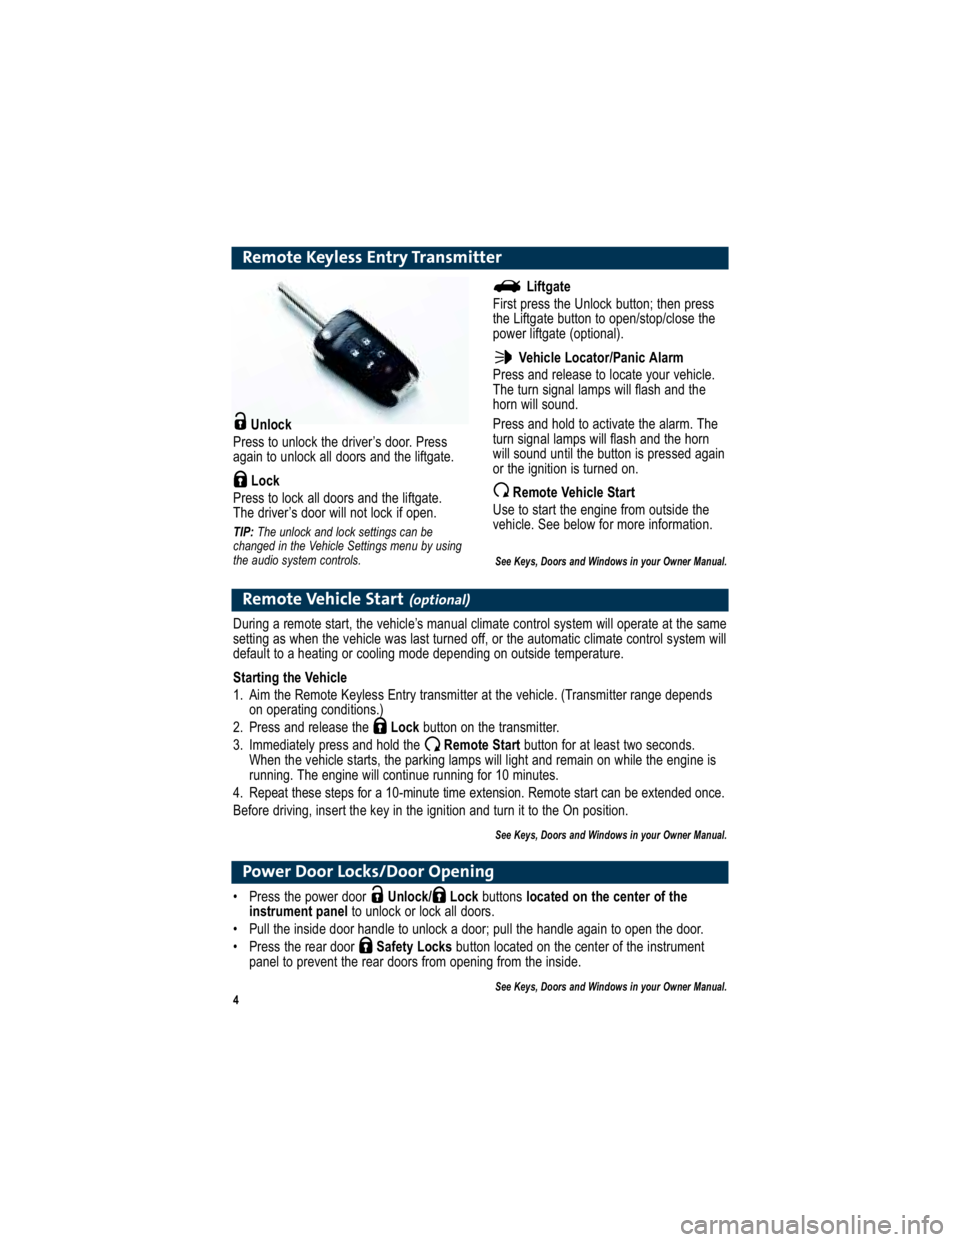
Unlock
Press to unlock the driver’s door. Press
again to unlock all doors and the liftgate.
Lock
Press to lock all doors and the liftgate.
The driver’s door will not lock if open.
TIP: The unlock and lock settings can be
changed in the Vehicle Settings menu by using
the audio system controls.
Remote Vehicle Start(optional)
During a remote start, the vehicle’s manual climate control sy stem will operate at the same
setting as when the vehicle was last turned off, or the automa tic climate control system will
default to a heating or cooling mode depending on outside temperature.
Starting the Vehicle
1. Aim the Remote Keyless Entry transmitter at the vehicle. (Trans mitter range depends
on operating conditions.)
2. Press and release the Lockbutton on the transmitter.
3. Immediately press and hold the Remote Start button for at least two seconds.
When the vehicle starts, the parking lamps will light and rem ain on while the engine is
running. The engine will continue running for 10 minutes.
4. Repeat these steps for a 10-minute time extension . Remote start can be extended once.
Before driving, insert the key in the ignition and turn it to the On position.
See Keys, Doors and Windows in your Owner Manual.
Liftgate
First press the Unlock button; then press
the Liftgate button to open/stop/close the
power liftgate (optional).
Vehicle Locator/Panic Alarm
Press and release to locate your vehicle.
The turn signal lamps will flash and the
horn will sound.
Press and hold to activate the alarm. The
turn signal lamps will flash and the horn
will sound until the button is pressed again
or the ignition is turned on.
Remote Vehicle Start
Use to start the engine from outside the
vehicle. See below for more information.
See Keys, Doors and Windows in your Owner Manual.
Power Door Locks/Door Opening
Press the power door Unlock/ Lock buttons located on the center of the
instrument panel to unlock or lock all doors.
Pull the inside door handle to unlock a door; pull the h andle again to open the door.
Press the rear door Safety Locksbutton located on the center of the instrument
panel to prevent the rear doors from opening from the inside.
See Keys, Doors and Windows in your Owner Manual.
Page 6 of 16

6
Exterior/Interior Lighting
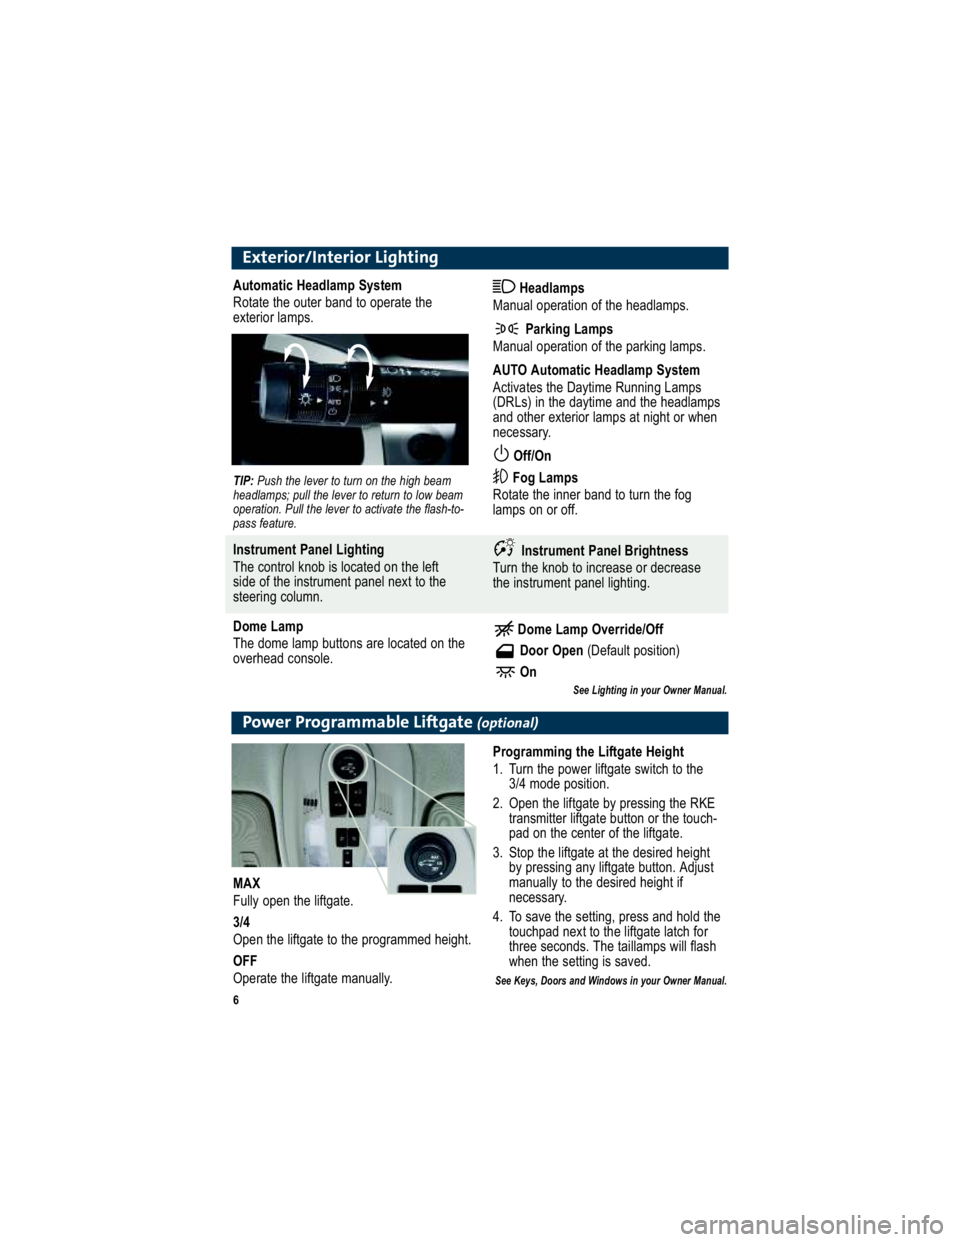
Automatic Headlamp System
Rotate the outer band to operate the
exterior lamps. Headlamps
Manual operation of the headlamps.
Parking Lamps
Manual operation of the parking lamps.
AUTO Automatic Headlamp System
Activates the Daytime Running Lamps
(DRLs) in the daytime and the headlamps
and other exterior lamps at night or when
necessary.
Off/On
Fog Lamps
Rotate the inner band to turn the fog
lamps on or off.
TIP: Push the lever to turn on the high beam
headlamps; pull the lever to return to low beam
operation. Pull the lever to activate the flash-to-
pass feature.
Instrument Panel Lighting
The control knob is located on the left
side of the instrument panel next to the
steering column. Instrument Panel Brightness
Turn the knob to increase or decrease
the instrument panel lighting.
Dome Lamp
The dome lamp buttons are located on the
overhead console. Dome Lamp Override/Off
Door Open (Default position)
On
See Lighting in your Owner Manual.
Power Programmable Liftgate(optional)
Programming the Liftgate Height
1. Turn the power liftgate switch to the 3/4 mode position.
2. Open the liftgate by pressing the RKE transmitter liftgate button or the touch-
pad on the center of the liftgate.
3. Stop the liftgate at the desired height by pressing any liftgate button. Adjust
manually to the desired height if
necessary.
4. To save the setting, press and hold the touchpad next to the liftgate latch for
three seconds. The taillamps will flash
when the setting is saved.
See Keys, Doors and Windows in your Owner Manual.
MAX
Fully open the liftgate.
3/4
Open the liftgate to the programmed height.
OFF
Operate the liftgate manually.
Page 10 of 16

10
DVD Entertainment System(optional)
Play a DVD Video
1. Press the release buttons on the seatback consoles to raise the screens.
2. Insert a DVD into the audio system.
3. Press the MEM/DVD/AUX button to select the DVD source. Sound will play through the
vehicle speakers.
4. To use the wireless headphones, press the On/Offbutton on the headphones, select
Channel 1, and adjust volume using the headphone volum e control.
5. To control DVD playback, use the audio controls or the rem ote control. For best
performance, aim the remote control at the driver-side seatback c onsole for proper
operation.
Changing the Source on the Video Screens
Continually press the AUXbutton on the remote control to play a DVD or an auxiliary
device such as a video game on both screens, or a differe nt source on each screen.
See Infotainment System in your Owner Manual.
Navigation Entertainment System(optional)
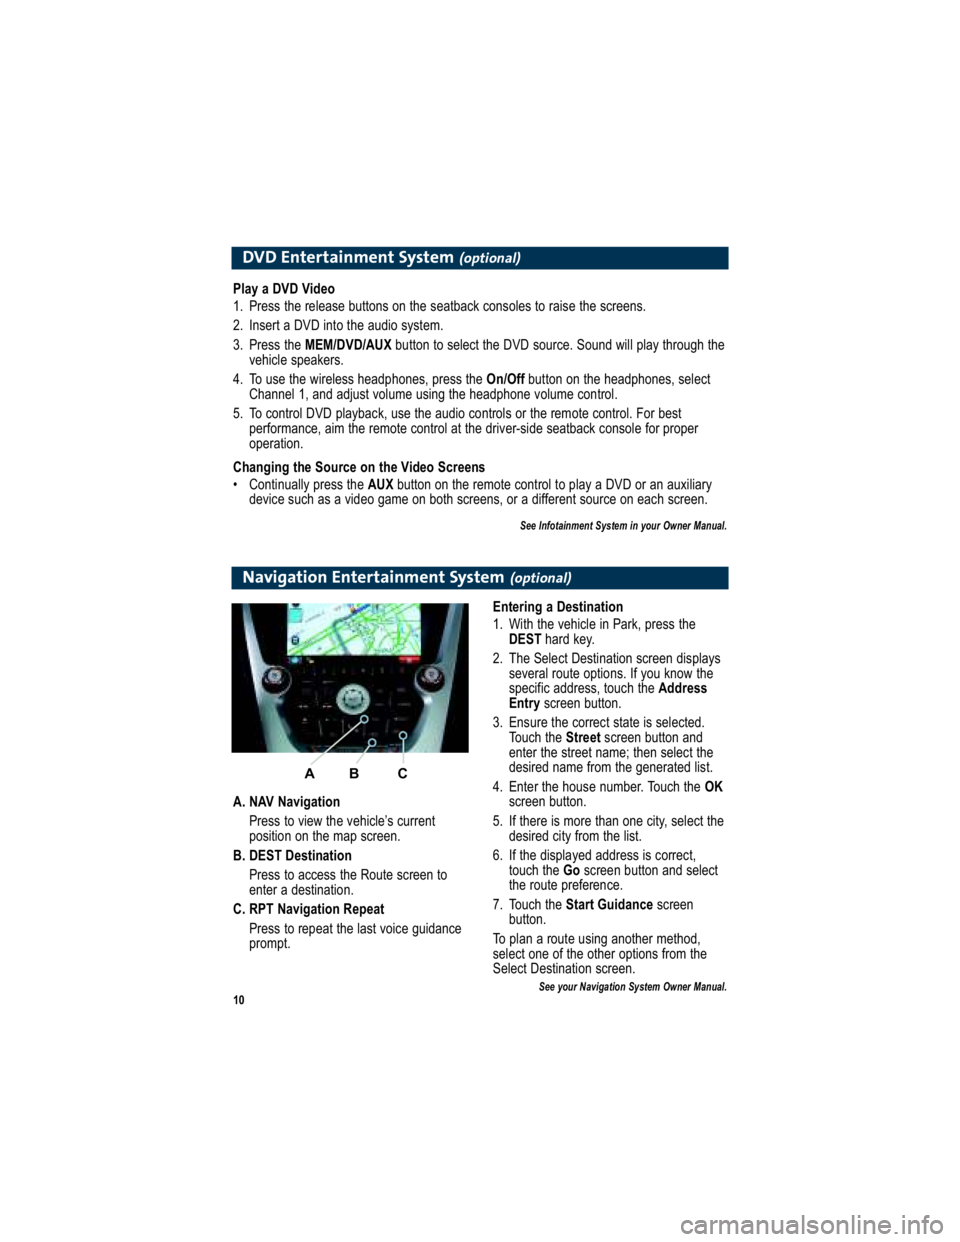
A. NAV Navigation
Press to view the vehicle’s current
position on the map screen.
B. DEST Destination Press to access the Route screen to
enter a destination.
C. RPT Navigation Repeat Press to repeat the last voice guidance
prompt. Entering a Destination
1. With the vehicle in Park, press the
DEST hard key.
2. The Select Destination screen displays several route options. If you know the
specific address, touch the Address
Entry screen button.
3. Ensure the correct state is selected. Touch the Streetscreen button and
enter the street name; then select the
desired name from the generated list.
4. Enter the house number. Touch the OK
screen button.
5. If there is more than one city, select the desired city from the list.
6. If the displayed address is correct, touch the Goscreen button and select
the route preference.
7. Touch the Start Guidance screen
button.
To plan a route using another method,
select one of the other options from the
Select Destination screen.
See your Navigation System Owner Manual.
A B C