ignition GMC TERRAIN 2010 Owner's Guide
[x] Cancel search | Manufacturer: GMC, Model Year: 2010, Model line: TERRAIN, Model: GMC TERRAIN 2010Pages: 410, PDF Size: 2.55 MB
Page 112 of 410

4-20 Instruments and Controls
When the ignition is on, the brake
system warning light comes on
when the parking brake is set. The
light stays on if the parking brake
does not fully release. If it stays on
after the parking brake is fully
released, there is a brake problem.
Have the brake system inspected
immediately.
{WARNING
The brake system might not be
working properly if the brake
system warning light is on.
Driving with the brake system
warning light on can lead to a
crash. If the light is still on after
the vehicle has been pulled off
the road and carefully stopped,
have the vehicle towed for
service.If the light comes on while driving, a
chime sounds. Pull off the road and
stop. The pedal might be harder to
push or go closer to the floor.
It might also take longer to stop.
If the light is still on, have the
vehicle towed for service. See
Towing the Vehicle on page 9‑81.
Antilock Brake System
(ABS) Warning Light
For vehicles with the Antilock Brake
System (ABS), this light comes on
briefly when the engine is started.
If the light does not come on, have it
fixed so it will be ready to warn if
there is a problem. If the ABS light stays on, turn the
ignition off. If the light comes on
while driving, stop as soon as it is
safely possible and turn the ignition
off. A chime may also sound when
the light comes on steady. Then
start the engine again to reset the
system. If the ABS light stays on,
or comes on again while driving, the
vehicle needs service. If the regular
brake system warning light is not
on, the vehicle still has brakes, but
not antilock brakes. If the regular
brake system warning light is also
on, the vehicle does not have
antilock brakes and there is a
problem with the regular brakes.
See
Brake System Warning Lighton page 4‑19.
For vehicles with a Driver
Information Center (DIC), see
Driver Information Center (DIC)
on
page 4‑25for all brake related DIC
messages.
Page 114 of 410
4-22 Instruments and Controls
The indicator/warning light flashes
while the StabiliTrak or TCS system
is working to control the vehicle on
a low traction surface.
If the TCS warning light comes on
and stays on while driving, the
vehicle needs service.
Check the Driver Information Center
(DIC) for applicable messages. See
Ride Control System Messages
on
page 4‑33for more information.
See Traction Control System (TCS)
on page 8‑41andStabiliTrak
Systemon page 8‑42for more
information.
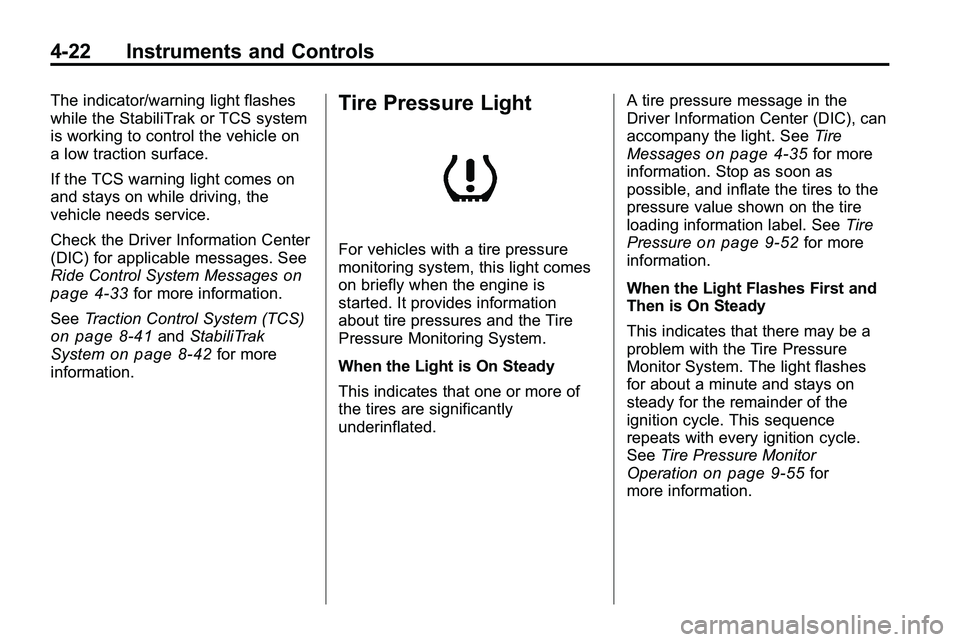
Tire Pressure Light
For vehicles with a tire pressure
monitoring system, this light comes
on briefly when the engine is
started. It provides information
about tire pressures and the Tire
Pressure Monitoring System.
When the Light is On Steady
This indicates that one or more of
the tires are significantly
underinflated. A tire pressure message in the
Driver Information Center (DIC), can
accompany the light. See
Tire
Messages
on page 4‑35for more
information. Stop as soon as
possible, and inflate the tires to the
pressure value shown on the tire
loading information label. See Tire
Pressure
on page 9‑52for more
information.
When the Light Flashes First and
Then is On Steady
This indicates that there may be a
problem with the Tire Pressure
Monitor System. The light flashes
for about a minute and stays on
steady for the remainder of the
ignition cycle. This sequence
repeats with every ignition cycle.
See Tire Pressure Monitor
Operation
on page 9‑55for
more information.
Page 116 of 410

4-24 Instruments and Controls
Low Fuel Warning Light
United States Shown, CanadaSimilar
This light comes on for a
few seconds when the ignition
is turned on as a check to indicate
it is working. If it does not come on,
have it fixed.
The low fuel warning light is a circle
located on the fuel gauge. This light
comes on and a chime sounds
periodically when the vehicle is low
on fuel. The light goes off when fuel
is added to the fuel tank.
For vehicles with a Driver
Information Center (DIC), see
Fuel System Messages
on
page 4‑32for more information.
Security Light
This light comes on if there is a
problem with the security system,
or if the vehicle has been
tampered with.
For more information, see Vehicle
Security on page 1‑13.
High-Beam on Light
The high-beam on light comes on
when the high-beam headlamps are
in use.
See Headlamp High/Low-Beam
Changer
on page 5‑2for more
information.
Page 119 of 410
Instruments and Controls 4-27
Average Fuel Economy
This display shows the approximate
average liters per 100 kilometers
(L/100 km) or miles per
gallon (mpg). This number is
calculated based on the number
of L/100 km (mpg) recorded since
the last time this menu item was
reset. The fuel economy can be
reset by pressing
Vor SET/CLR
while the Average Fuel Economy
display is showing. The display may
not reset to zero.
Instantaneous Fuel Economy
This display shows the current fuel
economy in either liters per
100 kilometers (L/100 km) or miles
per gallon (mpg). This number
reflects only the fuel economy that
the vehicle has right now and
changes frequently as driving
conditions change. Unlike average
economy, this display cannot be
reset. Average Vehicle Speed
This display shows the average
speed of the vehicle in kilometers
per hour (km/h) or miles per
hour (mph). This average is
calculated based on the various
vehicle speeds recorded since
the last reset of this value. The
average speed can be reset by
pressingVor SET/CLR while the
Average Vehicle Speed display is
showing.
Timer
This display can be used as a timer.
To start the timer, press
Vor
SET/CLR while Timer is displayed.
The display will show the amount of
time that has passed since the timer
was last reset, not including time the
ignition is off. Time will continue to
be counted as long as the ignition is
on, even if another display is being
shown on the DIC. The timer will
record up to 99 hours, 59 minutes
and 59 seconds (99:59:59) after
which the display will return to zero. To stop the timer, press
Vor
SET/CLR briefly while Timer is
displayed. To reset the timer to zero,
press and hold
Vor SET/CLR.
Digital Speedometer
The speedometer shows how fast
the vehicle is moving in either
kilometers per hour (km/h) or miles
per hour (mph). The speedometer
cannot be reset.
Turn-by-Turn
This display is used for the OnStar
or Navigation System Turn-by-Turn
guidance. See OnStar
®Systemon
page 4‑41or the Navigation
manual, if the vehicle has
navigation, for more information.
Blank Display
This display shows no information.
Page 125 of 410
Instruments and Controls 4-33
Key and Lock Messages
Replace Battery In Remote Key
This message displays when the
battery in the Remote Keyless Entry
(RKE) transmitter needs to be
replaced.
Transport Mode On
This message displays when the
ignition is held in START for
15 seconds. The battery light may
also be flashing when this message
is displayed. To turn this message
off, start the vehicle and hold the
key in the START position for
15 seconds.
Object Detection System
Messages
Park Assist Off
This message is displayed when the
park assist system has been turned
off. SeeUltrasonic Parking Assist
on page 8‑47.
Service Park Assist
This message is displayed if there is
a problem with the park assist
system. Take the vehicle to your
dealer/retailer for service.
Ride Control System
Messages
All Wheel Drive Off
If your vehicle has the All-Wheel
Drive (AWD) system, this message
displays when the rear drive system
is overheating. This message turns
off when the rear drive system cools
down. If the warning message stays
on for a while, you need to reset the
warning message. To reset the
warning message, turn the ignition
off and then back on again. If the
message stays on, see your dealer/
retailer right away. See All-Wheel
Drive
on page 8‑38for more
information.
Service All Wheel Drive
If your vehicle has the All-Wheel
Drive (AWD) system, this message
displays if a problem occurs with
this system. If this message
appears, stop as soon as possible
and turn off the vehicle. Restart the
vehicle and check for the message
on the DIC display. If the message
is still displayed or appears again
when you begin driving, the AWD
system needs service. See your
dealer/retailer.
Service Traction Control
This message displays when there
is a problem with the Traction
Control System (TCS). When this
message is displayed, the system
will not limit wheel spin. Adjust your
driving accordingly. See your dealer/
retailer for service.
Page 127 of 410
Instruments and Controls 4-35
Tire Messages
Service Tire Monitor System
This message displays if there is a
problem with the Tire Pressure
Monitor System (TPMS). SeeTire
Pressure Monitor Operation
on
page 9‑55for more information.
Tire Learning Active
This message displays when the
system is learning new tires. See
Tire Pressure Monitor Operation
on
page 9‑55for more information.
Tire Low Add Air To Tire
On vehicles with the Tire Pressure
Monitor System (TPMS), this
message displays when the
pressure in one or more of the
vehicle's tires is low.
This message also displays “Left
Front”, “Right Front”, “Left Rear”,
or “Right Rear” to indicate the
location of the low tire. The low tire pressure warning light
will also come on. See
Tire
Pressure Light on page 4‑22.
If a tire pressure message appears
on the DIC, stop as soon as you
can. Inflate the tires by adding air
until the tire pressure is equal to the
values shown on the Tire Loading
Information label. See Tires
on
page 9‑45, Vehicle Load Limitson
page 8‑22, and Tire Pressureon
page 9‑52.
You can receive more than one tire
pressure message at a time. To
read the other messages that may
have been sent at the same time,
press the set/reset button. The DIC
also shows the tire pressure values.
See Driver Information Center (DIC)
on page 4‑25.
Transmission Messages
Service Transmission
This message displays if there is a
problem with the transmission. See
your dealer/retailer.
Shift To Park
This message displays when the
transmission needs to be shifted to
P (Park). This may appear when
attempting to remove the key from
the ignition if the vehicle is not in
P (Park).
Transmission Hot –Idle
Engine
This message displays and a chime
sounds if the transmission fluid in
the vehicle gets hot. Driving with the
transmission fluid temperature high
can cause damage to the vehicle.
Stop the vehicle and let it idle to
allow the transmission to cool. This
message clears when the fluid
temperature reaches a safe level.
Page 136 of 410

5-2 Lighting
Headlamp High/
Low-Beam Changer
2 3
Headlamp High/Low Beam
Changer: Push the turn/lane
change lever away from you to turn
the high beams on.
Pull the lever towards you to return
to low beams.
This indicator light turns on in the
instrument panel cluster when the
high beam headlamps are on.
Flash-to-Pass
The flash‐to‐pass feature works with
the low‐beams or Daytime Running
Lamps (DRL) on or off.
To flash the high beams, pull the
turn signal/lane change lever all the
way towards you. Then release it.
Daytime Running
Lamps (DRL)
With DRL, the low-beam headlamps
come on at a reduced brightness in
daylight when the following
conditions are met:
.The ignition is on.
.The exterior lamp band is in the
automatic position.
.The transmission is not in
P (Park).
.The light sensor determines it is
daytime.
.The parking brake is released.
Fully functional DRL are required on
all vehicles first sold in Canada.
When the DRL are on, the taillamps,
sidemarker, instrument panel lights,
and other lamps will not be on. When the exterior lamp band is
turned to the headlamp position, the
low-beam headlamps come on. The
other lamps that come on with the
headlamps will also come on.
When the headlamps are turned off,
the regular lamps will go off, and the
low-beam headlamps come on to
the reduced brightness.
To idle the vehicle with the DRL off,
move the shift lever to P (Park). The
DRL will stay off until the shift lever
is moved out of the P (Park)
position.
The regular headlamp system
should be turned on when needed.
Page 138 of 410
5-4 Lighting
Interior Lighting
Instrument Panel
Illumination Control
This control is located on the
instrument panel, to the left of the
steering column.
D(Instrument Panel
Brightness): Turn clockwise or
counterclockwise to brighten or dim
the lights.
Dome Lamps
The dome lamp controls are located
in the overhead console. To change
the settings, press the following:
*(Dome Lamp Override): Turns
the lamp off, even when a door
is open.
1(Door): The lamp comes on
automatically when a door is
opened.
+(On): Turns the dome lamp on.
Reading Lamps
The reading lamps are located on
the overhead console. These lamps
come on automatically when any
door is opened.
For manual operation, press the
button next to each lamp to turn it
on or off.
Lighting Features
Entry Lighting
The dome lamp, cargo lamp and
foot lamp inside the vehicle come
on when any door is opened, if the
dome lamp is in the door position. In
addition, these lamps come on
when the Remote Keyless Entry
(RKE) unlock button is pressed.
They stay on for 20 seconds or until
a door is opened. After the door is
opened and then closed, the light
remains on for 20 seconds, or until
the ignition is turned to ON/RUN.
Page 140 of 410
6-2 Infotainment System
For more information, seeDefensive
Driving on page 8‑3.
This vehicle's infotainment system
may be equipped with a noise
reduction system which can work
improperly if the audio amplifier,
engine calibrations, exhaust system,
microphones, radio, or speakers are
modified or replaced. This could
result in more noticeable engine
noise at certain speeds. Notice:
Contact your dealer/
retailer before adding any
equipment.
Adding audio or communication
equipment could interfere with
the operation of the vehicle's
engine, radio, or other systems,
and could damage them. Follow
federal rules covering mobile
radio and telephone equipment.
The vehicle has Retained
Accessory Power (RAP). With RAP,
the audio system can be played
even after the ignition is turned off.
See Retained Accessory Power
(RAP)
on page 8‑29for more
information.
Navigation/Radio System
For vehicles with a navigation radio
system, see the separate Navigation
System manual.
Theft-Deterrent Feature
The theft-deterrent feature works by
learning a portion of the Vehicle
Identification Number (VIN) to the
infotainment system. The
infotainment system does not
operate if it is stolen or moved to a
different vehicle.
Page 145 of 410
Infotainment System 6-7
P.5/0(Phone/Mute)
.Opens the phone
main menu.
.Mutes the audio system.
Q. DEL
.MEM: Deletes the current
track from MEM.
R.
0BACK
.Menu: Moves one
level back.
.Character Input: Deletes
the last character.
Operation
Controls
The infotainment system is operated
by using the pushbuttons,
multifunction knobs, menus that are
shown on the display, and steering
wheel controls, if equipped.
Turning the System On or Off
VOL/O(Volume/Power): Press
to turn the system on and off.
Automatic Switch‐Off
If the infotainment system has been
turned on after the ignition is turned
off, the system will turn off
automatically after ten minutes.
Volume Control
VOL/O(Volume/Power): Turn to
adjust the volume.
5/0(Mute): For vehicles with
OnStar®, press and hold5/0to
mute the infotainment system. Press
and hold
5/0again, or turn the
VOL/
Oknob to cancel mute.
For vehicles without OnStar
®, press5/0to mute the infotainment
system. Press
5/0again, or turn
the VOL/
Oknob to cancel mute.
Menu System
Controls
The MENU/SEL knob and the
0BACK button are used to
navigate the menu system.
MENU/SEL (Menu/Select):
Press to:
.Enter the menu system.
.Select or activate the highlighted
menu option.
.Confirm a set value.
.Turn a system setting on or off.