fog light GMC TERRAIN 2010 Owner's Manual
[x] Cancel search | Manufacturer: GMC, Model Year: 2010, Model line: TERRAIN, Model: GMC TERRAIN 2010Pages: 410, PDF Size: 2.55 MB
Page 5 of 410
Introduction v
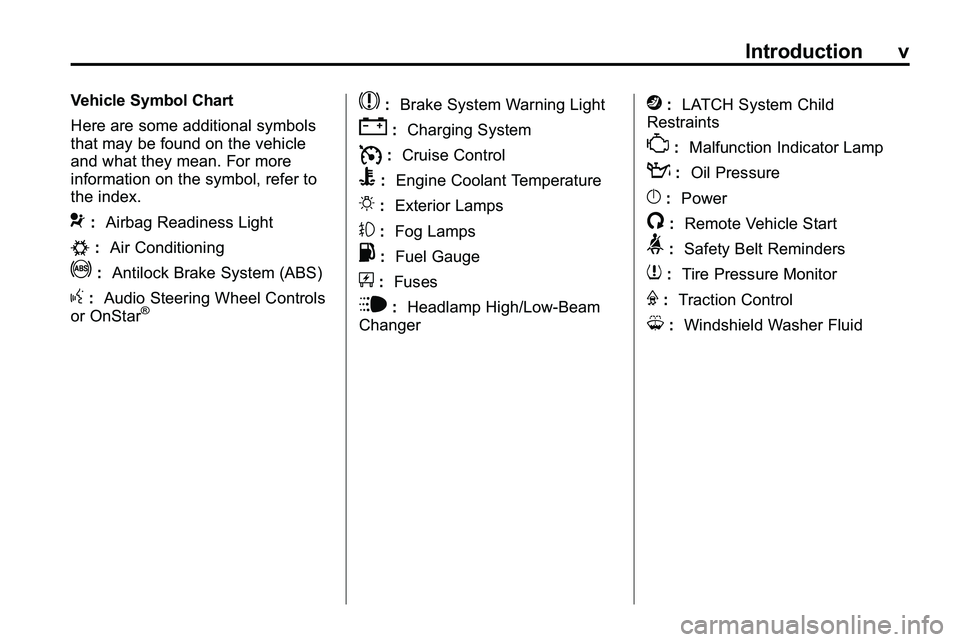
Vehicle Symbol Chart
Here are some additional symbols
that may be found on the vehicle
and what they mean. For more
information on the symbol, refer to
the index.
9:Airbag Readiness Light
#:Air Conditioning
!:Antilock Brake System (ABS)
g:Audio Steering Wheel Controls
or OnStar®
$: Brake System Warning Light
":Charging System
I:Cruise Control
B: Engine Coolant Temperature
O:Exterior Lamps
#:Fog Lamps
.: Fuel Gauge
+:Fuses
i: Headlamp High/Low-Beam
Changer
j: LATCH System Child
Restraints
*: Malfunction Indicator Lamp
::Oil Pressure
}:Power
/:Remote Vehicle Start
>:Safety Belt Reminders
7:Tire Pressure Monitor
F:Traction Control
M:Windshield Washer Fluid
Page 93 of 410
Instruments and Controls 4-1
Instruments and
Controls
Instrument Panel Overview
Instrument Panel Overview . . . . 4-4
Controls
Steering Wheel Adjustment . . . 4-6
Steering Wheel Controls . . . . . . 4-6
Horn . . . . . . . . . . . . . . . . . . . . . . . . . . 4-7
Windshield Wiper/Washer . . . . . 4-7
Rear Window Wiper/Washer . . . . . . . . . . . . . . . . . . . . . . 4-8
Compass . . . . . . . . . . . . . . . . . . . . . 4-9
Clock (With Date Display) . . . . . 4-9
Clock (Without Date Display) . . . . . . . . . . . . . . . . . . . . 4-10
Power Outlets . . . . . . . . . . . . . . . 4-10
Warning Lights, Gauges, and
Indicators
Warning Lights, Gauges, and Indicators . . . . . . . . . . . . . . . . . . . 4-11
Instrument Cluster . . . . . . . . . . . 4-12
Speedometer . . . . . . . . . . . . . . . . 4-13
Odometer . . . . . . . . . . . . . . . . . . . . 4-13
Tachometer . . . . . . . . . . . . . . . . . . 4-13
Fuel Gauge . . . . . . . . . . . . . . . . . . 4-13
Engine Coolant Temperature Gauge . . . . . . . . 4-14
Safety Belt Reminders . . . . . . . 4-14
Airbag Readiness Light . . . . . . 4-15
Passenger Airbag Status Indicator . . . . . . . . . . . . . . . . . . . . 4-15
Charging System Light . . . . . . 4-16
Malfunction Indicator Lamp . . . . . . . . . . . . . 4-17
Brake System Warning Light . . . . . . . . . . . . . . . . . . . . . . . 4-19 Antilock Brake System (ABS)
Warning Light . . . . . . . . . . . . . . 4-20
Traction Off Light . . . . . . . . . . . . 4-21
StabiliTrak®OFF Light . . . . . . . 4-21
Traction Control System
(TCS)/StabiliTrak
®Light . . . . 4-21
Tire Pressure Light . . . . . . . . . . 4-22
Engine Oil Pressure Light . . . . 4-23
Fuel Economy Light . . . . . . . . . 4-23
Low Fuel Warning Light . . . . . . 4-24
Security Light . . . . . . . . . . . . . . . . 4-24
High-Beam on Light . . . . . . . . . 4-24
Fog Lamp Light . . . . . . . . . . . . . . 4-25
Lamps on Reminder . . . . . . . . . 4-25
Cruise Control Light . . . . . . . . . 4-25
Information Displays
Driver Information Center (DIC) . . . . . . . . . . . . . . . 4-25
Page 117 of 410
Instruments and Controls 4-25
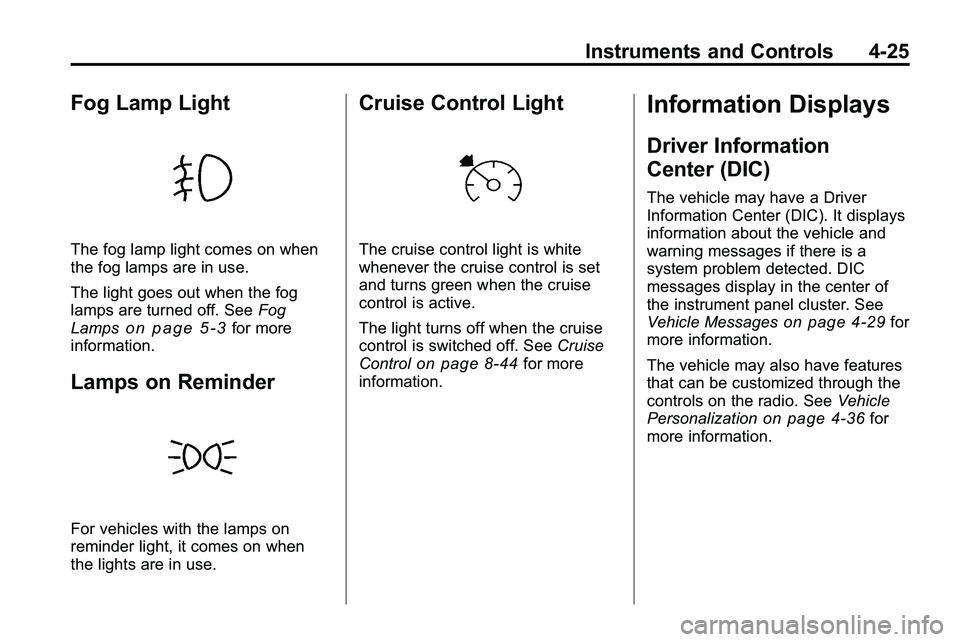
Fog Lamp Light
The fog lamp light comes on when
the fog lamps are in use.
The light goes out when the fog
lamps are turned off. SeeFog
Lamps
on page 5‑3for more
information.
Lamps on Reminder
For vehicles with the lamps on
reminder light, it comes on when
the lights are in use.
Cruise Control Light
The cruise control light is white
whenever the cruise control is set
and turns green when the cruise
control is active.
The light turns off when the cruise
control is switched off. See Cruise
Control
on page 8‑44for more
information.
Information Displays
Driver Information
Center (DIC)
The vehicle may have a Driver
Information Center (DIC). It displays
information about the vehicle and
warning messages if there is a
system problem detected. DIC
messages display in the center of
the instrument panel cluster. See
Vehicle Messages
on page 4‑29for
more information.
The vehicle may also have features
that can be customized through the
controls on the radio. See Vehicle
Personalization
on page 4‑36for
more information.
Page 135 of 410
Lighting 5-1
Lighting
Exterior Lighting
Exterior Lamp Controls . . . . . . . . 5-1
Headlamp High/Low-BeamChanger . . . . . . . . . . . . . . . . . . . . . 5-2
Flash-to-Pass . . . . . . . . . . . . . . . . . 5-2
Daytime Running Lamps (DRL) . . . . . . . . . . . . . . . . 5-2
Hazard Warning Flashers . . . . . 5-3
Turn and Lane-Change Signals . . . . . . . . . . . . . . . . . . . . . . 5-3
Fog Lamps . . . . . . . . . . . . . . . . . . . . 5-3
Interior Lighting
Instrument Panel Illumination Control . . . . . . . . . . . . . . . . . . . . . . 5-4
Dome Lamps . . . . . . . . . . . . . . . . . 5-4
Reading Lamps . . . . . . . . . . . . . . . 5-4
Lighting Features
Entry Lighting . . . . . . . . . . . . . . . . . 5-4
Exterior Lighting
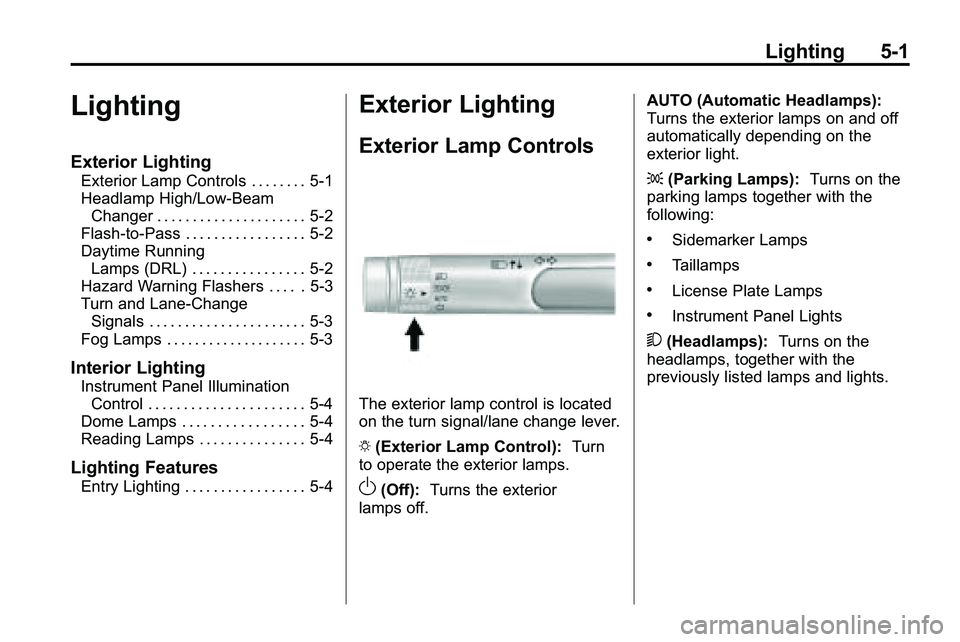
Exterior Lamp Controls
The exterior lamp control is located
on the turn signal/lane change lever.
O (Exterior Lamp Control): Turn
to operate the exterior lamps.
O(Off): Turns the exterior
lamps off. AUTO (Automatic Headlamps):
Turns the exterior lamps on and off
automatically depending on the
exterior light.
;
(Parking Lamps): Turns on the
parking lamps together with the
following:
.Sidemarker Lamps
.Taillamps
.License Plate Lamps
.Instrument Panel Lights
5 (Headlamps): Turns on the
headlamps, together with the
previously listed lamps and lights.
Page 137 of 410

Lighting 5-3
Hazard Warning Flashers
|
(Hazard Warning Flasher):
Press this button, located on the
center of the instrument panel, to
make the front and rear turn signal
lamps flash on and off. This warns
others that you are having trouble.
Press
|again to turn the
flashers off.
Turn and Lane-Change
Signals
An arrow on the instrument panel
cluster will flash in the direction of
the turn or lane change. Move the lever all the way up or
down to signal a turn.
Raise or lower the lever until the
arrow starts to flash to signal a lane
change. Hold it there until the lane
change is complete.
The lever returns to its starting
position when it is released.
If after signaling a turn or a lane
change the arrows flash rapidly or
do not come on, a signal bulb may
be burned out.
Have the bulbs replaced. If the bulb
is not burned out, check the fuse,
see
Fuses
on page 9‑38for more
information.
Fog Lamps
The fog lamps control is located on
the turn/lane change lever.
Use the fog lamps for better vision
in foggy or misty conditions.
# (Fog Lamps): Turn the fog lamp
band on the lever to
#and release
it, to turn the fog lamps on or off.
The band will return to its original
position.
The parking lamps or low‐beam
headlamps must be on to use the
fog lamps.
The fog lamps will go off whenever
the high-beam headlamps are
turned on. When the high‐beam
headlamps are turned off, the fog
lamps will come on again.
Some localities have laws that
require the headlamps to be on
along with the fog lamps.
Page 204 of 410
7-2 Climate Controls
Air Delivery Mode Control:To
change the current mode, select
one of the following:
F (Vent): Air is directed to the
instrument panel outlets.
* (Bi-Level): Air is directed to the
instrument panel outlets and the
floor outlets.
7 (Floor): Air is directed to the
floor outlets.
W(Defog): Clears the windows of
fog or moisture. Air is directed to the
windshield and floor outlets.
0(Defrost): Clears the
windshield of fog or frost more
quickly. Air is directed to the
windshield and side window outlets.
For best results, clear all snow and
ice from the windshield before
defrosting.
Do not drive the vehicle until all the
windows are clear.
Air Conditioning
#(Air Conditioning): Press to
turn the air conditioning on or off.
If the fan is turned off or the outside
temperature falls below freezing, the
air conditioning will not work.
h(Recirculation): Press to turn
on the recirculation. An indicator
light comes on. Air is recirculated
inside the vehicle. It helps to quickly
cool the air inside the vehicle or
prevent outside air and odors from
entering.
%(Outside Air): Press to turn
on the outside air. An indicator light
comes on. Outside air is circulated
throughout the vehicle.
Rear Window Defogger
<(Rear Defogger): Press to turn
the rear window defogger on or off.
The rear window defogger turns off
after about 10 minutes. It can also
be turned off by turning the ignition
to ACC/ACCESSORY or LOCK/
OFF. If turned on again, it runs for
about five minutes before
turning off.
Do not drive the vehicle until all the
windows are clear.
Notice: Do not use a razor blade
or sharp object to clear the inside
rear window. Do not adhere
anything to the defogger grid
lines in the rear glass. These
actions may damage the rear
defogger. Repairs would not be
covered by your warranty.
Page 206 of 410
7-4 Climate Controls
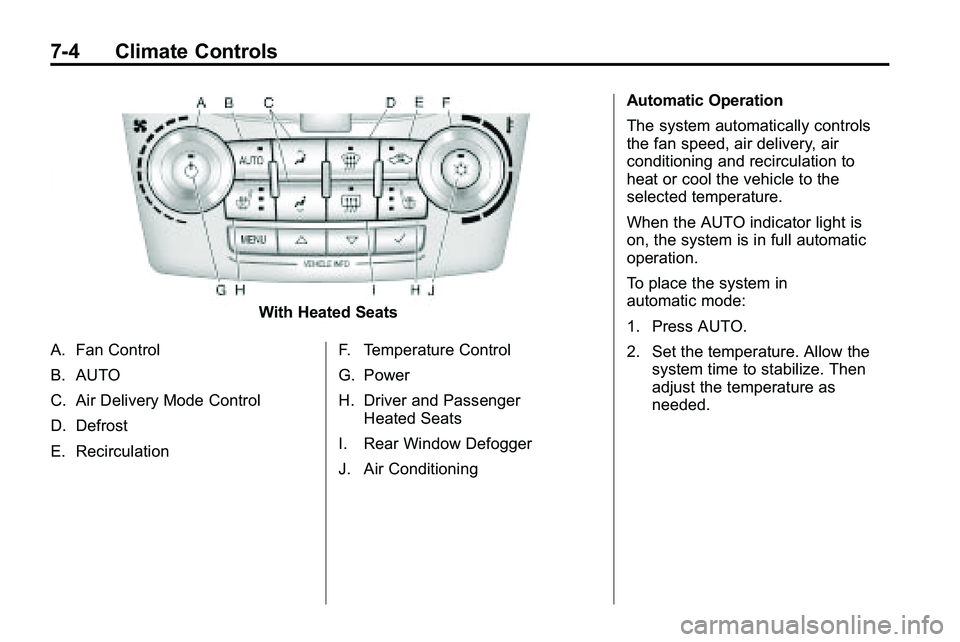
With Heated Seats
A. Fan Control
B. AUTO
C. Air Delivery Mode Control
D. Defrost
E. Recirculation F. Temperature Control
G. Power
H. Driver and Passenger
Heated Seats
I. Rear Window Defogger
J. Air Conditioning Automatic Operation
The system automatically controls
the fan speed, air delivery, air
conditioning and recirculation to
heat or cool the vehicle to the
selected temperature.
When the AUTO indicator light is
on, the system is in full automatic
operation.
To place the system in
automatic mode:
1. Press AUTO.
2. Set the temperature. Allow the
system time to stabilize. Then
adjust the temperature as
needed.
Page 207 of 410
Climate Controls 7-5
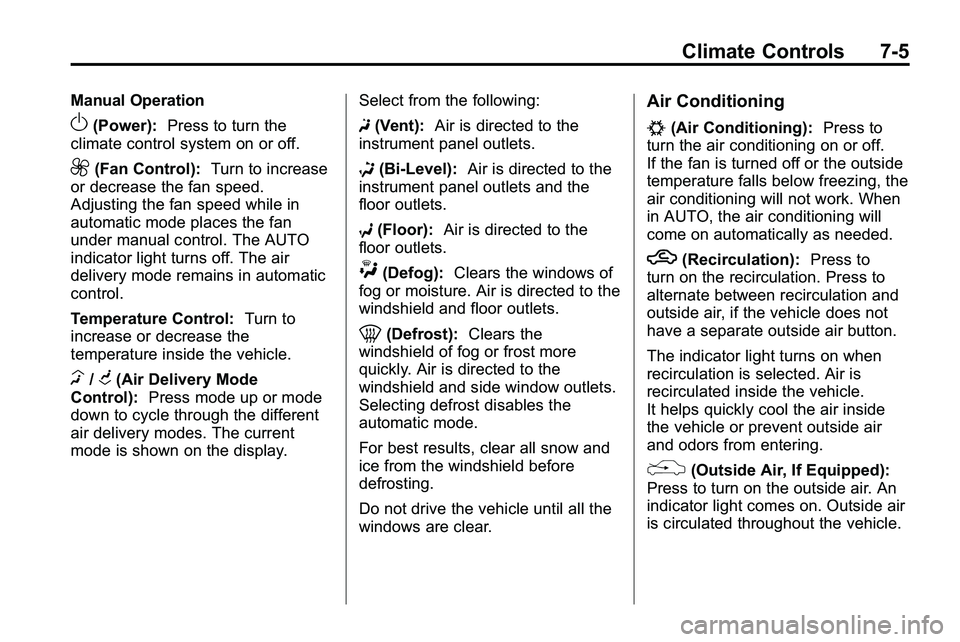
Manual Operation
O(Power):Press to turn the
climate control system on or off.
9(Fan Control): Turn to increase
or decrease the fan speed.
Adjusting the fan speed while in
automatic mode places the fan
under manual control. The AUTO
indicator light turns off. The air
delivery mode remains in automatic
control.
Temperature Control: Turn to
increase or decrease the
temperature inside the vehicle.
H/G(Air Delivery Mode
Control): Press mode up or mode
down to cycle through the different
air delivery modes. The current
mode is shown on the display. Select from the following:
F
(Vent): Air is directed to the
instrument panel outlets.
* (Bi-Level): Air is directed to the
instrument panel outlets and the
floor outlets.
7 (Floor): Air is directed to the
floor outlets.
W(Defog): Clears the windows of
fog or moisture. Air is directed to the
windshield and floor outlets.
0(Defrost): Clears the
windshield of fog or frost more
quickly. Air is directed to the
windshield and side window outlets.
Selecting defrost disables the
automatic mode.
For best results, clear all snow and
ice from the windshield before
defrosting.
Do not drive the vehicle until all the
windows are clear.
Air Conditioning
#(Air Conditioning): Press to
turn the air conditioning on or off.
If the fan is turned off or the outside
temperature falls below freezing, the
air conditioning will not work. When
in AUTO, the air conditioning will
come on automatically as needed.
h(Recirculation): Press to
turn on the recirculation. Press to
alternate between recirculation and
outside air, if the vehicle does not
have a separate outside air button.
The indicator light turns on when
recirculation is selected. Air is
recirculated inside the vehicle.
It helps quickly cool the air inside
the vehicle or prevent outside air
and odors from entering.
%(Outside Air, If Equipped):
Press to turn on the outside air. An
indicator light comes on. Outside air
is circulated throughout the vehicle.
Page 363 of 410

Vehicle Care 9-89
At least every spring, flush these
materials from the underbody with
plain water. Clean any areas where
mud and debris can collect. Dirt
packed in close areas of the frame
should be loosened before being
flushed. Your dealer/retailer or an
underbody car washing system can
do this.
Chemical Paint Spotting
Some weather and atmospheric
conditions can create a chemical
fallout. Airborne pollutants can fall
upon and attack painted surfaces on
the vehicle. This damage can take
two forms: blotchy, ring-shaped
discolorations, and small, irregular
dark spots etched into the paint
surface.
Interior Care
The vehicle's interior will continue to
look its best if it is cleaned often.
Dust and dirt can accumulate on the
upholstery and cause damage to
the carpet, fabric, leather, and
plastic surfaces. Stains should be
removed quickly as extreme heat
could cause them to set rapidly.
Lighter colored interiors may require
more frequent cleaning.
Newspapers and garments that can
transfer color to home furnishings
can also transfer color to the
vehicle's interior.
Remove dust from small buttons
and knobs with a small brush with
soft bristles.
Your dealer/retailer has products for
cleaning the vehicle's interior. When
cleaning the vehicle's interior, only
use cleaners specifically designed
for the surfaces that are beingcleaned. Permanent damage can
result from using cleaners on
surfaces for which they were not
intended. Apply the cleaner directly
to the cleaning cloth to prevent
over-spray. Remove any accidental
over-spray from other surfaces
immediately.
Notice:
Using abrasive cleaners
when cleaning glass surfaces on
the vehicle, could scratch the
glass and/or cause damage to the
rear window defogger. When
cleaning the glass on the vehicle,
use only a soft cloth and glass
cleaner.
Cleaners can contain solvents that
can become concentrated in the
vehicle's interior. Before using
cleaners, read and adhere to all
safety instructions on the label.
While cleaning the vehicle's interior,
maintain adequate ventilation by
opening the vehicle's doors and
windows.
Page 400 of 410

i-2 INDEX
B
Battery . . . . . . . . . . . . . . . . . . . . . . . . 9-25Jump Starting . . . . . . . . . . . . . . . . . 9-78
Voltage and ChargingMessages . . . . . . . . . . . . . . . . . . . 4-29
Blade Replacement, Wiper . . . . 9-28
Bluetooth . . . . 6-41, 6-42, 6-45, 6-56
Brakes . . . . . . . . . . . . . . . . . . . . . . . . . 9-23 Antilock . . . . . . . . . . . . . . . . . . . . . . . 8-39
Assist . . . . . . . . . . . . . . . . . . . . . . . . . 8-40
Fluid . . . . . . . . . . . . . . . . . . . . . . . . . . 9-24
Parking . . . . . . . . . . . . . . . . . . . . . . . 8-40
System Messages . . . . . . . . . . . . 4-30
Braking . . . . . . . . . . . . . . . . . . . . . . . . . 8-4
Break-In, New Vehicle . . . . . . . . . 8-27
Bulb Replacement . . . . . . . . . . . . . 9-38 Fog Lamps . . . . . . . . . . . . . . 5-3, 9-34
Headlamp Aiming . . . . . . . . . . . . . 9-30
Headlamps . . . . . . . . . . . . . . . . . . . 9-32
Headlamps, Front TurnSignal, Sidemarker, and
Parking Lamps . . . . . . . . . . . . . . 9-33 Bulb Replacement (cont.)
License Plate Lamps . . . . . . . . . 9-37
Taillamps, Turn Signal,
Sidemarker, Stoplamps,
and Backup Lamps . . . . . . . . . . 9-34
Buying New Tires . . . . . . . . . . . . . . 9-60
C
Calibration . . . . . . . . . . . . . . . . . . . . . . 4-9
California Fuel Requirements . . . . . . . . . . . 8-55
Perchlorate Materials
Requirements . . . . . . . . . . . . . . . . 9-3
Warning . . . . . . . . . . . . . . . . . . . . . . . 9-3
Camera, Rear Vision . . . . . . . . . . 8-50
Canadian Vehicle Owners . . . . . . . . iii
Capacities and Specifications . . . . . . . . . . . . . . . . 11-2
Carbon Monoxide Engine Exhaust . . . . . . . . . . . . . . . 8-34
Liftgate . . . . . . . . . . . . . . . . . . . 1-8, 1-9
Winter Driving . . . . . . . . . . . . . . . . 8-20 Cargo
Tie Downs . . . . . . . . . . . . . . . . . . . . . 3-2
Cautions, Danger, and Warnings . . . . . . . . . . . . . . . . . . . . . . . . iv
CD DVD Player . . . . . . . . . . . . . . . . . . . 6-21
CD Player . . . . . . . . . . . . . . . . . . . . . 6-18
Center Console Storage . . . . . . . . 3-1
Chains, Tire . . . . . . . . . . . . . . . . . . . 9-66
Charging System Light . . . . . . . . 4-16
Check
Engine Lamp . . . . . . . . . . . . . . . . . 4-17
Ignition Transmission Lock . . . 9-27
Child Restraints Infants and YoungChildren . . . . . . . . . . . . . . . . . . . . . 2-43
Lower Anchors and Tethers for Children . . . . . . . . . 2-49
Older Children . . . . . . . . . . . . . . . . 2-41
Securing . . . . . . . . . . . . . . . . 2-56, 2-58
Systems . . . . . . . . . . . . . . . . . . . . . . 2-46
Where to Put the Restraint . . . 2-47