steering GMC TERRAIN 2012 Owner's Guide
[x] Cancel search | Manufacturer: GMC, Model Year: 2012, Model line: TERRAIN, Model: GMC TERRAIN 2012Pages: 428, PDF Size: 5.45 MB
Page 223 of 428
Black plate (13,1)GMC Terrain Owner Manual (Include Mex) - 2012
Driving and Operating 9-13
{WARNING
Coasting downhill in N (Neutral)
or with the ignition off is
dangerous. The brakes will have
to do all the work of slowing down
and they could get so hot that
they would not work well. You
would then have poor braking or
even none going down a hill. You
could crash. Always have the
engine running and the vehicle in
gear when going downhill.
.Stay in your own lane. Do not
swing wide or cut across the
center of the road. Drive at
speeds that let you stay in your
own lane.
.Be alert on top of hills,
something could be in your lane
(stalled car, accident).
.Pay attention to special road
signs (falling rocks area, winding
roads, long grades, passing or
no-passing zones) and take
appropriate action.
Winter Driving
Driving on Snow or Ice
Drive carefully when there is snow
or ice between the tires and the
road, creating less traction or grip.
Wet ice can occur at about 0°C
(32°F) when freezing rain begins to
fall, resulting in even less traction.
Avoid driving on wet ice or in
freezing rain until roads can be
treated with salt or sand.
Drive with caution, whatever the
condition. Accelerate gently so
traction is not lost. Accelerating too
quickly causes the wheels to spin
and makes the surface under the
tires slick, so there is even less
traction.Try not to break the fragile traction.
If you accelerate too fast, the drive
wheels will spin and polish the
surface under the tires even more.
The
Antilock Brake System (ABS)
on page 9‑32 improves vehicle
stability during hard stops on
slippery roads, but apply the brakes
sooner than when on dry pavement.
Allow greater following distance on
any slippery road and watch for
slippery spots. Icy patches can
occur on otherwise clear roads in
shaded areas. The surface of a
curve or an overpass can remain icy
when the surrounding roads are
clear. Avoid sudden steering
maneuvers and braking while
on ice.
Turn off cruise control on slippery
surfaces.
Page 225 of 428

Black plate (15,1)GMC Terrain Owner Manual (Include Mex) - 2012
Driving and Operating 9-15
To save fuel, run the engine for only
short periods as needed to warm
the vehicle and then shut the engine
off and close the window most of
the way to save heat. Repeat this
until help arrives but only when you
feel really uncomfortable from the
cold. Moving about to keep warm
also helps.
If it takes some time for help to
arrive, now and then when you run
the engine, push the accelerator
pedal slightly so the engine runs
faster than the idle speed. This
keeps the battery charged to restart
the vehicle and to signal for help
with the headlamps. Do this as little
as possible to save fuel.
If the Vehicle Is Stuck
Slowly and cautiously spin the
wheels to free the vehicle when
stuck in sand, mud, ice, or snow.If stuck too severely for the traction
system to free the vehicle, turn the
traction system off and use the
rocking method. See
Traction
Control System (TCS) on
page 9‑35.
{WARNING
If the vehicle's tires spin at high
speed, they can explode, and you
or others could be injured. The
vehicle can overheat, causing an
engine compartment fire or other
damage. Spin the wheels as little
as possible and avoid going
above 55 km/h (35 mph).
For information about using tire
chains on the vehicle, see Tire
Chains on page 10‑65.
Rocking the Vehicle to Get
it Out
Turn the steering wheel left and
right to clear the area around the
front wheels. Turn off any traction
system. Shift back and forth
between R (Reverse) and a forward
gear, spinning the wheels as little as
possible. To prevent transmission
wear, wait until the wheels stop
spinning before shifting gears.
Release the accelerator pedal while
shifting, and press lightly on the
accelerator pedal when the
transmission is in gear. Slowly
spinning the wheels in the forward
and reverse directions causes a
rocking motion that could free the
vehicle. If that does not get the
vehicle out after a few tries, it might
need to be towed out. If the vehicle
does need to be towed out, see
Towing the Vehicle on page 10‑79.
Page 231 of 428
Black plate (21,1)GMC Terrain Owner Manual (Include Mex) - 2012
Driving and Operating 9-21
.Between the first 1 000 km
(600 mi) and 5 000 km
(3,000 mi), heavy
acceleration in lower gears
can be used. Vehicle speeds
above 110 km/h (68 mph)
should be limited to
five minutes per use.
.Avoid making hard stops for
the first 322 km (200 mi) or
so. During this time the new
brake linings are not yet
broken in. Hard stops with
new linings can mean
premature wear and earlier
replacement. Follow this
breaking-in guideline every
time you get new brake
linings.
.Do not tow a trailer during
break-in. SeeDriving
Characteristics and Towing
Tips on page 9‑57 for the
trailer towing capabilities of
your vehicle and more
information. Following break‐in, engine speed
and load can be gradually
increased.
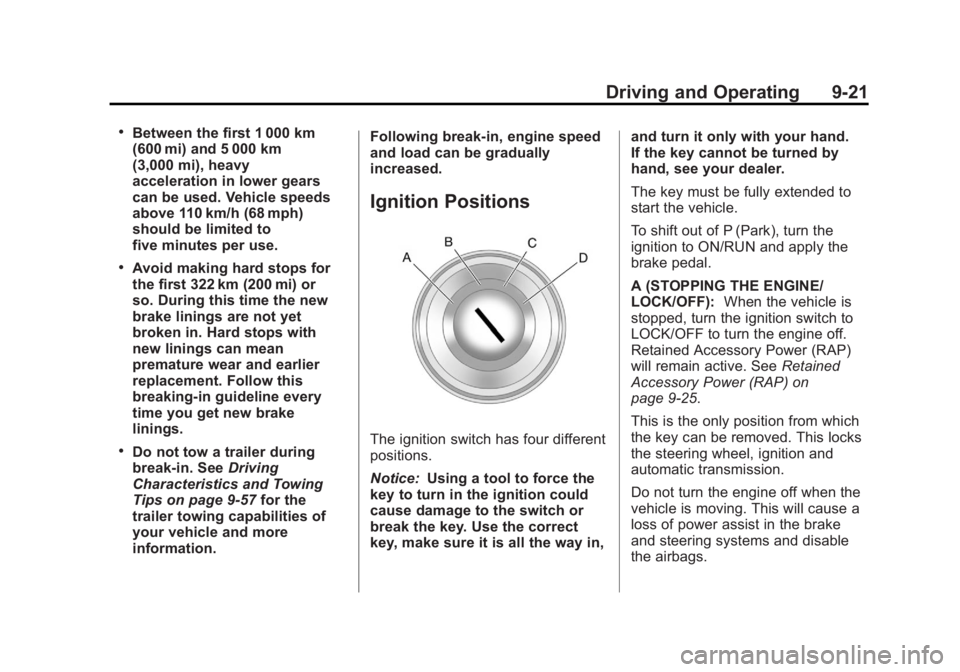
Ignition Positions
The ignition switch has four different
positions.
Notice:
Using a tool to force the
key to turn in the ignition could
cause damage to the switch or
break the key. Use the correct
key, make sure it is all the way in, and turn it only with your hand.
If the key cannot be turned by
hand, see your dealer.
The key must be fully extended to
start the vehicle.
To shift out of P (Park), turn the
ignition to ON/RUN and apply the
brake pedal.
A (STOPPING THE ENGINE/
LOCK/OFF):
When the vehicle is
stopped, turn the ignition switch to
LOCK/OFF to turn the engine off.
Retained Accessory Power (RAP)
will remain active. See Retained
Accessory Power (RAP) on
page 9‑25.
This is the only position from which
the key can be removed. This locks
the steering wheel, ignition and
automatic transmission.
Do not turn the engine off when the
vehicle is moving. This will cause a
loss of power assist in the brake
and steering systems and disable
the airbags.
Page 232 of 428
Black plate (22,1)GMC Terrain Owner Manual (Include Mex) - 2012
9-22 Driving and Operating
If the vehicle must be shut off in an
emergency:
1. Brake using a firm and steadypressure. Do not pump the
brakes repeatedly. This may
deplete power assist, requiring
increased brake pedal force.
2. Shift the vehicle to N (Neutral). This can be done while the
vehicle is moving. After shifting
to N (Neutral), firmly apply the
brakes and steer the vehicle to a
safe location.
3. Come to a complete stop, shift to P (Park), and turn the ignition
to LOCK/OFF. On vehicles with
an automatic transmission, the
shift lever must be in P (Park) to
turn the ignition switch to the
LOCK/OFF position.
4. Set the parking brake. See Parking Brake on page 9‑33.{WARNING
Turning off the vehicle while
moving may cause loss of power
assist in the brake and steering
systems and disable the airbags.
While driving, only shut the
vehicle off in an emergency.
If the vehicle cannot be pulled over,
and must be shut off while driving,
turn the ignition to ACC/
ACCESSORY.
The ignition switch can bind in the
LOCK/OFF position with the wheels
turned off center. If this happens,
move the steering wheel from right
to left while turning the key to ACC/
ACCESSORY. If this does not work,
then the vehicle needs service.
B (ACC/ACCESSORY): This
position provides power to some of
the electrical accessories. It unlocks
the steering wheel and ignition. To
move the key from ACC/ ACCESSORY to LOCK/OFF, push
in the key and then turn it to
LOCK/OFF.
C (ON/RUN):
The ignition switch
stays in this position when the
engine is running. This position can
be used to operate the electrical
accessories, including the
ventilation fan and 12‐volt power
outlets, as well as to display some
warning and indicator lights. This
position can also be used for
service and diagnostics, and to
verify the proper operation of the
malfunction indicator lamp as may
be required for emission inspection
purposes. The transmission is also
unlocked in this position on
automatic transmission vehicles.
The battery could be drained if the
key is left in the ACC/ACCESSORY
or ON/RUN position with the engine
off. The vehicle might not start if the
battery is allowed to drain for an
extended period of time.
Page 243 of 428
Black plate (33,1)GMC Terrain Owner Manual (Include Mex) - 2012
Driving and Operating 9-33
If driving safely on a wet road and it
becomes necessary to slam on the
brakes and continue braking to
avoid a sudden obstacle, a
computer senses that the wheels
are slowing down. If one of the
wheels is about to stop rolling, the
computer will separately work the
brakes at each wheel.
ABS can change the brake pressure
to each wheel, as required, faster
than any driver could. This can help
the driver steer around the obstacle
while braking hard.
As the brakes are applied, the
computer keeps receiving updates
on wheel speed and controls
braking pressure accordingly.Remember: ABS does not change
the time needed to get a foot up to
the brake pedal or always decrease
stopping distance. If you get too
close to the vehicle in front of you,
there will not be enough time to
apply the brakes if that vehicle
suddenly slows or stops. Always
leave enough room up ahead to
stop, even with ABS.
Using ABS
Do not pump the brakes. Just hold
the brake pedal down firmly and let
ABS work. You might hear the ABS
pump or motor operating and feel
the brake pedal pulsate, but this is
normal.
Braking in Emergencies
ABS allows the driver to steer and
brake at the same time. In many
emergencies, steering can help
more than even the very best
braking.
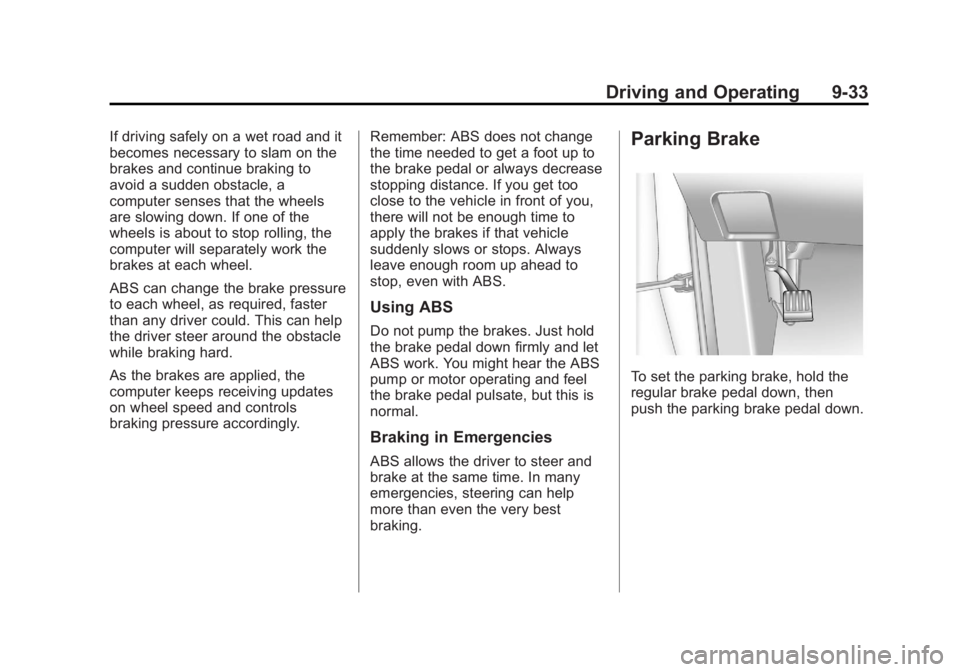
Parking Brake
To set the parking brake, hold the
regular brake pedal down, then
push the parking brake pedal down.
Page 250 of 428
Black plate (40,1)GMC Terrain Owner Manual (Include Mex) - 2012
9-40 Driving and Operating
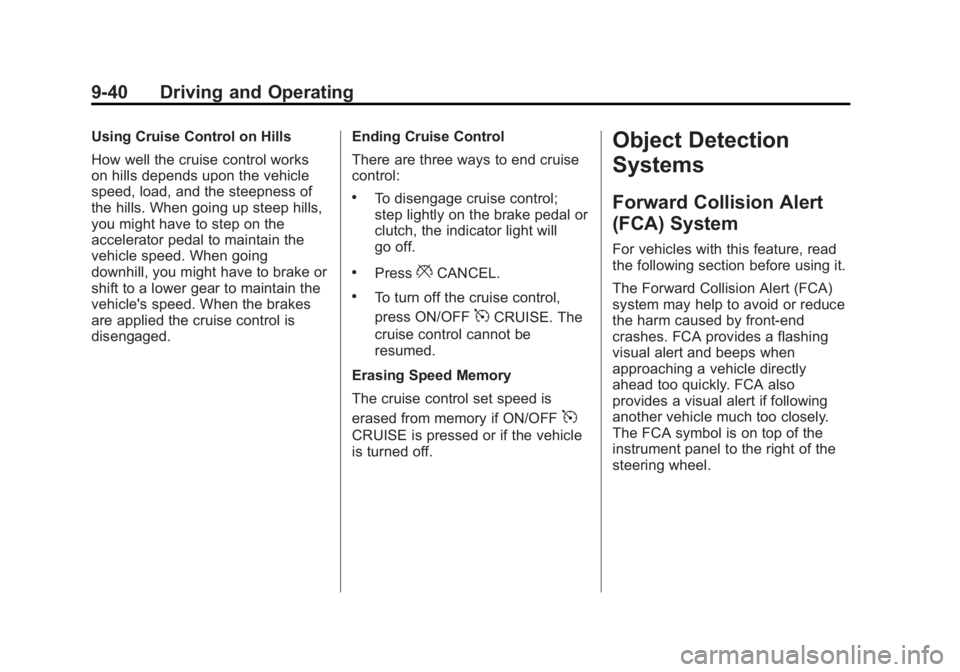
Using Cruise Control on Hills
How well the cruise control works
on hills depends upon the vehicle
speed, load, and the steepness of
the hills. When going up steep hills,
you might have to step on the
accelerator pedal to maintain the
vehicle speed. When going
downhill, you might have to brake or
shift to a lower gear to maintain the
vehicle's speed. When the brakes
are applied the cruise control is
disengaged.Ending Cruise Control
There are three ways to end cruise
control:
.To disengage cruise control;
step lightly on the brake pedal or
clutch, the indicator light will
go off.
.Press*CANCEL.
.To turn off the cruise control,
press ON/OFF
5CRUISE. The
cruise control cannot be
resumed.
Erasing Speed Memory
The cruise control set speed is
erased from memory if ON/OFF
5
CRUISE is pressed or if the vehicle
is turned off.
Object Detection
Systems
Forward Collision Alert
(FCA) System
For vehicles with this feature, read
the following section before using it.
The Forward Collision Alert (FCA)
system may help to avoid or reduce
the harm caused by front-end
crashes. FCA provides a flashing
visual alert and beeps when
approaching a vehicle directly
ahead too quickly. FCA also
provides a visual alert if following
another vehicle much too closely.
The FCA symbol is on top of the
instrument panel to the right of the
steering wheel.
Page 252 of 428

Black plate (42,1)GMC Terrain Owner Manual (Include Mex) - 2012
9-42 Driving and Operating
Selecting the Alert Timing
The Collision Alert control is on the
steering wheel. Press COLLISION
ALERT to set the alert timing to far,
medium, near or off. The first button
press shows the current control
setting on the DIC. Additional button
presses will change this setting. The
chosen setting will remain until it is
changed and will affect both the
Collision Alert and the Tailgating
Alert features. The timing of both
alerts will vary based on vehicle
speed. The faster the vehicle speed,
the further away the alert will occur.Consider traffic and weather
conditions when selecting the alert
timing. The range of selectable alert
timing may not be appropriate for all
drivers and driving conditions.
Detecting the Vehicle Ahead
The green vehicle ahead indicator
will appear when a vehicle is
detected ahead. Whenever this
indicator does not appear, FCA will
not respond. The indicator may
disappear on curves, highway exit
ramps, or hills, or due to poor
visibility. The FCA system will not
detect another vehicle ahead until it
is completely in the driving lane.
{WARNING
If the FCA camera sensor is
blocked by dirt, snow, or ice, or if
the windshield is damaged, it may
not detect a vehicle ahead. FCA
may not help avoid a collision
under these conditions. Do not
rely on FCA when the camera is
blocked by snow, ice, or dirt.
Keep the windshield clean.
{WARNING
If the headlamps are not cleaned
or properly aimed, the FCA
system may not detect a vehicle
ahead. FCA may not help avoid a
collision under these conditions.
Keep the headlamps clean and
properly aimed.
Page 259 of 428

Black plate (49,1)GMC Terrain Owner Manual (Include Mex) - 2012
Driving and Operating 9-49
When the vehicle crosses a
detected lane marking, the LDW
indicator will flash and three beeps
will sound. LDW will not warn if the
turn signal is on or if a sharp
maneuver is made.
How the System Works
The LDW camera sensor is on the
windshield ahead of the rearview
mirror.
To turn LDW on and off, press the
LANE DEPART control on the
steering wheel. The control indicator
will light when LDW is on.When the vehicle is started, the
LDW indicator on the instrument
panel will come on briefly.
LDW operates at speeds of 56 km
(35 mph) or greater. If LDW is on,
the LDW indicator will appear green
if the system detects a left or right
lane marking. This indicator will
change to amber, flash, and three
beeps will sound if the vehicle
crosses a detected lane marking
without using the turn signal.
Page 269 of 428

Black plate (59,1)GMC Terrain Owner Manual (Include Mex) - 2012
Driving and Operating 9-59
Backing Up
Hold the bottom of the steering
wheel with one hand. To move the
trailer to the left, move that hand to
the left. To move the trailer to the
right, move your hand to the right.
Always back up slowly and,
if possible, have someone
guide you.
Making Turns
Notice:Making very sharp turns
while trailering could cause the
trailer to come in contact with the
vehicle. The vehicle could be
damaged. Avoid making very
sharp turns while trailering.
When turning with a trailer, make
wider turns than normal so the
trailer will not strike soft shoulders,
curbs, road signs, trees or other
objects. Use the turn signal well in
advance and avoid jerky or sudden
maneuvers.
Turn Signals When Towing a
Trailer
The turn signal indicators on the
instrument panel flash whenever
signaling a turn or lane change.
Properly hooked up, the trailer
lamps also flash, telling other
drivers the vehicle is turning,
changing lanes or stopping.
When towing a trailer, the arrows on
the instrument panel flash for turns
even if the bulbs on the trailer are
burned out. Check occasionally to
be sure the trailer bulbs are still
working.
Driving on Grades
Reduce speed and shift to a lower
gear before starting down a long or
steep downgrade. If the
transmission is not shifted down, the
brakes might have to be used so
much that they would get hot and no
longer work well. The vehicle can tow in D (Drive).
Use a lower gear if the transmission
shifts too often.
When towing at high altitude on
steep uphill grades, engine coolant
will boil at a lower temperature than
at normal altitudes. If the engine is
turned off immediately after towing
at high altitude on steep uphill
grades, the vehicle may show signs
similar to engine overheating. To
avoid this, let the engine run while
parked, preferably on level ground,
with the transmission in P (Park) for
a few minutes before turning the
engine off. If the overheat warning
comes on, see
Engine Overheating
on page 10‑20.
Page 275 of 428
Black plate (1,1)GMC Terrain Owner Manual (Include Mex) - 2012
Vehicle Care 10-1
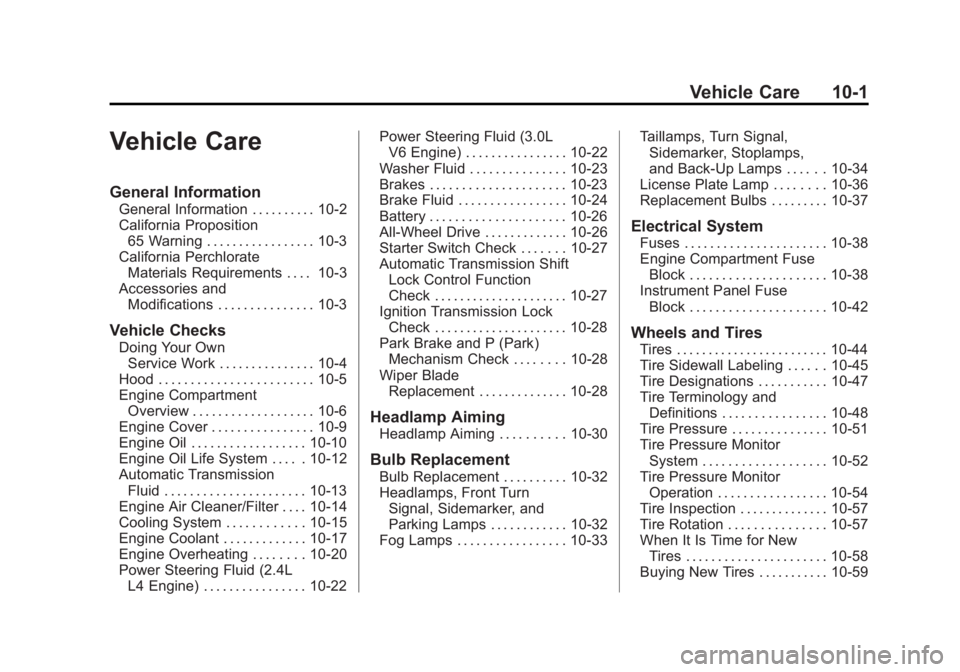
Vehicle Care
General Information
General Information . . . . . . . . . . 10-2
California Proposition65 Warning . . . . . . . . . . . . . . . . . 10-3
California Perchlorate Materials Requirements . . . . 10-3
Accessories and Modifications . . . . . . . . . . . . . . . 10-3
Vehicle Checks
Doing Your OwnService Work . . . . . . . . . . . . . . . 10-4
Hood . . . . . . . . . . . . . . . . . . . . . . . . 10-5
Engine Compartment Overview . . . . . . . . . . . . . . . . . . . 10-6
Engine Cover . . . . . . . . . . . . . . . . 10-9
Engine Oil . . . . . . . . . . . . . . . . . . 10-10
Engine Oil Life System . . . . . 10-12
Automatic Transmission Fluid . . . . . . . . . . . . . . . . . . . . . . 10-13
Engine Air Cleaner/Filter . . . . 10-14
Cooling System . . . . . . . . . . . . 10-15
Engine Coolant . . . . . . . . . . . . . 10-17
Engine Overheating . . . . . . . . 10-20
Power Steering Fluid (2.4L L4 Engine) . . . . . . . . . . . . . . . . 10-22 Power Steering Fluid (3.0L
V6 Engine) . . . . . . . . . . . . . . . . 10-22
Washer Fluid . . . . . . . . . . . . . . . 10-23
Brakes . . . . . . . . . . . . . . . . . . . . . 10-23
Brake Fluid . . . . . . . . . . . . . . . . . 10-24
Battery . . . . . . . . . . . . . . . . . . . . . 10-26
All-Wheel Drive . . . . . . . . . . . . . 10-26
Starter Switch Check . . . . . . . 10-27
Automatic Transmission Shift Lock Control Function
Check . . . . . . . . . . . . . . . . . . . . . 10-27
Ignition Transmission Lock Check . . . . . . . . . . . . . . . . . . . . . 10-28
Park Brake and P (Park) Mechanism Check . . . . . . . . 10-28
Wiper Blade Replacement . . . . . . . . . . . . . . 10-28
Headlamp Aiming
Headlamp Aiming . . . . . . . . . . 10-30
Bulb Replacement
Bulb Replacement . . . . . . . . . . 10-32
Headlamps, Front TurnSignal, Sidemarker, and
Parking Lamps . . . . . . . . . . . . 10-32
Fog Lamps . . . . . . . . . . . . . . . . . 10-33 Taillamps, Turn Signal,
Sidemarker, Stoplamps,
and Back-Up Lamps . . . . . . 10-34
License Plate Lamp . . . . . . . . 10-36
Replacement Bulbs . . . . . . . . . 10-37
Electrical System
Fuses . . . . . . . . . . . . . . . . . . . . . . 10-38
Engine Compartment Fuse Block . . . . . . . . . . . . . . . . . . . . . 10-38
Instrument Panel Fuse Block . . . . . . . . . . . . . . . . . . . . . 10-42
Wheels and Tires
Tires . . . . . . . . . . . . . . . . . . . . . . . . 10-44
Tire Sidewall Labeling . . . . . . 10-45
Tire Designations . . . . . . . . . . . 10-47
Tire Terminology andDefinitions . . . . . . . . . . . . . . . . 10-48
Tire Pressure . . . . . . . . . . . . . . . 10-51
Tire Pressure Monitor System . . . . . . . . . . . . . . . . . . . 10-52
Tire Pressure Monitor Operation . . . . . . . . . . . . . . . . . 10-54
Tire Inspection . . . . . . . . . . . . . . 10-57
Tire Rotation . . . . . . . . . . . . . . . 10-57
When It Is Time for New Tires . . . . . . . . . . . . . . . . . . . . . . 10-58
Buying New Tires . . . . . . . . . . . 10-59