stop start GMC TERRAIN 2012 Owner's Manual
[x] Cancel search | Manufacturer: GMC, Model Year: 2012, Model line: TERRAIN, Model: GMC TERRAIN 2012Pages: 428, PDF Size: 5.45 MB
Page 30 of 428
Black plate (24,1)GMC Terrain Owner Manual (Include Mex) - 2012
1-24 In Brief
Performance and
Maintenance
Traction Control
System (TCS)
The traction control system limits
wheel spin. The system is on when
the vehicle is started.
.To turn off traction control, press
and release
glocated on the
console.
iilluminates and the
appropriate DIC message
displays. See Vehicle Messages
on page 5‑26.
.Press and releasegagain to
turn traction control back on.
For more information, see Traction
Control System (TCS) on
page 9‑35.
StabiliTrak®System
The StabiliTrak system assists with
directional control of the vehicle in
difficult driving conditions. The
system is on when the vehicle is
started.
.To turn off both Traction Control
and StabiliTrak, press and hold
guntilgandiilluminate and
the appropriate DIC message
displays. See Vehicle Messages
on page 5‑26.
.Pressgagain to turn on both
systems.
For more information, see
StabiliTrak
®System on page 9‑36.
Tire Pressure Monitor
This vehicle may have a Tire
Pressure Monitor System (TPMS).
The TPMS warning light alerts you
to a significant loss in pressure of
one of the vehicle's tires. If the
warning light comes on, stop as
soon as possible and inflate the
tires to the recommended pressure
shown on the Tire and Loading
Information label. See Vehicle Load
Limits on page 9‑16. The warning
light will remain on until the tire
pressure is corrected.
Page 31 of 428
Black plate (25,1)GMC Terrain Owner Manual (Include Mex) - 2012
In Brief 1-25
During cooler conditions, the low tire
pressure warning light may appear
when the vehicle is first started and
then turn off. This may be an early
indicator that the tire pressures are
getting low and the tires need to be
inflated to the proper pressure.
The TPMS does not replace normal
monthly tire maintenance. It is the
driver’s responsibility to maintain
correct tire pressures.
See Tire Pressure Monitor System
on page 10‑52.
Engine Oil Life System
The engine oil life system calculates
engine oil life based on vehicle use
and displays the CHANGE ENGINE
OIL SOON message when it is time
to change the engine oil and filter.
The oil life system should be reset
to 100% only following an oil
change. Resetting the Oil Life System
1. Turn the ignition to ON/RUN,
with the engine off.
2. Press the DIC MENU button to display the Vehicle
Information menu.
3. Press either the up or down arrows to view REMAINING
OIL LIFE.
4. Press the SET/CLR button until 100% is displayed.
5. Turn the key to LOCK/OFF.
Or:
1. Turn the ignition to ON/RUN with the engine off.
2. Fully press and release the accelerator pedal three times
within five seconds.
See Engine Oil Life System on
page 10‑12.
Fuel E85 (85% Ethanol)
Vehicles that have a FlexFuel badge
and a yellow fuel cap can use either
unleaded gasoline or ethanol fuel
containing up to 85% ethanol (E85).
See Fuel E85 (85% Ethanol) on
page 9‑53. For all other vehicles,
use only the unleaded gasoline
described under Recommended
Fuel on page 9‑51.
Driving for Better Fuel
Economy
Driving habits can affect fuel
mileage. Here are some driving tips
to get the best fuel economy
possible.
.Avoid fast starts and accelerate
smoothly.
.Brake gradually and avoid
abrupt stops.
.Avoid idling the engine for long
periods of time.
Page 43 of 428
Black plate (11,1)GMC Terrain Owner Manual (Include Mex) - 2012
Keys, Doors, and Windows 2-11
In either the MAX or the 3/4 mode,
the liftgate can be power opened
and closed by:
.First pressingKand then
pressing and holding
Von the
RKE transmitter until the liftgate
starts moving. See Remote
Keyless Entry (RKE) System
Operation on page 2‑3.
.Pressing the power liftgate
button in the center of the mode
switch on the overhead console,
with the driver door unlocked.
.Pressing the touch pad switch
on the liftgate outside handle,
with all doors unlocked, to open
the liftgate.
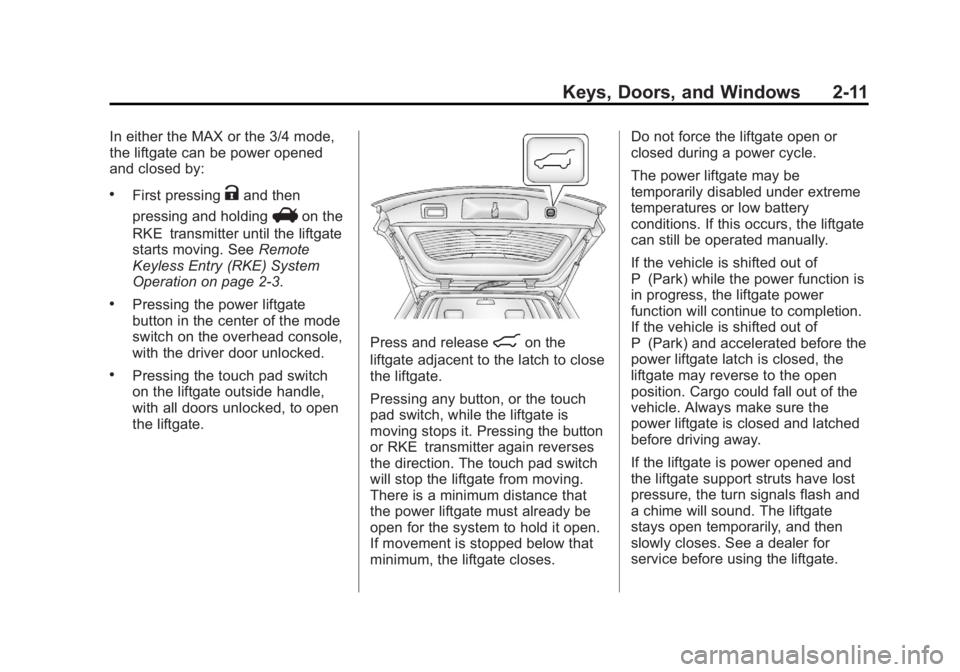
Press and release8on the
liftgate adjacent to the latch to close
the liftgate.
Pressing any button, or the touch
pad switch, while the liftgate is
moving stops it. Pressing the button
or RKE transmitter again reverses
the direction. The touch pad switch
will stop the liftgate from moving.
There is a minimum distance that
the power liftgate must already be
open for the system to hold it open.
If movement is stopped below that
minimum, the liftgate closes. Do not force the liftgate open or
closed during a power cycle.
The power liftgate may be
temporarily disabled under extreme
temperatures or low battery
conditions. If this occurs, the liftgate
can still be operated manually.
If the vehicle is shifted out of
P (Park) while the power function is
in progress, the liftgate power
function will continue to completion.
If the vehicle is shifted out of
P (Park) and accelerated before the
power liftgate latch is closed, the
liftgate may reverse to the open
position. Cargo could fall out of the
vehicle. Always make sure the
power liftgate is closed and latched
before driving away.
If the liftgate is power opened and
the liftgate support struts have lost
pressure, the turn signals flash and
a chime will sound. The liftgate
stays open temporarily, and then
slowly closes. See a dealer for
service before using the liftgate.
Page 57 of 428
Black plate (3,1)GMC Terrain Owner Manual (Include Mex) - 2012
Seats and Restraints 3-3
Rear Seats
The vehicle's rear seat has head
restraints in the outboard seating
positions that cannot be adjusted.
Rear outboard head restraints are
not designed to be removed.
Front Seats
Seat Adjustment
{WARNING
You can lose control of the
vehicle if you try to adjust a
manual driver seat while the
vehicle is moving. The sudden
movement could startle and
confuse you, or make you push a
pedal when you do not want to.
Adjust the driver seat only when
the vehicle is not moving.
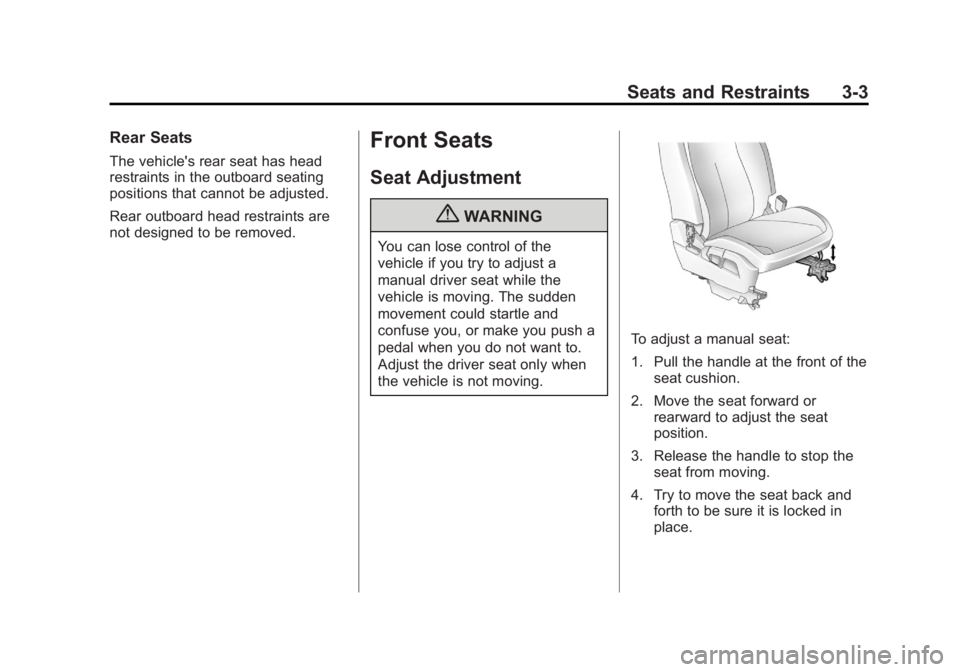
To adjust a manual seat:
1. Pull the handle at the front of theseat cushion.
2. Move the seat forward or rearward to adjust the seat
position.
3. Release the handle to stop the seat from moving.
4. Try to move the seat back and forth to be sure it is locked in
place.
Page 60 of 428
Black plate (6,1)GMC Terrain Owner Manual (Include Mex) - 2012
3-6 Seats and Restraints
Manual Reclining Seatbacks
{WARNING
You can lose control of the
vehicle if you try to adjust a
manual driver seat while the
vehicle is moving. The sudden
movement could startle and
confuse you, or make you push a
pedal when you do not want to.
Adjust the driver seat only when
the vehicle is not moving.
{WARNING
If either seatback is not locked, it
could move forward in a sudden
stop or crash. That could cause
injury to the person sitting there.
Always push and pull on the
seatbacks to be sure they are
locked.
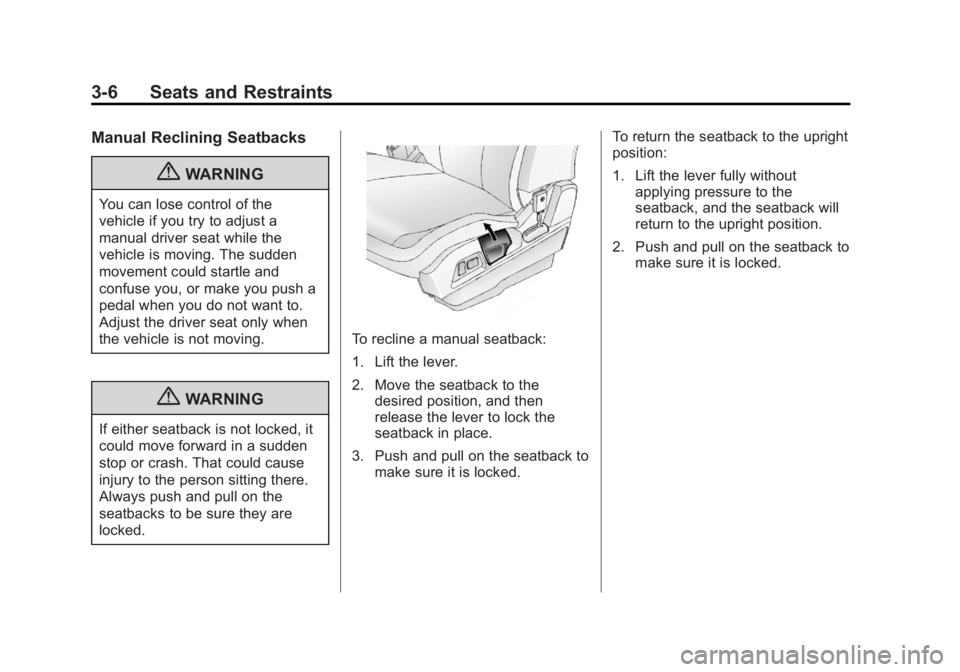
To recline a manual seatback:
1. Lift the lever.
2. Move the seatback to thedesired position, and then
release the lever to lock the
seatback in place.
3. Push and pull on the seatback to make sure it is locked. To return the seatback to the upright
position:
1. Lift the lever fully without
applying pressure to the
seatback, and the seatback will
return to the upright position.
2. Push and pull on the seatback to make sure it is locked.
Page 62 of 428

Black plate (8,1)GMC Terrain Owner Manual (Include Mex) - 2012
3-8 Seats and Restraints
Recalling Button Memory
Positions
To recall the manually saved Button
Memory positions, press and hold
“1”or“2.” The driver seat and
outside mirrors move to the
positions stored to those buttons
when pressed. Releasing “1”or“2”
before the stored positions are
reached stops the recall.
If something has blocked the driver
seat while recalling a memory
position, the recall may stop.
Remove the obstruction; then press
and hold the appropriate manual
control for the memory item that is
not recalling for two seconds. Try
recalling the memory position again
by pressing the appropriate memory
button. If the memory position is still
not recalling, see your dealer for
service. Recalling RKE Memory Positions
(Memory Remote Recall)
The Memory Remote Recall feature
can recall the driver seat and
outside mirrors to previously stored
RKE Memory positions when
entering the vehicle.
Every time the ignition is turned off,
the positions of the driver seat and
outside mirrors are automatically
stored to the RKE transmitter that
was used to start the vehicle. These
positions are called RKE Memory
positions and may be different than
the previously mentioned Button
Memory positions saved to the
“1”
or“2” buttons. To automatically
recall RKE Memory positions,
unlock the driver door with the RKE
transmitter and open the driver door.
If the driver door is already open,
pressing the RKE transmitter K
button will also activate the RKE
Memory recall. The driver seat and
outside mirrors will move to the
previously saved RKE Memory
positions. This feature is turned on or off using
the vehicle personalization menu.
See
Vehicle Personalization on
page 5‑33 for more information.
To stop recall movement, press any
of the memory, power mirror,
or power seat controls.
If something has blocked the driver
seat while recalling a memory
position, the recall may stop.
Remove the obstruction; then press
and hold the appropriate manual
control for the memory item that is
not recalling for two seconds. Try
recalling the memory position again
by opening the driver door and
pressing the RKE Kbutton. If the
memory position is still not recalling,
see your dealer for service.
Page 64 of 428

Black plate (10,1)GMC Terrain Owner Manual (Include Mex) - 2012
3-10 Seats and Restraints
The passenger seat may take
longer to heat up.
Remote Start Heated Seats
When it is cold outside, the heated
seats can be programmed to turn on
automatically during a remote
vehicle start. The heated seats will
be canceled when the ignition is
turned on. Press the heated seat
button to use the heated seats after
the vehicle is started.
The heated seat button lights will
not turn on during a remote start.
The temperature of an unoccupied
seat may be reduced.
To program the heated seat feature
to enabled, seeVehicle
Personalization on page 5‑33 for
more information.Rear Seats
Split Folding Seatbacks
With this feature, either side of the
rear seatback can be folded down
for more cargo space.
{WARNING
If either seatback is not locked, it
could move forward in a sudden
stop or crash. That could cause
injury to the person sitting there.
Always push and pull on the
seatbacks to be sure they are
locked.
{WARNING
A safety belt that is improperly
routed, not properly attached,
or twisted will not provide the
protection needed in a crash. The
person wearing the belt could be
seriously injured. After raising the
rear seatback, always check to be
sure that the safety belts are
properly routed and attached, and
are not twisted.
Page 113 of 428

Black plate (3,1)GMC Terrain Owner Manual (Include Mex) - 2012
Storage 4-3
Notice:Loading cargo on the
roof rack that weighs more than
100 kg (220 lbs) or hangs over the
rear or sides of the vehicle may
damage the vehicle. Load cargo
so that it rests evenly between
the crossrails, making sure to
fasten cargo securely.
To prevent damage or loss of cargo
when driving, check to make sure
cross rails and cargo are securely
fastened. Loading cargo on the roof
rack will make the vehicle's center
of gravity higher. Avoid high speeds,
sudden starts, sharp turns, sudden
braking, or abrupt maneuvers;
otherwise it may result in loss of
control. If driving for a long distance,
on rough roads, or at high speeds,
occasionally stop the vehicle to
make sure the cargo remains in its
place. Do not exceed the maximum
vehicle capacity when loading the
vehicle. For more information on
vehicle capacity and loading, see
Vehicle Load Limits on page 9‑16.
The roof rack cross rails can be
locked in four positions along the
roof rack side rails. These are the
only positions that the cross rails
will lock.Lift the lever to release and move
the cross rail.
Position the cross rail on both sides
of the vehicle at the same time.
Page 118 of 428

Black plate (4,1)GMC Terrain Owner Manual (Include Mex) - 2012
5-4 Instruments and Controls
nLFRONT (Windshield
Washer): Pull the windshield wiper
lever toward you to spray windshield
washer fluid and activate the wipers.
The wipers will continue until the
lever is released or the maximum
wash time is reached. When the
windshield wiper lever is released,
additional wipes may occur
depending on how long the
windshield washer had been
activated. See Washer Fluid on
page 10‑23 for information on filling
the windshield washer fluid
reservoir.
{WARNING
In freezing weather, do not use
the washer until the windshield is
warmed. Otherwise the washer
fluid can form ice on the
windshield, blocking your vision. Clear snow and ice from the wiper
blades before using them. If frozen
to the windshield, carefully loosen or
thaw them. Damaged blades should
be replaced. See
Wiper Blade
Replacement on page 10‑28.
Heavy snow or ice can overload the
wiper motor.
Wipe Parking
If the ignition is turned to LOCK/
OFF while the wipers are on LO, HI,
or INT, they will immediately stop.
If the windshield wiper lever is then
moved to off before the driver door
is opened or within 10 minutes, the
wipers will restart and move to the
base of the windshield.
If the ignition is turned to LOCK/
OFF while the wipers are performing
wipes due to windshield washing,
the wipers continue to run until they
reach the base of the windshield.
Rear Window Wiper/
Washer
The rear wiper controls are on the
end of the windshield wiper lever.
ON: Press the upper portion of the
button for continuous rear window
wipes.
OFF: The rear wiper turns off when
the button is returned to the middle
position.
INT (Intermittent Rear Wipes):
Press the lower portion of the button
to set a delay between wipes.
m =REAR (Rear Washer): Push
the windshield wiper lever forward
to spray washer fluid on the rear
window. The lever returns to its
starting position when released.
Page 128 of 428
Black plate (14,1)GMC Terrain Owner Manual (Include Mex) - 2012
5-14 Instruments and Controls
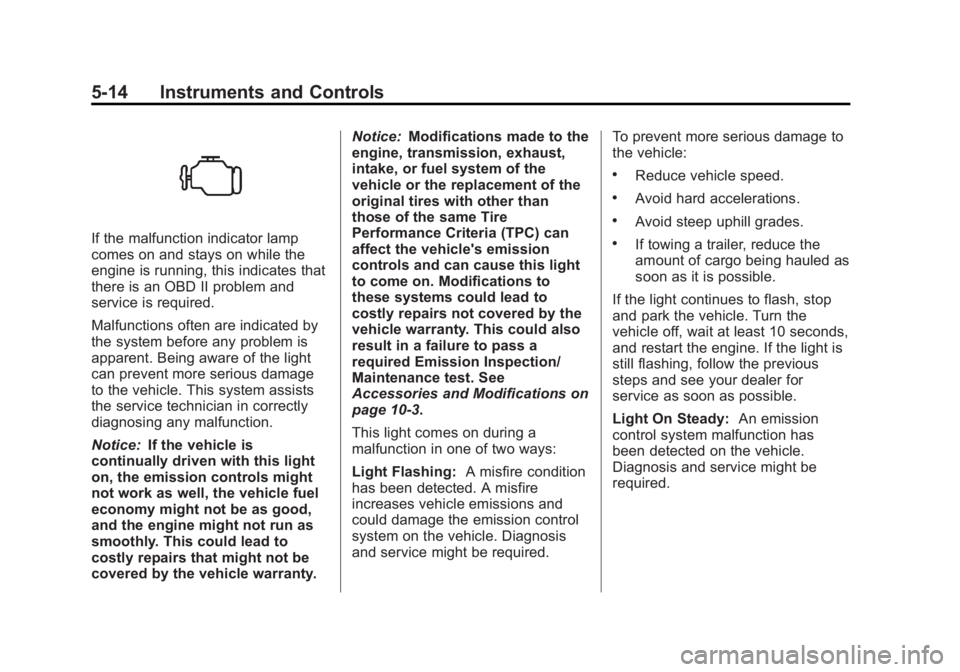
If the malfunction indicator lamp
comes on and stays on while the
engine is running, this indicates that
there is an OBD II problem and
service is required.
Malfunctions often are indicated by
the system before any problem is
apparent. Being aware of the light
can prevent more serious damage
to the vehicle. This system assists
the service technician in correctly
diagnosing any malfunction.
Notice:If the vehicle is
continually driven with this light
on, the emission controls might
not work as well, the vehicle fuel
economy might not be as good,
and the engine might not run as
smoothly. This could lead to
costly repairs that might not be
covered by the vehicle warranty. Notice:
Modifications made to the
engine, transmission, exhaust,
intake, or fuel system of the
vehicle or the replacement of the
original tires with other than
those of the same Tire
Performance Criteria (TPC) can
affect the vehicle's emission
controls and can cause this light
to come on. Modifications to
these systems could lead to
costly repairs not covered by the
vehicle warranty. This could also
result in a failure to pass a
required Emission Inspection/
Maintenance test. See
Accessories and Modifications on
page 10‑3.
This light comes on during a
malfunction in one of two ways:
Light Flashing: A misfire condition
has been detected. A misfire
increases vehicle emissions and
could damage the emission control
system on the vehicle. Diagnosis
and service might be required. To prevent more serious damage to
the vehicle:
.Reduce vehicle speed.
.Avoid hard accelerations.
.Avoid steep uphill grades.
.If towing a trailer, reduce the
amount of cargo being hauled as
soon as it is possible.
If the light continues to flash, stop
and park the vehicle. Turn the
vehicle off, wait at least 10 seconds,
and restart the engine. If the light is
still flashing, follow the previous
steps and see your dealer for
service as soon as possible.
Light On Steady: An emission
control system malfunction has
been detected on the vehicle.
Diagnosis and service might be
required.