Instrument control GMC TERRAIN 2017 Repair Manual
[x] Cancel search | Manufacturer: GMC, Model Year: 2017, Model line: TERRAIN, Model: GMC TERRAIN 2017Pages: 330, PDF Size: 4.54 MB
Page 182 of 330
GMC Terrain/Terrain Denali Owner Manual (GMNA-Localizing-U.S./Canada/
Mexico-9919509) - 2017 - crc - 8/16/16
Driving and Operating 181
briefly. For each press, the
vehicle goes about 1.6 km/h
(1 mph) faster.
The speedometer reading can be
displayed in either English or metric
units. See Instrument Cluster 0102.
The increment value used depends
on the units displayed.
Reducing Speed While Using
Cruise Control
If the cruise control system is
already activated:
. Move the thumbwheel toward
SET/− and hold until the desired
lower speed is reached, then
release it.
. To decrease the vehicle speed in
small increments, move the
thumbwheel toward SET/−
briefly. For each press, the
vehicle goes about 1.6 km/h
(1 mph) slower.
The speedometer reading can be
displayed in either English or metric
units. See Instrument Cluster 0102.
The increment value used depends
on the units displayed. Passing Another Vehicle While
Using Cruise Control
Use the accelerator pedal to
increase the vehicle speed. When
you take your foot off the pedal, the
vehicle slows down to the previously
set cruise control speed. While
pressing the accelerator pedal or
shortly following the release to
override cruise control, briefly
moving the thumbwheel toward
SET/−
will result in cruise set to the
current vehicle speed.
Using Cruise Control on Hills
How well the cruise control works
on hills depends upon the vehicle
speed, load, and the steepness of
the hills. When going up steep hills,
you might have to step on the
accelerator pedal to maintain the
vehicle speed. When going
downhill, you might have to brake or
shift to a lower gear to maintain the
vehicle speed. When the brakes are
applied, the cruise control is
disengaged. Ending Cruise Control
There are four ways to end cruise
control:
.
Step lightly on the brake pedal.
. Press
n.
. Shift the transmission to
N (Neutral).
. To turn off cruise control,
press
o.
Erasing Speed Memory
The cruise control set speed is
erased from memory if
ois
pressed or if the vehicle is
turned off.
Page 196 of 330

GMC Terrain/Terrain Denali Owner Manual (GMNA-Localizing-U.S./Canada/
Mexico-9919509) - 2017 - crc - 8/16/16
Driving and Operating 195
Trailer Towing
General Towing
Information
Only use towing equipment that has
been designed for the vehicle.
Contact your dealer or trailering
dealer for assistance with preparing
the vehicle for towing a trailer. Read
the entire section before towing a
trailer.
For towing a disabled vehicle, see
Towing the Vehicle0266. For
towing the vehicle behind another
vehicle such as a motor home, see
Recreational Vehicle Towing 0266.
Driving Characteristics
and Towing Tips
Driving with a Trailer
When towing a trailer:
.
Become familiar with the state
and local laws that apply
specifically to trailer towing. .
Do not tow a trailer during the
first 800 km (500 miles), to
prevent damage to the engine,
axle or other parts.
. Then, during the first 800 km
(500 miles) trailer towing, do not
drive over 80 km/h (50 mph) and
do not make starts at full throttle.
. The vehicle can tow in D (Drive).
Use a lower gear if the
transmission shifts too often.
. Do not use the Fuel Economy
Mode when towing.
. Turn off Park Assist when
towing.
{Warning
When towing a trailer, exhaust
gases may collect at the rear of
the vehicle and enter if the
liftgate, trunk/hatch, or rear-most
window is open.
When towing a trailer:
(Continued)
Warning (Continued)
.Do not drive with the
liftgate, trunk/hatch,
or rear-most window open.
. Fully open the air outlets on
or under the instrument
panel.
. Also adjust the climate
control system to a setting
that brings in only outside
air. See “Climate Control
Systems” in the Index.
For information about carbon
monoxide, see Engine
Exhaust 0171.
Towing a trailer requires a certain
amount of experience. The
combination you are driving is
longer and not as responsive as the
vehicle itself. Get acquainted with
the handling and braking of the rig
before setting out for the open road.
Before starting, check all trailer hitch
parts and attachments, safety
chains, electrical connectors, lamps,
tires and mirrors. If the trailer has
Page 197 of 330

GMC Terrain/Terrain Denali Owner Manual (GMNA-Localizing-U.S./Canada/
Mexico-9919509) - 2017 - crc - 8/16/16
196 Driving and Operating
electric brakes, start the
combination moving and then apply
the trailer brake controller by hand
to be sure the brakes work.
During the trip, check occasionally
to be sure that the load is secure
and the lamps and any trailer
brakes still work.
Towing with a Stability Control
System
When towing, the sound of the
stability control system might be
heard. The system is reacting to the
vehicle movement caused by the
trailer, which mainly occurs during
cornering. This is normal when
towing heavier trailers.
Following Distance
Stay at least twice as far behind the
vehicle ahead as you would when
driving the vehicle without a trailer.
This can help to avoid situations
that require heavy braking and
sudden turns.
Passing
More passing distance is needed
when towing a trailer. Because the
rig is longer, it is necessary to go
farther beyond the passed vehicle
before returning to the lane.
Backing Up
Hold the bottom of the steering
wheel with one hand. To move the
trailer to the left, move your hand to
the left. To move the trailer to the
right, move your hand to the right.
Always back up slowly and,
if possible, have someone
guide you.
Making TurnsCaution
Making very sharp turns while
trailering could cause the trailer to
come in contact with the vehicle.
The vehicle could be damaged.
Avoid making very sharp turns
while trailering. When turning with a trailer, make
wider turns than normal so the
trailer will not strike soft shoulders,
curbs, road signs, trees or other
objects. Use the turn signal well in
advance and avoid jerky or sudden
maneuvers.
Turn Signals When Towing a
Trailer
The turn signal indicators on the
instrument panel flash whenever
signaling a turn or lane change.
Properly hooked up, the trailer
lamps also flash, telling other
drivers the vehicle is turning,
changing lanes or stopping.
When towing a trailer, the arrows on
the instrument panel flash for turns
even if the bulbs on the trailer are
burned out. Check occasionally to
be sure the trailer bulbs are still
working.
Driving on Grades
Reduce speed and shift to a lower
gear before starting down a long or
steep downgrade. If the
transmission is not shifted down, the
Page 203 of 330
GMC Terrain/Terrain Denali Owner Manual (GMNA-Localizing-U.S./Canada/
Mexico-9919509) - 2017 - crc - 8/16/16
202 Vehicle Care
Vehicle Care
General Information
General Information . . . . . . . . . . 203
California Proposition65 Warning . . . . . . . . . . . . . . . . . 203
California Perchlorate Materials Requirements . . . . . 203
Accessories and Modifications . . . . . . . . . . . . . . . . 204
Vehicle Checks
Doing Your OwnService Work . . . . . . . . . . . . . . . 204
Hood . . . . . . . . . . . . . . . . . . . . . . . . . 205
Engine Compartment Overview . . . . . . . . . . . . . . . . . . . . 206
Engine Cover . . . . . . . . . . . . . . . . . 209
Engine Oil . . . . . . . . . . . . . . . . . . . . 209
Engine Oil Life System . . . . . . . 212
Automatic Transmission Fluid . . . . . . . . . . . . . . . . . . . . . . . . 213
Engine Air Cleaner/Filter . . . . . . 213
Cooling System . . . . . . . . . . . . . . 214
Engine Coolant . . . . . . . . . . . . . . . 215
Engine Overheating . . . . . . . . . . 219
Power Steering Fluid (2.4L L4 Engine) . . . . . . . . . . . . . . . . . . . . . 220
Power Steering Fluid (3.6L V6 Engine) . . . . . . . . . . . . . . . . . . 220 Washer Fluid . . . . . . . . . . . . . . . . . 221
Brakes . . . . . . . . . . . . . . . . . . . . . . . 221
Brake Fluid . . . . . . . . . . . . . . . . . . . 222
Battery - North America . . . . . . 223
All-Wheel Drive . . . . . . . . . . . . . . . 224
Starter Switch Check . . . . . . . . . 224
Automatic Transmission Shift
Lock Control Function
Check . . . . . . . . . . . . . . . . . . . . . . . 224
Ignition Transmission Lock Check . . . . . . . . . . . . . . . . . . . . . . . 225
Park Brake and P (Park) Mechanism Check . . . . . . . . . . 225
Wiper Blade Replacement . . . . 225
Headlamp Aiming
Headlamp Aiming . . . . . . . . . . . . 227
Bulb Replacement
Bulb Replacement . . . . . . . . . . . . 227
Halogen Bulbs . . . . . . . . . . . . . . . . 227
Taillamps, Turn Signal, Sidemarker, Stoplamps, and
Back-Up Lamps . . . . . . . . . . . . . 227
License Plate Lamp . . . . . . . . . . 230
Replacement Bulbs . . . . . . . . . . . 230
Electrical System
Fuses . . . . . . . . . . . . . . . . . . . . . . . . 231
Engine Compartment Fuse Block . . . . . . . . . . . . . . . . . . . . . . . . 231 Instrument Panel Fuse
Block . . . . . . . . . . . . . . . . . . . . . . . . 234
Wheels and Tires
Tires . . . . . . . . . . . . . . . . . . . . . . . . . . 235
All-Season Tires . . . . . . . . . . . . . . 236
Winter Tires . . . . . . . . . . . . . . . . . . 237
Summer Tires . . . . . . . . . . . . . . . . 237
Tire Sidewall Labeling . . . . . . . . 238
Tire Designations . . . . . . . . . . . . . 240
Tire Terminology andDefinitions . . . . . . . . . . . . . . . . . . 240
Tire Pressure . . . . . . . . . . . . . . . . . 243
Tire Pressure Monitor System . . . . . . . . . . . . . . . . . . . . . . 244
Tire Pressure Monitor Operation . . . . . . . . . . . . . . . . . . . 245
Tire Inspection . . . . . . . . . . . . . . . . 248
Tire Rotation . . . . . . . . . . . . . . . . . 248
When It Is Time for New Tires . . . . . . . . . . . . . . . . . . . . . . . . 249
Buying New Tires . . . . . . . . . . . . . 250
Different Size Tires and Wheels . . . . . . . . . . . . . . . . . . . . . . 251
Uniform Tire Quality Grading . . . . . . . . . . . . . . . . . . . . . 252
Wheel Alignment and Tire Balance . . . . . . . . . . . . . . . . . . . . . 253
Wheel Replacement . . . . . . . . . . 254
Tire Chains . . . . . . . . . . . . . . . . . . . 254
If a Tire Goes Flat . . . . . . . . . . . . 255
Page 233 of 330
GMC Terrain/Terrain Denali Owner Manual (GMNA-Localizing-U.S./Canada/
Mexico-9919509) - 2017 - crc - 8/16/16
232 Vehicle Care
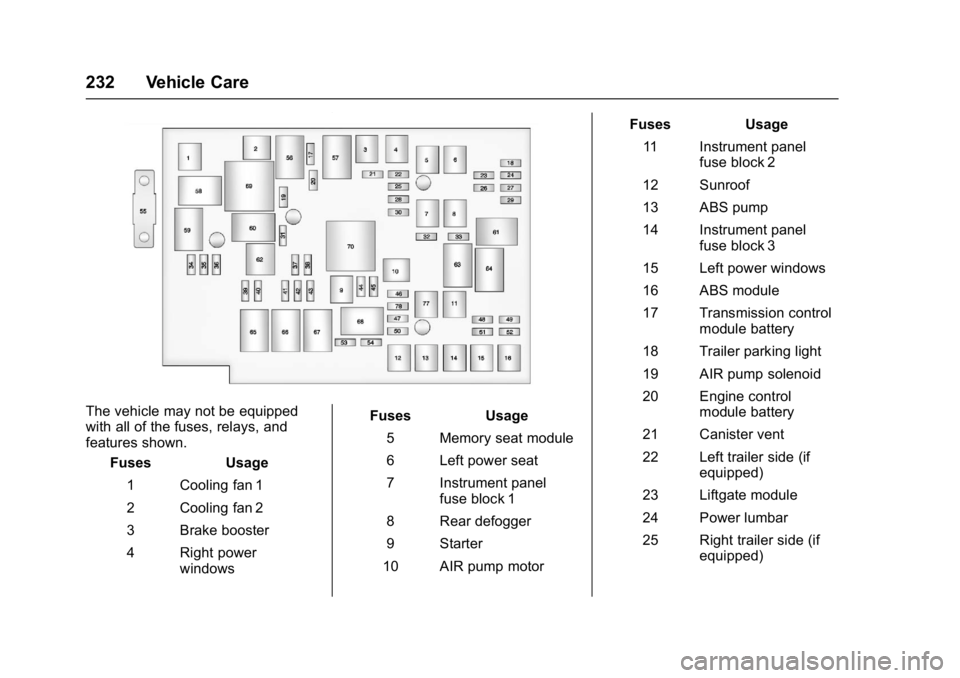
The vehicle may not be equipped
with all of the fuses, relays, and
features shown.Fuses Usage
1 Cooling fan 1
2 Cooling fan 2
3 Brake booster
4 Right power windows Fuses Usage
5 Memory seat module
6 Left power seat
7 Instrument panel fuse block 1
8 Rear defogger
9 Starter
10 AIR pump motor Fuses Usage
11 Instrument panel fuse block 2
12 Sunroof
13 ABS pump
14 Instrument panel fuse block 3
15 Left power windows
16 ABS module
17 Transmission control module battery
18 Trailer parking light
19 AIR pump solenoid
20 Engine control module battery
21 Canister vent
22 Left trailer side (if equipped)
23 Liftgate module
24 Power lumbar
25 Right trailer side (if equipped)
Page 234 of 330
GMC Terrain/Terrain Denali Owner Manual (GMNA-Localizing-U.S./Canada/
Mexico-9919509) - 2017 - crc - 8/16/16
Vehicle Care 233
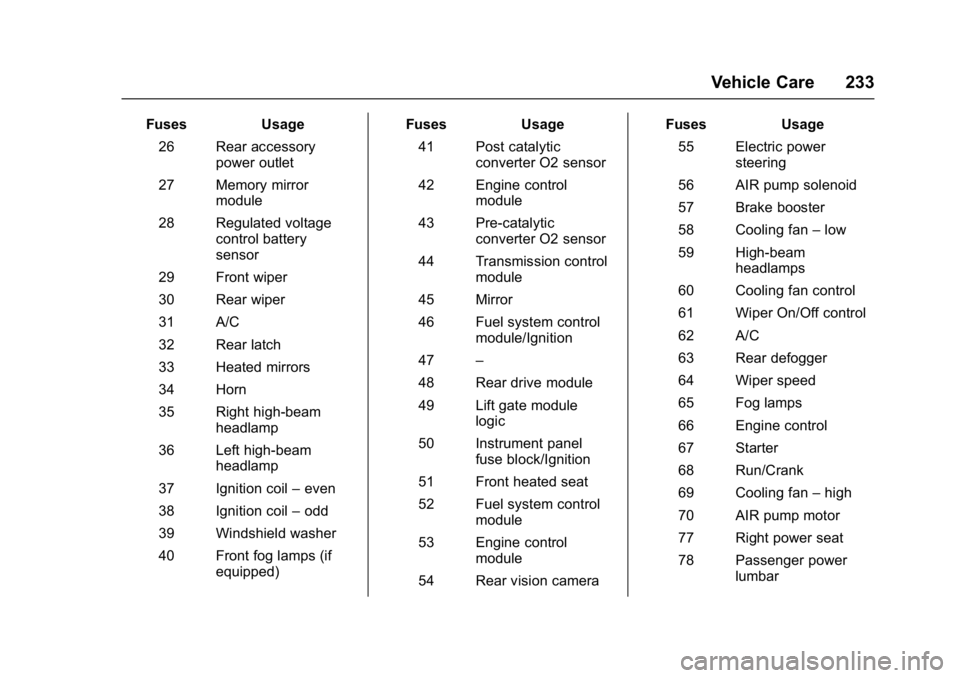
FusesUsage
26 Rear accessory power outlet
27 Memory mirror module
28 Regulated voltage control battery
sensor
29 Front wiper
30 Rear wiper
31 A/C
32 Rear latch
33 Heated mirrors
34 Horn
35 Right high-beam headlamp
36 Left high-beam headlamp
37 Ignition coil –even
38 Ignition coil –odd
39 Windshield washer
40 Front fog lamps (if equipped) Fuses
Usage
41 Post catalytic converter O2 sensor
42 Engine control module
43 Pre-catalytic converter O2 sensor
44 Transmission control module
45 Mirror
46 Fuel system control module/Ignition
47 –
48 Rear drive module
49 Lift gate module logic
50 Instrument panel fuse block/Ignition
51 Front heated seat
52 Fuel system control module
53 Engine control module
54 Rear vision camera Fuses
Usage
55 Electric power steering
56 AIR pump solenoid
57 Brake booster
58 Cooling fan –low
59 High-beam headlamps
60 Cooling fan control
61 Wiper On/Off control
62 A/C
63 Rear defogger
64 Wiper speed
65 Fog lamps
66 Engine control
67 Starter
68 Run/Crank
69 Cooling fan –high
70 AIR pump motor
77 Right power seat
78 Passenger power lumbar
Page 235 of 330
GMC Terrain/Terrain Denali Owner Manual (GMNA-Localizing-U.S./Canada/
Mexico-9919509) - 2017 - crc - 8/16/16
234 Vehicle Care
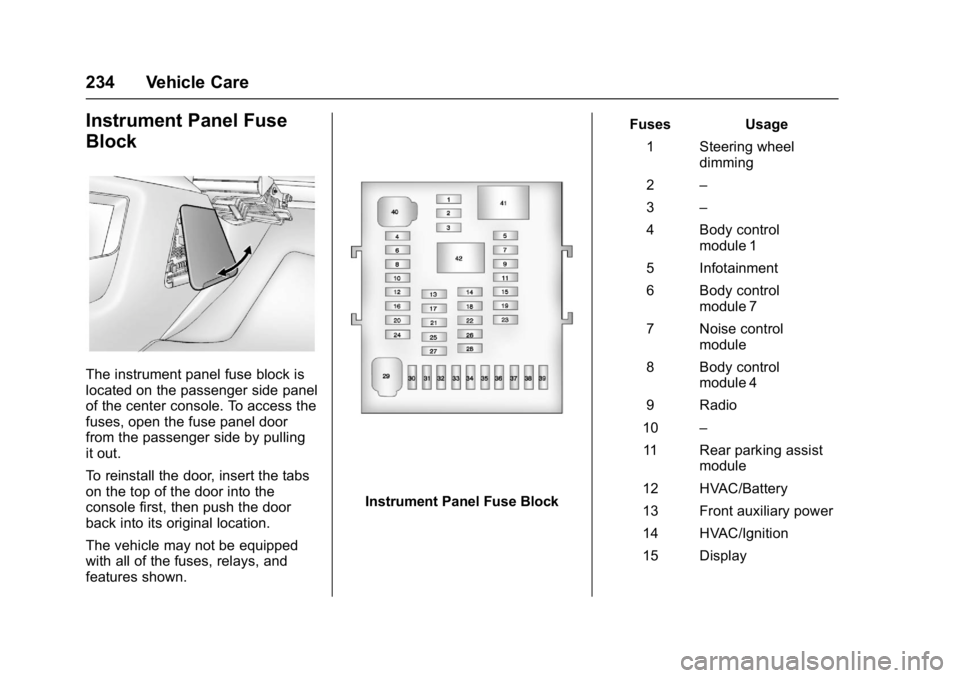
Instrument Panel Fuse
Block
The instrument panel fuse block is
located on the passenger side panel
of the center console. To access the
fuses, open the fuse panel door
from the passenger side by pulling
it out.
To reinstall the door, insert the tabs
on the top of the door into the
console first, then push the door
back into its original location.
The vehicle may not be equipped
with all of the fuses, relays, and
features shown.
Instrument Panel Fuse BlockFuses Usage
1 Steering wheel dimming
2 –
3 –
4 Body control module 1
5 Infotainment
6 Body control module 7
7 Noise control module
8 Body control module 4
9 Radio
10 –
11 Rear parking assist module
12 HVAC/Battery
13 Front auxiliary power
14 HVAC/Ignition
15 Display
Page 236 of 330
GMC Terrain/Terrain Denali Owner Manual (GMNA-Localizing-U.S./Canada/
Mexico-9919509) - 2017 - crc - 8/16/16
Vehicle Care 235
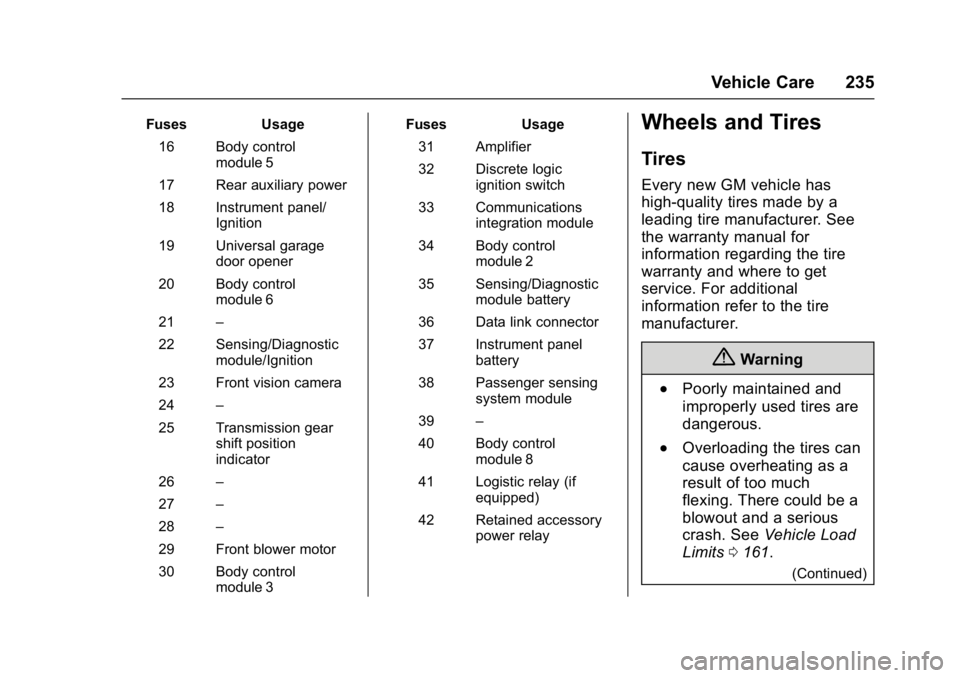
FusesUsage
16 Body control module 5
17 Rear auxiliary power
18 Instrument panel/ Ignition
19 Universal garage door opener
20 Body control module 6
21 –
22 Sensing/Diagnostic module/Ignition
23 Front vision camera
24 –
25 Transmission gear shift position
indicator
26 –
27 –
28 –
29 Front blower motor
30 Body control module 3 Fuses
Usage
31 Amplifier
32 Discrete logic ignition switch
33 Communications integration module
34 Body control module 2
35 Sensing/Diagnostic module battery
36 Data link connector
37 Instrument panel battery
38 Passenger sensing system module
39 –
40 Body control module 8
41 Logistic relay (if equipped)
42 Retained accessory power relayWheels and Tires
Tires
Every new GM vehicle has
high-quality tires made by a
leading tire manufacturer. See
the warranty manual for
information regarding the tire
warranty and where to get
service. For additional
information refer to the tire
manufacturer.
{Warning
.Poorly maintained and
improperly used tires are
dangerous.
.Overloading the tires can
cause overheating as a
result of too much
flexing. There could be a
blowout and a serious
crash. See Vehicle Load
Limits 0161.
(Continued)
Page 275 of 330
GMC Terrain/Terrain Denali Owner Manual (GMNA-Localizing-U.S./Canada/
Mexico-9919509) - 2017 - crc - 8/16/16
274 Vehicle Care
Sheet Metal Damage
If the vehicle is damaged and
requires sheet metal repair or
replacement, make sure the body
repair shop applies anti-corrosion
material to parts repaired or
replaced to restore corrosion
protection.
Original manufacturer replacement
parts will provide the corrosion
protection while maintaining the
vehicle warranty.
Finish Damage
Quickly repair minor chips and
scratches with touch-up materials
available from your dealer to avoid
corrosion. Larger areas of finish
damage can be corrected in your
dealer's body and paint shop.
Chemical Paint Spotting
Airborne pollutants can fall upon
and attack painted vehicle surfaces
causing blotchy, ring-shaped
discolorations, and small, irregular
dark spots etched into the paint
surface. See“Finish Care”
previously in this section.
Interior Care
To prevent dirt particle abrasions,
regularly clean the vehicle's interior.
Immediately remove any soils.
Newspapers or dark garments can
transfer color to the vehicle’s
interior.
Use a soft bristle brush to remove
dust from knobs and crevices on the
instrument cluster. Using a mild
soap solution, immediately remove
hand lotions, sunscreen, and insect
repellent from all interior surfaces or
permanent damage may result.
Use cleaners specifically designed
for the surfaces being cleaned to
prevent permanent damage. Apply
all cleaners directly to the cleaning
cloth. Do not spray cleaners on any
switches or controls. Remove
cleaners quickly.
Before using cleaners, read and
follow all safety instructions on the
label. While cleaning the interior,
open the doors and windows to get
proper ventilation. To prevent damage, do not clean
the interior using the following
cleaners or techniques:
.
Never use a razor or any other
sharp object to remove soil from
any interior surface.
. Never use a brush with stiff
bristles.
. Never rub any surface
aggressively or with too much
pressure.
. Do not use laundry detergents or
dishwashing soaps with
degreasers. For liquid cleaners,
use approximately 20 drops per
3.8 L (1 gal) of water.
A concentrated soap solution will
create streaks and attract dirt.
Do not use solutions that contain
strong or caustic soap.
. Do not heavily saturate the
upholstery when cleaning.
. Do not use solvents or cleaners
containing solvents.
Page 288 of 330
GMC Terrain/Terrain Denali Owner Manual (GMNA-Localizing-U.S./Canada/
Mexico-9919509) - 2017 - crc - 8/16/16
Service and Maintenance 287
.To avoid break-down or failure to
start the vehicle, maintain a
battery with full cranking power.
. Trained dealer technicians have
the diagnostic equipment to test
the battery and ensure that the
connections and cables are
corrosion-free.
Belts
. Belts may need replacing if they
squeak or show signs of
cracking or splitting.
. Trained dealer technicians have
access to tools and equipment
to inspect the belts and
recommend adjustment or
replacement when necessary.
Brakes
Brakes stop the vehicle and are
crucial to safe driving.
. Signs of brake wear may include
chirping, grinding, or squealing
noises, or difficulty stopping. .
Trained dealer technicians have
access to tools and equipment
to inspect the brakes and
recommend quality parts
engineered for the vehicle.
Fluids
Proper fluid levels and approved
fluids protect the vehicle’s systems
and components. See
Recommended Fluids and
Lubricants 0289 for GM approved
fluids.
. Engine oil and windshield
washer fluid levels should be
checked at every fuel fill.
. Instrument cluster lights may
come on to indicate that fluids
may be low and need to be
filled.
Hoses
Hoses transport fluids and should
be regularly inspected to ensure
that there are no cracks or leaks.
With a multi-point inspection, your
dealer can inspect the hoses and
advise if replacement is needed. Lamps
Properly working headlamps,
taillamps, and brake lamps are
important to see and be seen on
the road.
.
Signs that the headlamps need
attention include dimming, failure
to light, cracking, or damage.
The brake lamps need to be
checked periodically to ensure
that they light when braking.
. With a multi-point inspection,
your dealer can check the lamps
and note any concerns.
Shocks and Struts
Shocks and struts help aid in control
for a smoother ride.
. Signs of wear may include
steering wheel vibration, bounce/
sway while braking, longer
stopping distance, or uneven
tire wear.
. As part of the multi-point
inspection, trained dealer
technicians can visually inspect
the shocks and struts for signs