radio controls GMC TERRAIN 2017 Owner's Manual
[x] Cancel search | Manufacturer: GMC, Model Year: 2017, Model line: TERRAIN, Model: GMC TERRAIN 2017Pages: 330, PDF Size: 4.54 MB
Page 19 of 330
GMC Terrain/Terrain Denali Owner Manual (GMNA-Localizing-U.S./Canada/
Mexico-9919509) - 2017 - crc - 8/16/16
18 In Brief
Press the eco (economy) button to
turn this feature on or off. The eco
light in the instrument cluster will
come on when engaged, and a
Driver Information Center (DIC)
message displays. SeeFuel
Economy Mode 0174.
Parking Brake
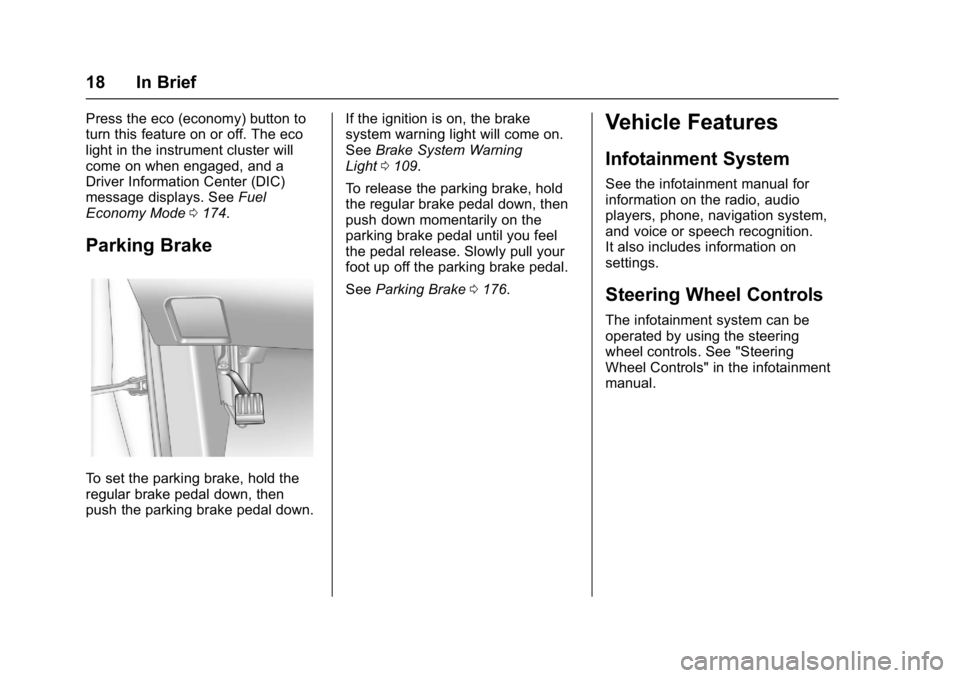
To set the parking brake, hold the
regular brake pedal down, then
push the parking brake pedal down. If the ignition is on, the brake
system warning light will come on.
See
Brake System Warning
Light 0109.
To release the parking brake, hold
the regular brake pedal down, then
push down momentarily on the
parking brake pedal until you feel
the pedal release. Slowly pull your
foot up off the parking brake pedal.
See Parking Brake 0176.
Vehicle Features
Infotainment System
See the infotainment manual for
information on the radio, audio
players, phone, navigation system,
and voice or speech recognition.
It also includes information on
settings.
Steering Wheel Controls
The infotainment system can be
operated by using the steering
wheel controls. See "Steering
Wheel Controls" in the infotainment
manual.
Page 108 of 330
GMC Terrain/Terrain Denali Owner Manual (GMNA-Localizing-U.S./Canada/
Mexico-9919509) - 2017 - crc - 8/16/16
Instruments and Controls 107
{Warning
If the airbag readiness light ever
comes on and stays on, it means
that something may be wrong
with the airbag system. To help
avoid injury to yourself or others,
have the vehicle serviced right
away. SeeAirbag Readiness
Light 0105 for more information,
including important safety
information.
Charging System Light
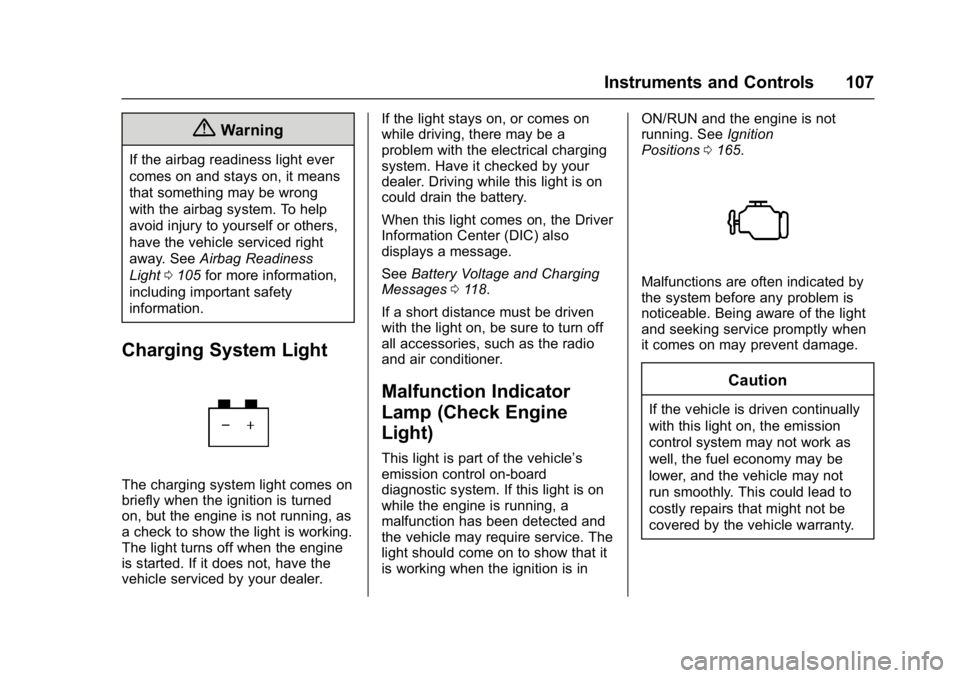
The charging system light comes on
briefly when the ignition is turned
on, but the engine is not running, as
a check to show the light is working.
The light turns off when the engine
is started. If it does not, have the
vehicle serviced by your dealer. If the light stays on, or comes on
while driving, there may be a
problem with the electrical charging
system. Have it checked by your
dealer. Driving while this light is on
could drain the battery.
When this light comes on, the Driver
Information Center (DIC) also
displays a message.
See
Battery Voltage and Charging
Messages 0118.
If a short distance must be driven
with the light on, be sure to turn off
all accessories, such as the radio
and air conditioner.
Malfunction Indicator
Lamp (Check Engine
Light)
This light is part of the vehicle’s
emission control on-board
diagnostic system. If this light is on
while the engine is running, a
malfunction has been detected and
the vehicle may require service. The
light should come on to show that it
is working when the ignition is in ON/RUN and the engine is not
running. See
Ignition
Positions 0165.
Malfunctions are often indicated by
the system before any problem is
noticeable. Being aware of the light
and seeking service promptly when
it comes on may prevent damage.
Caution
If the vehicle is driven continually
with this light on, the emission
control system may not work as
well, the fuel economy may be
lower, and the vehicle may not
run smoothly. This could lead to
costly repairs that might not be
covered by the vehicle warranty.
Page 116 of 330
GMC Terrain/Terrain Denali Owner Manual (GMNA-Localizing-U.S./Canada/
Mexico-9919509) - 2017 - crc - 8/16/16
Instruments and Controls 115
Information Displays
Driver Information
Center (DIC)
The vehicle may have a DIC.
It displays information about the
vehicle and warning messages if
there is a system problem detected.
DIC messages display in the center
of the instrument cluster. See
Vehicle Messages0118.
The vehicle may also have features
that can be customized through the
controls on the radio. See Vehicle
Personalization 0125.
DIC Operation and Displays
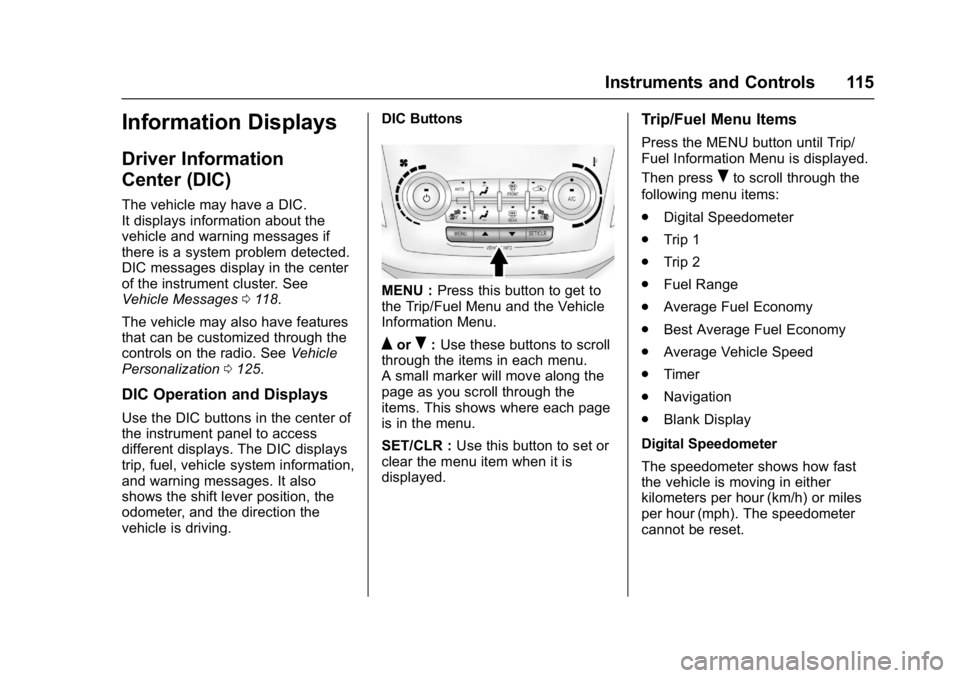
Use the DIC buttons in the center of
the instrument panel to access
different displays. The DIC displays
trip, fuel, vehicle system information,
and warning messages. It also
shows the shift lever position, the
odometer, and the direction the
vehicle is driving. DIC Buttons
MENU :
Press this button to get to
the Trip/Fuel Menu and the Vehicle
Information Menu.
QorR: Use these buttons to scroll
through the items in each menu.
A small marker will move along the
page as you scroll through the
items. This shows where each page
is in the menu.
SET/CLR : Use this button to set or
clear the menu item when it is
displayed.
Trip/Fuel Menu Items
Press the MENU button until Trip/
Fuel Information Menu is displayed.
Then press
Rto scroll through the
following menu items:
. Digital Speedometer
. Trip 1
. Trip 2
. Fuel Range
. Average Fuel Economy
. Best Average Fuel Economy
. Average Vehicle Speed
. Timer
. Navigation
. Blank Display
Digital Speedometer
The speedometer shows how fast
the vehicle is moving in either
kilometers per hour (km/h) or miles
per hour (mph). The speedometer
cannot be reset.
Page 126 of 330
GMC Terrain/Terrain Denali Owner Manual (GMNA-Localizing-U.S./Canada/
Mexico-9919509) - 2017 - crc - 8/16/16
Instruments and Controls 125
Vehicle
Personalization
Use the audio system controls to
access the personalization menus
for customizing vehicle features.
The following are all possible
personalization features. Depending
on the vehicle, some may not be
available.
Infotainment System Audio
System Controls
Using the Faceplate
MENU/SEL Knob
.Press to enter, select, or activate
a highlighted menu option.
. Turn to highlight a menu option.
. Press to enable or disable a
system setting.
EBACK
. Press to exit a menu.
. Press to return to a previous
screen. Using the Touchscreen
Touch a screen feature to:
.
View more feature options.
. Enable or disable the feature.
w:Touch to scroll up.
x:Touch to scroll down.
Back : Touch to return to the
previous menu.
To access the
personalization menu:
1. Touch Config on the Home page on the infotainment
display or press CONFIG on
the faceplate.
2. Select the desired feature to display a list of available
options.
3. Select the desired feature setting.
Personalization Menus
The following list of menu items may
be available:
. Languages
. Time and Date .
Radio Settings
. Phone Settings
. Navigation Settings
. Display Settings
. Vehicle Settings
Each menu is detailed in the
following information.
Languages
Select Languages, then select from
the available language(s).
Time and Date
Manually set the time and date. See
Clock 099.
Radio Settings
Select and the following may
display:
.
Auto Volume
. Gracenote Options
. XM Channel Art
. Max Startup Volume
. Number of Favorites Pages
. XM Categories
Page 128 of 330
GMC Terrain/Terrain Denali Owner Manual (GMNA-Localizing-U.S./Canada/
Mexico-9919509) - 2017 - crc - 8/16/16
Instruments and Controls 127
Sort Order
Select to change the sort order of
the contact list. See“Phone
Settings” under“Bluetooth” in the
infotainment manual.
Select First Name Last or Last
Name First.
Navigation Settings
See “Navigation Settings” under
“Configure Menu” in the
infotainment manual.
Display Settings
Select and the following may
display:
. Home Page Menu
. Rear Camera Options
. Display Off
. Map Settings
Home Page Menu
Select and the following may
display:
. Customize
. Sort
. Restore Home Page Defaults Customize
This feature allows the selection of
what icons will be on the first
Home Page.
Select and follow the screen
prompts.
Sort
This feature allows the icons on the
Home Page to be moved.
Select and follow the screen
prompts.
Restore Home Page Defaults
This feature will restore the Home
Page to the factory settings.
Select and follow the screen
prompts.
Rear Camera Options
Select and the following may
display:
.
Symbols
. Guide Lines
. Rear Cross Traffic Alert (RCTA) Symbols
When enabled, symbols will show
on the camera screen. See
Rear
Vision Camera (RVC) 0182.
Select to enable or disable.
Guide Lines
When enabled, guide lines will show
on the camera screen. See Rear
Vision Camera (RVC) 0182.
Select to enable or disable.
Rear Cross Traffic Alert (RCTA)
When enabled, a symbol will show
on the camera screen to warn of
traffic coming from either direction.
See Rear Vision Camera
(RVC) 0182.
Select to enable or disable.
Display Off
Select to turn the display off. The
display will return when any radio
buttons are pressed or the screen is
touched.
Page 132 of 330
GMC Terrain/Terrain Denali Owner Manual (GMNA-Localizing-U.S./Canada/
Mexico-9919509) - 2017 - crc - 8/16/16
Instruments and Controls 131
Remote Lock Feedback
This allows selection of what type of
feedback is given when unlocking
the vehicle with the RKE transmitter.
Select Lights and Horn, Lights Only,
Horn Only, or Off.
Remote Door Unlock
This allows selection of which doors
will unlock when pressing
Kon the
RKE transmitter.
Select All Doors or Driver Door.
Return to Factory Settings?
Select Return to Factory Settings to
return all of the vehicle
personalization to the default
settings.
Select Yes or No.
Universal Remote
System
See Radio Frequency
Statement 0305.
Universal Remote System
Programming
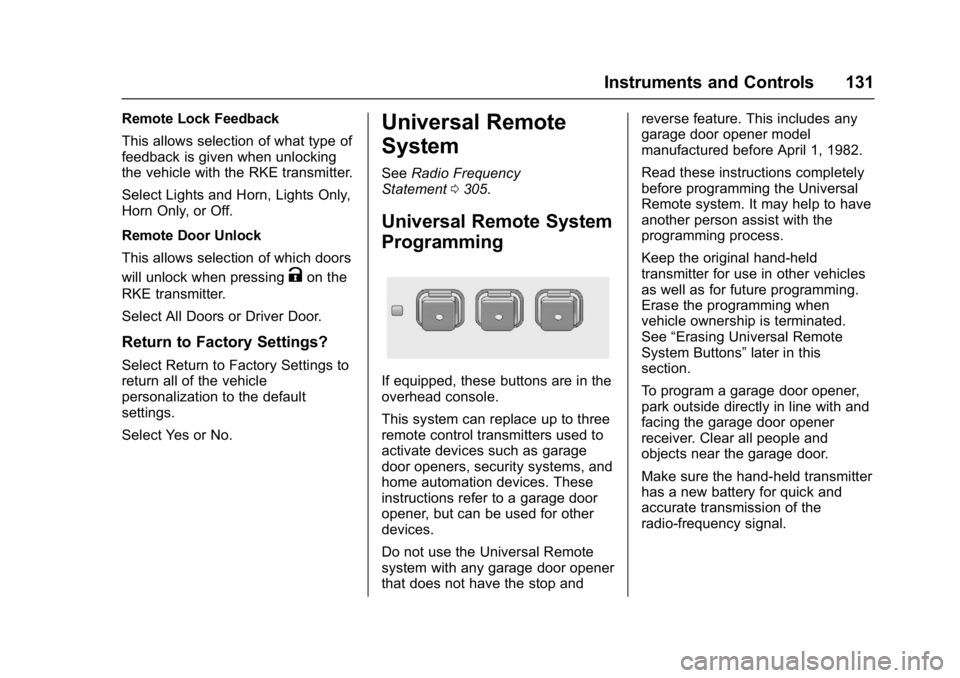
If equipped, these buttons are in the
overhead console.
This system can replace up to three
remote control transmitters used to
activate devices such as garage
door openers, security systems, and
home automation devices. These
instructions refer to a garage door
opener, but can be used for other
devices.
Do not use the Universal Remote
system with any garage door opener
that does not have the stop and reverse feature. This includes any
garage door opener model
manufactured before April 1, 1982.
Read these instructions completely
before programming the Universal
Remote system. It may help to have
another person assist with the
programming process.
Keep the original hand-held
transmitter for use in other vehicles
as well as for future programming.
Erase the programming when
vehicle ownership is terminated.
See
“Erasing Universal Remote
System Buttons” later in this
section.
To program a garage door opener,
park outside directly in line with and
facing the garage door opener
receiver. Clear all people and
objects near the garage door.
Make sure the hand-held transmitter
has a new battery for quick and
accurate transmission of the
radio-frequency signal.
Page 133 of 330
GMC Terrain/Terrain Denali Owner Manual (GMNA-Localizing-U.S./Canada/
Mexico-9919509) - 2017 - crc - 8/16/16
132 Instruments and Controls
Programming the Universal
Remote System
For questions or help programming
the Universal Remote system, call
1-800-355-3515 or see
www.homelink.com.
Programming involves
time-sensitive actions, and may time
out causing the procedure to be
repeated.
To program up to three devices:1. Hold the end of the hand-held transmitter about 3 to 8 cm (1
to 3 in) away from the
Universal Remote system
buttons with the indicator light
in view. The hand-held
transmitter was supplied by the
manufacturer of the garage
door opener receiver.
2. At the same time, press and hold both the hand-held
transmitter button and one of
the three Universal Remote
system buttons to be used to
operate the garage door. Do
not release either button until the indicator light changes from
a slow to a rapid flash. Then
release both buttons.
Some garage door openers
may require substitution of
Step 2 with the procedure
under
“Radio Signals for
Canada and Some Gate
Operators” later in this section.
3. Press and hold the newly programmed Universal Remote
system button for five seconds
while watching the indicator
light and garage door
activation.
.If the indicator light stays on
continuously or the garage
door moves when the
button is pressed, then
programming is complete.
There is no need to
complete Steps 4–6.
. If the indicator light does
not come on or the garage
door does not move, a
second button press may
be required. For a second
time, press and hold the
newly programmed button for five seconds. If the light
stays on or the garage door
moves, programming is
complete.
. If the indicator light blinks
rapidly for two seconds,
then changes to a solid light
and the garage door does
not move, continue with
programming Steps 4–6.
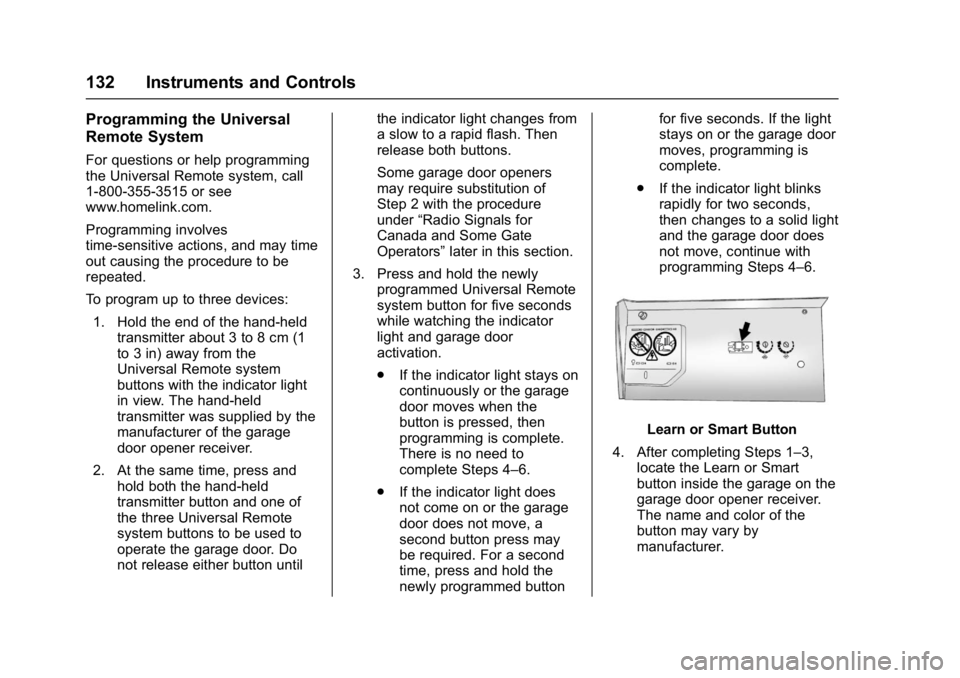
Learn or Smart Button
4. After completing Steps 1–3, locate the Learn or Smart
button inside the garage on the
garage door opener receiver.
The name and color of the
button may vary by
manufacturer.
Page 134 of 330
GMC Terrain/Terrain Denali Owner Manual (GMNA-Localizing-U.S./Canada/
Mexico-9919509) - 2017 - crc - 8/16/16
Instruments and Controls 133
5. Press and release the Learn orSmart button. Step 6 must be
completed within 30 seconds of
pressing this button.
6. Inside the vehicle, press and hold the newly programmed
Universal Remote system
button for two seconds and
then release it. If the garage
door does not move or the
lamp on the garage door
opener receiver does not flash,
press and hold the same
button a second time for
two seconds, then release it.
Again, if the door does not
move or the garage door lamp
does not flash, press and hold
the same button a third time for
two seconds, then release it.
The Universal Remote system
should now activate the
garage door.
Repeat the process for
programming the two remaining
buttons.Radio Signals for Canada and
Some Gate Operators
For questions or programming help
call 1-800-355-3515 or see
www.homelink.com.
Canadian radio-frequency laws and
some U.S. gate operators require
transmitter signals to time out or quit
after several seconds of
transmission. This may not be long
enough for the Universal Remote
system to pick up the signal during
programming.
If the programming did not work,
replace Step 2 under “Programming
the Universal Remote System” with
the following:
Press and hold the Universal
Remote system button while
pressing and releasing the
hand-held transmitter button every
two seconds until the signal has
been successfully accepted by the
Universal Remote system. The
Universal Remote system indicator
light will flash slowly at first and then
rapidly. Proceed with Step 3 under
“Programming the Universal Remote
System” to complete.
Universal Remote System
Operation
Using the Universal Remote
System
Press and hold the appropriate
Universal Remote system button for
at least one-half second. The
indicator light will come on while the
signal is being transmitted.
Erasing Universal Remote
System Buttons
Erase all programmed buttons when
vehicle ownership is terminated.
To erase:
1. Press and hold the two outside buttons until the indicator light
begins to flash. This should
take about 10 seconds.
2. Release both buttons.
Page 323 of 330

GMC Terrain/Terrain Denali Owner Manual (GMNA-Localizing-U.S./Canada/
Mexico-9919509) - 2017 - crc - 8/16/16
322 Index
Electrical SystemEngine Compartment Fuse
Block . . . . . . . . . . . . . . . . . . . . . . . . 231
Fuses . . . . . . . . . . . . . . . . . . . . . . . . 231
Instrument Panel Fuse Block . . . . . . . . . . . . . . . . . . . . . . . . 234
Emergency
OnStar
®. . . . . . . . . . . . . . . . . . . . . . 310
Engine Air Cleaner/Filter . . . . . . . . . . . . . 213
Check and Service EngineSoon Light . . . . . . . . . . . . . . . . . . 107
Compartment Overview . . . . . . . 206
Coolant . . . . . . . . . . . . . . . . . . . . . . . 215
Coolant Heater . . . . . . . . . . . . . . . 168
Coolant Temperature Gauge . . . . . . . . . . . . . . . . . . . . . . 104
Cooling System . . . . . . . . . . . . . . . 214
Cooling System Messages . . . .119
Cover . . . . . . . . . . . . . . . . . . . . . . . . . 209
Drive Belt Routing . . . . . . . . . . . . 294
Exhaust . . . . . . . . . . . . . . . . . . . . . . 171
Oil Life System . . . . . . . . . . . . . . . 212
Oil Messages . . . . . . . . . . . . . . . . . 120
Oil Pressure Light . . . . . . . . . . . . .112
Overheating . . . . . . . . . . . . . . . . . . 219
Power Messages . . . . . . . . . . . . . 121
Running While Parked . . . . . . . . 172 Engine (cont'd)
Starting . . . . . . . . . . . . . . . . . . . . . . . 167
Entry Lighting . . . . . . . . . . . . . . . . . . . 139
Equipment, Towing . . . . . . . . . . . . . 200
Event Data Recorders . . . . . . . . . . 307
Exit Lighting . . . . . . . . . . . . . . . . . . . . 139
Extender, Safety Belt . . . . . . . . . . . . 60
Exterior Lamp Controls . . . . . . . . . 135
Exterior Lighting Battery Saver . . . . . . . . . . . . . . . . . . . . . . . . . 140
F
FeaturesMemory . . . . . . . . . . . . . . . . . . . . . . . . . 11
Filter, Engine Air Cleaner . . . . . . . . . . . 213
Flash-to-Pass . . . . . . . . . . . . . . . . . . . 135
Flashers, Hazard Warning . . . . . . 137
Flat Tire . . . . . . . . . . . . . . . . . . . . . . . . 255 Changing . . . . . . . . . . . . . . . . . . . . . 256
FlexFuel E85 . . . . . . . . . . . . . . . . . . . . . . . . . . . 192
Floor Mats . . . . . . . . . . . . . . . . . . . . . . 277
Fluid Automatic Transmission . . . . . . 213
Brakes . . . . . . . . . . . . . . . . . . . . . . . . 222
Power Steering . . . . . . . . . . . . . . . 220
Washer . . . . . . . . . . . . . . . . . . . . . . . 221 Forward Collision Alert
(FCA) System . . . . . . . . . . . . . . . . . 185
Forward Collision Alert (FCA) Warning Light . . . . . . . . . . . . . . . . . 110
Frequency Statement Radio . . . . . . . . . . . . . . . . . . . . . . . . . 305
Front Seats
Adjustment . . . . . . . . . . . . . . . . . . . . . 47
Heated . . . . . . . . . . . . . . . . . . . . . . . . . 52
Fuel . . . . . . . . . . . . . . . . . . . . . . . . . . . . 191 Additives . . . . . . . . . . . . . . . . . . . . . 192
Economy Driving . . . . . . . . . . . . . . . 23
Economy Light . . . . . . . . . . . . . . . .113
Filling a Portable Fuel
Container . . . . . . . . . . . . . . . . . . . 194
Filling the Tank . . . . . . . . . . . . . . . 193
Foreign Countries . . . . . . . . . . . . 192
Gauge . . . . . . . . . . . . . . . . . . . . . . . . 103
Low Fuel Warning Light . . . . . . . .113
Requirements, California . . . . . 191
System Messages . . . . . . . . . . . . 121
Fuel Economy Mode . . . . . . . . . . . . 174
Fuses . . . . . . . . . . . . . . . . . . . . . . . . . . 231 Engine Compartment FuseBlock . . . . . . . . . . . . . . . . . . . . . . . . 231
Instrument Panel Fuse Block . . . . . . . . . . . . . . . . . . . . . . . . 234