light GMC TERRAIN 2022 Workshop Manual
[x] Cancel search | Manufacturer: GMC, Model Year: 2022, Model line: TERRAIN, Model: GMC TERRAIN 2022Pages: 371, PDF Size: 17.71 MB
Page 125 of 371
GMC Terrain/Terrain Denali Owner Manual (GMNA-Localizing-U.S./Canada/
Mexico-16540740) - 2023 - CRC - 6/16/22
124 Lighting
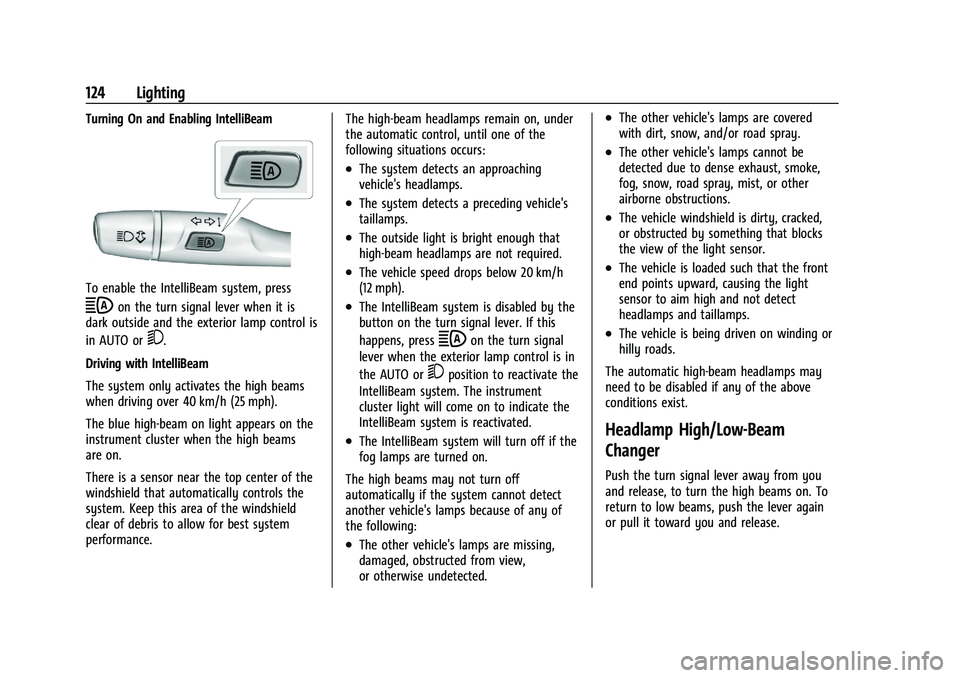
Turning On and Enabling IntelliBeam
To enable the IntelliBeam system, press
bon the turn signal lever when it is
dark outside and the exterior lamp control is
in AUTO or
5.
Driving with IntelliBeam
The system only activates the high beams
when driving over 40 km/h (25 mph).
The blue high-beam on light appears on the
instrument cluster when the high beams
are on.
There is a sensor near the top center of the
windshield that automatically controls the
system. Keep this area of the windshield
clear of debris to allow for best system
performance. The high-beam headlamps remain on, under
the automatic control, until one of the
following situations occurs:
.The system detects an approaching
vehicle's headlamps.
.The system detects a preceding vehicle's
taillamps.
.The outside light is bright enough that
high-beam headlamps are not required.
.The vehicle speed drops below 20 km/h
(12 mph).
.The IntelliBeam system is disabled by the
button on the turn signal lever. If this
happens, press
bon the turn signal
lever when the exterior lamp control is in
the AUTO or
5position to reactivate the
IntelliBeam system. The instrument
cluster light will come on to indicate the
IntelliBeam system is reactivated.
.The IntelliBeam system will turn off if the
fog lamps are turned on.
The high beams may not turn off
automatically if the system cannot detect
another vehicle's lamps because of any of
the following:
.The other vehicle's lamps are missing,
damaged, obstructed from view,
or otherwise undetected.
.The other vehicle's lamps are covered
with dirt, snow, and/or road spray.
.The other vehicle's lamps cannot be
detected due to dense exhaust, smoke,
fog, snow, road spray, mist, or other
airborne obstructions.
.The vehicle windshield is dirty, cracked,
or obstructed by something that blocks
the view of the light sensor.
.The vehicle is loaded such that the front
end points upward, causing the light
sensor to aim high and not detect
headlamps and taillamps.
.The vehicle is being driven on winding or
hilly roads.
The automatic high-beam headlamps may
need to be disabled if any of the above
conditions exist.
Headlamp High/Low-Beam
Changer
Push the turn signal lever away from you
and release, to turn the high beams on. To
return to low beams, push the lever again
or pull it toward you and release.
Page 126 of 371
GMC Terrain/Terrain Denali Owner Manual (GMNA-Localizing-U.S./Canada/
Mexico-16540740) - 2023 - CRC - 6/16/22
Lighting 125
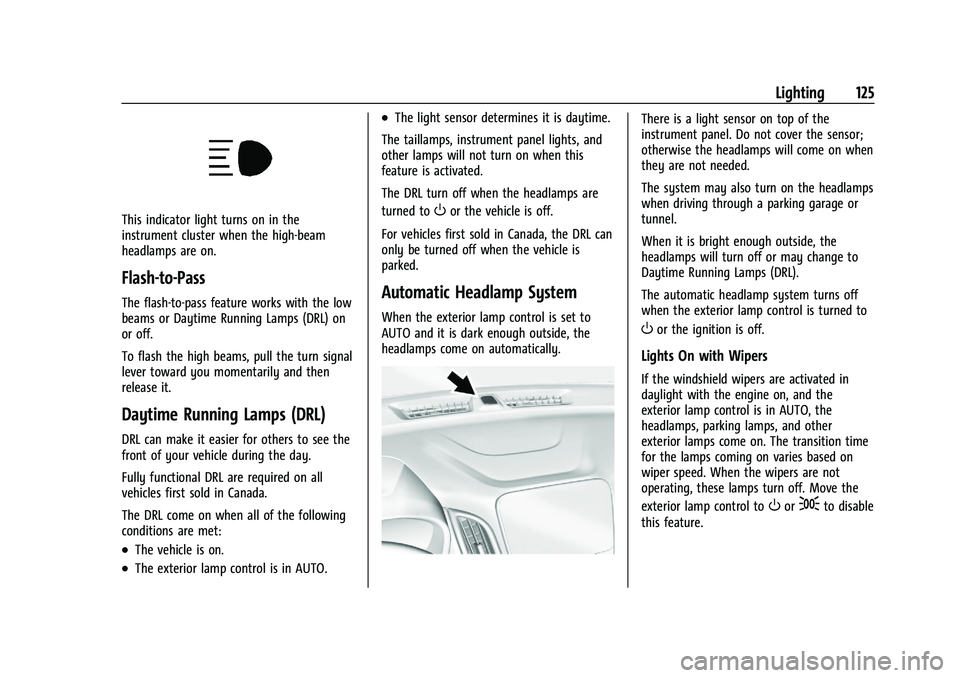
This indicator light turns on in the
instrument cluster when the high-beam
headlamps are on.
Flash-to-Pass
The flash-to-pass feature works with the low
beams or Daytime Running Lamps (DRL) on
or off.
To flash the high beams, pull the turn signal
lever toward you momentarily and then
release it.
Daytime Running Lamps (DRL)
DRL can make it easier for others to see the
front of your vehicle during the day.
Fully functional DRL are required on all
vehicles first sold in Canada.
The DRL come on when all of the following
conditions are met:
.The vehicle is on.
.The exterior lamp control is in AUTO.
.The light sensor determines it is daytime.
The taillamps, instrument panel lights, and
other lamps will not turn on when this
feature is activated.
The DRL turn off when the headlamps are
turned to
Oor the vehicle is off.
For vehicles first sold in Canada, the DRL can
only be turned off when the vehicle is
parked.
Automatic Headlamp System
When the exterior lamp control is set to
AUTO and it is dark enough outside, the
headlamps come on automatically.
There is a light sensor on top of the
instrument panel. Do not cover the sensor;
otherwise the headlamps will come on when
they are not needed.
The system may also turn on the headlamps
when driving through a parking garage or
tunnel.
When it is bright enough outside, the
headlamps will turn off or may change to
Daytime Running Lamps (DRL).
The automatic headlamp system turns off
when the exterior lamp control is turned to
Oor the ignition is off.
Lights On with Wipers
If the windshield wipers are activated in
daylight with the engine on, and the
exterior lamp control is in AUTO, the
headlamps, parking lamps, and other
exterior lamps come on. The transition time
for the lamps coming on varies based on
wiper speed. When the wipers are not
operating, these lamps turn off. Move the
exterior lamp control to
Oor;to disable
this feature.
Page 127 of 371
GMC Terrain/Terrain Denali Owner Manual (GMNA-Localizing-U.S./Canada/
Mexico-16540740) - 2023 - CRC - 6/16/22
126 Lighting
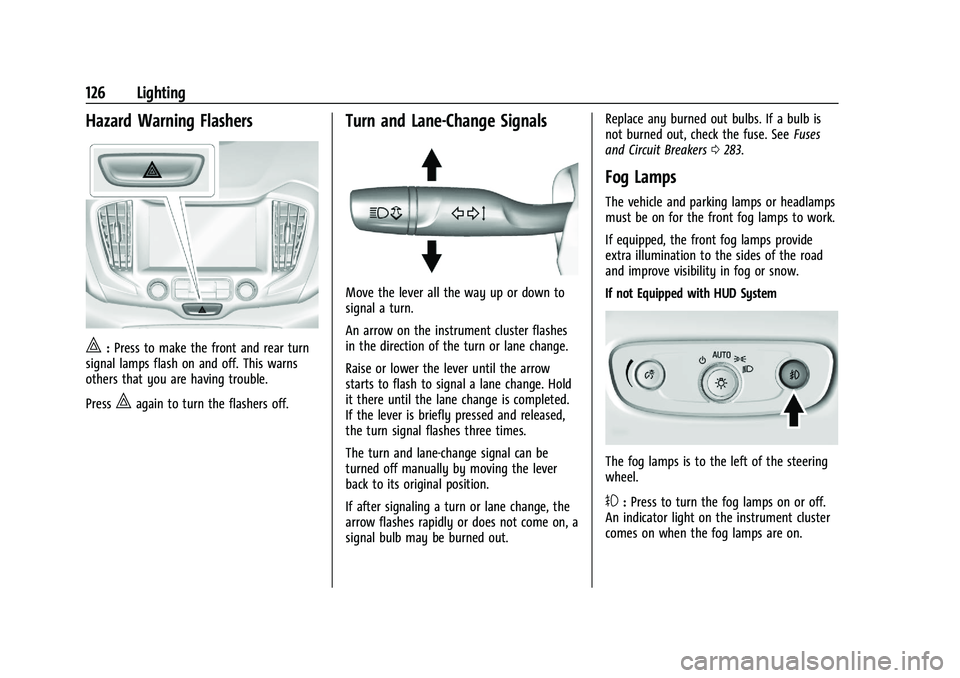
Hazard Warning Flashers
|:Press to make the front and rear turn
signal lamps flash on and off. This warns
others that you are having trouble.
Press
|again to turn the flashers off.
Turn and Lane-Change Signals
Move the lever all the way up or down to
signal a turn.
An arrow on the instrument cluster flashes
in the direction of the turn or lane change.
Raise or lower the lever until the arrow
starts to flash to signal a lane change. Hold
it there until the lane change is completed.
If the lever is briefly pressed and released,
the turn signal flashes three times.
The turn and lane-change signal can be
turned off manually by moving the lever
back to its original position.
If after signaling a turn or lane change, the
arrow flashes rapidly or does not come on, a
signal bulb may be burned out. Replace any burned out bulbs. If a bulb is
not burned out, check the fuse. See
Fuses
and Circuit Breakers 0283.
Fog Lamps
The vehicle and parking lamps or headlamps
must be on for the front fog lamps to work.
If equipped, the front fog lamps provide
extra illumination to the sides of the road
and improve visibility in fog or snow.
If not Equipped with HUD System
The fog lamps is to the left of the steering
wheel.
#:Press to turn the fog lamps on or off.
An indicator light on the instrument cluster
comes on when the fog lamps are on.
Page 128 of 371
GMC Terrain/Terrain Denali Owner Manual (GMNA-Localizing-U.S./Canada/
Mexico-16540740) - 2023 - CRC - 6/16/22
Lighting 127
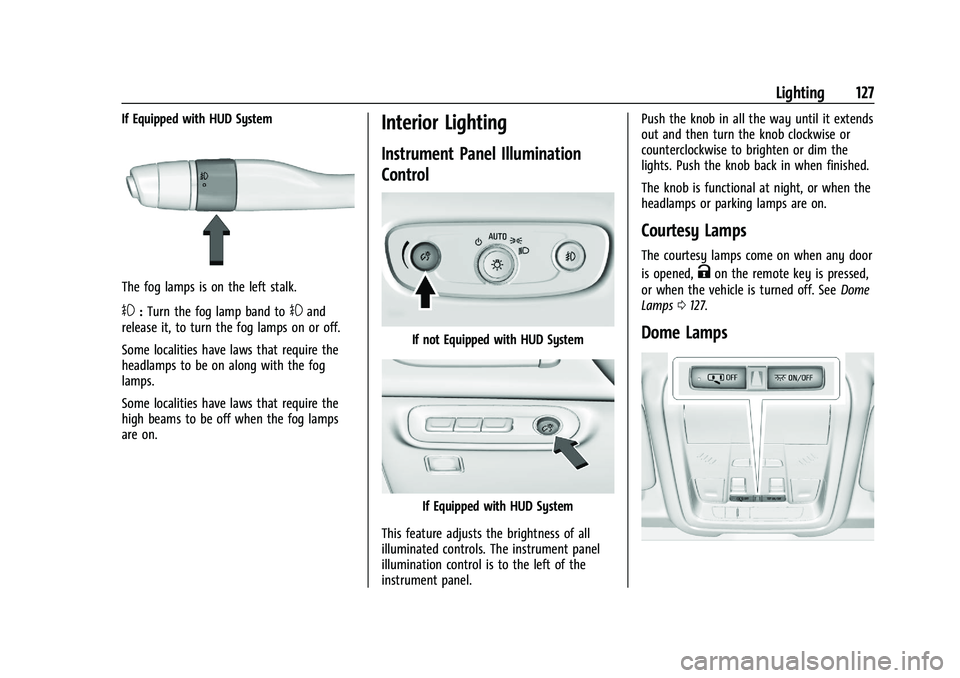
If Equipped with HUD System
The fog lamps is on the left stalk.
#:Turn the fog lamp band to#and
release it, to turn the fog lamps on or off.
Some localities have laws that require the
headlamps to be on along with the fog
lamps.
Some localities have laws that require the
high beams to be off when the fog lamps
are on.
Interior Lighting
Instrument Panel Illumination
Control
If not Equipped with HUD System
If Equipped with HUD System
This feature adjusts the brightness of all
illuminated controls. The instrument panel
illumination control is to the left of the
instrument panel. Push the knob in all the way until it extends
out and then turn the knob clockwise or
counterclockwise to brighten or dim the
lights. Push the knob back in when finished.
The knob is functional at night, or when the
headlamps or parking lamps are on.
Courtesy Lamps
The courtesy lamps come on when any door
is opened,
Kon the remote key is pressed,
or when the vehicle is turned off. See Dome
Lamps 0127.
Dome Lamps
Page 129 of 371

GMC Terrain/Terrain Denali Owner Manual (GMNA-Localizing-U.S./Canada/
Mexico-16540740) - 2023 - CRC - 6/16/22
128 Lighting
The dome lamp controls are in the overhead
console. The dome lamps activate when any
door is opened,
Kon the remote key is
pressed, or when the vehicle is turned off.
To operate, press the following buttons:
jOFF : Press to turn off the dome
lamps. An indicator light on the button will
turn on when the dome lamp override is
activated. Press
jOFF again to
deactivate this feature and the indicator
light will turn off.
+ON/OFF : Press to turn the dome lamps
on or off manually.
Reading Lamps
There are reading lamps on the overhead
console and over the rear passenger doors.
These lamps come on when any door is
opened,
Kon the remote key is pressed,
or when the vehicle is turned off.
Front Reading Lamps
The front reading lamps are in the overhead
console.
Press the lamp lenses to turn the front
reading lamps on or off.
Rear Reading Lamps Press the lamp lens to turn the rear
passenger reading lamps on or off.
Lighting Features
Entry Lighting
The interior lamps turn on when pressingK
on the remote key or opening any doors,
and the dome lamp control is in the door
position.
Some exterior lamps also turn on when
pressing
Kon the remote key or opening
any doors. Low-Beam lamps will only turn
on briefly at night, or in areas with limited
lighting.
All lamps will gradually fade out after about
30 seconds.
Entry lighting can be disabled manually by
closing all doors, pressing
Qon the remote
key, or starting the vehicle.
This feature can be changed. On the
infotainment home page, select the Settings
icon
TVehicleTVehicle Locator Lights.
Page 130 of 371
GMC Terrain/Terrain Denali Owner Manual (GMNA-Localizing-U.S./Canada/
Mexico-16540740) - 2023 - CRC - 6/16/22
Lighting 129
Exit Lighting
Some exterior lamps and interior lamps turn
on when the driver door is opened after the
vehicle is turned off.
The exterior and interior lamps remain on
for a set amount of time, then automatically
turn off.
The interior lights turn on when the vehicle
is turned off.
The exterior lamps turn off immediately by
turning the exterior lamp control off.
This feature can be changed. On the
infotainment home screen, select the
Settings icon
TVehicleTExit Lighting.
Battery Load Management
The vehicle has Electric Power Management
(EPM) that estimates the battery's
temperature and state of charge. It then
adjusts the voltage for best performance
and extended life of the battery.
When the battery's state of charge is low,
the voltage is raised slightly to quickly bring
the charge back up. When the state of
charge is high, the voltage is lowered
slightly to prevent overcharging. If the
vehicle has a voltmeter gauge or a voltagedisplay on the Driver Information Center
(DIC), you may see the voltage move up or
down. This is normal. If there is a problem,
an alert will be displayed.
The battery can be discharged at idle if the
electrical loads are very high. This is true for
all vehicles. This is because the generator
(alternator) may not be spinning fast
enough at idle to produce all of the power
needed for very high electrical loads.
A high electrical load occurs when several of
the following are on, such as: headlamps,
high beams, rear window defogger, climate
control fan at high speed, heated seats,
engine cooling fans, trailer loads, and loads
plugged into accessory power outlets.
EPM works to prevent excessive discharge of
the battery. It does this by balancing the
generator's output and the vehicle's
electrical needs. It can increase engine idle
speed to generate more power whenever
needed. It can temporarily reduce the power
demands of some accessories.
Normally, these actions occur in steps or
levels, without being noticeable. In rare
cases at the highest levels of corrective
action, this action may be noticeable to the
driver. If so, a DIC message might be
displayed and it is recommended that the
driver reduce the electrical loads as much as
possible.
Battery Power Protection
This feature helps prevent the battery from
being drained, if the interior courtesy lamps
or reading lamps are accidentally left on.
If any of these lamps are left on, they
automatically turn off after 10 minutes,
if the ignition is off. The lamps will not
come back on again until one of the
following occurs:
.The ignition is turned on.
.The doors are closed and then re-opened.
Exterior Lighting Battery Saver
The exterior lamps turn off about 10 minutes
after the ignition is turned off, if the parking
lamps or headlamps have been manually
left on. This protects against draining the
battery. To restart the 10-minute timer, turn
the exterior lamp control to the
Oposition
and then back to the
;or2position.
To keep the lamps on for more than
10 minutes, the ignition must be on or in
accessory mode.
Page 133 of 371
GMC Terrain/Terrain Denali Owner Manual (GMNA-Localizing-U.S./Canada/
Mexico-16540740) - 2023 - CRC - 6/16/22
132 Infotainment System
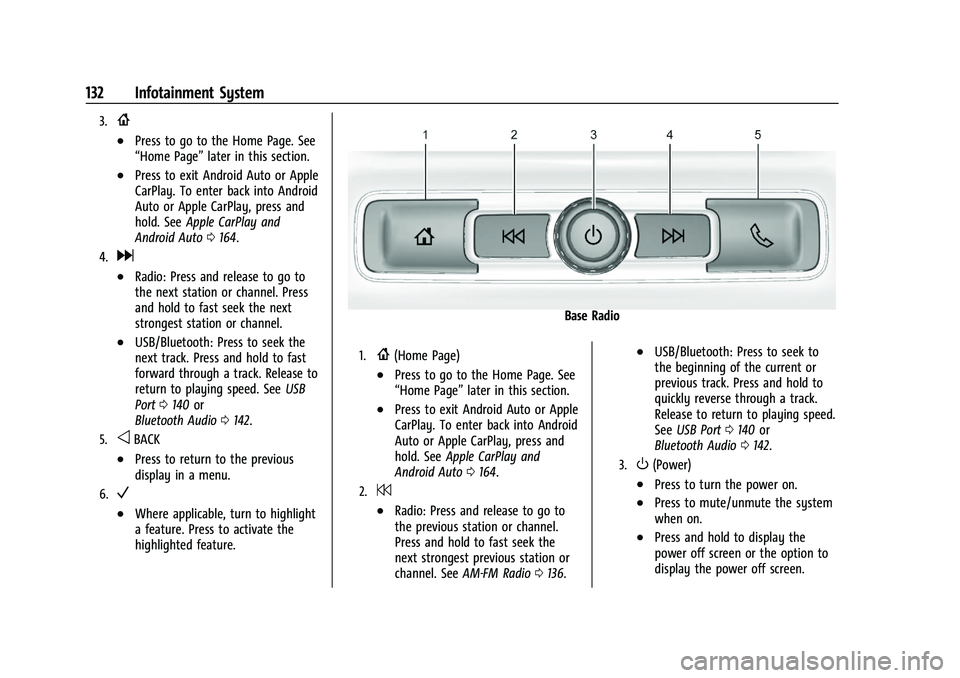
3.{
.Press to go to the Home Page. See
“Home Page”later in this section.
.Press to exit Android Auto or Apple
CarPlay. To enter back into Android
Auto or Apple CarPlay, press and
hold. SeeApple CarPlay and
Android Auto 0164.
4.d
.Radio: Press and release to go to
the next station or channel. Press
and hold to fast seek the next
strongest station or channel.
.USB/Bluetooth: Press to seek the
next track. Press and hold to fast
forward through a track. Release to
return to playing speed. See USB
Port 0140 or
Bluetooth Audio 0142.
5.oBACK
.Press to return to the previous
display in a menu.
6.V
.Where applicable, turn to highlight
a feature. Press to activate the
highlighted feature.
Base Radio
1.{(Home Page)
.Press to go to the Home Page. See
“Home Page” later in this section.
.Press to exit Android Auto or Apple
CarPlay. To enter back into Android
Auto or Apple CarPlay, press and
hold. SeeApple CarPlay and
Android Auto 0164.
2.7
.Radio: Press and release to go to
the previous station or channel.
Press and hold to fast seek the
next strongest previous station or
channel. See AM-FM Radio 0136.
.USB/Bluetooth: Press to seek to
the beginning of the current or
previous track. Press and hold to
quickly reverse through a track.
Release to return to playing speed.
See USB Port 0140 or
Bluetooth Audio 0142.
3.O(Power)
.Press to turn the power on.
.Press to mute/unmute the system
when on.
.Press and hold to display the
power off screen or the option to
display the power off screen.
Page 136 of 371

GMC Terrain/Terrain Denali Owner Manual (GMNA-Localizing-U.S./Canada/
Mexico-16540740) - 2023 - CRC - 6/16/22
Infotainment System 135
OnStar Services
If equipped, touch the OnStar Services icon
to display the OnStar Services and Account
pages. SeeOnStar Overview 0350.
Camera
If equipped, touch the Camera icon to access
the camera application. See Surround Vision
System 0234.
Shortcut Tray
The shortcut tray is near the bottom of the
display. It shows up to four applications.
Infotainment Display Features
Infotainment display features show on the
display when available. When a feature is
unavailable, it may gray out. When a
feature is touched, it may highlight.
Haptic Feedback
If equipped, haptic feedback is a pulse that
occurs when an icon or option is touched on
the display or when controls on the center
stack are pressed.
Infotainment Gestures
Use the following finger gestures to control
the infotainment system. Touch/Tap
Touch/tap is used to select an icon or
option, activate an application, or change
the location inside a map.
Touch and Hold
Touch and hold can be used to start another
gesture, or to move or delete an application.
Drag
Drag is used to move applications on the
Home Page, or to pan the map. To drag the
item, it must be held and moved along the
display to the new location. This can be
done up, down, right, or left. This feature is
only available when vehicle is parked and
not in motion.
Nudge
Page 139 of 371

GMC Terrain/Terrain Denali Owner Manual (GMNA-Localizing-U.S./Canada/
Mexico-16540740) - 2023 - CRC - 6/16/22
138 Infotainment System
If equipped, HD Radio multicast stations
cannot be tuned directly through the Direct
Tune feature. Only the analog or
HD1 station can use that feature. Use the
display arrows to adjust to the multicast
stations.
AM, FM, and SXM Categories
From the AM stations, if equipped with HD
Radio, FM, or SXM (if equipped) display,
touch Categories at the top of the Browse
menu to access the categories list. The list
contains names associated with the AM or
FM stations, or SXM channels. Touch a
category name to display a list of stations
or channels for that category. Touching a
station or channel from the list will tune the
radio to that station or channel.
Storing Radio Station Presets
Favorites show in the area at the top of the
display.
AM, FM, SXM (if equipped), and HD Radio
Stations (if equipped) :Touch and hold a
preset to store the current station or
channel as a favorite. Touch a saved favorite
to recall a favorite station.
Favorites can also be stored by touching
H
in a station or channel list. This will
highlight indicating that it is now saved as a
favorite.
The number of favorites displayed is
automatically adjusted by default, but can
be manually adjusted in Settings in the
System tab under Favorites and then Set
Number of Audio Favorites. It can also be
adjusted in Settings in the Apps tab under
Audio and then Set Number of Audio
Favorites.
Radio Data System (RDS)
RDS relies on receiving specific RDS
information from radio stations and only
works when the information is available.
It is possible that a radio station could
broadcast information that causes the radio
to work improperly. In addition, RDS features are region and
country of sale specific. This means specific
RDS content may not be available in your
listening area or in the country you operate
the vehicle.
To turn RDS features on or off, select
Settings > Apps> Audio> RDS> Select ON
or OFF.
The following core and region specific RDS
features may be supported by radio
broadcasters in your listening area:
Core RDS features
.Display radio station call letters
.Display messages from radio stations
.Provide radio station category information
(when available)
Region Specific RDS features
.Support Traffic Program (TP) Alerts
.Support Alternate Frequency (AF)
Switching
.Support Region Switching
Page 146 of 371

GMC Terrain/Terrain Denali Owner Manual (GMNA-Localizing-U.S./Canada/
Mexico-16540740) - 2023 - CRC - 6/16/22
Infotainment System 145
Make sure to set up preferences before
setting a destination and starting active
guidance.
Map Preferences
Touch to choose between basic map feature
configurations:
Map Colors
.Auto–Touch to automatically change
modes based on lighting conditions.
.Day (Light)
.Night (Dark)
3D Landmarks (Default is On) : Touch On or
Off. When turned on, the system will
display all 3D Landmarks on the map
depending on the zoom level.
3D Buildings (Default is Off) : Touch On or
Off. When turned on, the system will
display all of the possible 3D building shapes
on the map depending on the zoom level.
Show Terrain in 3D (Default is Off) :
If equipped, touch On or Off. When turned
on, the system will display terrain
information on the map in 3D view.
Auto-Zoom (Default is On) : Touch On or
Off. When turned on, the system will
automatically adjust the zoom level when
the vehicle is approaching a turn. After the turn is completed, the system automatically
brings the zoom back to the originally set
level. If the vehicle is approaching a turn
with the next turn occurring shortly after,
the Auto-Zoom will remain on until both
turns are completed.
Route Preferences
Touch to access the Route Preferences. The
choices are:
.Preferred Route
–Choose from two
different route options: Fastest or
Eco-Friendly.
‐ Fastest would be the route with the
shortest drive time.
‐ Eco-Friendly would be the most
fuel-efficient route.
.Avoid on Route –Choose any of the road
features to avoid while on route:
‐ Highways
‐ Unpaved Roads
‐ Ferries
‐ Carpool Lanes
‐ Toll Roads
‐ Tunnels
‐ Country Borders Navigation Voice Control
Touch to access the voice control setting
display.
.Navigation Volume
–To adjust the
volume level, touch the up and down
arrows. If the voice guidance prompt is
being heard, volume can also be adjusted
using the knob on the center stack or the
volume switch on the steering wheel.
.Navigation Voice Prompt Level During a
Call. Options available are:
‐ Full Prompt (Selected by default)
‐ Tone Only
‐ None
Traffic Events (If Equipped)
This feature provides a list of events that
are on the route or nearby. Touch
Aand
then select Traffic Events. A connected
Navigation service plan is required.
Traffic Preferences (If Equipped)
While in Map View, touch
A, then Settings
and then Map and Navigation Settings to
access Traffic Preferences. When Show
Traffic on Map is turned on, the feature