air condition GMC YUKON 2009 Get To Know Guide
[x] Cancel search | Manufacturer: GMC, Model Year: 2009, Model line: YUKON, Model: GMC YUKON 2009Pages: 24, PDF Size: 1.31 MB
Page 9 of 24

9
Automatic Climate Controls
(if equipped)
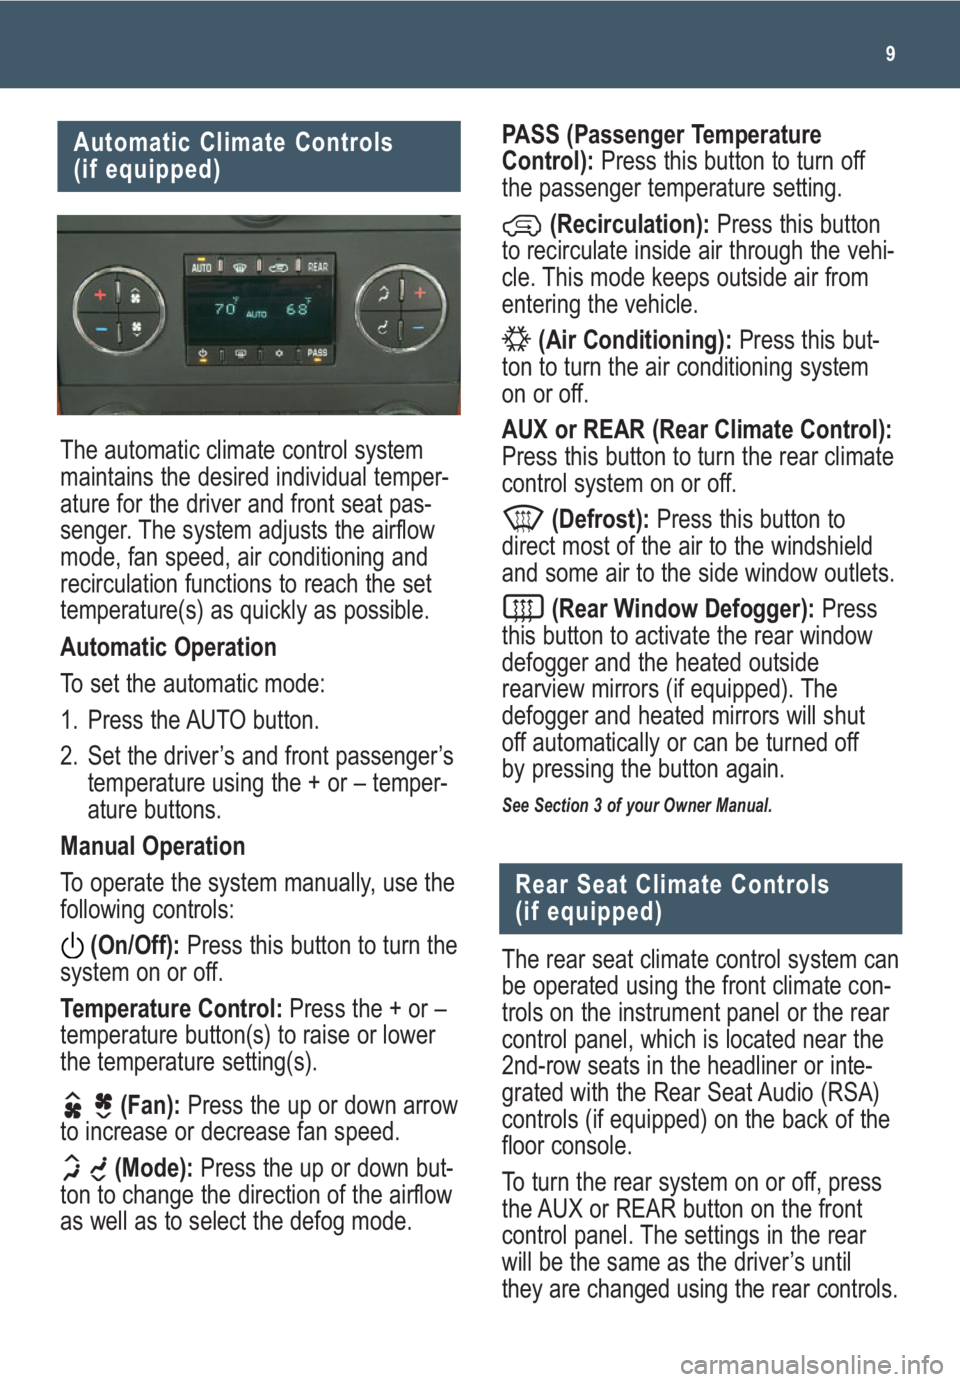
The automatic climate control system
maintains the desired individual temper-
ature for the driver and front seat pas-
senger. The system adjusts the airflow
mode, fan speed, air conditioning and
recirculation functions to reach the set
temperature(s) as quickly as possible.
Automatic Operation
To set the automatic mode:
1. Press the AUTO button.
2. Set the driver’s and front passenger’s
temperature using the + or – temper-
ature buttons.
Manual Operation
To operate the system manually, use the
following controls:
(On/Off):Press this button to turn the
system on or off.
Temperature Control:Press the + or –
temperature button(s) to raise or lower
the temperature setting(s).
(Fan):Press the up or down arrow
to increase or decrease fan speed.
(Mode):Press the up or down but-
ton to change the direction of the airflow
as well as to select the defog mode.
PASS (Passenger Temperature
Control):Press this button to turn off
the passenger temperature setting.
(Recirculation):Press this button
to recirculate inside air through the vehi-
cle. This mode keeps outside air from
entering the vehicle.
(Air Conditioning):Press this but-
ton to turn the air conditioning system
on or off.
AUX or REAR (Rear Climate Control):
Press this button to turn the rear climate
control system on or off.
(Defrost):Press this button to
direct most of the air to the windshield
and some air to the side window outlets.
(Rear Window Defogger):Press
this button to activate the rear window
defogger and the heated outside
rearview mirrors (if equipped). The
defogger and heated mirrors will shut
off automatically or can be turned off
by pressing the button again.
See Section 3 of your Owner Manual.
The rear seat climate control system can
be operated using the front climate con-
trols on the instrument panel or the rear
control panel, which is located near the
2nd-row seats in the headliner or inte-
grated with the Rear Seat Audio (RSA)
controls (if equipped) on the back of the
floor console.
To turn the rear system on or off, press
the AUX or REAR button on the front
control panel. The settings in the rear
will be the same as the driver’s until
they are changed using the rear controls.
Rear Seat Climate Controls
(if equipped)
Page 13 of 24

13
Your vehicle’s Navigation Entertainment
System provides you with detailed maps
of all major highways and roads
throughout the United States and
Canada. After you enter a destination,
the system provides turn-by-turn instruc-
tions for reaching your destination and
can help you locate a variety of points
of interest, such as banks, airports,
restaurants and more. Additional
navigation assistance is available with
Destination Download from OnStar and
real-time XM NavTraffic (if equipped).
See your Navigation Entertainment
System Owner Manual for operating
instructions.
See Section 3 of your Owner Manual.
To load multiple CDs:
• Press and hold the LOAD button
for two seconds. Follow the display
prompts to load each CD. Press the
LOAD button again to cancel
loading more CDs.
To play a specific CD:
• Press the pushbutton below the arrow
label on the display to select the
desired CD number.
To eject a CD:
• To eject the CD that is currently
playing, press the EJECT button
once.
• To eject all CDs, press and hold the
EJECT button for two seconds.
If a CD is not removed after several sec-
onds, it will automatically be pulled back
into the player.
See Section 3 of your Owner Manual.
Note:CDs with any affixed labels may
jam in the CD player. Label a CD using
a permanent marker. If more than one
CD is inserted into the slot at a time,
or if scratched or damaged CDs are
played, the CD player could be dam-
aged. When using the CD player, use
only CDs in good condition without
labels; load one CD at a time; and keep
the CD player and the loading slot free
of foreign materials, liquids or debris.
Navigation Entertainment
System (if equipped)
XM®Radio (if equipped)
XM radio offers more than 170 channels
of digital-quality sound that goes
wherever you go — coast to coast —
and real-time XM NavTraffic on the
navigation system (if equipped) of many
vehicles. After a free three-month trial
period, service subscription fees apply.
Service is based in the continental U.S.
and Canada. For more information, visit
XM online at www.XMradio.comor call
1-800-929-2100.
See Section 3 of your Owner Manual.
Page 23 of 24

23
The Oil Life System calculates engine oil
life based on vehicle use and displays
CHANGE ENGINE OIL in the Driver
Information Center (DIC) when it’s nec-
essary to change your engine oil and
filter. The Oil Life System should be reset
to 100% only following an oil change.
Reset the Oil Life System using the DIC:
1. Turn on the ignition.
2. Press the (Vehicle Information)
button until the DIC displays OIL LIFE
REMAINING.
3. Press and hold the (Set/Reset)
button until 100% is displayed.
4. Turn off the ignition.
Reset the Oil Life System without the DIC:
1. Turn on the ignition, with the engine off.
2. Fully press and release the accelera-
tor pedal slowly three times within
five seconds.
3. If the CHANGE ENGINE OIL mes-
sage flashes, the system is reset;
otherwise, repeat the procedure.
4. Turn off the ignition.
See Section 5 of your Owner Manual.
Reset the Engine Oil Life
System
Refueling the Vehicle
To open the fuel door, press the center-
rear edge of the door and it will pop
open slightly. Pull the door to open it
fully.
When closing the fuel door, press the
rear edge of the door until it latches and
is flush with the side of the vehicle.
See Section 5 of your Owner Manual.
Maximizing Fuel Economy
Your driving behavior is a big contributor
to your vehicle’s fuel economy.
Modifying your driving habits will
improve your fuel mileage. Here are
several fuel-saving tips:
• Combine short trips to minimize cold
engine starts, which reduce fuel
economy.
• Avoid quick starts and stops.
Accelerate moderately and drive at a
steady speed.
• Anticipate traffic flow and brake mod-
erately or coast.
• Use the air conditioning and defrost
modes only when necessary.
• Minimize electrical accessory opera-
tion by turning off items such as the
rear defogger and heated seats when
they are not needed.
• Use the remote start feature sparing-
ly. This feature turns the engine on,
consuming fuel at idle.
• Do not warm up the engine by idling.
Even on the coldest days, driving will
help the engine warm up faster.
• Selecting the AUTO feature on 4WD
models will be less economical than
2WD.
• Unload unnecessary cargo to reduce
the amount of weight in the vehicle.
• Regularly check and maintain proper
tire pressure.
• Maintain your vehicle. Regular main-
tenance will keep your vehicle run-
ning cleaner and more efficiently.