light GMC YUKON 2009 Owner's Guide
[x] Cancel search | Manufacturer: GMC, Model Year: 2009, Model line: YUKON, Model: GMC YUKON 2009Pages: 576, PDF Size: 3.06 MB
Page 145 of 576
Shifting Into Four-Wheel Drive High or
AUTO (Automatic Four-Wheel Drive)
Turn the knob to the Four-Wheel High or AUTO position.
This can be done at any speed, except when shifting
from Four-Wheel Drive Low. The indicator light will �ash
while shifting. It will remain on when the shift is
completed.
Shifting Into Two-Wheel Drive High
Turn the knob to the Two-Wheel High position. This
can be done at any speed, except when shifting
from Four-Wheel Drive Low.
See shifting out of Four-Wheel Drive Low later in this
section for more information.
Shifting Into Four-Wheel Drive Low
When Four-Wheel Low is engaged, vehicle speed
should be kept below 45 mph (72 km/h). Extended
high-speed operation in 4L may damage or shorten
the life of the drivetrain.
To shift to the Four-Wheel Drive Low position, the ignition
must be in ON/RUN and the vehicle must be stopped or
moving less than 3 mph (5 km/h) with the transmissionin N (Neutral). The preferred method for shifting into
Four-Wheel Drive Low is to have the vehicle moving
1 to 2 mph (1.6 to 3.2 km/h). Turn the knob to the
Four-Wheel Drive Low position. You must wait for the
Four-Wheel Drive Low indicator light to stop �ashing and
remain on before shifting the transmission into gear.
Notice:Shifting the transmission into gear before
the Four-Wheel Drive Low indicator light has
stopped �ashing could damage the transfer case.
To help avoid damaging the vehicle, always wait for
the Four-Wheel Drive Low indicator light to stop
�ashing before shifting the transmission into gear.
The vehicle may have signi�cant engagement noise
and bump when shifting between Four-Wheel Drive Low
and Four-Wheel Drive High ranges or from N (Neutral)
while the engine is running.
If the knob is turned to the Four-Wheel Drive Low
position when the vehicle is in gear and/or moving, the
Four-Wheel Drive Low indicator light will �ash for
30 seconds and not complete the shift unless the vehicle
is moving less than 3 mph (5 km/h) and the transmission
is in N (Neutral). After 30 seconds the transfer case
will shift to Four-Wheel Drive High mode.
2-39
Page 146 of 576
Shifting Out of Four-Wheel Drive Low
To shift from Four-Wheel Drive Low to Four-Wheel Drive
High, AUTO, or Two-Wheel Drive High, the vehicle must
be stopped or moving less than 3 mph (5 km/h) with the
transmission in N (Neutral) and the ignition in ON/RUN.
The preferred method for shifting out of Four-Wheel
Drive Low is to have your vehicle moving 1 to 2 mph
(1.6 to 3.2 km/h). Turn the knob to the Four-Wheel Drive
High, AUTO, or Two-Wheel Drive High position. You
must wait for the Four-Wheel Drive High, AUTO, or
Two-Wheel Drive High indicator light to stop �ashing and
remain on before shifting the transmission into gear.
Notice:Shifting the transmission into gear before
the Four-Wheel Drive Low indicator light has
stopped �ashing could damage the transfer case.
To help avoid damaging the vehicle, always wait for
the Four-Wheel Drive Low indicator light to stop
�ashing before shifting the transmission into gear.
The vehicle may have signi�cant engagement noise
and bump when shifting between Four-Wheel Drive Low
and Four-Wheel Drive High ranges or from N (Neutral)
while the engine is running.
If the knob is turned to the Four-Wheel Drive High,
AUTO, or Two-Wheel Drive High switch position when
the vehicle is in gear and/or moving, the Four-Wheel
Drive High, AUTO or Two-Wheel Drive High indicator
light will �ash for 30 seconds but will not complete
the shift unless the vehicle is moving less than
3 mph (5 km/h) and the transmission is in N (Neutral).
Shifting into Neutral
To shift the transfer case to N (Neutral) do the following:
1. Make sure the vehicle is parked so that it will
not roll.
2. Set the parking brake and apply the regular brake
pedal. SeeParking Brake on page 2-42for more
information.
3. Start the vehicle or turn the ignition to ON/RUN.
4. Put the transmission in N (Neutral).
5. Shift the transfer case to Two-Wheel Drive High.
6. Turn the transfer case dial clockwise to N (Neutral)
until it stops and hold it there until the N (Neutral)
light starts blinking. This will take at least
10 seconds. Then slowly release the dial to the
Four-Wheel Drive Low position. The N (Neutral) light
will come on when the transfer case shift to
N (Neutral) is complete.
7. If the engine is running, verify that the transfer case
is in N (Neutral) by shifting the transmission to
R (Reverse) for one second, then shift the
transmission to D (Drive) for one second.
2-40
Page 147 of 576
8. Turn the ignition to ACC/ACCESSORY, which will
turn the engine off.
9. Place the transmission shift lever in P (Park).
10. Release the parking brake prior to moving the
vehicle.
11. Turn the ignition to LOCK/OFF.
Shifting Out of Neutral
To shift out of N Neutral do the following:
1. Set the parking brake and apply the regular brake
pedal.
2. Turn the ignition to ON/RUN with the engine off,
and shift the transmission to N (Neutral).
3. Turn the transfer case dial to the desired transfer
case shift position (Two-Wheel Drive High,
Four-Wheel Drive High, AUTO).
After the transfer case has shifted out of N (Neutral),
the N (Neutral) light will go out.4. Release the parking brake prior to moving the
vehicle.
Notice:Shifting the transmission into gear before
the Four-Wheel Drive Low indicator light has
stopped �ashing could damage the transfer case.
To help avoid damaging the vehicle, always wait for
the Four-Wheel Drive Low indicator light to stop
�ashing before shifting the transmission into gear.
5. Start the engine and shift the transmission to
the desired position.
Excessively shifting the transfer case into or out of
the different modes may cause the transfer case to enter
the shift protection mode. This will protect the transfer
case from possible damage and will only allow the
transfer case to respond to one shift per 10 seconds.
The transfer case may stay in this mode for up to
three minutes.
2-41
Page 148 of 576
Parking Brake
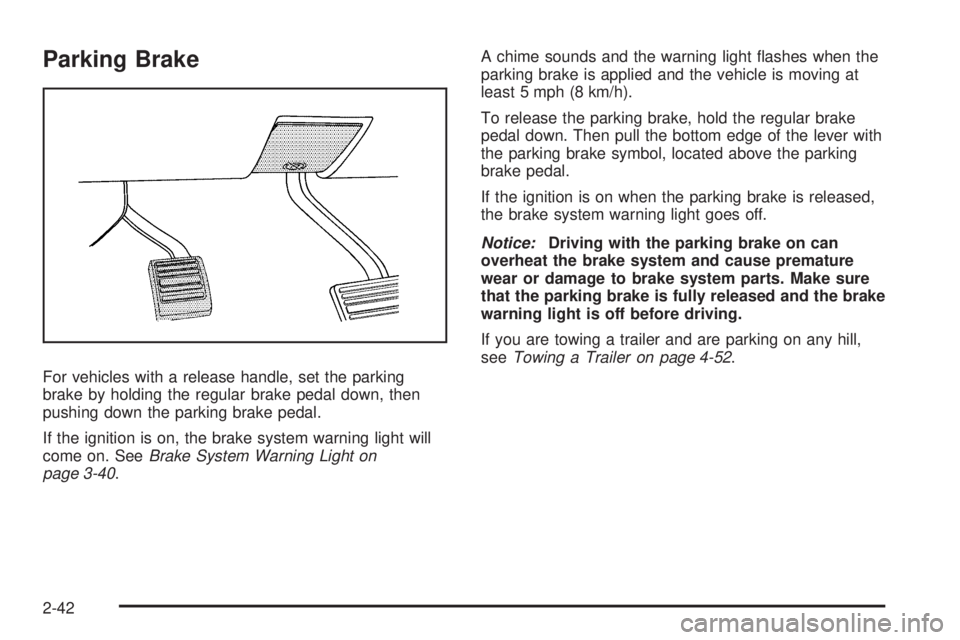
For vehicles with a release handle, set the parking
brake by holding the regular brake pedal down, then
pushing down the parking brake pedal.
If the ignition is on, the brake system warning light will
come on. SeeBrake System Warning Light on
page 3-40.A chime sounds and the warning light �ashes when the
parking brake is applied and the vehicle is moving at
least 5 mph (8 km/h).
To release the parking brake, hold the regular brake
pedal down. Then pull the bottom edge of the lever with
the parking brake symbol, located above the parking
brake pedal.
If the ignition is on when the parking brake is released,
the brake system warning light goes off.
Notice:Driving with the parking brake on can
overheat the brake system and cause premature
wear or damage to brake system parts. Make sure
that the parking brake is fully released and the brake
warning light is off before driving.
If you are towing a trailer and are parking on any hill,
seeTowing a Trailer on page 4-52.
2-42
Page 149 of 576
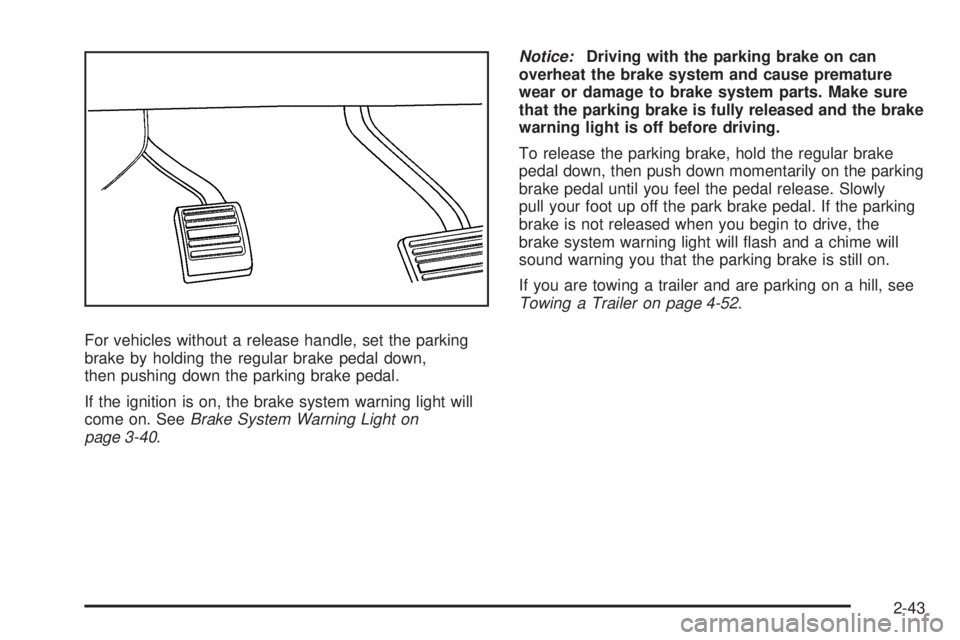
For vehicles without a release handle, set the parking
brake by holding the regular brake pedal down,
then pushing down the parking brake pedal.
If the ignition is on, the brake system warning light will
come on. SeeBrake System Warning Light on
page 3-40.Notice:Driving with the parking brake on can
overheat the brake system and cause premature
wear or damage to brake system parts. Make sure
that the parking brake is fully released and the brake
warning light is off before driving.
To release the parking brake, hold the regular brake
pedal down, then push down momentarily on the parking
brake pedal until you feel the pedal release. Slowly
pull your foot up off the park brake pedal. If the parking
brake is not released when you begin to drive, the
brake system warning light will �ash and a chime will
sound warning you that the parking brake is still on.
If you are towing a trailer and are parking on a hill, see
Towing a Trailer on page 4-52.
2-43
Page 155 of 576

O(On/Off):Press to turn the dimming feature on
or off.
The vehicle may also have a Rear Vision Camera
(RVC). SeeRear Vision Camera (RVC) on page 2-59
for more information.
If the vehicle has RVC, the
O(On/Off) button for
turning the automatic dimming feature on or off will not
be available.
Automatic Dimming Mirror Operation
Automatic dimming reduces the glare from the
headlamps of the vehicle behind you. The dimming
feature comes on and the indicator light illuminates each
time the ignition is turned to start.
Cleaning the Mirror
Do not spray glass cleaner directly on the mirror. Use a
soft towel dampened with water.
Outside Manual Mirrors
Adjust the outside mirrors to see the side of the vehicle
and have a clear view of objects behind you.
Manually fold the mirrors inward to prevent damage when
going through an automatic car wash. To fold, push the
mirror toward the vehicle. Push the mirror outward, to
return to its original position.
Using hood-mounted air de�ectors and add-on convex
mirror attachments could decrease mirror performance.
Outside Towing Mirrors
If the vehicle has towing mirrors, they can be adjusted
for a clearer view of the objects behind you. Manually
pull out the mirror head to extend it for better visibility
when towing a trailer.
Manually fold the mirrors forward or rearward. The
lower portion of the mirror is convex. A convex mirror’s
surface is curved to see more from the driver seat.
The convex mirror can be adjusted manually to
the driver preferred position for better vision.
The mirror may have a turn signal arrow that �ashes in
the direction of the turn or lane change.
2-49
Page 159 of 576
Object Detection Systems
Ultrasonic Rear Parking Assist
(URPA)
For vehicles with the Ultrasonic Rear Parking Assist
(URPA) system, it operates at speeds less than
5 mph (8 km/h), and assists the driver with parking and
avoiding objects while in R (Reverse). The sensors
on the rear bumper are used to detect the distance to
an object up to 8 feet (2.5 m) behind the vehicle, and at
least 10 inches (25.4 cm) off the ground.
{CAUTION:
The Ultrasonic Rear Parking Assist (URPA) system
does not replace driver vision. It cannot detect:
objects that are below the bumper, underneath
the vehicle, or if they are too close or far from
the vehicle
children, pedestrians, bicyclists, or pets.
CAUTION: (Continued)
CAUTION: (Continued)
If you do not use proper care before and while
backing; vehicle damage, injury, or death could
occur. Even with URPA, always check behind the
vehicle before backing up. While backing, be sure
to look for objects and check the vehicle’s mirrors.
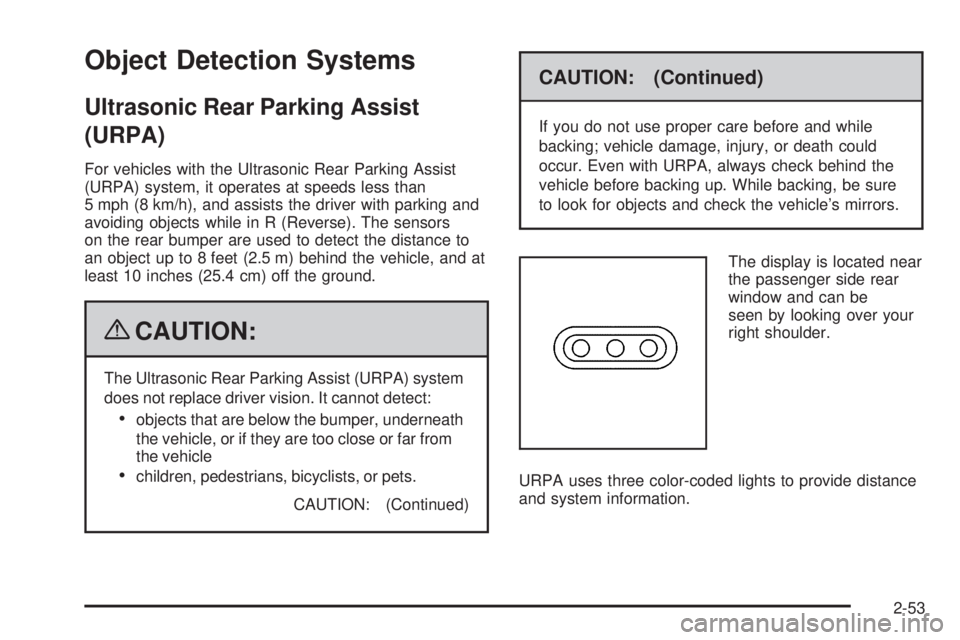
The display is located near
the passenger side rear
window and can be
seen by looking over your
right shoulder.
URPA uses three color-coded lights to provide distance
and system information.
2-53
Page 160 of 576
How the System Works
URPA comes on automatically when the shift lever is
moved into R (Reverse). The rear display brie�y
illuminates to indicate the system is working.
URPA operates only at speeds less than 5 mph (8 km/h).
If the vehicle is above this speed, the red light on the rear
display will �ash.
To be detected, objects must be at least 10 inches
(25.4 cm) off the ground and below liftgate level. Objects
must also be within 8 feet (2.5 m) from the rear bumper.
This distance may be less during warmer or humid
weather.
A single beep will sound the �rst time an object is
detected between 40 inches (1 m) and 8 feet (2.5 m)
away. Beeping will occur continuously when the vehicle
is at 23 inches (0.6 m) or closer to an object.The following describes what will occur with the URPA
display as the vehicle gets closer to a detected object:
Description English Metric
amber light 8 ft 2.5 m
amber/amber lights 40 in 1.0 m
amber/amber/red lights
and continuous beeping
for �ve seconds23 in 0.6 m
amber/amber/red lights
�ashing and continuous
beeping for �ve seconds1 ft 0.3 m
The system can be
disabled by pressing the
rear park aid disable button
located next to the radio.
2-54
Page 161 of 576
The indicator light will come on and PARK ASSIST OFF
displays on the Driver Information Center (DIC) to
indicate that URPA is off, seeDIC Warnings and
Messages on page 3-64for information about clearing
the message.
When the System Does Not Seem to
Work Properly
If the URPA system will not activate due to a temporary
condition, the message PARK ASSIST OFF will be
displayed on the DIC and a red light will be shown on
the rear URPA display when the shift lever is moved into
R (Reverse). This occurs under the following conditions:
The driver disables the system.
The ultrasonic sensors are not clean. Keep the
vehicle’s rear bumper free of mud, dirt, snow,
ice and slush. For cleaning instructions, see
Washing Your Vehicle on page 5-111.
A trailer was attached to the vehicle, or a bicycle or
an object was hanging out of the liftgate during the
last drive cycle, the red light may illuminate in
the rear display. Once the attached object is
removed, URPA will return to normal operation.
A tow bar is attached to the vehicle.
The vehicle’s bumper is damaged. Take the vehicle
to your dealer/retailer to repair the system.
Other conditions may affect system performance,
such as vibrations from a jackhammer or the
compression of air brakes on a very large truck.
If the system is still disabled, after driving forward at
least 15 mph (25 km/h), take the vehicle to your
dealer/retailer.
2-55
Page 162 of 576
Side Blind Zone Alert (SBZA)
The vehicle may have a Side Blind Zone Alert (SBZA)
system. Read this entire section before using the system.
The SBZA system operates on a radio frequency
subject to Federal Communications Commission (FCC)
Rules and with Industry Canada.
This device complies with Part 15 of the FCC Rules.
Operation is subject to the following two conditions:
1. This device may not cause harmful interference.
2. This device must accept any interference received,
including interference that may cause undesired
operation.
This device complies with RSS-310 of Industry Canada.
Operation is subject to the following two conditions:
1. This device may not cause harmful interference.
2. This device must accept any interference received,
including interference that may cause undesired
operation.
Frequency of operation: 24.05GHz – 24.25GHz
Field Strength: Not greater than 2.5V/m peak
(0.25V/m average) at a distance of 3mThe manufacturer is not responsible for any radio or TV
interference caused by unauthorized modi�cations to
this equipment. Such modi�cations could void the user’s
authority to operate the equipment.
{CAUTION:
SBZA is only a lane changing aid and does not
replace driver vision. SBZA does not detect:
Vehicles outside the side blind zones which
may be rapidly approaching.
Pedestrians, bicyclists, or animals.
Failure to use proper care when changing lanes
may result in damage to the vehicle, injury, or
death. Always check the outside and rearview
mirrors, glance over your shoulder, and use the
turn signal before changing lanes.
When the system detects a vehicle in the side blind
zone, amber SBZA displays light up in the side mirrors.
This indicates that it may be unsafe to change lanes.
Before making a lane change, always check the SBZA
display, check the outside and rearview mirrors, look
over your shoulder for vehicles and hazards, and
use the turn signal.
2-56