stop start GMC YUKON 2010 Owner's Guide
[x] Cancel search | Manufacturer: GMC, Model Year: 2010, Model line: YUKON, Model: GMC YUKON 2010Pages: 614, PDF Size: 3.55 MB
Page 288 of 614

SERVICE BATTERY CHARGING
SYSTEM
On some vehicles, this message displays if there is a
problem with the battery charging system. Under certain
conditions, the charging system light may also turn on
in the instrument panel cluster. SeeCharging System
Light
on page 4‑34. Driving with this problem could
drain the battery. Turn off all unnecessary accessories.
Have the electrical system checked as soon as
possible. See your dealer.
SERVICE BRAKE SYSTEM
This message displays along with the brake system
warning light if there is a problem with the brake
system. See Brake System Warning Light
on
page 4‑36. If this message appears, stop as soon as
possible and turn off the vehicle. Restart the vehicle
and check for the message on the DIC display. If the
message is still displayed or appears again when you
begin driving, the brake system needs service as soon
as possible. See your dealer.
SERVICE BRAKES SOON
This message displays if there is a problem with the
brake system. If this message appears, stop as soon
as possible and turn off the vehicle. Restart the vehicle
and check for the message on the DIC display. If the
message is still displayed or appears again when
you begin driving, the brake system needs service.
See your dealer.
SERVICE PARK ASSIST
If your vehicle has the Ultrasonic Rear Parking Assist
(URPA) system, this message displays if there is a
problem with the URPA system. Do not use this system
to help you park. See Ultrasonic Rear Parking Assist
(URPA)
on page 3‑58for more information. See your
dealer for service.
SERVICE SIDE BLIND ZONE ALERT
SYSTEM
If your vehicle has the Side Blind Zone Alert (SBZA)
system and this message displays, both SBZA displays
will remain on indicating there is a problem with the
SBZA system. If these displays remain on after
continued driving, the system needs service. See your
dealer. See Side Blind Zone Alert (SBZA)
on page 3‑60for more information.
4-66
Page 289 of 614

SERVICE STABILITRAK
If your vehicle has StabiliTrak®and this message
displays, it means there may be a problem with the
StabiliTrak system. If you see this message, try to
reset the system. Stop; turn off the engine for at least
15 seconds; then start the engine again. If this message
still comes on, it means there is a problem. You should
see your dealer for service. The vehicle is safe to drive,
however, you do not have the benefit of StabiliTrak, so
reduce your speed and drive accordingly.
SERVICE SUSPENSION SYSTEM
If your vehicle has the Autoride®suspension system,
this message displays when the Autoride suspension
system is not operating properly. Have your vehicle
serviced by your dealer.
SERVICE THEFT DETERRENT SYSTEM
This message displays when there is a problem
with the theft-deterrent system. The vehicle may or
may not restart so you may want to take the vehicle
to your dealer before turning off the engine. See
PASS-Key
®III+ Electronic Immobilizer Operationon
page 3‑25for more information.
SERVICE TIRE MONITOR SYSTEM
On vehicles with the Tire Pressure Monitor System
(TPMS), this message displays if a part on the TPMS is
not working properly. The tire pressure light also flashes
and then remains on during the same ignition cycle.
See Tire Pressure Light
on page 4‑39. Several
conditions may cause this message to appear. See Tire
Pressure Monitor Operation
on page 6‑75for more
information. If the warning comes on and stays on,
there may be a problem with the TPMS. See your
dealer.
SERVICE TRACTION CONTROL
If your vehicle has StabiliTrak, this message
displays when there is a problem with the Traction
Control System (TCS). When this message displays,
the system will not limit wheel spin. Adjust your
driving accordingly. See your dealer for service.
See StabiliTrak
®Systemon page 5‑6for more
information.
4-67
Page 311 of 614
Care of CDs and DVDs
If playing a CD-R, the sound quality can be reduced
due to CD-R or CD-RW quality, the method of
recording, the quality of the music that has been
recorded, and the way the CD-R or CD-RW has been
handled. Handle them carefully. Store CD-R(s) or
CD-RW(s) in their original cases or other protective
cases and away from direct sunlight and dust. The CD
or DVD player scans the bottom surface of the disc.
If the surface of a CD or DVD is damaged, such as
cracked, broken, or scratched, the CD or DVD does
not play properly or not at all. Do not touch the bottom
side of a CD or DVD while handling it; this could
damage the surface. Pick up CDs by grasping the outer
edges or the edge of the hole and the outer edge.
If the surface of a CD or DVD is soiled, clean it with
a soft, lint free cloth or dampen a clean, soft cloth in
a mild, neutral detergent solution mixed with water.
Make sure the wiping process starts from the center
to the edge.
Using the CD Player
Inserting a Disc (Single CD Player)
Insert a CD partway into the slot, label side up.
The player pulls it in and the CD should begin playing.
Inserting a Disc (In Either the DVD or
CD Slot)
Insert a CD partway into the slot, label side up.
The player pulls it in and the CD should begin playing in
5 to 20 seconds for a CD, and in 30 seconds for a DVD,
depending on media type and format ranges.
If the ignition or radio is turned off, while a CD is in the
player, it stays in the player. When the ignition or radio
is turned on, the CD starts playing where it stopped,
if it was the last selected audio source. The CD is
controlled by the buttons on the radio faceplate or
by the RSA unit. SeeRear Seat Audio (RSA)
on
page 4‑134for more information. The DVD/CD decks,
(upper slot is the DVD deck and the lower slot is the CD
deck) of the radio are compatible with most audio CDs,
CD-R, CD-RW, and MP3s.
When a CD is inserted, the text label DVD or CD
symbol displays on the left side of the radio display.
As each new track starts to play, the track number
displays.
The CD player can play the smaller 8 cm (3 in) single
CDs with an adapter ring. Full-size CDs and the smaller
CDs are loaded in the same manner.
4-89
Page 317 of 614
A lock symbol displays next to the clock display.
The parental control feature remains on until this knob
is pressed and held for more than two seconds again,
or until the driver turns the ignition off and exits the
vehicle.
f(Tune):Turn to change tracks on a CD or DVD.
©SEEK (Previous Track/Chapter): Press the left
arrow to return to the start of the current track or
chapter. Press the left arrow again to go to the previous
track or chapter. This button might not work when
the DVD is playing the copyright information or the
previews.
SEEK
¨(Next Track/Chapter): Press the right arrow
to go to the next track or chapter. This button might not
work when the DVD is playing the copyright information
or the previews.
sREV (Fast Reverse): Press to quickly reverse the
CD or DVD at five times the normal speed. The radio
displays the elapsed time while in fast reverse. To stop
fast reversing, press again. This button might not work
when the DVD is playing the copyright information or
the previews.
\FWD (Fast Forward): Press to fast forward the CD
or DVD. The radio displays the elapsed time and fast
forwards five times the normal speed. To stop fast
forwarding, press again. This button might not work
when the DVD is playing the copyright information or
the previews.
Z(Eject): Press this button to eject a CD or DVD.
If a CD or DVD is ejected, but not removed, the player
automatically pulls it back in after 15 seconds.
If loading and reading of a CD cannot be completed,
because of an unknown format, etc., and the disc fails
to eject, press and hold this button for more than
five seconds to force the disc to eject.
DVD-V (Video) Display Buttons
Once a DVD-V is inserted, the radio display menu
shows several tab options for DVD playing. Press
the pushbuttons located under any desired tab option
during DVD playback. See the tab options listed after,
for more information.
The rear seat passenger can navigate the DVD-V
menus and controls through the remote control.
See “Remote Control”, under Rear Seat Entertainment
(RSE) System
on page 4‑125for more information.
The Video Screen automatically turns on when the
DVD-V is inserted into the DVD slot.
r/j(Play/Pause): Press either the play or pause
tab displayed on the radio system, to toggle between
pausing or restarting playback of a DVD. If the forward
arrow is showing on display, the system is in pause
mode. If the pause icon is showing on display, the
system is in playback mode. If the DVD screen is off,
press the play button to turn the screen on.
4-95
Page 318 of 614
Some DVDs begin playing after the previews have
finished, although there could be a delay of up to
30 seconds. If the DVD does not begin playing the
movie automatically, press the softkey under the
play/pause tab on the radio. If the DVD still does not
play, refer to the on-screen instructions, if available.
c(Stop):Press to stop playing, rewinding, or fast
forwarding a DVD.
r(Enter): Press to select the choices that are
highlighted in any menu.
y(Menu): Press to access the DVD menu. The DVD
menu is different on every DVD. Use the softkey under
the navigation arrows to navigate the cursor through the
DVD menu. After making a selection press this button.
This button only operates when using a DVD.
Nav (Navigate): Press to display directional arrows for
navigating through the menus.
q(Return): Press to exit the current active menu and
return to the previous menu. This tab operates only
when a DVD is playing and a menu is active.
DVD-A (Audio) Display Buttons
Once a DVD-A is inserted, radio display menu shows
several tab options for DVD playing. Press the softkeys
under any desired tab option during DVD playback.
See the tab options listed after, for more information.
The rear seat operator can navigate the DVD-A menus
and controls through the remote control. See “Remote
Control”, under Rear Seat Entertainment (RSE) System
on page 4‑125for more information. The Video Screen
does not automatically power on when the DVD-A is
inserted into the DVD slot. It must be manually turned
on by the rear seat occupant through the remote control
power button.
r/j(Play/Pause): Press either the play or pause
icon displayed on the radio system, to toggle between
pausing or restarting playback of a DVD. If the forward
arrow is showing on the display, the system is in pause
mode. If the pause icon is showing on the display, the
system is in playback mode.
qGroupr: Press to cycle through musical
groupings on the DVD-A disc.
Nav (Navigate): Press to display directional arrows for
navigating through the menus.
e(Audio Stream): Press to cycle through audio
stream formats located on the DVD-A disc. The video
screen shows the audio stream changing.
4-96
Page 353 of 614

z(Display Menu):Press this button to adjust the
brightness, screen display mode (normal, full, or zoom),
and display the language menu.
q(Return): Press this button to exit the current
active menu and return to the previous menu. This
button operates only when the display menu or a DVD
menu is active.
c(Stop): Press this button to stop playing, fast
reversing, or fast forwarding a DVD. Press this button
twice to return to the beginning of the DVD.
s(Play/Pause): Press this button to start playing a
DVD. Press this button while a DVD is playing to pause
it. Press it again to continue playing the DVD.
On some radios, play may be slowed down by pressing
the play/pause button then pressing the fast forward
button when the DVD is playing. The DVD continues
playing in a slow play mode. Some radios may perform
reverse slow play by pressing the play/pause button
and then pressing the fast reverse button. To cancel
slow play mode, press the play/pause button.
t(Previous Track/Chapter): Press this button to
return to the start of the current track or chapter. Press
this button again to go to the previous track or chapter.
This button might not work when the DVD is playing the
copyright information or the previews.
u(Next Track/Chapter): Press this button to go to
the beginning of the next chapter or track. This button
might not work when the DVD is playing the copyright
information or the previews.
r(Fast Reverse): Press this button to fast reverse
the DVD or CD. To stop fast reversing a DVD video,
press the play button. To stop fast reversing a DVD
audio or CD, release this button. This button might not
work when the DVD is playing the copyright information
or the previews.
[(Fast Forward): Press this button to fast forward the
DVD or CD. To stop fast forwarding a DVD video, press
the play/pause button. To stop fast forwarding a DVD
audio or CD, release this button. This button might not
work when the DVD is playing the copyright information
or the previews.
e(Audio): Press this button to change audio tracks on
DVDs that have this feature when the DVD is playing.
The format and content of this function vary for
each disc.
{(Subtitles): Press this button to turn ON/OFF
subtitles and to move through subtitle options when a
DVD is playing. The format and content of this function
vary for each disc.
AUX (Auxiliary): Press this button to switch the system
between the DVD player and an auxiliary source.
4-131
Page 355 of 614
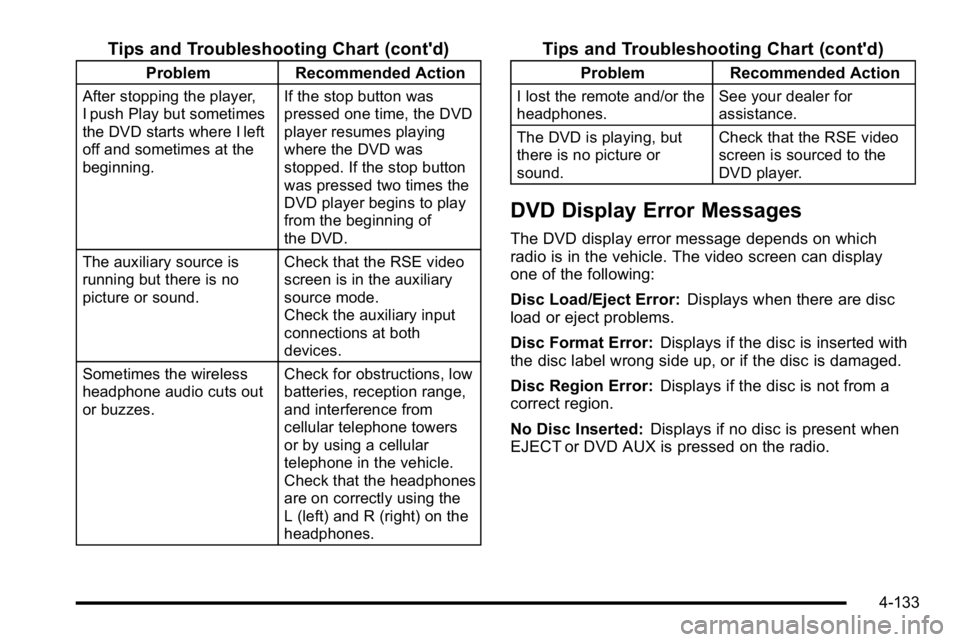
Tips and Troubleshooting Chart (cont'd)
ProblemRecommended Action
After stopping the player,
I push Play but sometimes
the DVD starts where I left
off and sometimes at the
beginning. If the stop button was
pressed one time, the DVD
player resumes playing
where the DVD was
stopped. If the stop button
was pressed two times the
DVD player begins to play
from the beginning of
the DVD.
The auxiliary source is
running but there is no
picture or sound. Check that the RSE video
screen is in the auxiliary
source mode.
Check the auxiliary input
connections at both
devices.
Sometimes the wireless
headphone audio cuts out
or buzzes. Check for obstructions, low
batteries, reception range,
and interference from
cellular telephone towers
or by using a cellular
telephone in the vehicle.
Check that the headphones
are on correctly using the
L (left) and R (right) on the
headphones.
Tips and Troubleshooting Chart (cont'd)
Problem
Recommended Action
I lost the remote and/or the
headphones. See your dealer for
assistance.
The DVD is playing, but
there is no picture or
sound. Check that the RSE video
screen is sourced to the
DVD player.
DVD Display Error Messages
The DVD display error message depends on which
radio is in the vehicle. The video screen can display
one of the following:
Disc Load/Eject Error:
Displays when there are disc
load or eject problems.
Disc Format Error: Displays if the disc is inserted with
the disc label wrong side up, or if the disc is damaged.
Disc Region Error: Displays if the disc is not from a
correct region.
No Disc Inserted: Displays if no disc is present when
EJECT or DVD AUX is pressed on the radio.
4-133
Page 357 of 614

Audio can be heard through wired headphones (not
included) plugged into the jacks on the RSA. If the
vehicle has this feature, audio can also be heard on
Channel 2 of the wireless headphones.
The audio system mutes the rear speakers when the
RSA audio is active through the headphones.
P(Power):Press thePbutton to turn the RSA on
or off.
Volume: Turn this knob to increase or to decrease the
volume of the wired headphones. The left knob controls
the left headphones and the right knob controls the right
headphones. SRCE (Source):
Press this button to switch between
the radio (AM/FM), XM™ (if equipped), CD, and if the
vehicle has these features, DVD, front auxiliary, and
rear auxiliary.
© ¨(Seek): When listening to FM, AM, or XM™
(if equipped), press the left
©or right¨seek arrow to
go to the previous or to the next station or channel and
stay there. This function is inactive, with some radios,
if the front seat passengers are listening to the radio.
Press and hold the left
©or right¨seek arrow until
the display flashes, to tune to an individual station.
The display stops flashing after the buttons have not
been pushed for more than two seconds. This function
is inactive, with some radios, if the front seat
passengers are listening to the radio.
While listening to a disc, press the left
©seek arrow
to go back to the start of the current track or chapter
(if more than ten seconds have played). Press the
right
¨seek arrow to go to the next track or chapter
on the disc. This function is inactive, with some radios,
if the front seat passengers are listening to the disc.
When a DVD video menu is being displayed, press the
left
©or right¨seek arrow to perform a cursor up or
down on the menu. Hold the left
©or right¨arrow to
perform a cursor left or right on the menu.
4-135
Page 366 of 614
Avoid needless heavy braking. Some people drive in
spurts, heavy acceleration followed by heavy braking,
rather than keeping pace with traffic. This is a mistake.
The brakes might not have time to cool between hard
stops. The brakes will wear out much faster with a lot
of heavy braking. Keeping pace with the traffic and
allowing realistic following distances eliminates a lot of
unnecessary braking. That means better braking and
longer brake life.
If the engine ever stops while the vehicle is being
driven, brake normally but do not pump the brakes.
If the brakes are pumped, the pedal could get harder to
push down. If the engine stops, there will still be some
power brake assist but it will be used when the brake is
applied. Once the power assist is used up, it can take
longer to stop and the brake pedal will be harder
to push.
Adding non‐dealer/non‐retailer accessories can
affect vehicle performance. SeeAccessories and
Modifications on page 6‑4.Antilock Brake System (ABS)
This vehicle has the Antilock Brake System (ABS), an
advanced electronic braking system that helps prevent
a braking skid.
When the engine is started and the vehicle begins to
drive away, ABS checks itself. A momentary motor or
clicking noise might be heard while this test is going on.
This is normal.
If there is a problem with
ABS, this warning light
stays on. See Antilock
Brake System (ABS)
Warning Light
on
page 4‑37.
Along with ABS, the vehicle has a Dynamic Rear
Proportioning (DRP) system. If there is a DRP problem,
both the brake and ABS warning lights come on
accompanied by a 10‐second chime. The lights and
chime will come on each time the ignition is turned
on until the problem is repaired. See your dealer for
service.
5-4
Page 378 of 614

Controlling the vehicle is the key to successful off-road
driving. One of the best ways to control the vehicle is to
control the speed. At higher speeds:
.You approach things faster and have less time to
react.
.There is less time to scan the terrain for obstacles.
.The vehicle has more bounce when driving over
obstacles.
.More braking distance is needed, especially on an
unpaved surface.
{WARNING:
When you are driving off-road, bouncing and
quick changes in direction can easily throw you
out of position. This could cause you to lose
control and crash. So, whether you are driving on
or off the road, you and your passengers should
wear safety belts.
Scanning the Terrain
Off-road driving can take you over many different kinds
of terrain. Be familiar with the terrain and its many
different features.
Surface Conditions:Off-roading surfaces can be
hard-packed dirt, gravel, rocks, grass, sand, mud, snow,
or ice. Each of these surfaces affects the vehicle's
steering, acceleration, and braking in different ways.
Depending on the surface, slipping, sliding, wheel
spinning, delayed acceleration, poor traction, and
longer braking distances can occur.
Surface Obstacles: Unseen or hidden obstacles
can be hazardous. A rock, log, hole, rut, or bump can
startle you if you are not prepared for them. Often these
obstacles are hidden by grass, bushes, snow, or even
the rise and fall of the terrain itself.
Some things to consider:
.Is the path ahead clear?
.Will the surface texture change abruptly up ahead?
.Does the travel take you uphill or downhill?
.Will you have to stop suddenly or change direction
quickly?
When driving over obstacles or rough terrain, keep a
firm grip on the steering wheel. Ruts, troughs, or other
surface features can jerk the wheel out of your hands.
5-16