buttons GMC YUKON 2017 Owner's Manual
[x] Cancel search | Manufacturer: GMC, Model Year: 2017, Model line: YUKON, Model: GMC YUKON 2017Pages: 429, PDF Size: 5.79 MB
Page 8 of 429

GMC Yukon/Yukon XL/Denali Owner Manual (GMNA-Localizing-U.S./
Canada/Mexico-9955936) - 2017 - crc - 11/9/16
In Brief 7
1.Air Vents 0197.
2. Head-Up Display (HUD) 0156
(If Equipped).
3.
gTraction Control/Electronic
Stability Control 0241.
jPower Assist Steps 049 (If
Equipped).
XParking Assist Button (If
Equipped). See Assistance
Systems for Parking or Backing
0 254.
ALane Departure Warning
(LDW) 0263 (If Equipped).
0Pedal Adjust Switch (If
Equipped). See Adjustable
Throttle and Brake Pedal
0 218.
4. Turn Signal Lever. See Turn
and Lane-Change Signals
0 186.
Windshield Wiper/Washer
0 127. 5. Favorite Switches (Out of
View). See “Steering Wheel
Controls” in the infotainment
manual.
Volume Switches (Out of View).
See “Steering Wheel Controls”
in the infotainment manual.
6. Hazard Warning Flashers
0186.
7. Instrument Cluster 0135.
8. Shift Lever. See Automatic
Transmission 0229.
Tow/Haul Selector Button. See
Tow/Haul Mode 0234.
Range Selection Mode (If
Equipped). See Manual Mode
0 231.
9. Light Sensor. See Automatic
Headlamp System 0185.
10. Infotainment 0191.
11. Dual Automatic Climate Control
System 0192.
12. Heated and Ventilated Front
Seats 069. 13. Rear Climate Control Buttons.
SeeRear Climate Control
System 0196.
14. Ignition Positions (Keyless
Access) 0220 orIgnition
Positions (Key Access) 0218.
15. Steering Wheel Controls. See the infotainment manual.
16. Horn 0127.
17. Steering Wheel Adjustment
0126.
18. Hood Release. See Hood
0 287.
19. Cruise Control 0244.
Adaptive Cruise Control 0246
(If Equipped).
Forward Collision Alert (FCA)
System 0257 (If Equipped).
20. Trailer Brake Control Panel (If Equipped). See Towing
Equipment 0275.
21. Data Link Connector (DLC) (Out of View). See Malfunction
Indicator Lamp (Check Engine
Light) 0145.
Page 14 of 429
GMC Yukon/Yukon XL/Denali Owner Manual (GMNA-Localizing-U.S./
Canada/Mexico-9955936) - 2017 - crc - 11/9/16
In Brief 13
release SET; a beep will sound.
Then immediately press and hold 1,
2, or
B(Exit) on the driver door
until two beeps sound. To manually
recall these positions, press and
hold 1, 2, or
Buntil the saved
position is reached. See Memory
Seats 066.
Second Row Seats
The second row seatbacks can be
folded for additional cargo space,
or the seats can be folded and
tumbled for easy entry/exit to the
third row seats. The seatbacks also
recline.
See Second Row Seats 071.
Third Row Seats
Third row seatbacks can be folded.
See Third Row Seats 076.
Heated and Ventilated
Seats
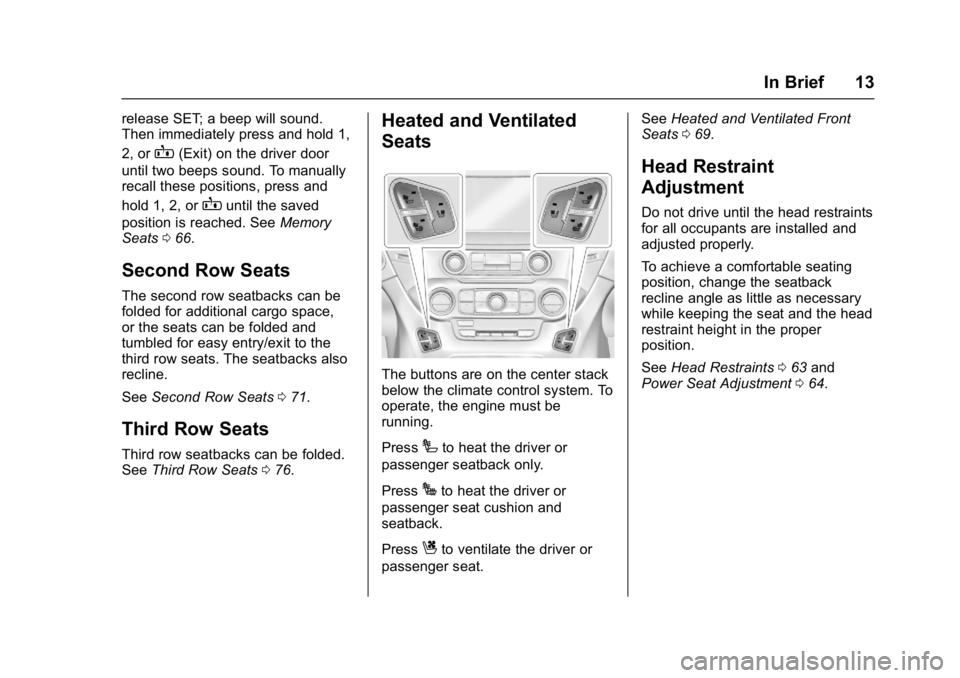
The buttons are on the center stack
below the climate control system. To
operate, the engine must be
running.
Press
Ito heat the driver or
passenger seatback only.
Press
Jto heat the driver or
passenger seat cushion and
seatback.
Press
Cto ventilate the driver or
passenger seat. See
Heated and Ventilated Front
Seats 069.
Head Restraint
Adjustment
Do not drive until the head restraints
for all occupants are installed and
adjusted properly.
To achieve a comfortable seating
position, change the seatback
recline angle as little as necessary
while keeping the seat and the head
restraint height in the proper
position.
See Head Restraints 063 and
Power Seat Adjustment 064.
Page 20 of 429
GMC Yukon/Yukon XL/Denali Owner Manual (GMNA-Localizing-U.S./
Canada/Mexico-9955936) - 2017 - crc - 11/9/16
In Brief 19
Transmission
Range Selection Mode
The Range Selection Mode switch,
if equipped, is on the shift lever.1. To enable the Range Selection feature, move the shift lever to
the L (Manual Mode) position.
The current range will appear
next to the L. This is the
highest attainable range with
all lower gears accessible. As
an example, when 5 (Fifth)
gear is selected, 1 (First)
through 5 (Fifth) gears are
available.
2. Tap the plus/minus buttons on the shift lever to select the
desired range of gears for
current driving conditions. See
Manual Mode 0231. While using Range Selection Mode,
cruise control and the Tow/Haul
Mode can be used.
Grade Braking is not available when
Range Selection Mode is active.
See
Tow/Haul Mode 0234.
Four-Wheel Drive
If equipped with four-wheel drive,
you can send the engine's driving
power to all four wheels for extra
traction.
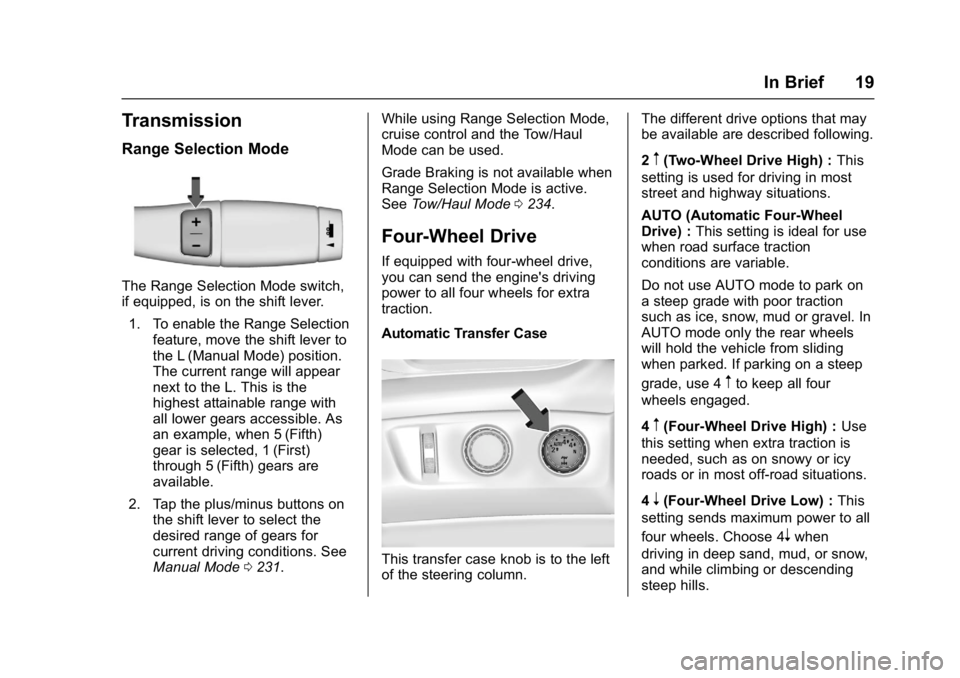
Automatic Transfer Case
This transfer case knob is to the left
of the steering column. The different drive options that may
be available are described following.
2
m(Two-Wheel Drive High) :
This
setting is used for driving in most
street and highway situations.
AUTO (Automatic Four-Wheel
Drive) : This setting is ideal for use
when road surface traction
conditions are variable.
Do not use AUTO mode to park on
a steep grade with poor traction
such as ice, snow, mud or gravel. In
AUTO mode only the rear wheels
will hold the vehicle from sliding
when parked. If parking on a steep
grade, use 4
mto keep all four
wheels engaged.
4
m(Four-Wheel Drive High) : Use
this setting when extra traction is
needed, such as on snowy or icy
roads or in most off-road situations.
4
n(Four-Wheel Drive Low) : This
setting sends maximum power to all
four wheels. Choose 4
nwhen
driving in deep sand, mud, or snow,
and while climbing or descending
steep hills.
Page 24 of 429
GMC Yukon/Yukon XL/Denali Owner Manual (GMNA-Localizing-U.S./
Canada/Mexico-9955936) - 2017 - crc - 11/9/16
In Brief 23
The vehicle may have up to five
accessory power outlets:
Vehicles with a Center Console
.One in front of the cupholders on
the center console.
. One inside the center storage
console.
. One on the rear of the center
storage console.
. One in the third row seat on the
driver side.
. One in the rear cargo area on
the passenger side.
Vehicles with Bench Seats
. One on the center stack below
the climate control system.
. One in the storage area on the
bench seat.
. One on the rear of the center
armrest storage.
. One in the third row seat area on
the driver side.
. One in the rear cargo area on
the passenger side. Lift the cover to access and replace
when not in use.
See
Power Outlets 0131.
Universal Remote System
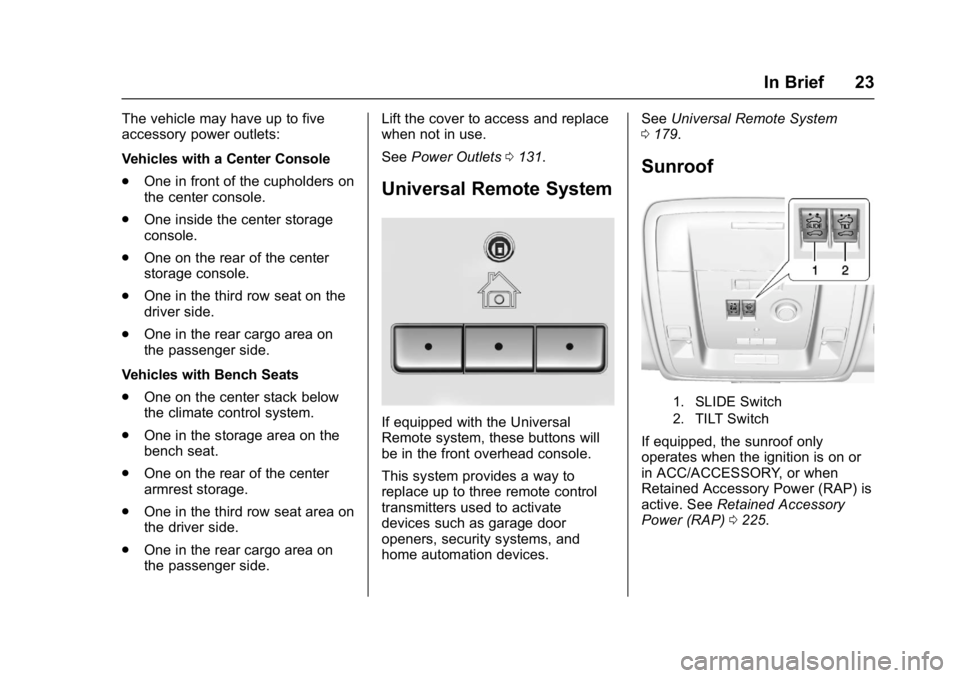
If equipped with the Universal
Remote system, these buttons will
be in the front overhead console.
This system provides a way to
replace up to three remote control
transmitters used to activate
devices such as garage door
openers, security systems, and
home automation devices. See
Universal Remote System
0 179.
Sunroof
1. SLIDE Switch
2. TILT Switch
If equipped, the sunroof only
operates when the ignition is on or
in ACC/ACCESSORY, or when
Retained Accessory Power (RAP) is
active. See Retained Accessory
Power (RAP) 0225.
Page 58 of 429

GMC Yukon/Yukon XL/Denali Owner Manual (GMNA-Localizing-U.S./
Canada/Mexico-9955936) - 2017 - crc - 11/10/16
Keys, Doors, and Windows 57
Interior Mirrors
Interior Rearview Mirrors
Adjust the rearview mirror for a clear
view of the area behind your
vehicle.
If equipped with OnStar, the vehicle
may have three control buttons at
the bottom of the mirror. See your
dealer for more information about
OnStar and how to subscribe to it.
SeeOnStar Overview 0407.
Do not spray glass cleaner directly
on the mirror. Use a soft towel
dampened with water.
Manual Rearview Mirror
If equipped with a manual rearview
mirror, push the tab forward for
daytime use and pull it for nighttime
use to avoid glare from the
headlamps from behind.
Automatic Dimming
Rearview Mirror
If equipped, automatic dimming
reduces the glare of headlamps
from behind. The dimming feature
comes on when the vehicle is
started.
Child-View Mirror
If equipped, push up on the
sunglasses bin and release. Push
the bin back in halfway to secure
the mirror in position.
Push the mirror back up when not
in use.
Windows
{Warning
Never leave a child, a helpless
adult, or a pet alone in a vehicle,
especially with the windows
closed in warm or hot weather.
They can be overcome by the
extreme heat and suffer
permanent injuries or even death
from heat stroke.
The vehicle aerodynamics are
designed to improve fuel economy
performance. This may result in a
Page 70 of 429
GMC Yukon/Yukon XL/Denali Owner Manual (GMNA-Localizing-U.S./
Canada/Mexico-9955936) - 2017 - crc - 11/9/16
Seats and Restraints 69
To stop Easy Exit Recall movement,
press any of the following memory
controls:
.Power seat
. Memory SET, 1, 2, or
B
.Power mirror, with the driver or
passenger side mirror selected
. Power steering wheel,
if equipped
. Adjustable pedals, if equipped
Obstructions
If something has blocked the driver
seat and/or power steering wheel
while recalling a memory position,
the recall may stop. Remove the
obstruction and try the recall again.
If the memory position still does not
recall, see your dealer for service.
Heated and Ventilated
Front Seats
{Warning
If you cannot feel temperature
change or pain to the skin, the
seat heater may cause burns. To
reduce the risk of burns, people
with such a condition should use
care when using the seat heater,
especially for long periods of
time. Do not place anything on
the seat that insulates against
heat, such as a blanket, cushion,
cover, or similar item. This may
cause the seat heater to
overheat. An overheated seat
heater may cause a burn or may
damage the seat.
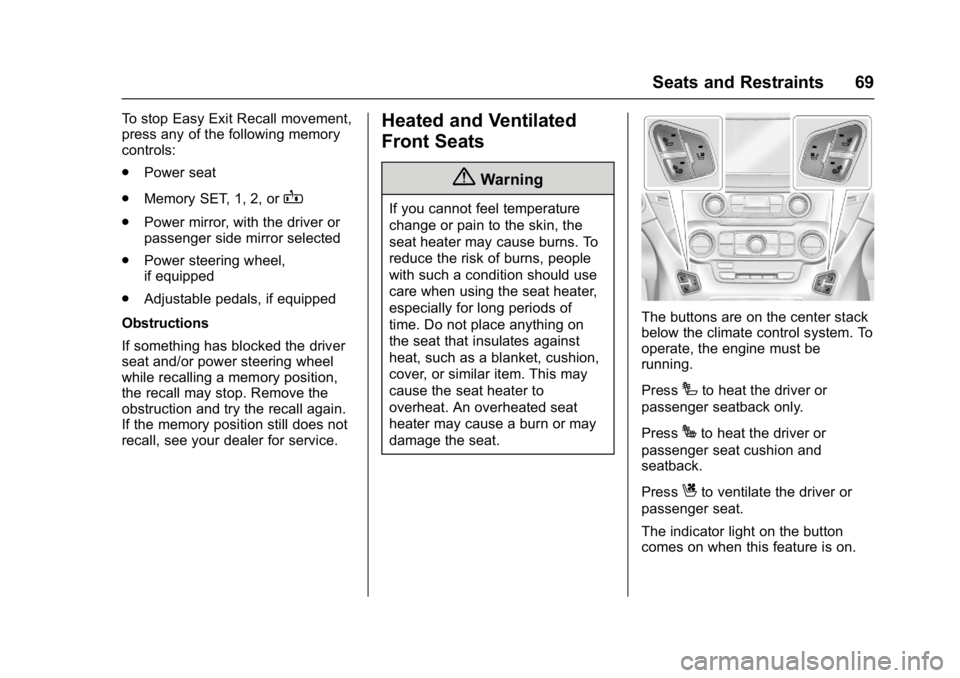
The buttons are on the center stack
below the climate control system. To
operate, the engine must be
running.
Press
Ito heat the driver or
passenger seatback only.
Press
Jto heat the driver or
passenger seat cushion and
seatback.
Press
Cto ventilate the driver or
passenger seat.
The indicator light on the button
comes on when this feature is on.
Page 71 of 429
GMC Yukon/Yukon XL/Denali Owner Manual (GMNA-Localizing-U.S./
Canada/Mexico-9955936) - 2017 - crc - 11/9/16
70 Seats and Restraints
Press the button once for the
highest setting. With each press of
the button, the seat will change to
the next lower setting, and then to
the off setting. The indicator lights
next to the buttons indicate three for
the highest setting and one for the
lowest. If the heated seats are on
high for an extended time, their level
may automatically be lowered.
The passenger seat may take
longer to heat up.
Remote Start Auto Heated and
Ventilated Seats
During a remote start, the heated or
ventilated seats can be turned on
automatically. When it is cold
outside, the heated seats turn on,
and when it is hot outside the
ventilated seats turn on. The heated
or ventilated seats are canceled
when the ignition is turned on. Press
the heated or ventilated seat button
to use the heated or ventilated seats
after the vehicle is started.The heated or ventilated seat
indicator lights do not turn on during
a remote start.
The temperature performance of an
unoccupied seat may be reduced.
This is normal.
The heated or ventilated seats will
not turn on during a remote start
unless they are enabled in the
vehicle personalization menu.
See
Remote Vehicle Start 041 and
Vehicle Personalization 0171.Rear Seats
Rear Seat Reminder
If equipped, the message REAR
SEAT REMINDER LOOK IN REAR
SEAT displays under certain
conditions indicating there may be
an item or passenger in the rear
seat. Check before exiting the
vehicle.
This feature will activate when a
second row door is opened while
the vehicle is on or up to 10 minutes
before the vehicle is turned on.
There will be an alert when the
vehicle is turned off. The alert does
not directly detect objects in the rear
seat; instead, under certain
conditions, it detects when a rear
door is opened and closed,
indicating that there may be
something in the rear seat.
The feature is active only once each
time the vehicle is turned on and off,
and will require reactivation by
opening and closing the second row
doors. There may be an alert even
when there is nothing in the rear
seat; for example, if a child entered
Page 72 of 429
GMC Yukon/Yukon XL/Denali Owner Manual (GMNA-Localizing-U.S./
Canada/Mexico-9955936) - 2017 - crc - 11/9/16
Seats and Restraints 71
the vehicle through the rear door
and left the vehicle without the
vehicle being shut off.
The feature can be turned on or off.
SeeVehicle Personalization 0171.
Heated Rear Seats
{Warning
If you cannot feel temperature
change or pain to the skin, the
seat heater may cause burns.
See the Warning under Heated
and Ventilated Front Seats 069.
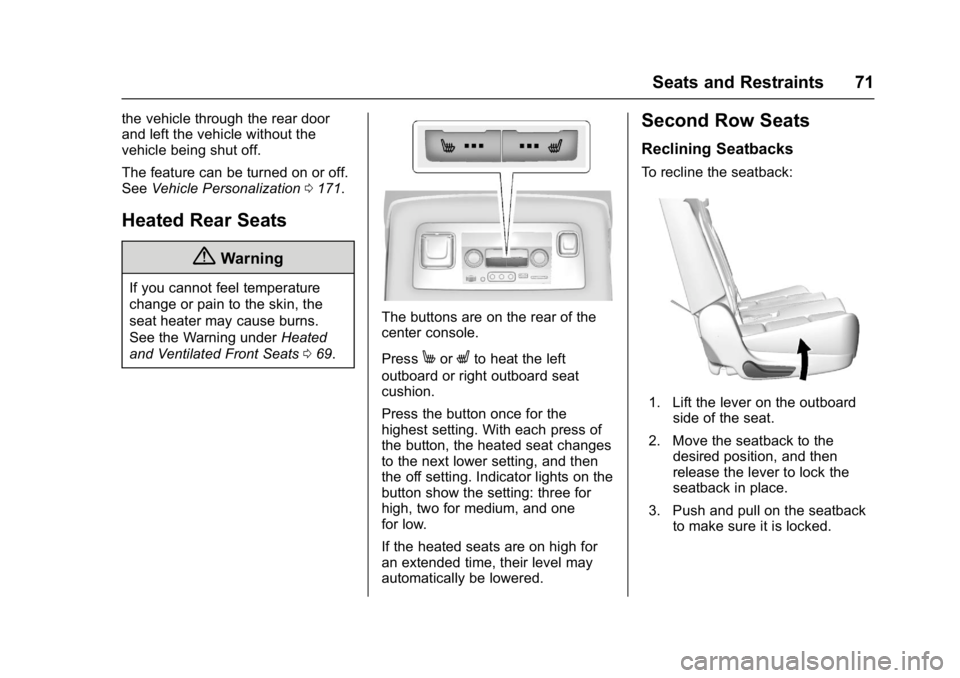
The buttons are on the rear of the
center console.
Press
MorLto heat the left
outboard or right outboard seat
cushion.
Press the button once for the
highest setting. With each press of
the button, the heated seat changes
to the next lower setting, and then
the off setting. Indicator lights on the
button show the setting: three for
high, two for medium, and one
for low.
If the heated seats are on high for
an extended time, their level may
automatically be lowered.
Second Row Seats
Reclining Seatbacks
To recline the seatback:
1. Lift the lever on the outboard side of the seat.
2. Move the seatback to the desired position, and then
release the lever to lock the
seatback in place.
3. Push and pull on the seatback to make sure it is locked.
Page 114 of 429

GMC Yukon/Yukon XL/Denali Owner Manual (GMNA-Localizing-U.S./
Canada/Mexico-9955936) - 2017 - crc - 11/9/16
Seats and Restraints 113
If the position you are
using has a fixed
headrest or head restraint
and you are using a
single tether, route the
tether around the inboard
or outboard side of the
headrest or head
restraint.
If the position you are
using has a fixed or an
adjustable head restraint
and you are using a dual
tether, route the tether
around the head restraint.
3. Before placing a child in the child restraint, make sure it is
securely held in place. To
check, grasp the child restraint
at the LATCH path and attempt
to move it side to side and
back and forth. There should
be no more than 2.5 cm (1 in) of
movement, for proper
installation.
Head Restraint Removal and
Reinstallation
1. Partially fold the seatbackforward. See Third Row Seats
0 76 for additional information.
2. Press the buttons on the head
restraint posts and pull up on
the head restraint.
3. Route the top tether of the child restraint under the head
restraint.
Page 180 of 429
GMC Yukon/Yukon XL/Denali Owner Manual (GMNA-Localizing-U.S./
Canada/Mexico-9955936) - 2017 - crc - 11/9/16
Instruments and Controls 179
Universal Remote
System
SeeRadio Frequency Statement
0 403.
Universal Remote System
Programming
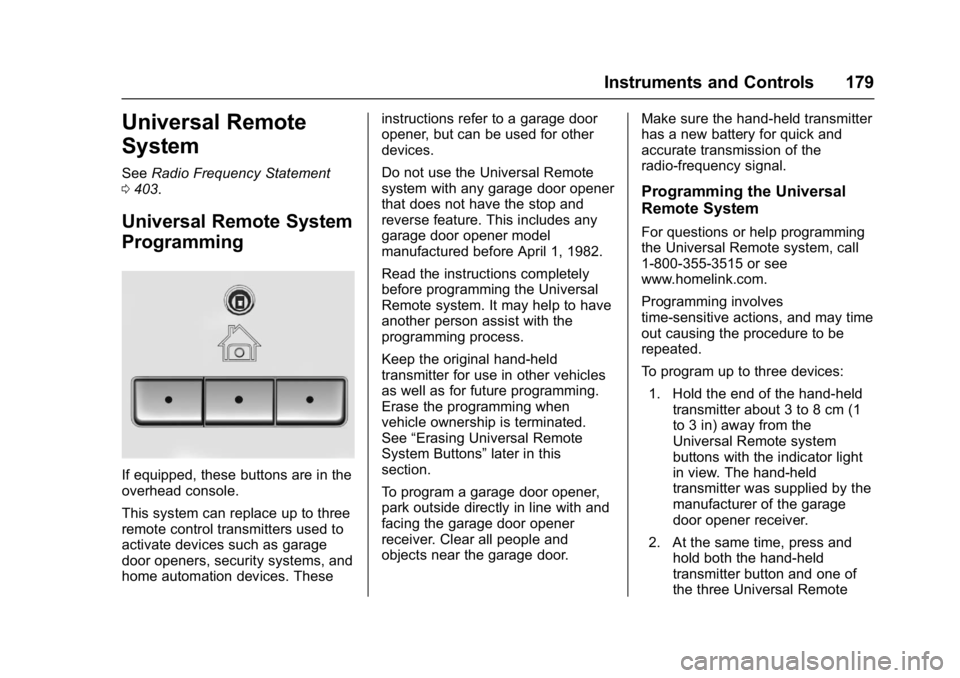
If equipped, these buttons are in the
overhead console.
This system can replace up to three
remote control transmitters used to
activate devices such as garage
door openers, security systems, and
home automation devices. These instructions refer to a garage door
opener, but can be used for other
devices.
Do not use the Universal Remote
system with any garage door opener
that does not have the stop and
reverse feature. This includes any
garage door opener model
manufactured before April 1, 1982.
Read the instructions completely
before programming the Universal
Remote system. It may help to have
another person assist with the
programming process.
Keep the original hand-held
transmitter for use in other vehicles
as well as for future programming.
Erase the programming when
vehicle ownership is terminated.
See
“Erasing Universal Remote
System Buttons” later in this
section.
To program a garage door opener,
park outside directly in line with and
facing the garage door opener
receiver. Clear all people and
objects near the garage door. Make sure the hand-held transmitter
has a new battery for quick and
accurate transmission of the
radio-frequency signal.
Programming the Universal
Remote System
For questions or help programming
the Universal Remote system, call
1-800-355-3515 or see
www.homelink.com.
Programming involves
time-sensitive actions, and may time
out causing the procedure to be
repeated.
To program up to three devices:
1. Hold the end of the hand-held transmitter about 3 to 8 cm (1
to 3 in) away from the
Universal Remote system
buttons with the indicator light
in view. The hand-held
transmitter was supplied by the
manufacturer of the garage
door opener receiver.
2. At the same time, press and hold both the hand-held
transmitter button and one of
the three Universal Remote