USB GMC YUKON 2021 Get To Know Guide
[x] Cancel search | Manufacturer: GMC, Model Year: 2021, Model line: YUKON, Model: GMC YUKON 2021Pages: 20, PDF Size: 5 MB
Page 3 of 20

3
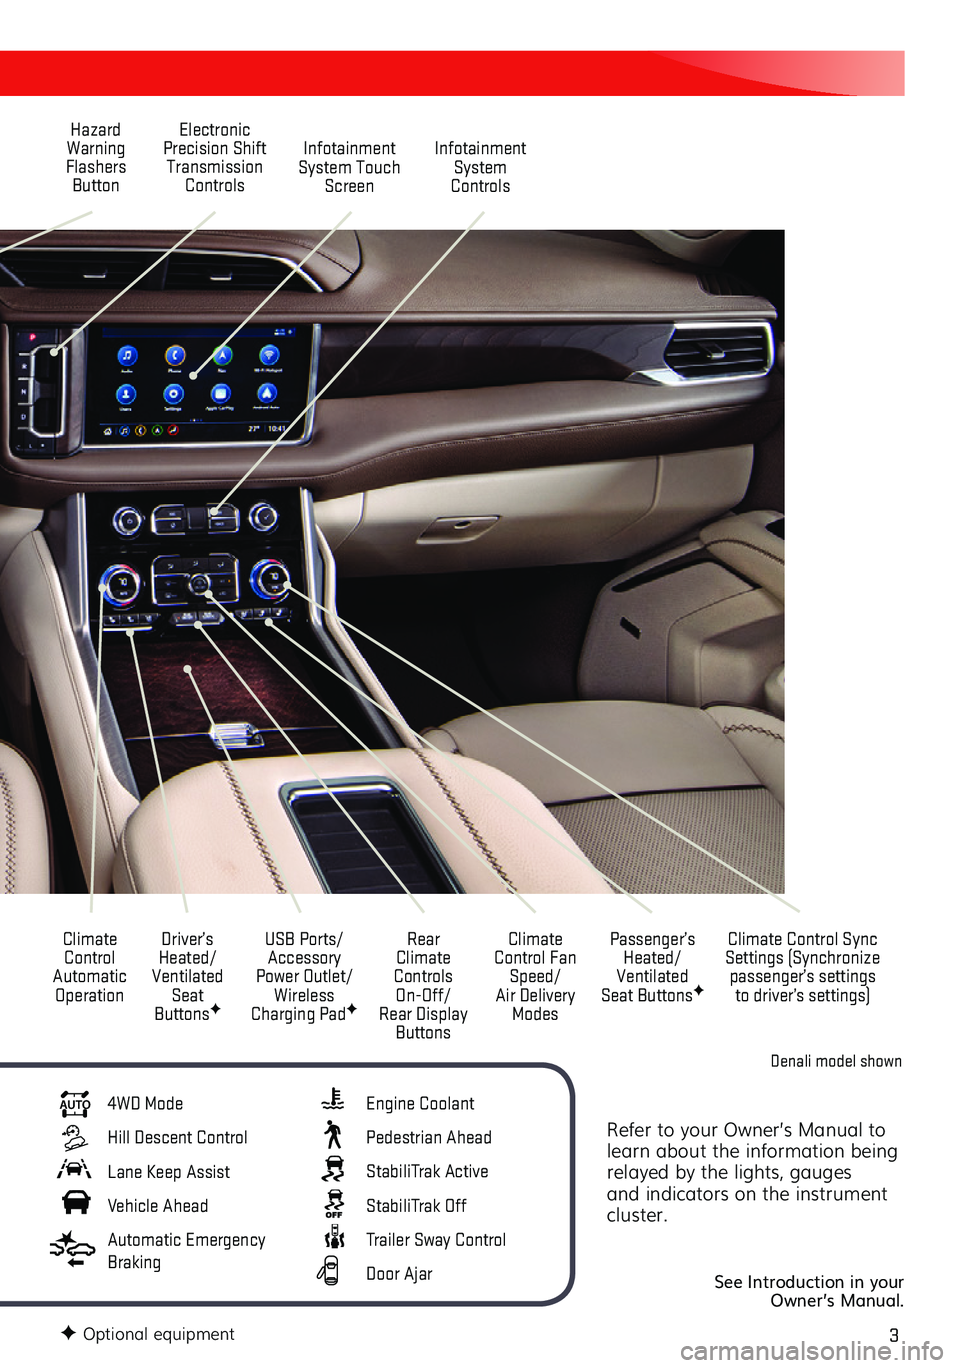
Refer to your Owner’s Manual to learn about the information being relayed by the lights, gauges and indicators on the instrument cluster.
See Introduction in your Owner’s Manual.
Climate Control Automatic Operation
Infotainment System Touch Screen
Passenger’s Heated/Ventilated Seat ButtonsF
Climate Control Sync Settings (Synchronize passenger’s settings to driver’s settings)
Infotainment System Controls
Rear Climate Controls On-Off/ Rear Display Buttons
Climate Control Fan Speed/Air Delivery Modes
Driver’s Heated/ Ventilated Seat ButtonsF
Electronic Precision Shift Transmission Controls
Hazard Warning Flashers Button
USB Ports/ Accessory Power Outlet/Wireless Charging PadF
AUTO 4WD Mode
Hill Descent Control
Lane Keep Assist
Vehicle Ahead
Automatic Emergency Braking
Engine Coolant
Pedestrian Ahead
StabiliTrak Active
StabiliTrak Off
Trailer Sway Control
Door Ajar
F Optional equipment
Denali model shown
Page 10 of 20

10F Optional equipment
INFOTAINMENT SYSTEM
Read your Owner’s Manual for important information about using the infotainment system while driving.
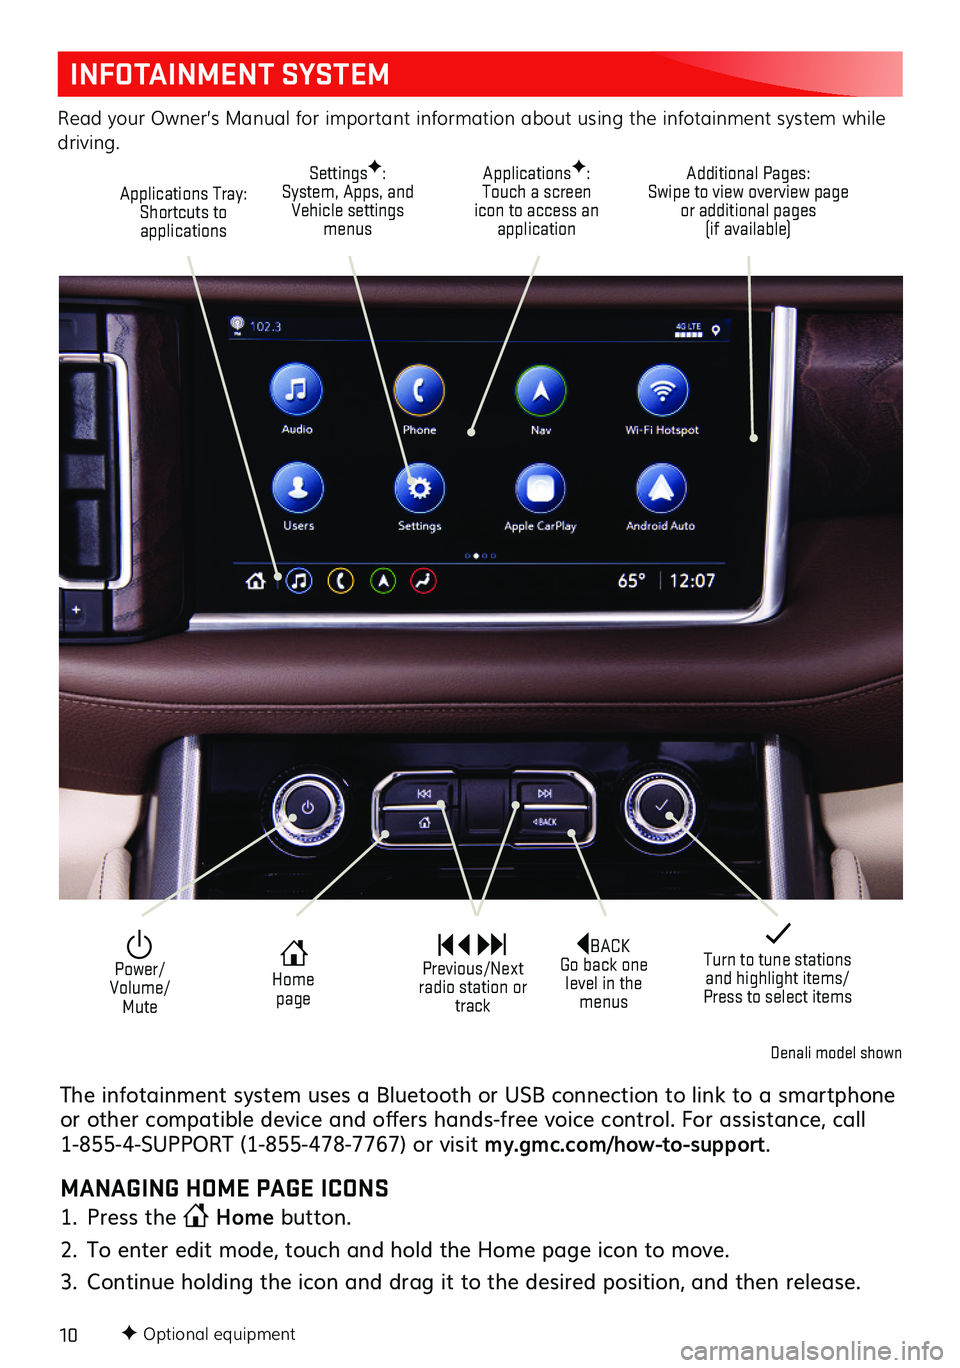
Additional Pages: Swipe to view overview page or additional pages (if available)
Applications Tray: Shortcuts to applications
ApplicationsF: Touch a screen icon to access an application
SettingsF: System, Apps, and Vehicle settings menus
BACK Go back one level in the menus
Home page
Power/ Volume/Mute
Previous/Next radio station or track
Turn to tune stations and highlight items/Press to select items
Denali model shown
The infotainment system uses a Bluetooth or USB connection to link to a smartphone or other compatible device and offers hands-free voice control. For assistance, call 1-855-4-SUPPORT (1-855-478-7767) or visit my.gmc.com/how-to-support.
MANAGING HOME PAGE ICONS
1. Press the Home button.
2. To enter edit mode, touch and hold the Home page icon to move.
3. Continue holding the icon and drag it to the desired position, and then release.
Page 11 of 20

11F Optional equipment
INFOTAINMENT SYSTEM
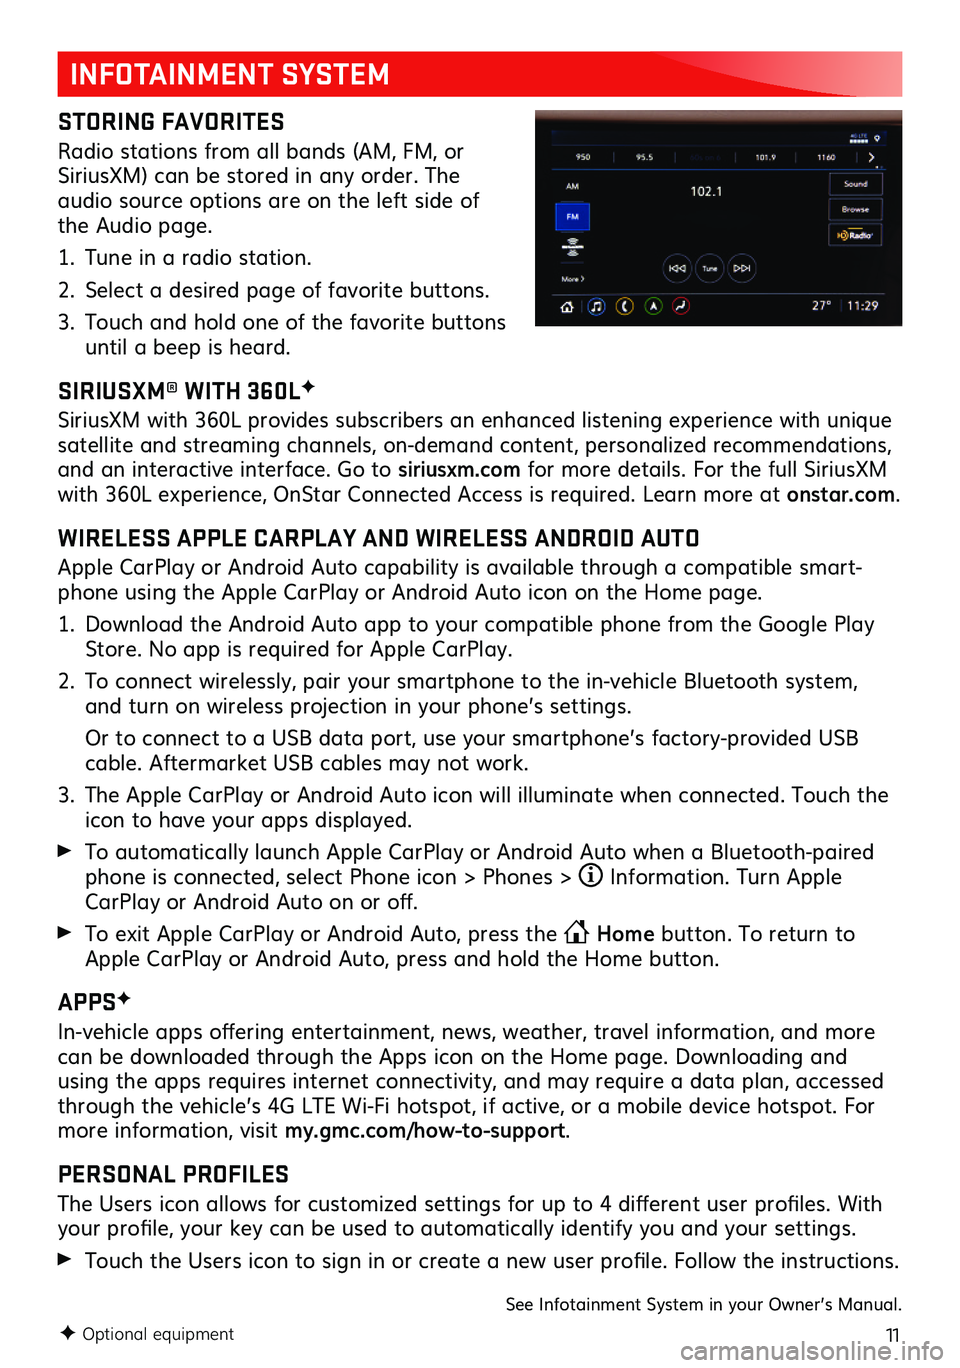
STORING FAVORITES
Radio stations from all bands (AM, FM, or SiriusXM) can be stored in any order. The audio source options are on the left side of the Audio page.
1. Tune in a radio station.
2. Select a desired page of favorite buttons.
3. Touch and hold one of the favorite buttons until a beep is heard.
SIRIUSXM® WITH 360LF
SiriusXM with 360L provides subscribers an enhanced listening experience with unique satellite and streaming channels, on-demand content, personalized recommendations, and an interactive interface. Go to siriusxm.com for more details. For the full SiriusXM with 360L experience, OnStar Connected Access is required. Learn more at onstar.com.
WIRELESS APPLE CARPLAY AND WIRELESS ANDROID AUTO
Apple CarPlay or Android Auto capability is available through a compatible smart-phone using the Apple CarPlay or Android Auto icon on the Home page.
1. Download the Android Auto app to your compatible phone from the Google Play Store. No app is required for Apple CarPlay.
2. To connect wirelessly, pair your smartphone to the in-vehicle Bluetooth system, and turn on wireless projection in your phone’s settings.
Or to connect to a USB data port, use your smartphone’s factory-provided USB cable. Aftermarket USB cables may not work.
3. The Apple CarPlay or Android Auto icon will illuminate when connected. Touch the icon to have your apps displayed.
To automatically launch Apple CarPlay or Android Auto when a Bluetooth-paired phone is connected, select Phone icon > Phones > Information. Turn Apple CarPlay or Android Auto on or off.
To exit Apple CarPlay or Android Auto, press the Home button. To return to Apple CarPlay or Android Auto, press and hold the Home button.
APPSF
In-vehicle apps offering entertainment, news, weather, travel information, and more can be downloaded through the Apps icon on the Home page. Downloading and using the apps requires internet connectivity, and may require a data plan, accessed through the vehicle’s 4G LTE Wi-Fi hotspot, if active, or a mobile device hotspot. For more information, visit my.gmc.com/how-to-support.
PERSONAL PROFILES
The Users icon allows for customized settings for up to 4 different user profiles. With your profile, your key can be used to automatically identify you and your settings.
Touch the Users icon to sign in or create a new user profile. Follow the instructions.
See Infotainment System in your Owner’s Manual.
Page 13 of 20

13
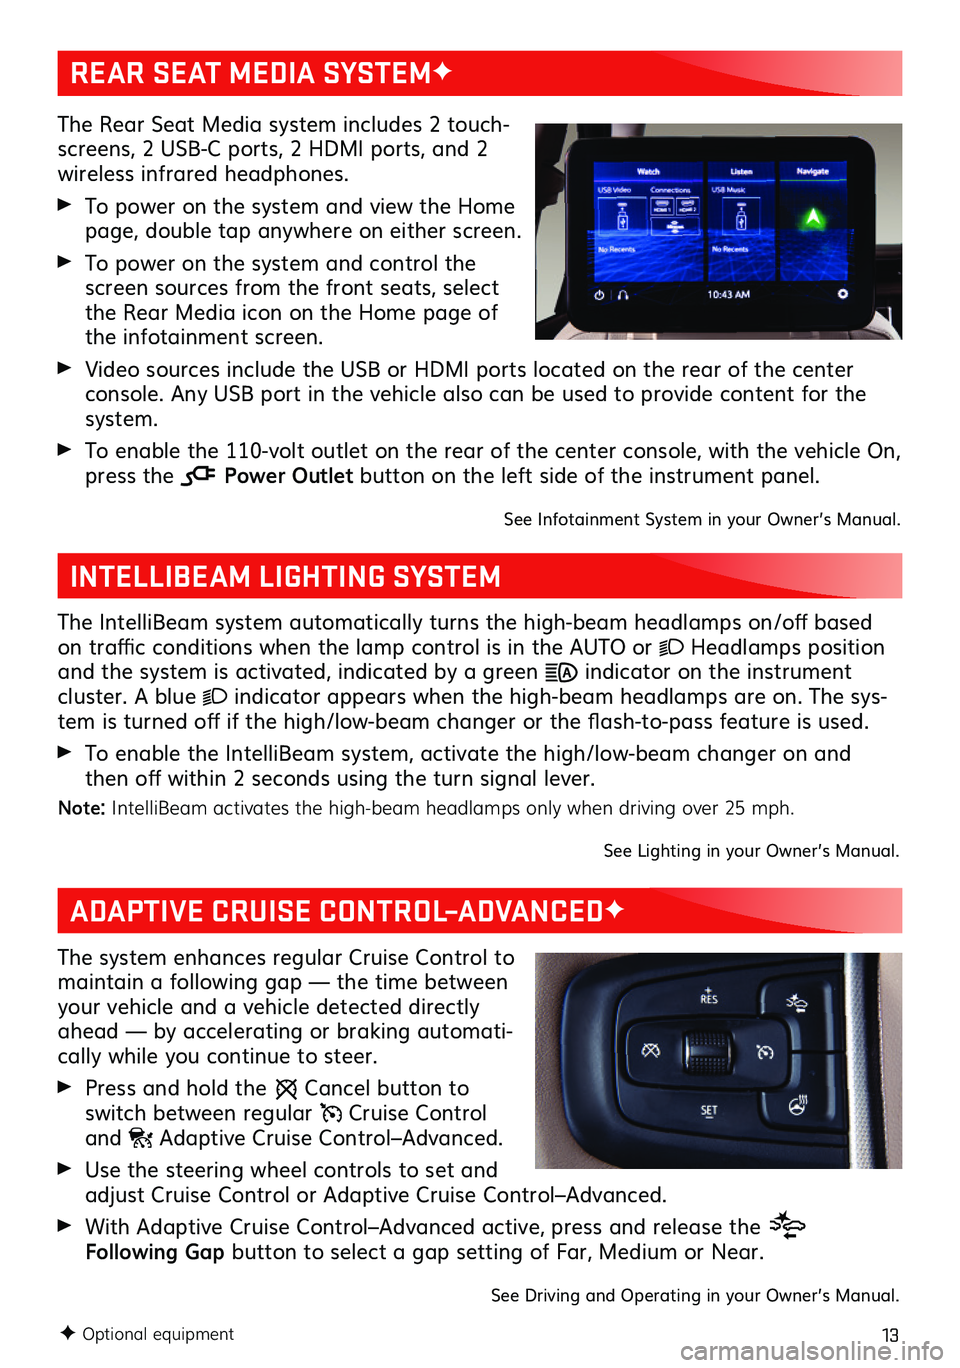
The Rear Seat Media system includes 2 touch-screens, 2 USB-C ports, 2 HDMI ports, and 2 wireless infrared headphones.
To power on the system and view the Home page, double tap anywhere on either screen.
To power on the system and control the screen sources from the front seats, select the Rear Media icon on the Home page of the infotainment screen.
Video sources include the USB or HDMI ports located on the rear of the center console. Any USB port in the vehicle also can be used to provide content for the system.
To enable the 110-volt outlet on the rear of the center console, with the vehicle On, press the Power Outlet button on the left side of the instrument panel.
See Infotainment System in your Owner’s Manual.
INTELLIBEAM LIGHTING SYSTEM
The IntelliBeam system automatically turns the high-beam headlamps on/off based on traffic conditions when the lamp control is in the AUTO or Headlamps position and the system is activated, indicated by a green indicator on the instrument cluster. A blue indicator appears when the high-beam headlamps are on. The sys-tem is turned off if the high/low-beam changer or the flash-to-pass feature is used.
To enable the IntelliBeam system, activate the high/low-beam changer on and then off within 2 seconds using the turn signal lever.
Note: IntelliBeam activates the high-beam headlamps only when driving over 25 mph.
See Lighting in your Owner’s Manual.
REAR SEAT MEDIA SYSTEMF
ADAPTIVE CRUISE CONTROL–ADVANCEDF
The system enhances regular Cruise Control to maintain a following gap — the time between your vehicle and a vehicle detected directly ahead — by accelerating or braking automati-cally while you continue to steer.
Press and hold the Cancel button to switch between regular Cruise Control and Adaptive Cruise Control–Advanced.
Use the steering wheel controls to set and adjust Cruise Control or Adaptive Cruise Control–Advanced.
With Adaptive Cruise Control–Advanced active, press and release the Following Gap button to select a gap setting of Far, Medium or Near.
See Driving and Operating in your Owner’s Manual.
F Optional equipment